Nah, they’re too popular to miss me. And when I pass a scoop shop, I walk in. But at home, I’m too busy concocting fun ice cream flavors. This one is perfect for your summer celebrations because I think it’s totally original, plus it’s easy. Three base ingredients, everyone! It takes about two minutes to throw together.
You know what takes a lot more time? Like, a lot? Getting my hair done. Which is bizarre, because I have low-maintenance hair. It’s curly. But ever since the grays began popping out like overeager distant relatives who keep coming by to visit unannounced, I have to get it dyed every few months, which takes hours. And I should be doing it more often because the grays come back in a much shorter time. I’m just never up for sitting in a chair for hours on end.
When I was getting my summer fun shade put in yesterday (eggplant, woohoo!), the hair washing person began giving me my scalp massage and head rub. I always dread this part of the appointment. I know a lot of people enjoy getting their heads rubbed, but I have never been one of them. I mean, they’re not massaging sore muscles. Can they put that pressure on my quads instead? Or if we’re keeping it close to the hair, my completely f-ed up neck muscles?
But I always wonder if it’s rude to ask the head rubber to stop her good work, so I sit through it quietly and try not to think about anything funny, like what it must look like for me to be reclining in a massage chair in sweats and sneakers while a bored-looking hair washer rubs my forehead.
It’s awkward moments like this where I dream up ideas for baking, or even better, ice cream flavors. And this one is definitely worth trying.
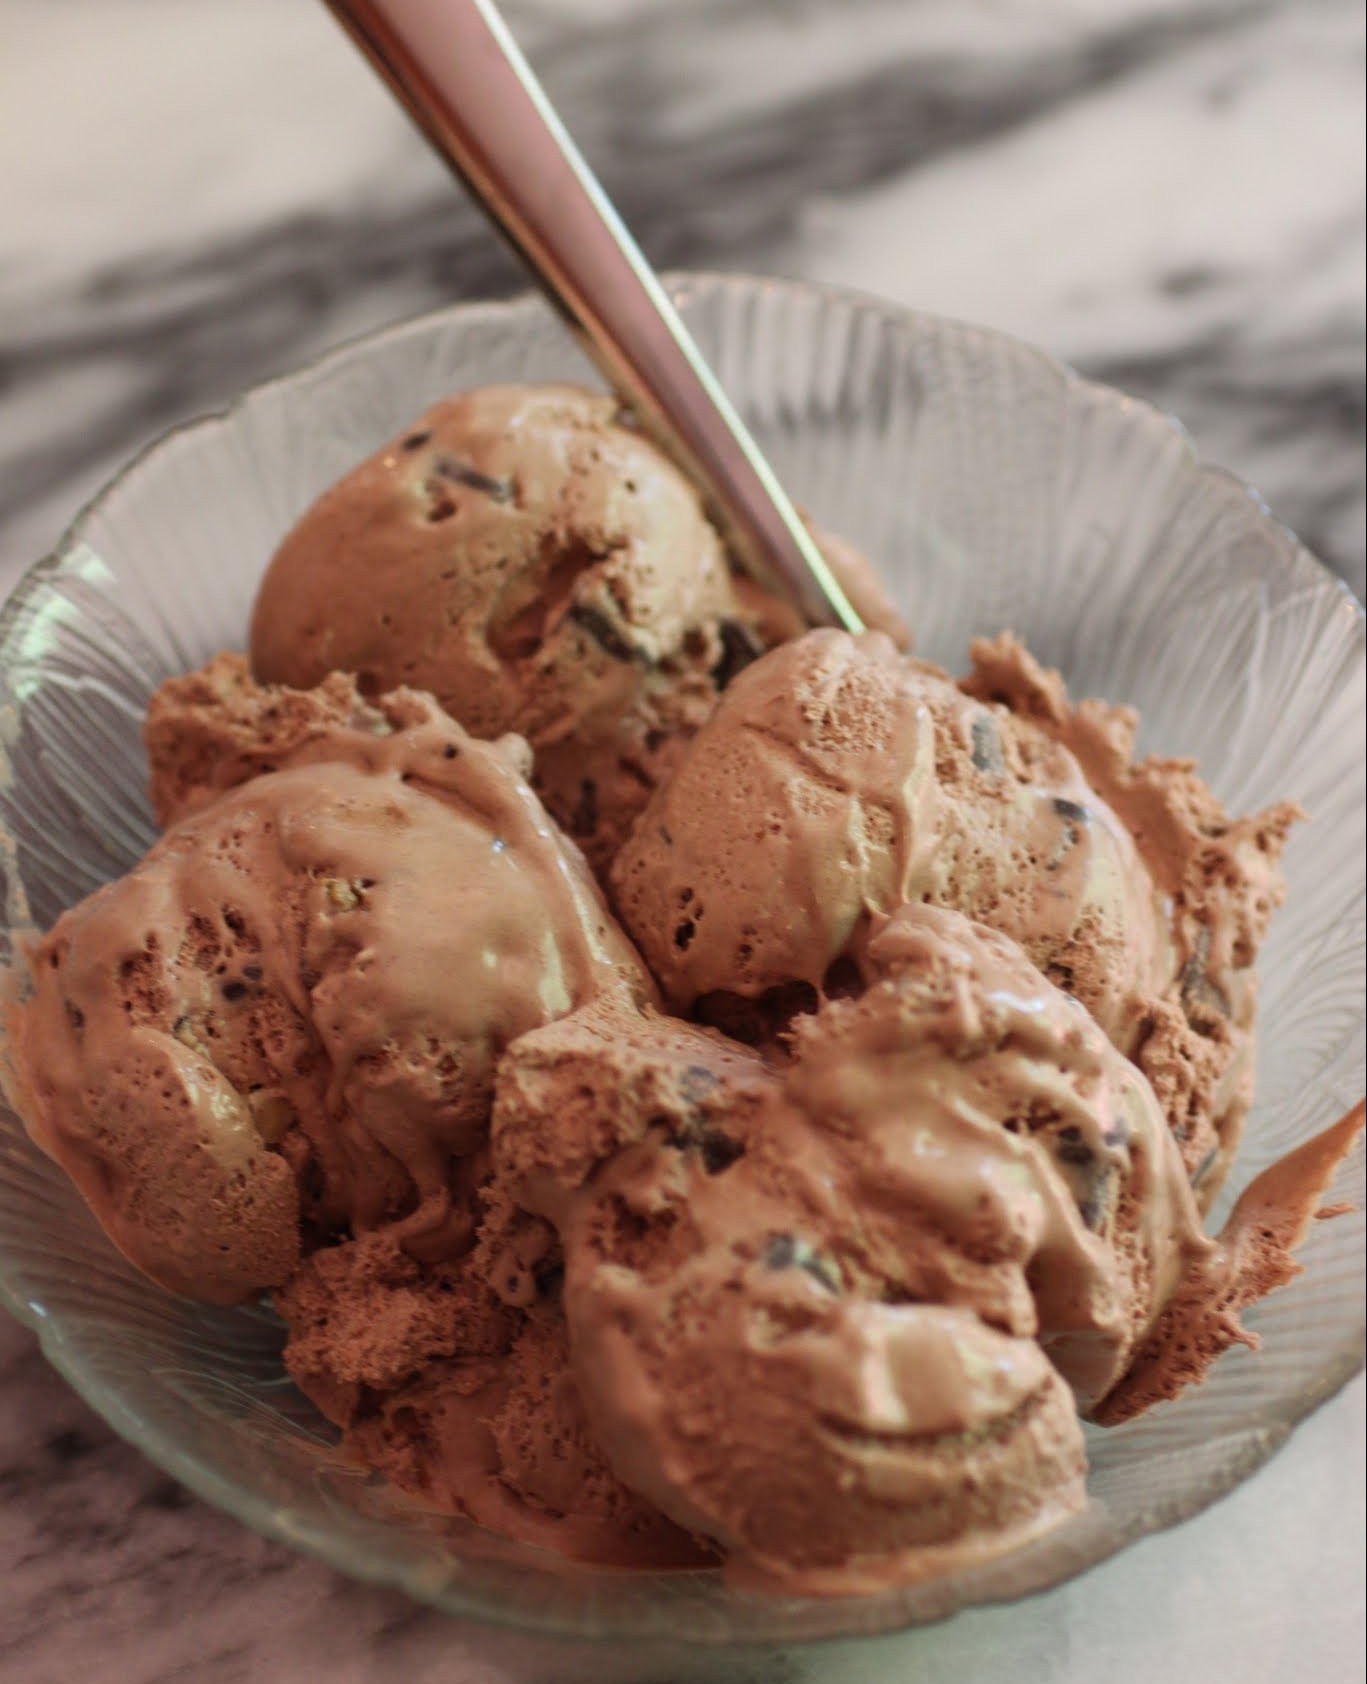
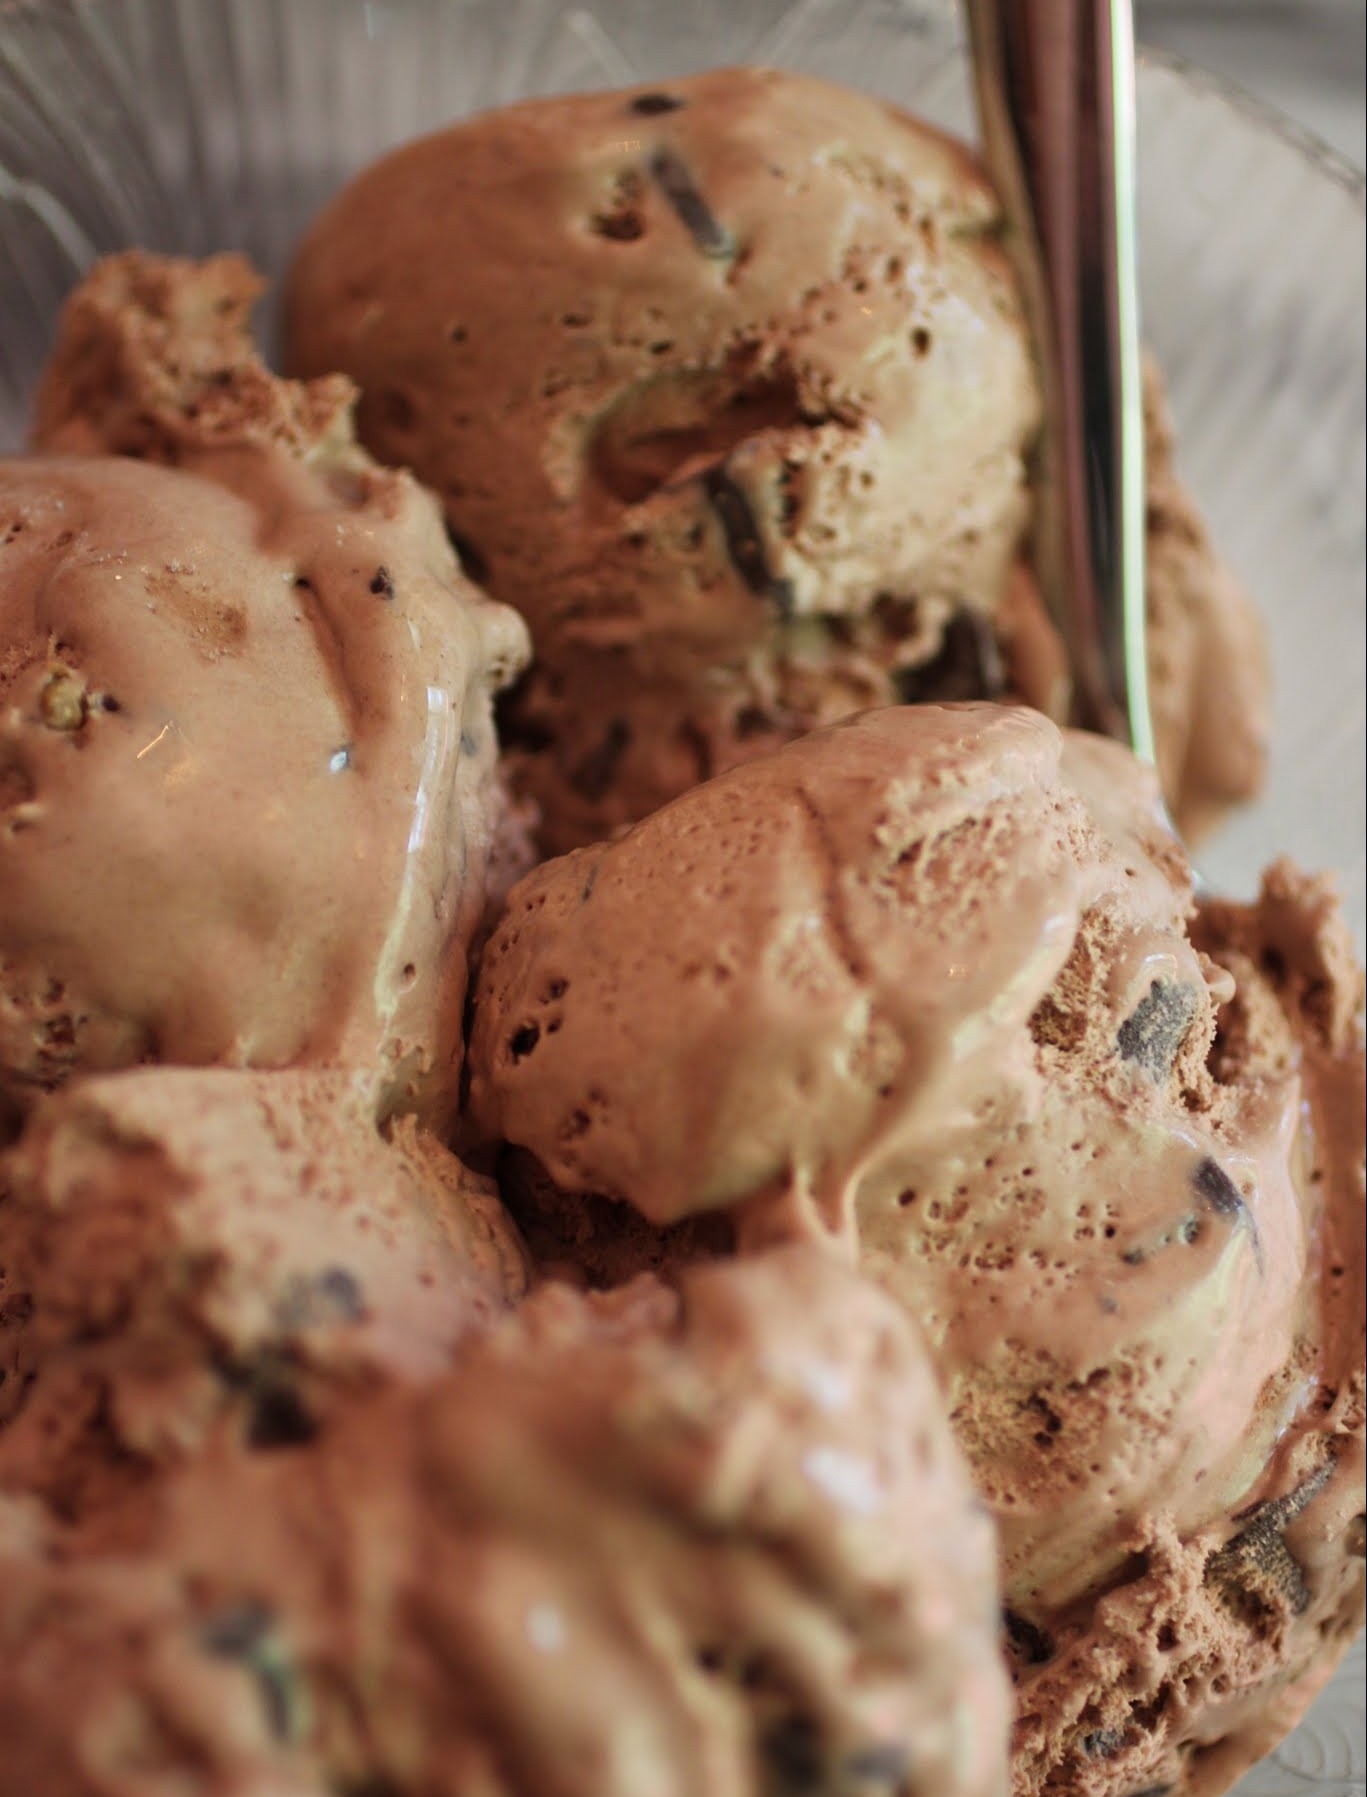
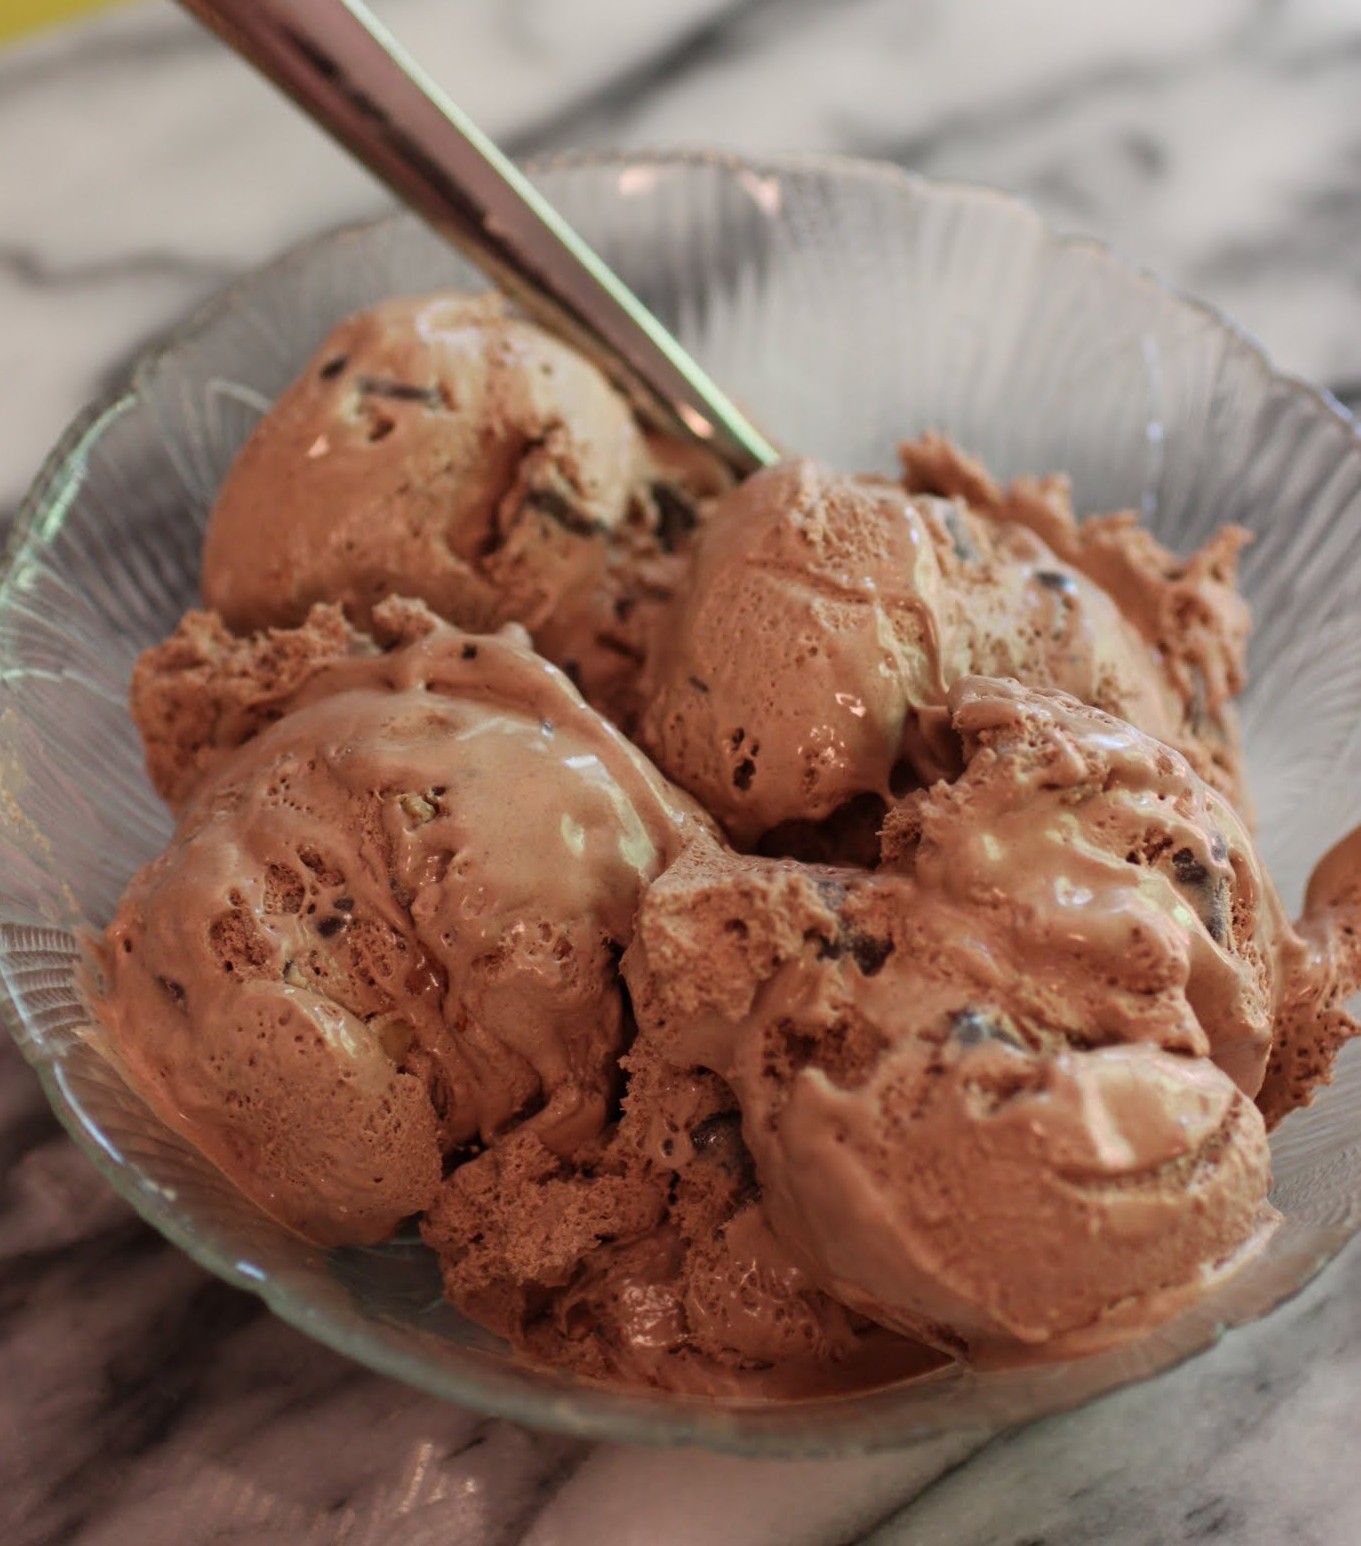
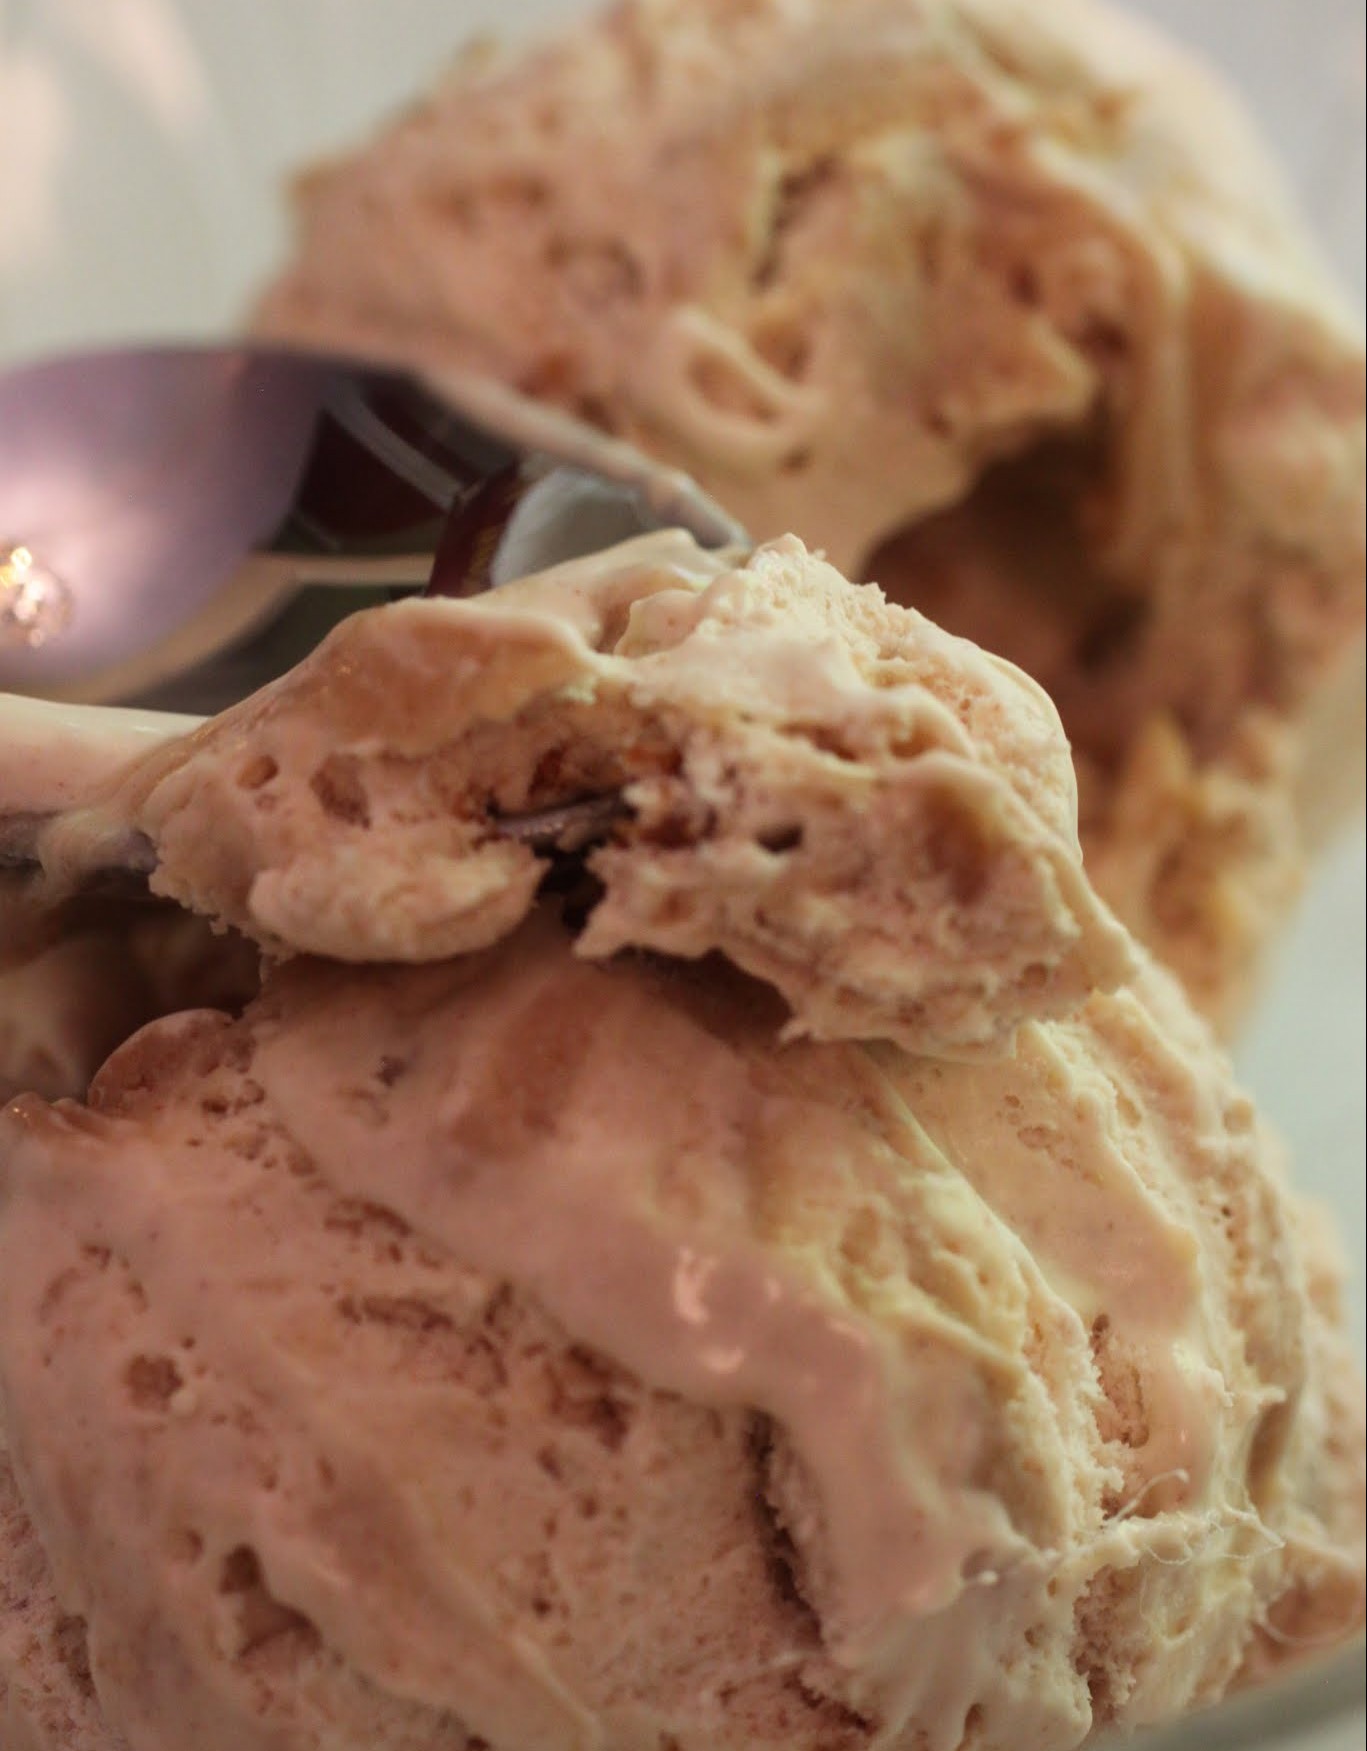
To make this ice cream, you’ll need those Nestle filled chips, the cherry flavor. They’re so good. You’ll also need roasted salted walnuts. Those are your two mix-ins. But the ice cream itself is what I’m talking about here. Ready?
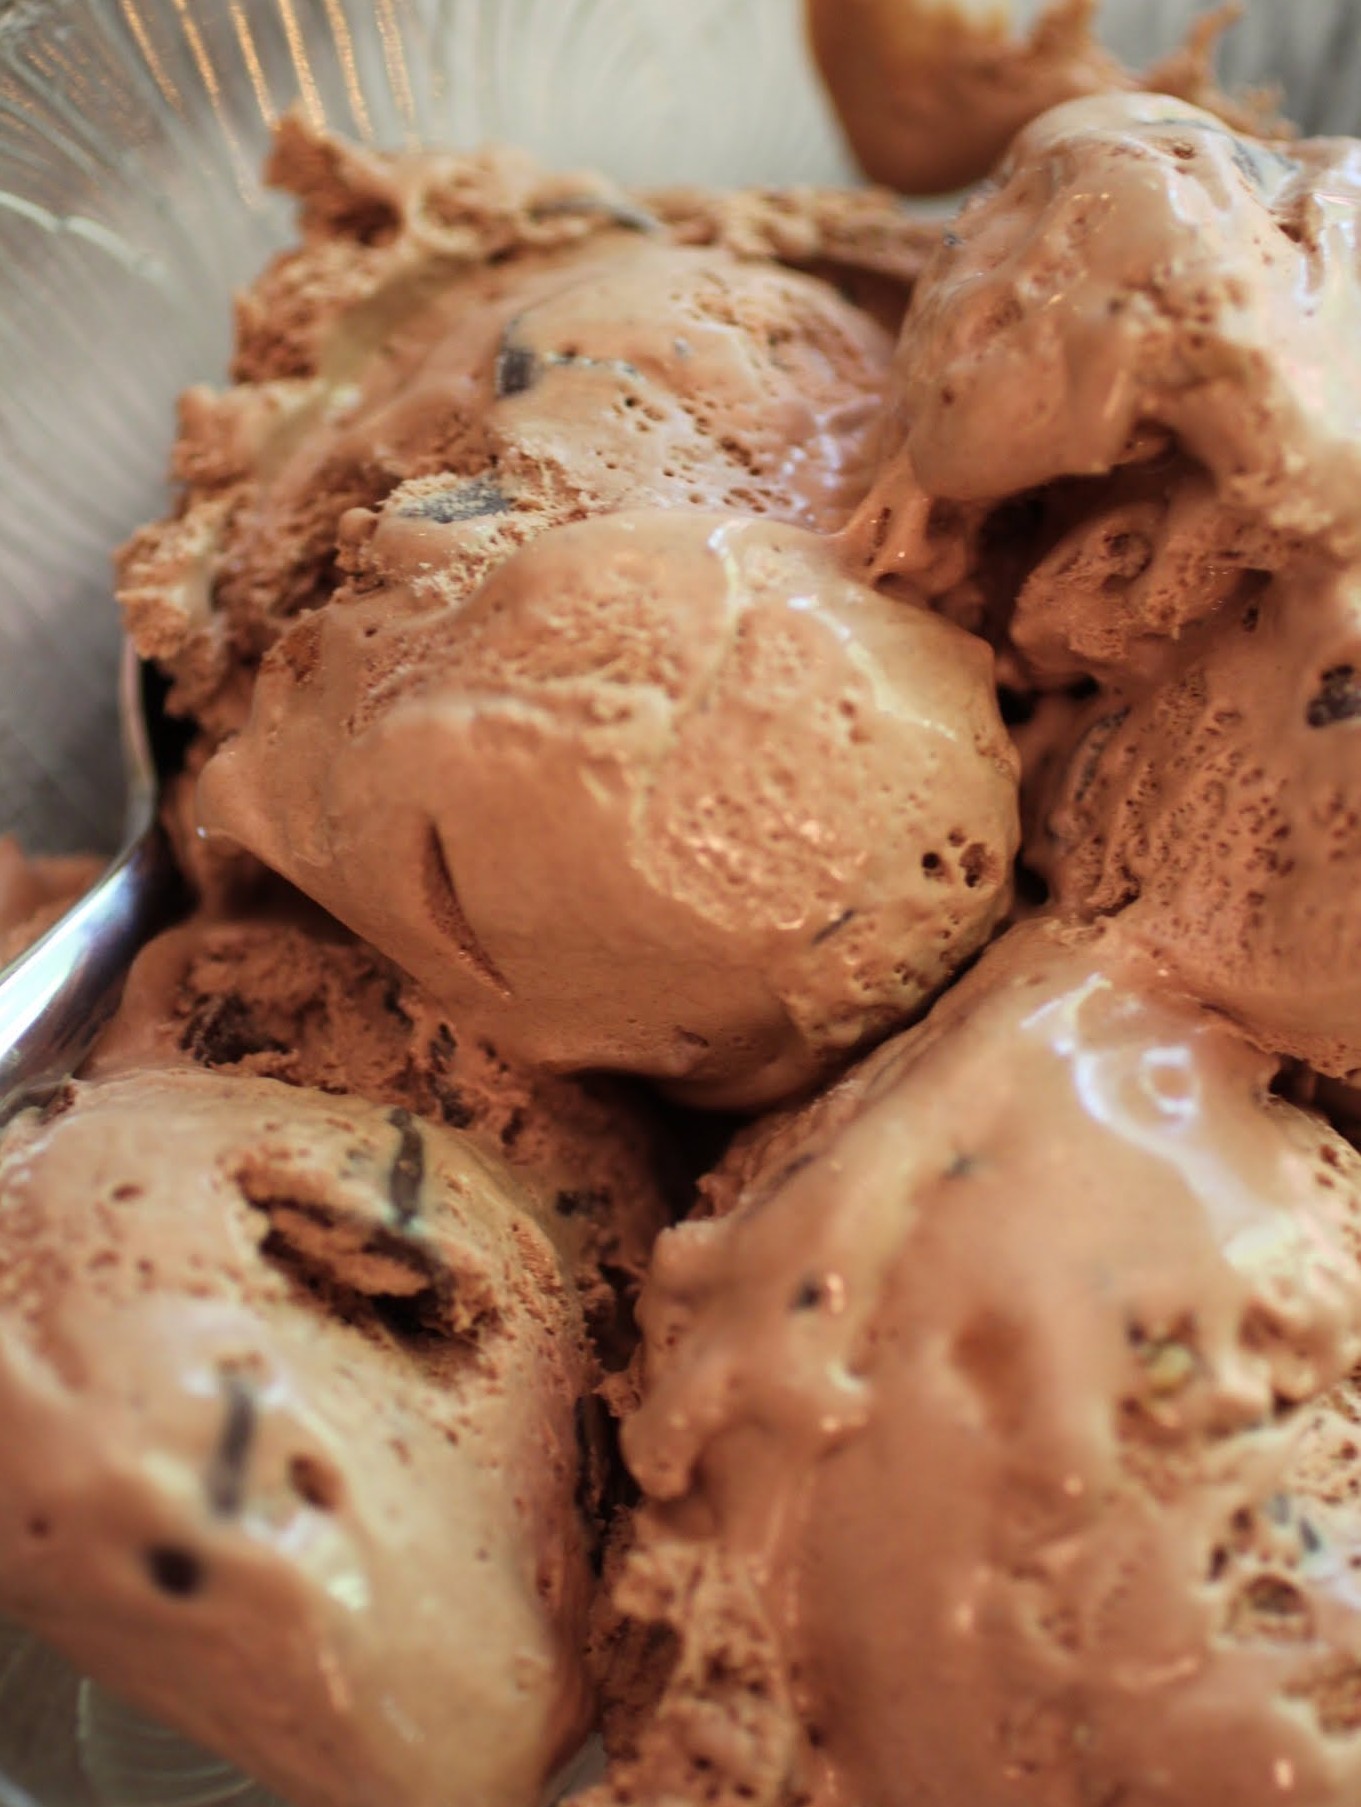
Cool whip. Sweetened condensed milk. Cocoa. That’s all, folks. Mix, fold in your chips and walnuts, and freeze overnight. When you wake up in the morning, you’ve got amazing chocolate ice cream with the best crunchy bits! It’s like a summer miracle. Heck, summer itself is a miracle. Ice cream just makes it better.
You probably can’t do anything to control those grays replacing the color in your hair other than face the stylist. And you definitely can’t do much about awkward moments other than take your mind elsewhere. So free your mind, and the ice cream ideas will follow!
Ingredients
Instructions
- In a bowl, mix the condensed milk with the cocoa until well combined. Fold in the Cool Whip until no streaks remain.
- Add the cherry-filled chocolate chips and walnuts.
- Pour the mixture into ice cream containers or a baking pan. Freeze overnight. Do not leave on the counter for long: it melts faster than churned ice cream!
Well, that’s a dumb question. It’s not like I didn’t work hard for July 4th to become a reality. Months of commuting to work in the dark, sometimes in the ice, often in the rain. Months of teaching teenagers the difference between “it’s” and “its.” Months of wrapping myself up in a blanket at my desk when the heat in my classroom, once again, failed to deliver.
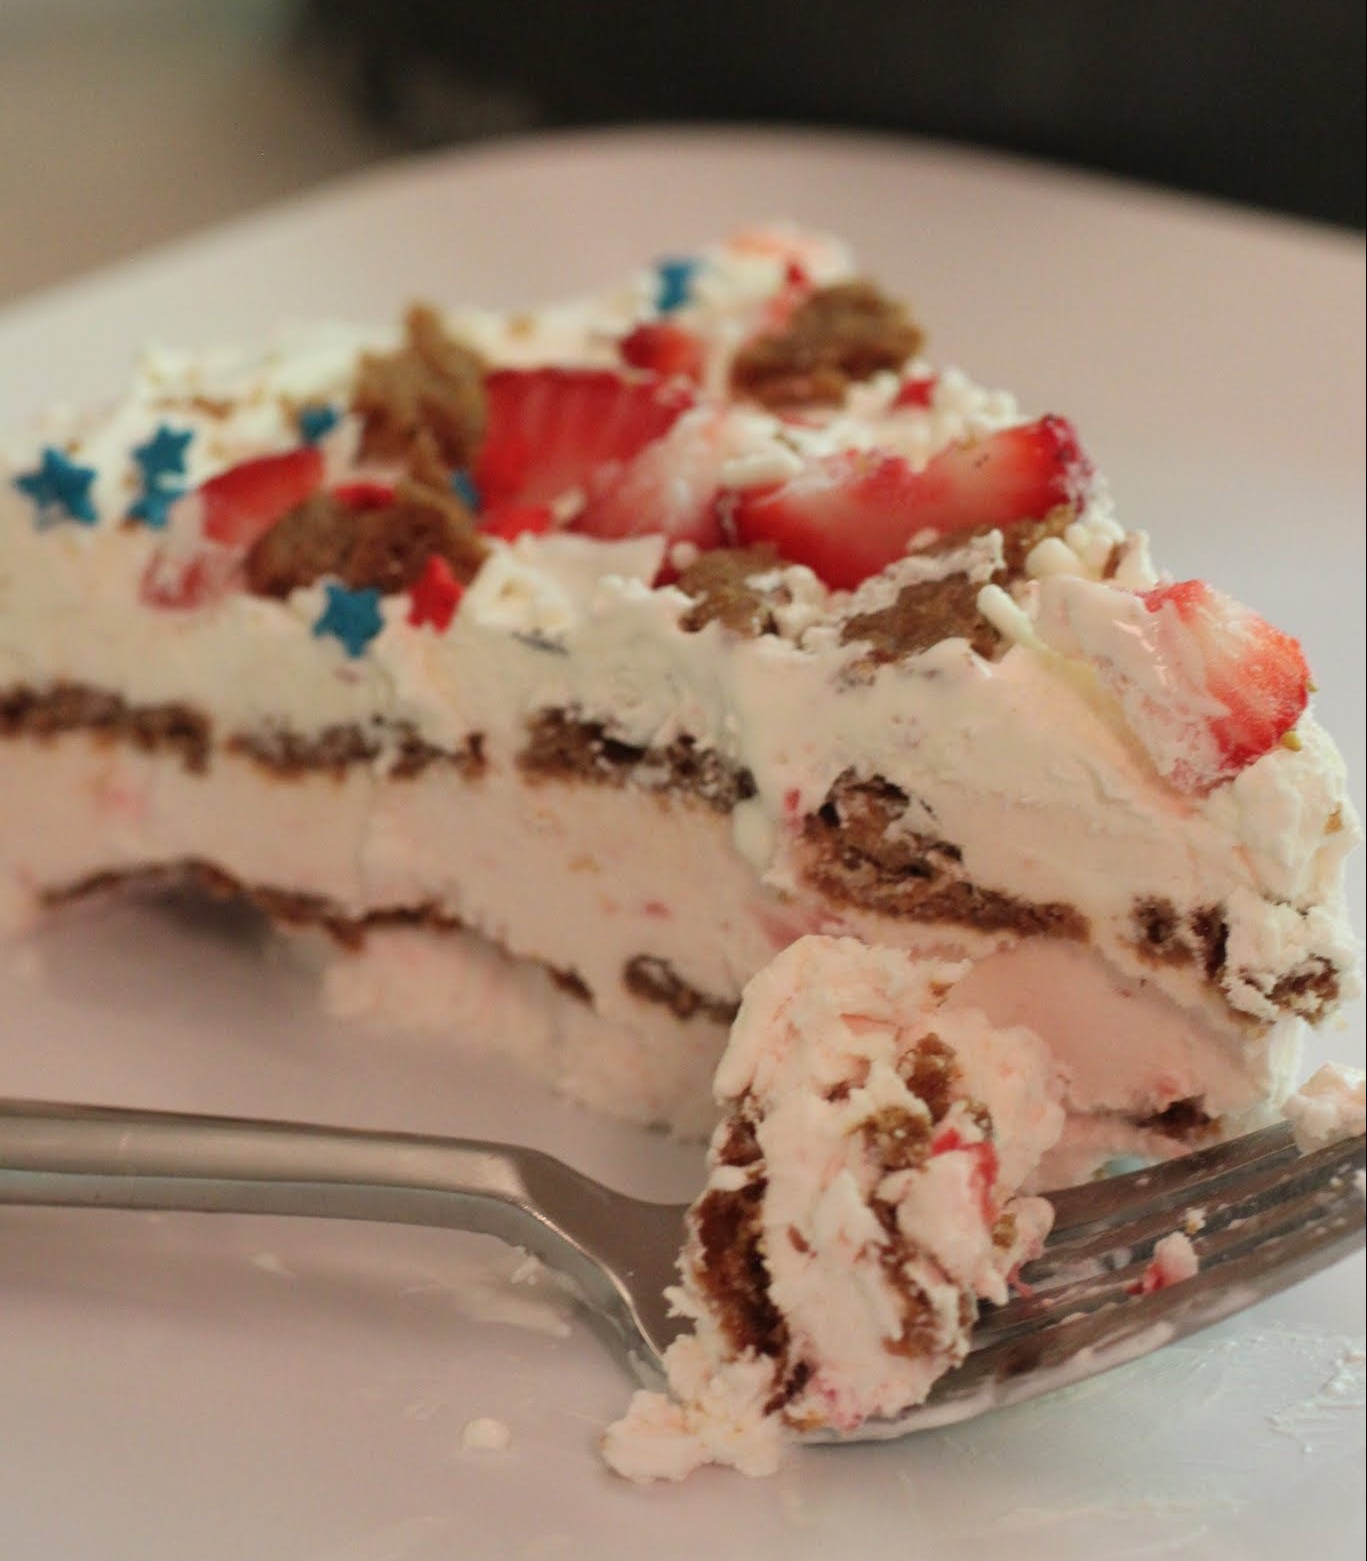
I mean, it dang well better be July 4th. And it better be icebox cheesecake weather. Because no-bake is definitely the way to go right now! Especially when this holiday-themed, easy dessert is filled with delicious Hannah Max cookie chips!
July 4th is one of my favorite holidays. For one thing, it’s my annual hot dog indulgence. Once a year, I eat a super-burned, carcinogenic, mega-processed hot dog. And it’s on July 4th. Don’t worry, I balance all of that indulgence with lots of potato chips. And the real Heinz ketchup, not the sugar-free variety I usually have on the table year-round.

It’s magnificent. What is better than standing out in the sun, hot dog on a wobbly paper plate, watermelon juice dribbling down your chin while you somehow balance a frozen margarita with your elbow? Not much beats that, I can tell you. And I can’t wait for this year’s bash.
We’ll be combining our July 4th celebration with my daughter’s birthday. Yep, she exploded into the world along with the holiday fireworks five years ago. The hospital was deserted and we bonded over two silent days of meal delivery and baby blankets. But this year, we’ll celebrate with hot dogs, birthday cake, and this icebox cheesecake!
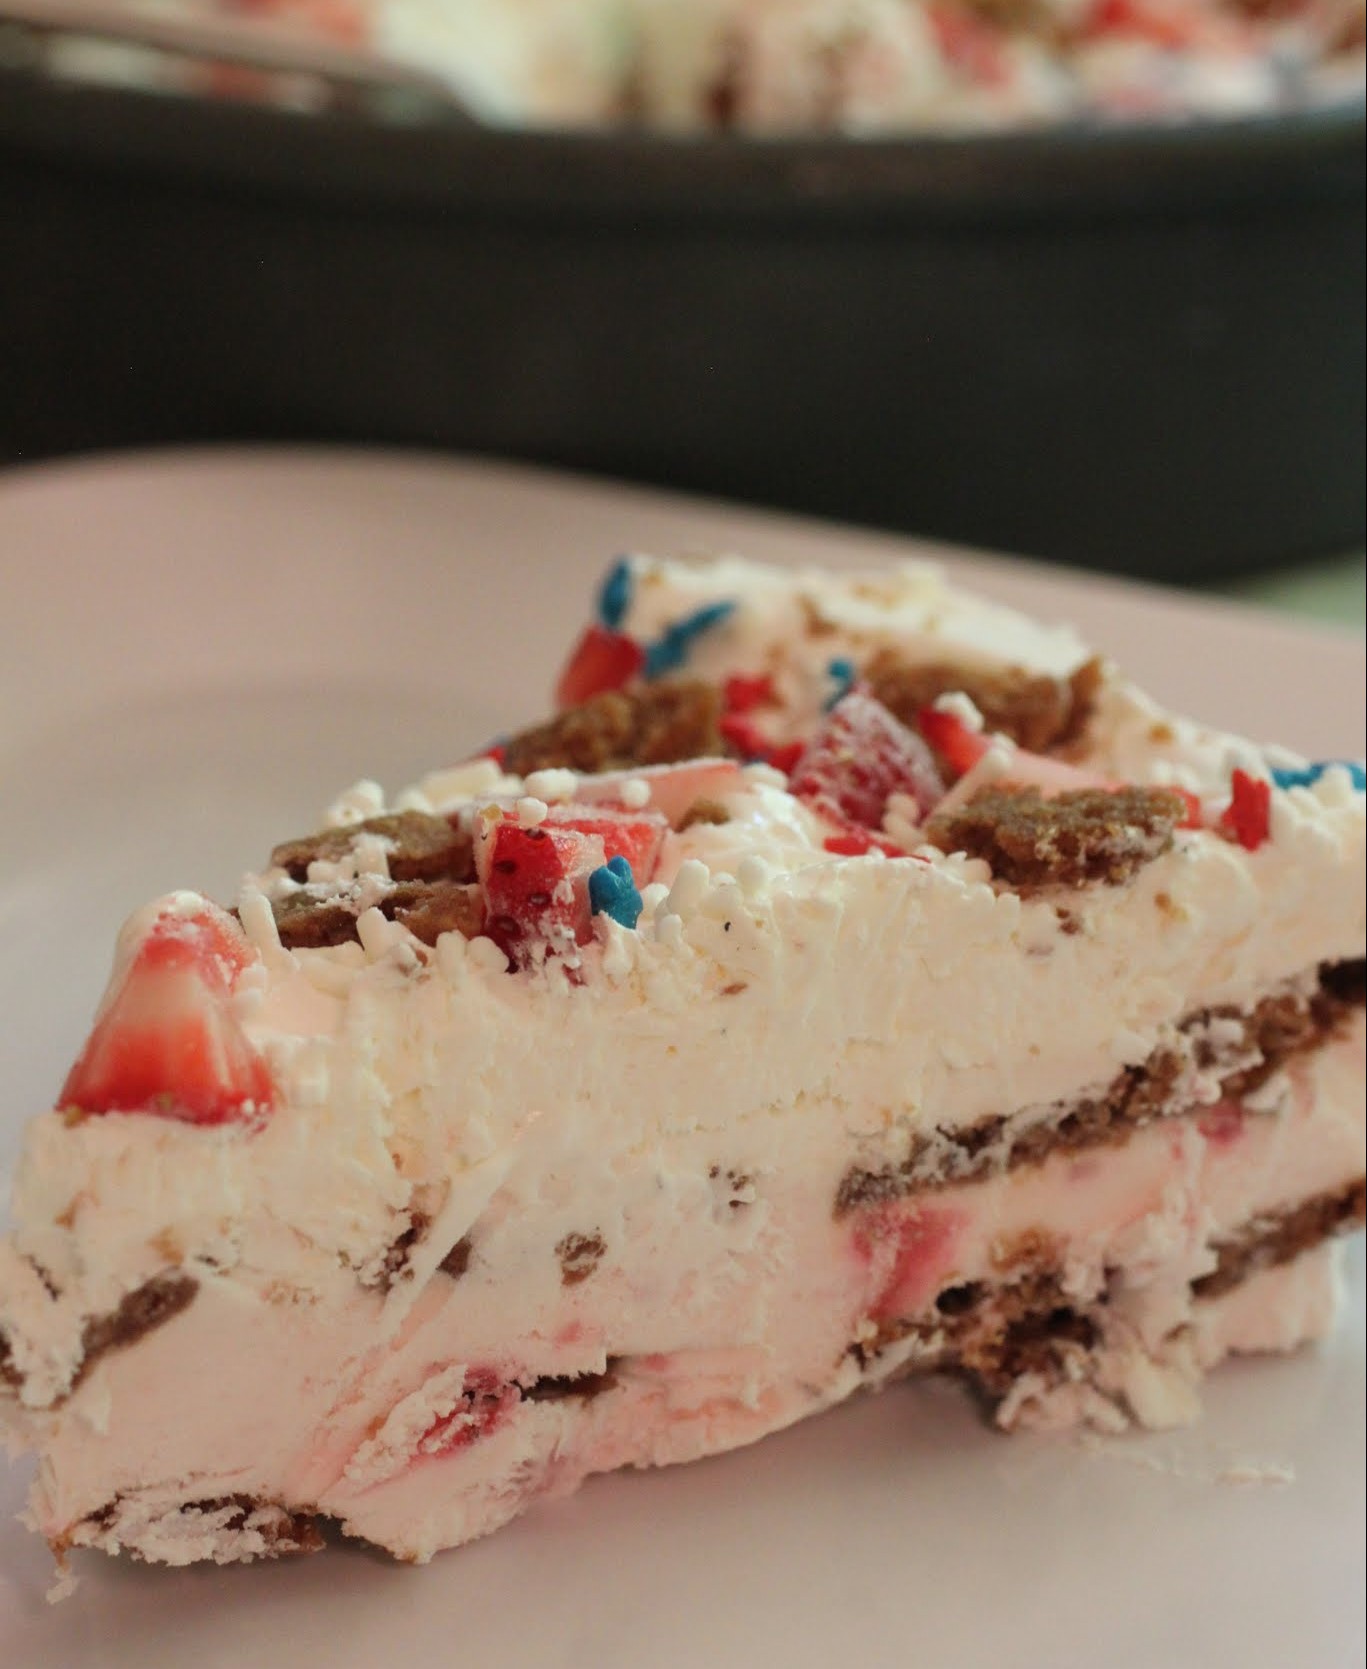
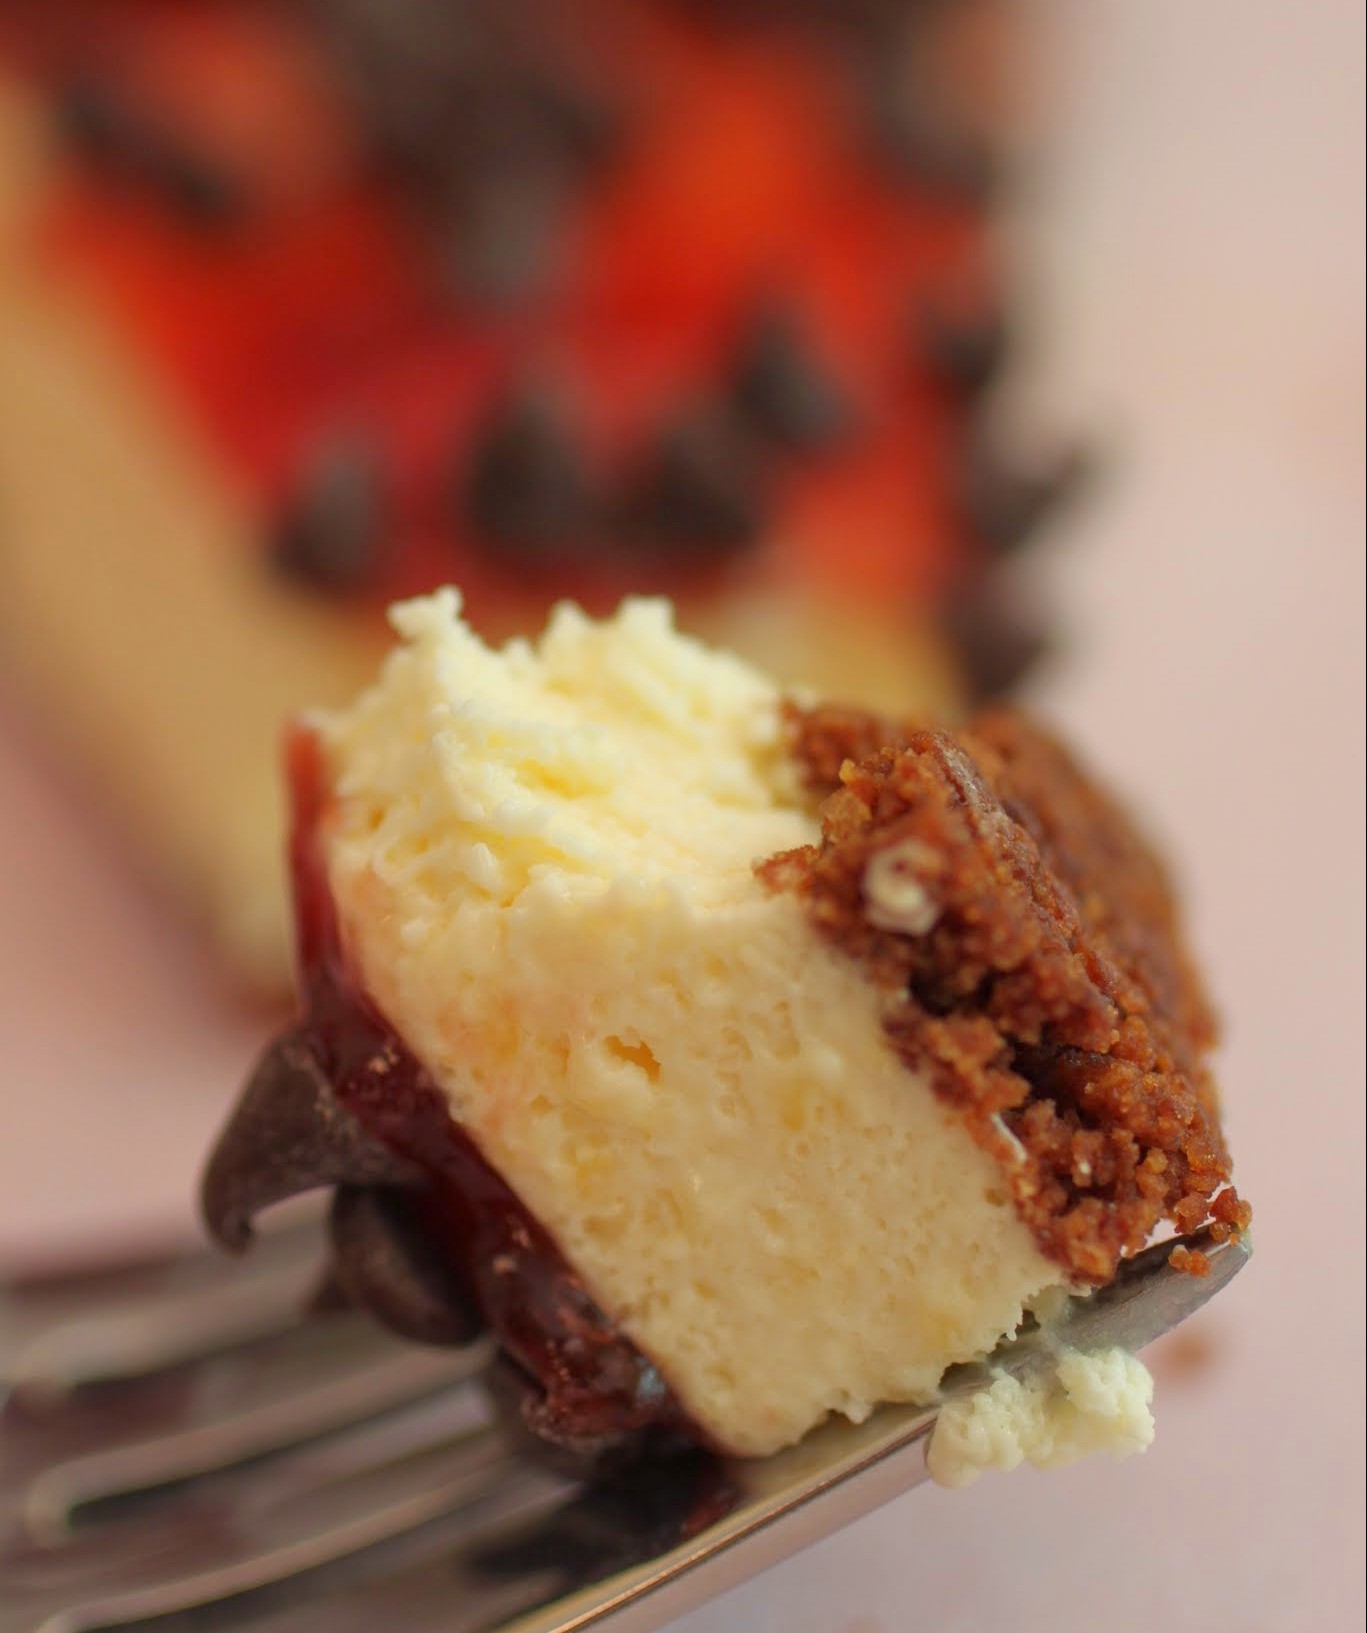
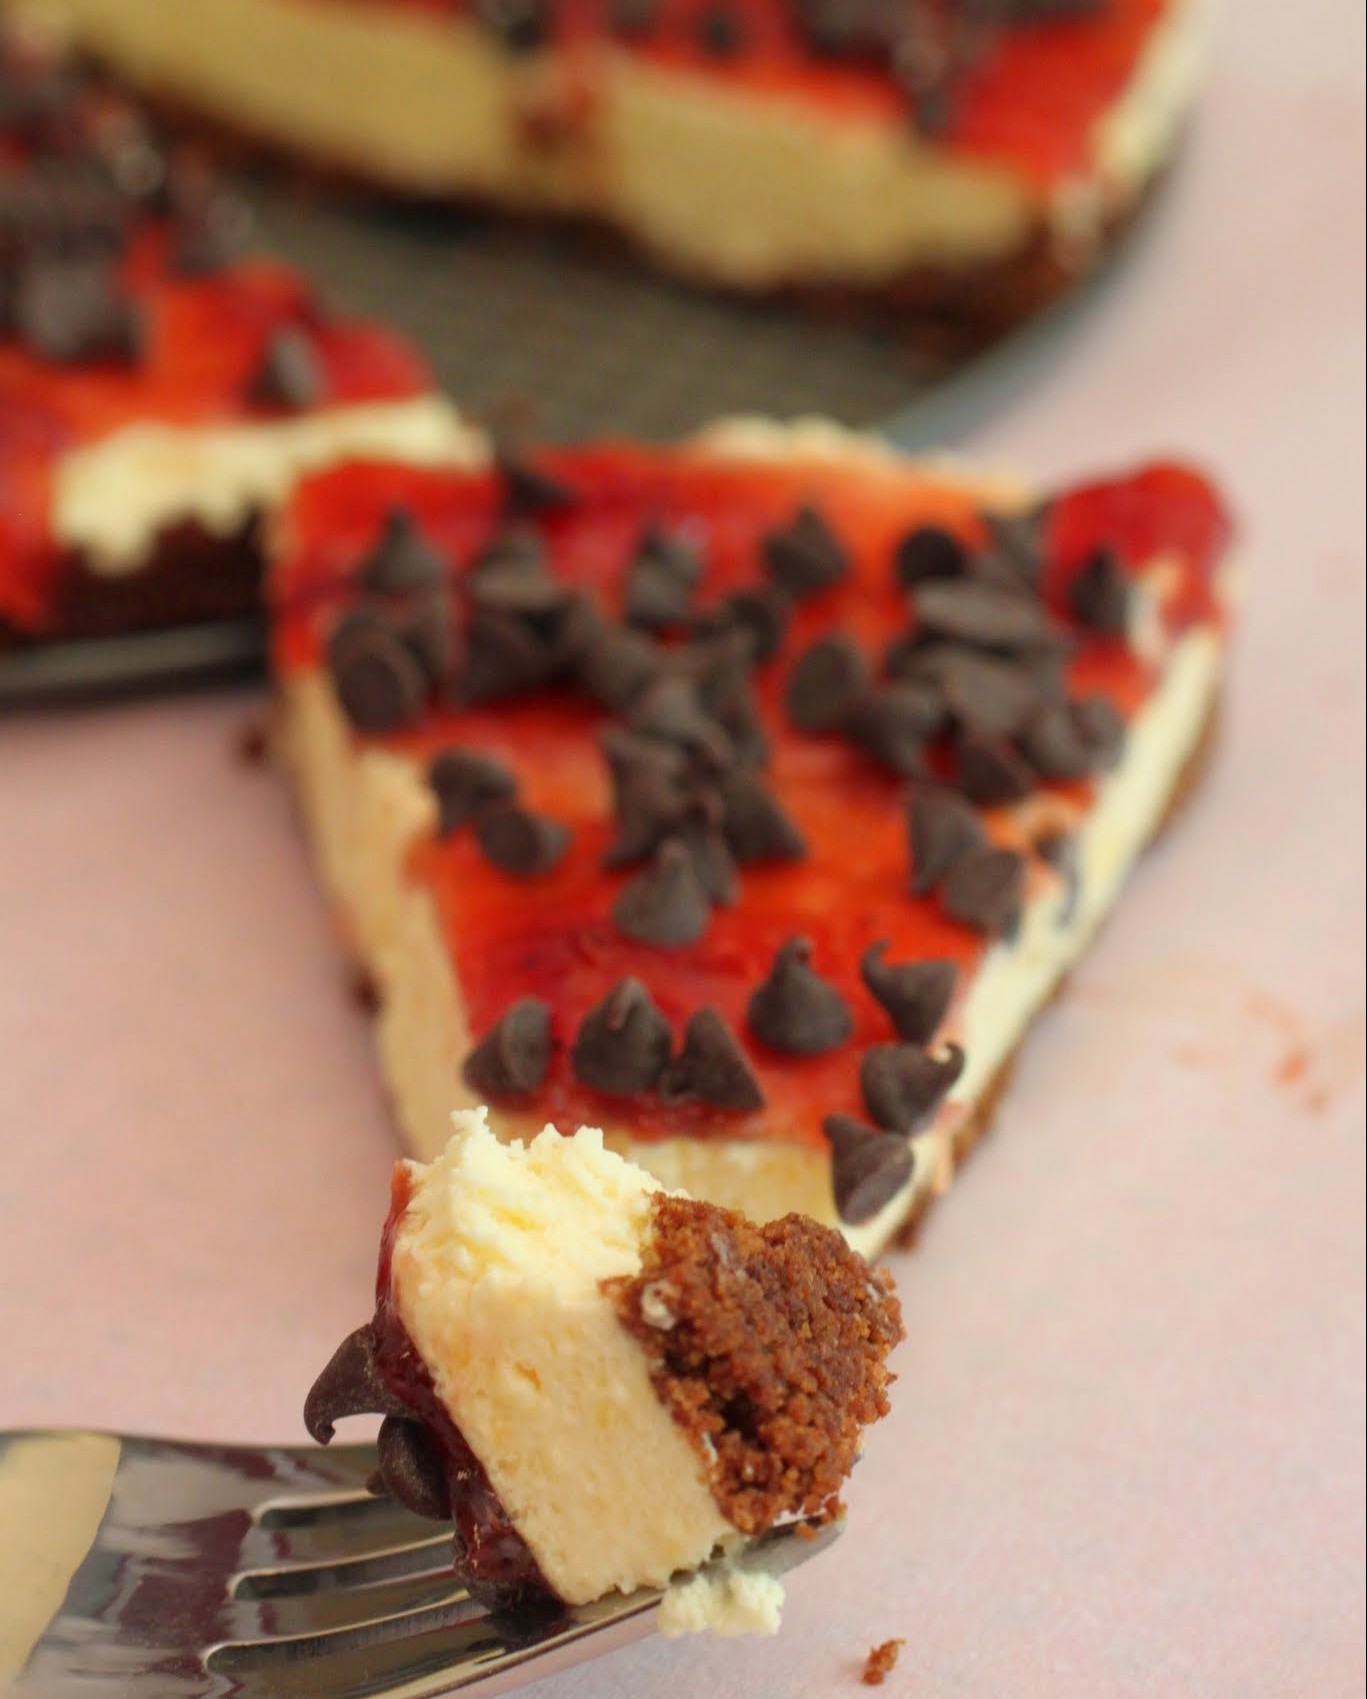
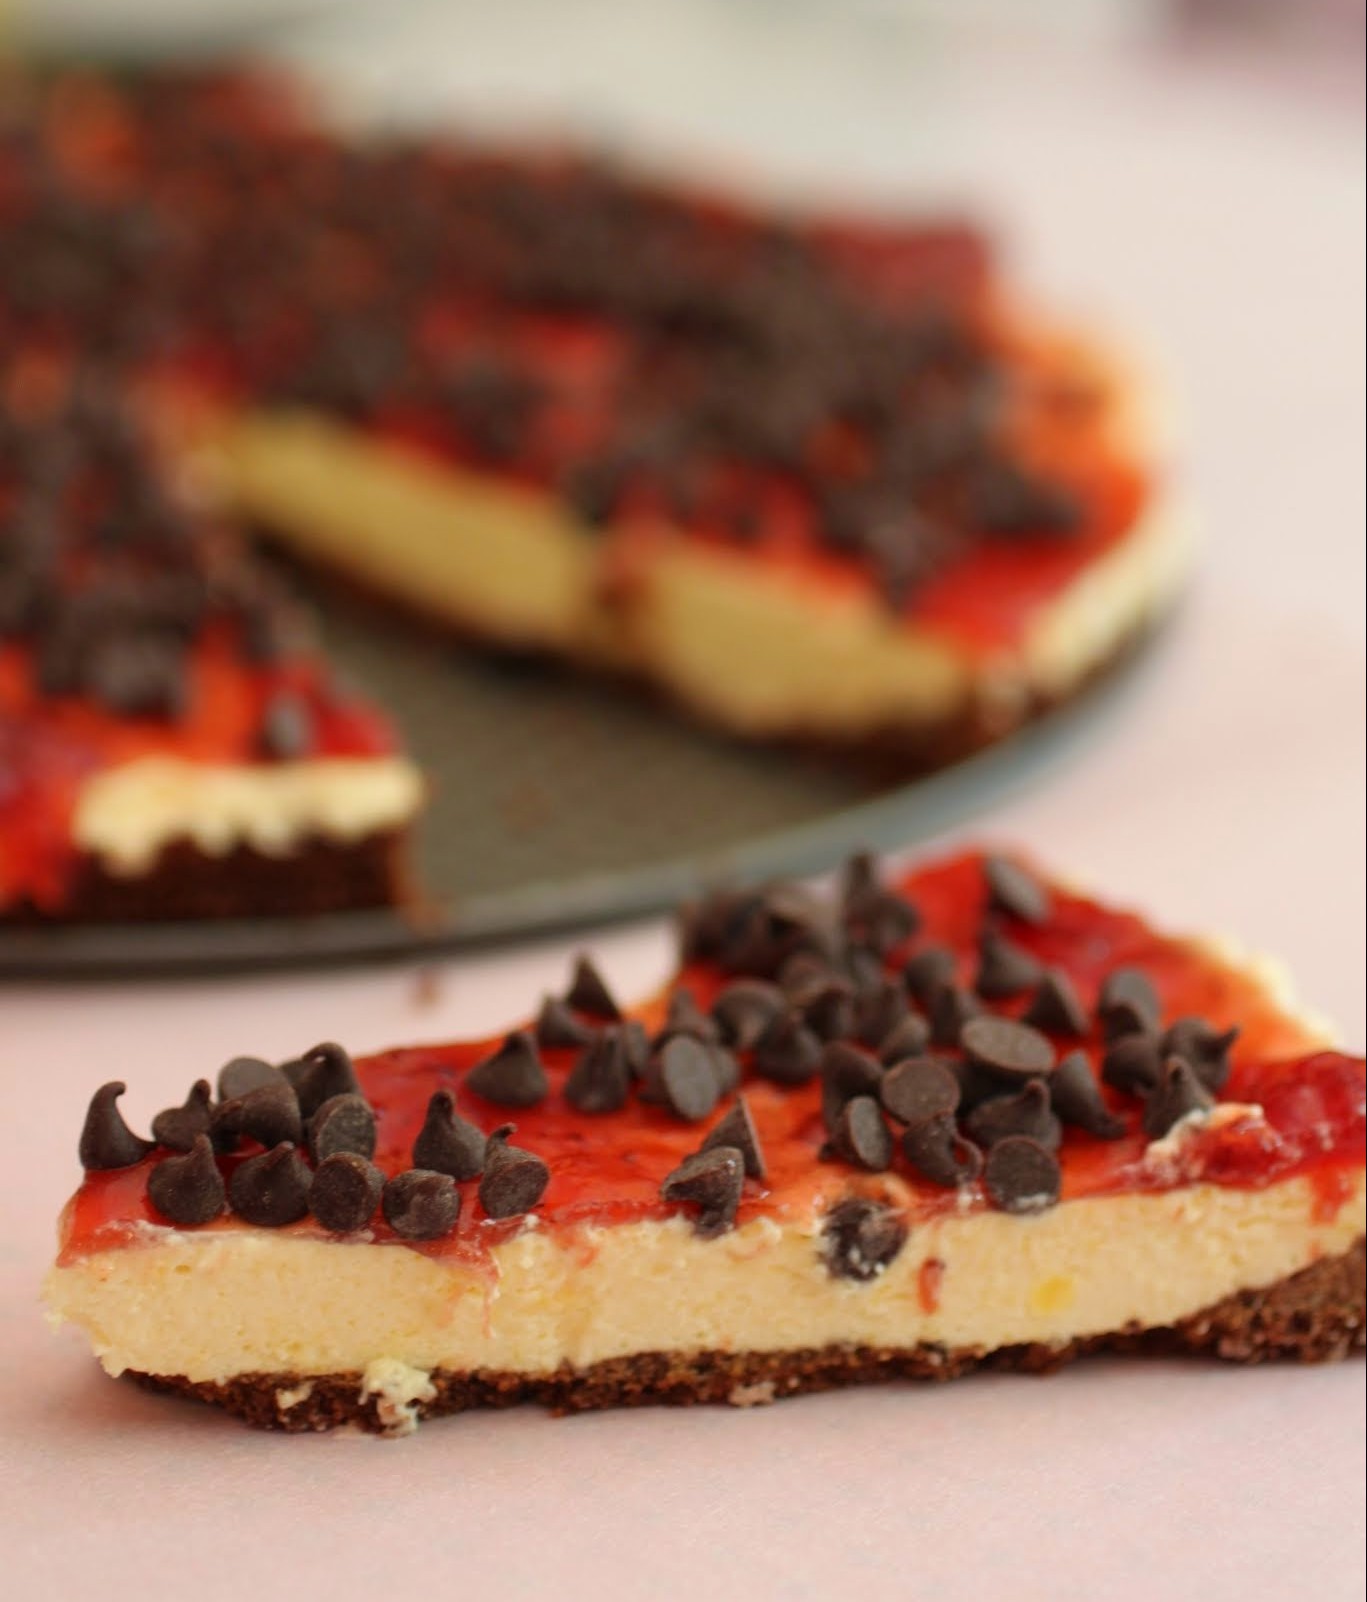
If you’re not familiar with icebox cakes, they’re made with cream (or Cool Whip, for unhealthy cheaters like me), and they’re layered with cookies or cake and kept chilled before serving. They’re delicious. This one is not only strawberry-flavored, but it also has a strong cream cheese base. Thus: icebox cheesecake!
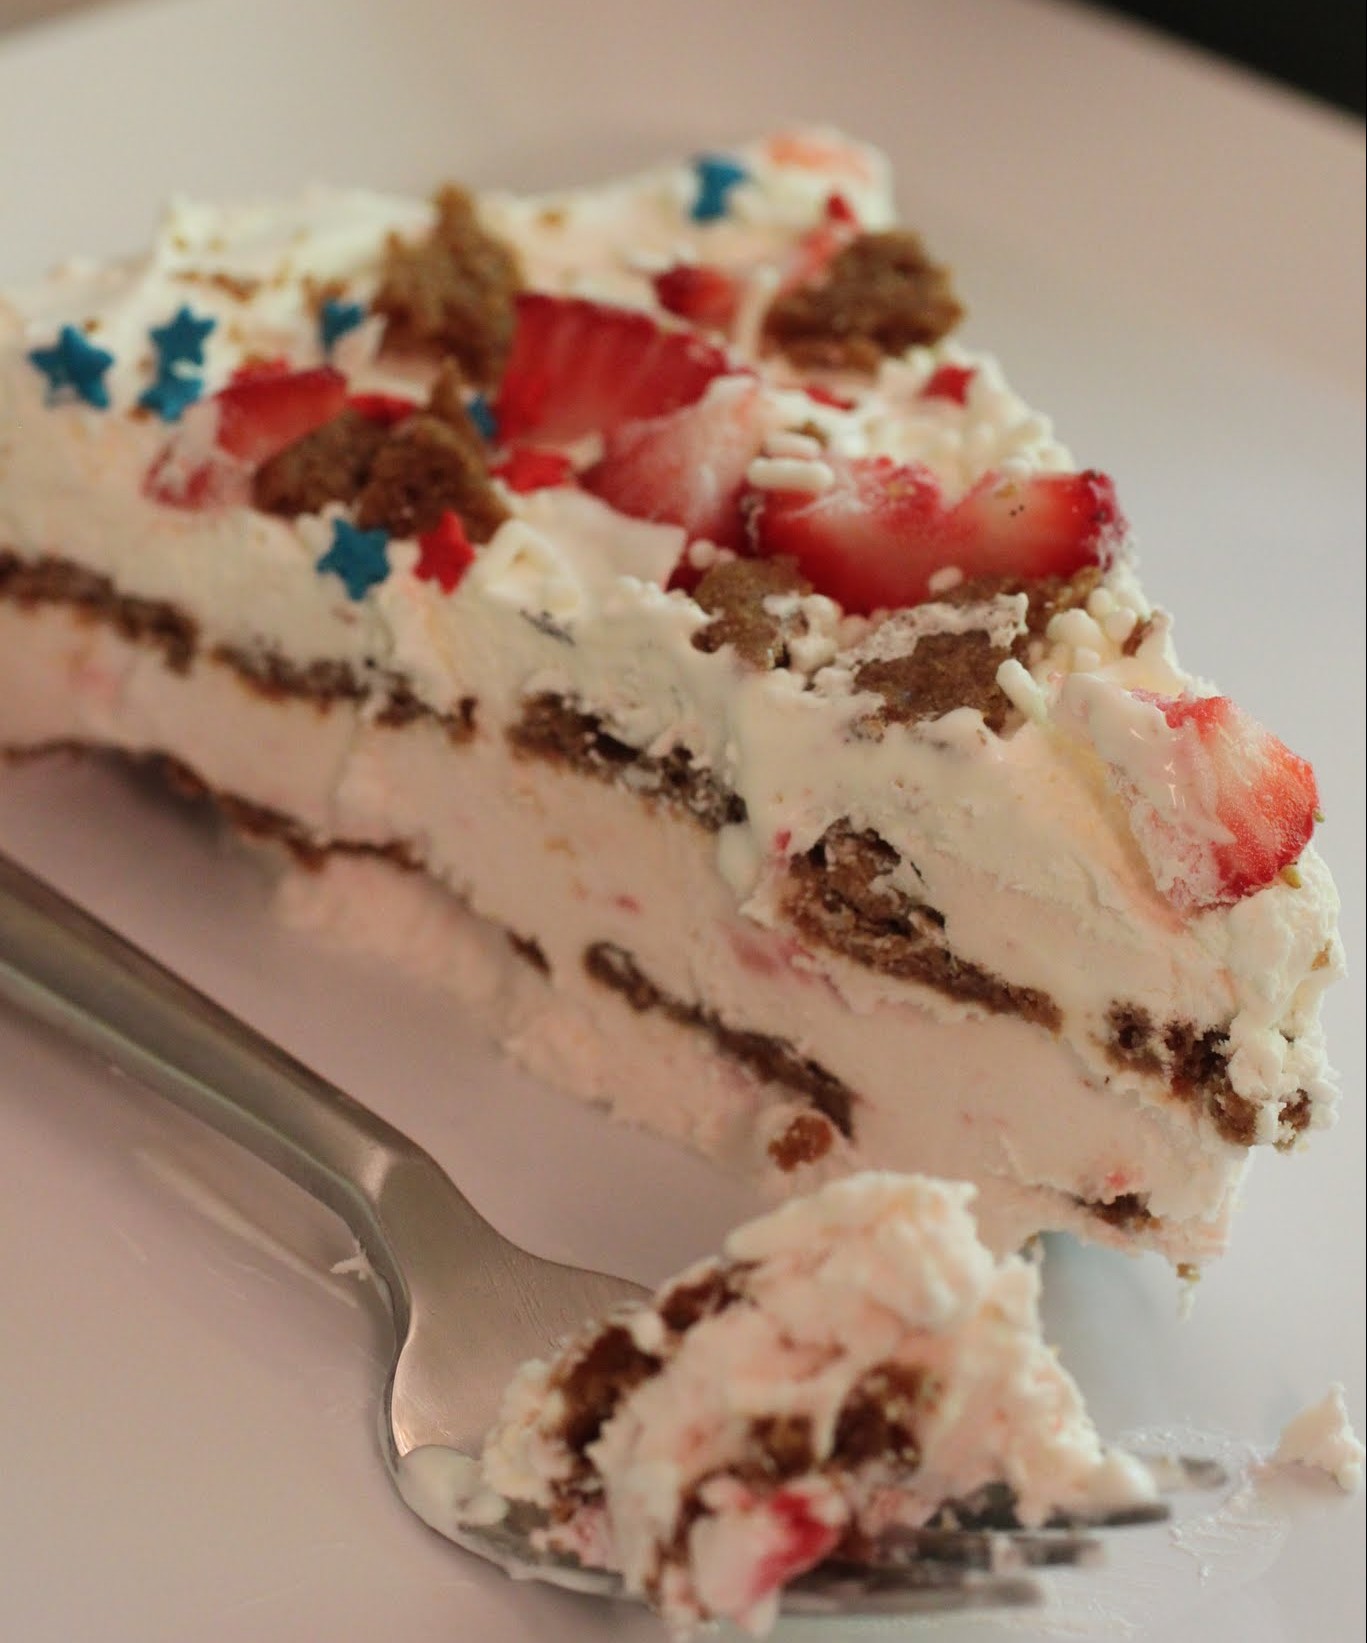
This recipe is, like most of mine, simple and quick. Layered into the cheesecake mixture are the original-flavored Hannah Max cookie chips, which my son was munching on as I made the cake. He couldn’t resist. They’re so addictive! And while a lot of icebox cake recipes call for dipping the cookies in milk before layering, I opted to keep my cookie chips nice and crisp. It makes for more texture contrast when you’re eating.
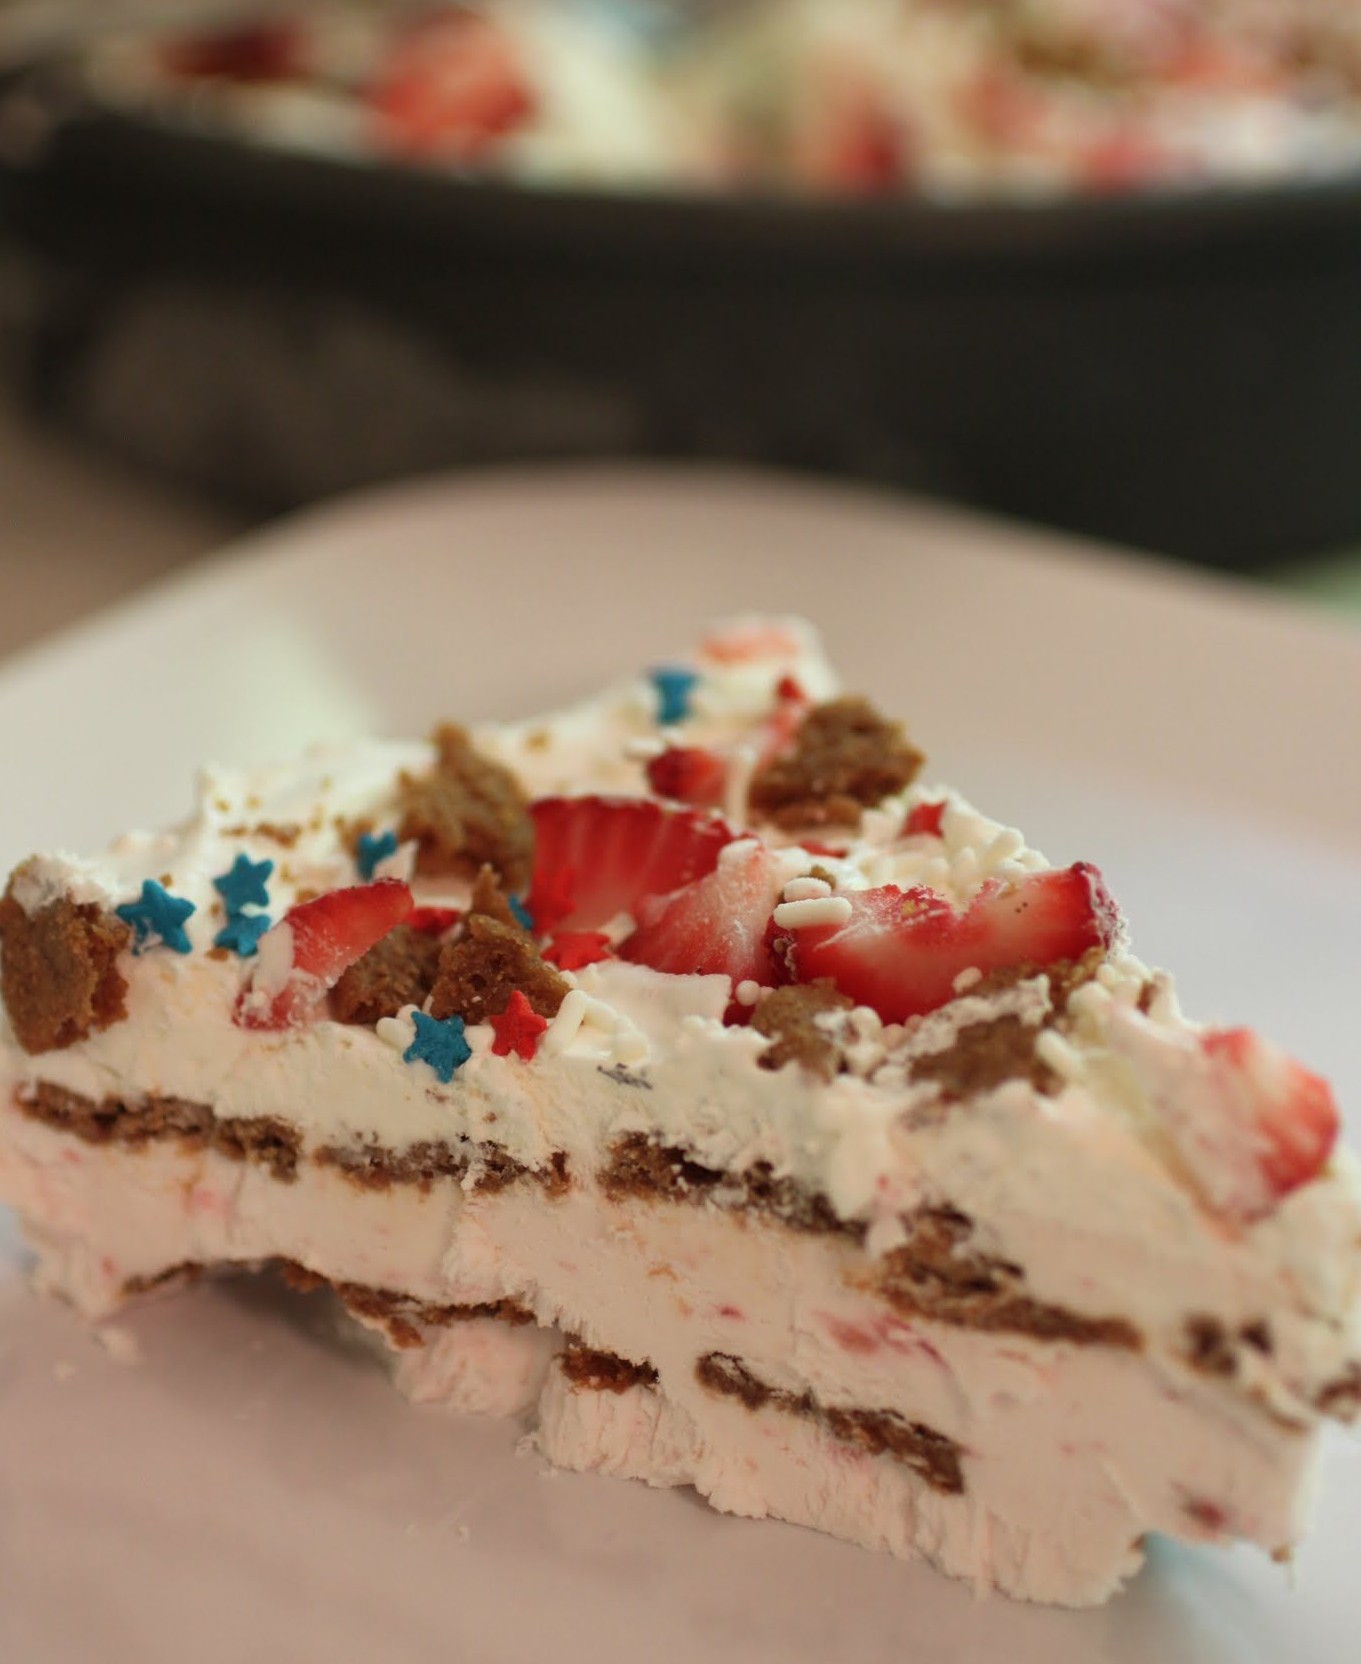
The festive sprinkles and diced strawberries, along with crumbled cookie chips, make for the perfect July 4th finish. Creamy, crunchy and easy, this cookie chips icebox cheesecake is the best way to say goodbye to those dreary dark mornings. It’s time to kick off your summer!
Note: Hannah Max Cookie Chips provided a product for this post. All opinions are 100% my own.
Ingredients
Instructions
- In a large bowl, beat the cream cheese and powdered sugar until smooth. Set aside.
- Mash about 3/4 cup of diced strawberries roughly with a fork. Add to the cream cheese mixture and stir. Fold in 3/4 of the Cool Whip container and mix until no streaks remain.
- In a 9-inch round cake pan (you can also use a square pan if you want to cut into squares instead of wedges), spread a layer of the cheesecake mixture on the bottom. Place a layer of cookie chips on top, filling in all gaps with broken pieces of cookie chips. Repeat the process one more time.
- Take the remaining Cool Whip and spread it evenly on top. Crumble on remaining cookie chips, diced strawberries, and sprinkles (if desired).
- Chill overnight. If you prefer a cleaner cut, freeze the icebox cheesecake. It will be firmer in the freezer and creamier in the fridge.
]]>
A couple of years back, I was in the bakery section of my local Safeway (not an unusual place to find me) when I spotted Hannah Max Cookie Chips on the shelf. They had several flavors, and I picked up the chocolate chip, not knowing what to expect.
What I got was a crispy cookie that tasted absolutely homemade. And they were so good that Kenny (these were the days prior to his gluten-free lifestyle) ate the entire bag. And when I bought more, I was wise enough to hide them.
A few weeks ago, I wrote to the company to tell them how much I loved their product. I do that a lot. I figure people should know how good their food is! And in return, they sent me a big ol’ box of assorted cookie chips and their blessing for me to create recipes. What lovely people. If I were the sort of person who sent Christmas cards, they’d definitely be getting one.
When he saw the box full of cookie chips, Kenny’s eyes lit up. And then I not at all gently reminded him that not only did his gluten-free self need to back on up, but that these were also MINE for recipe development. All mine. And if a few (okay, a lot) got eaten in the process, that was entirely my affair.
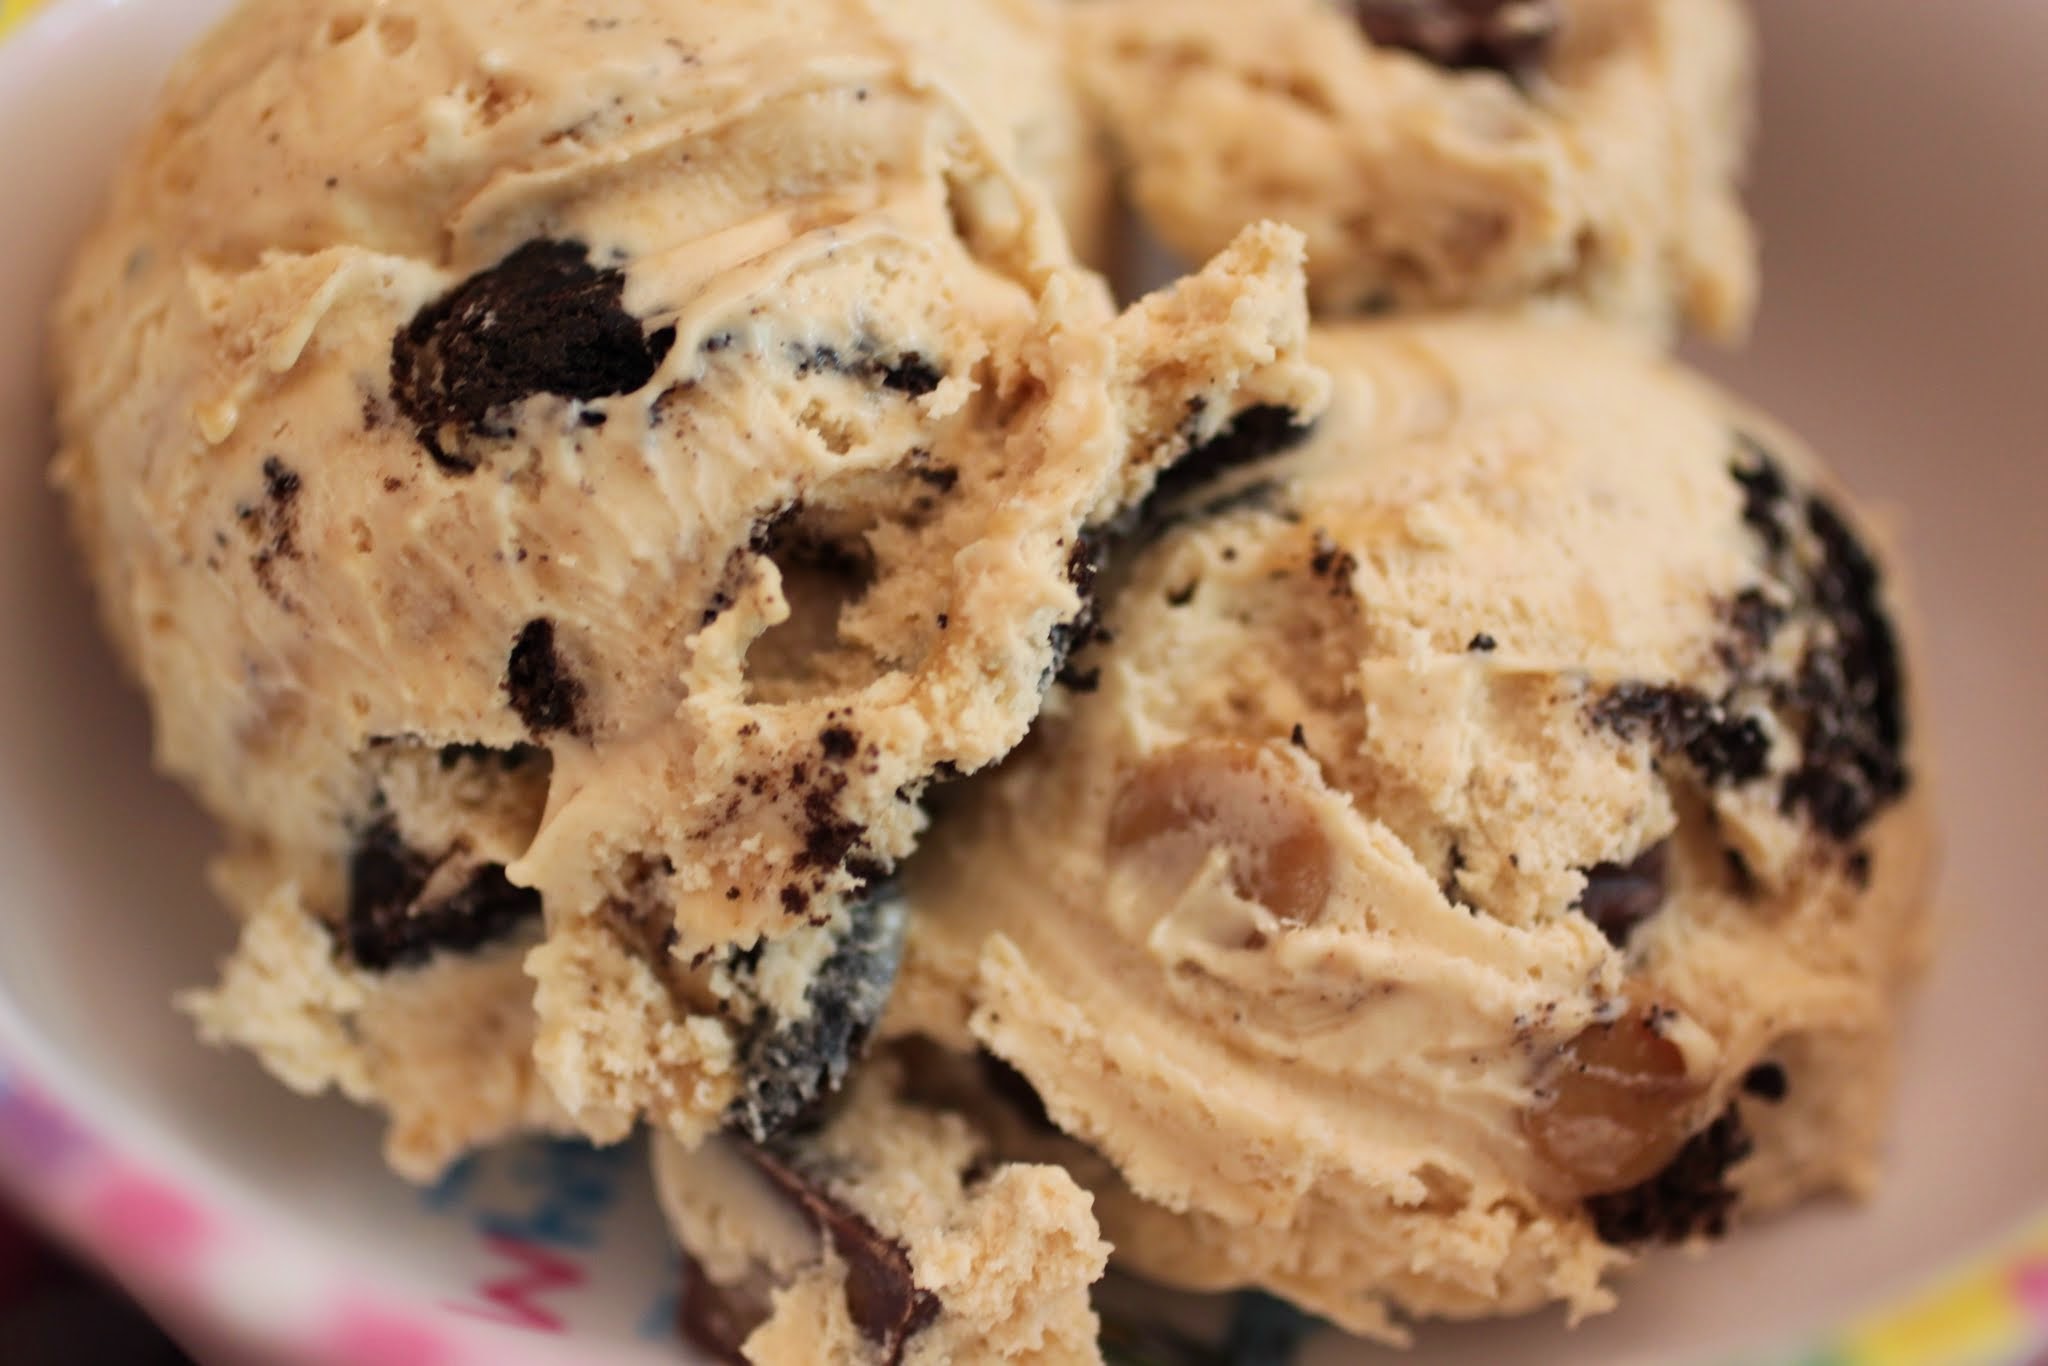
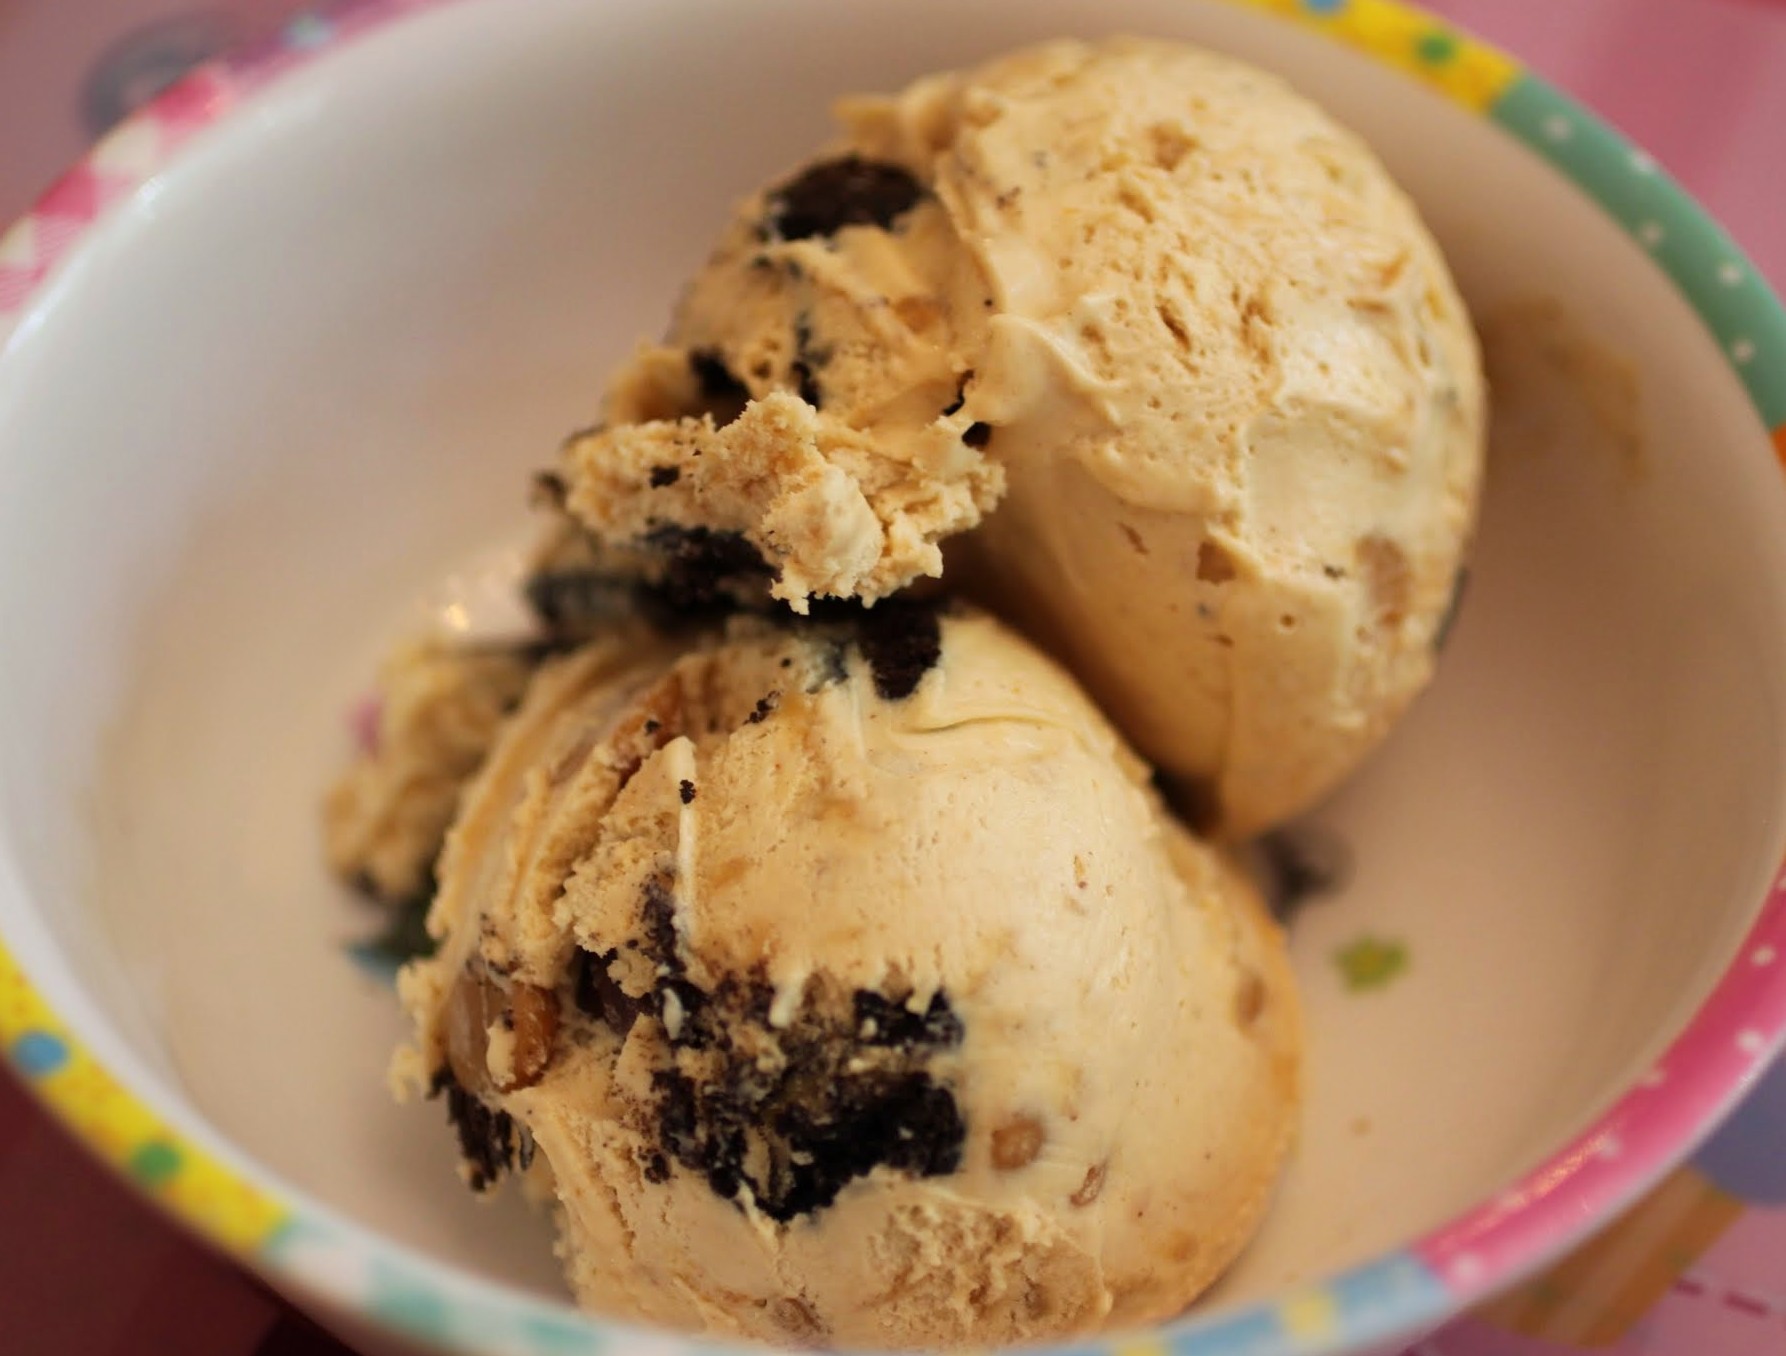
The first bag I opened was this one, the sea salt peanut butter cookie chips. And may I say…wow.
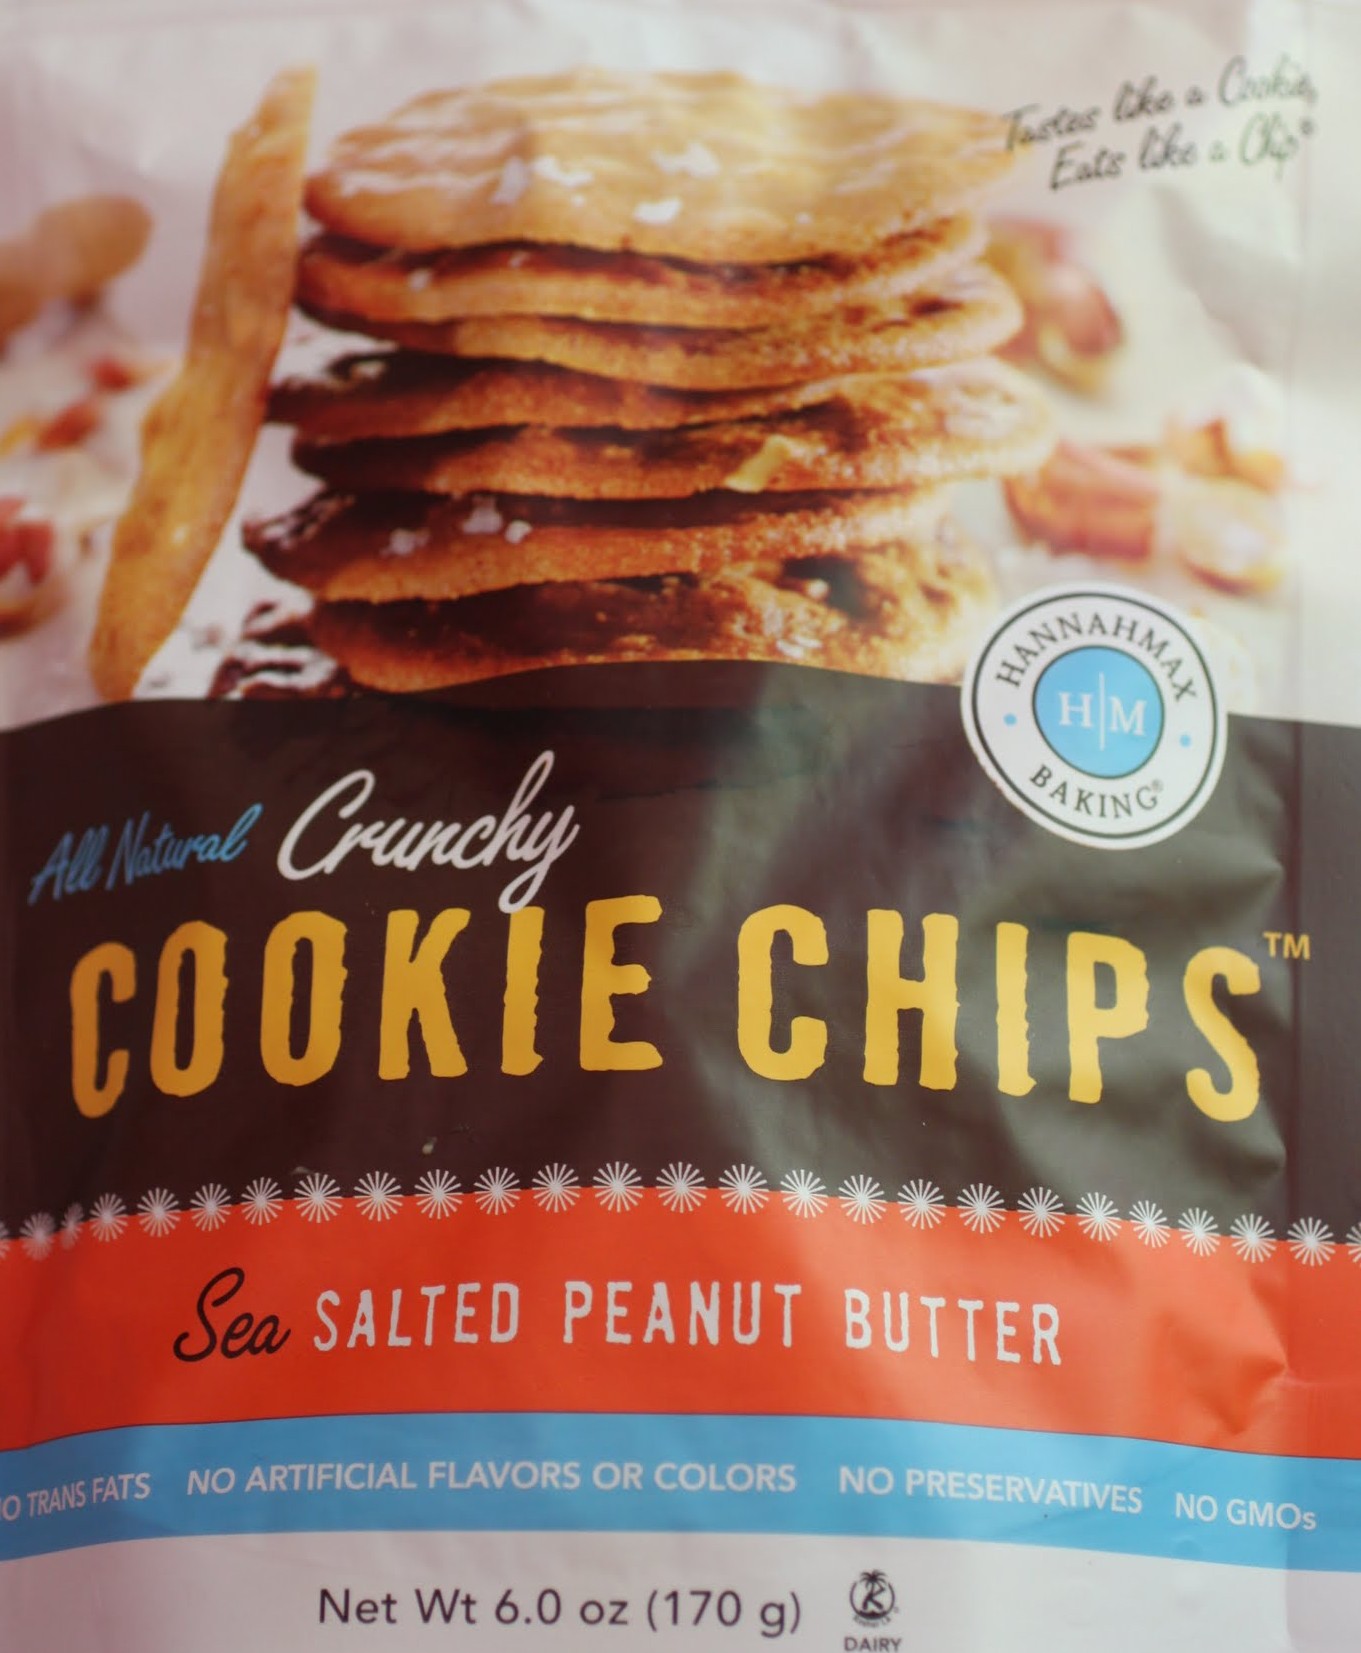
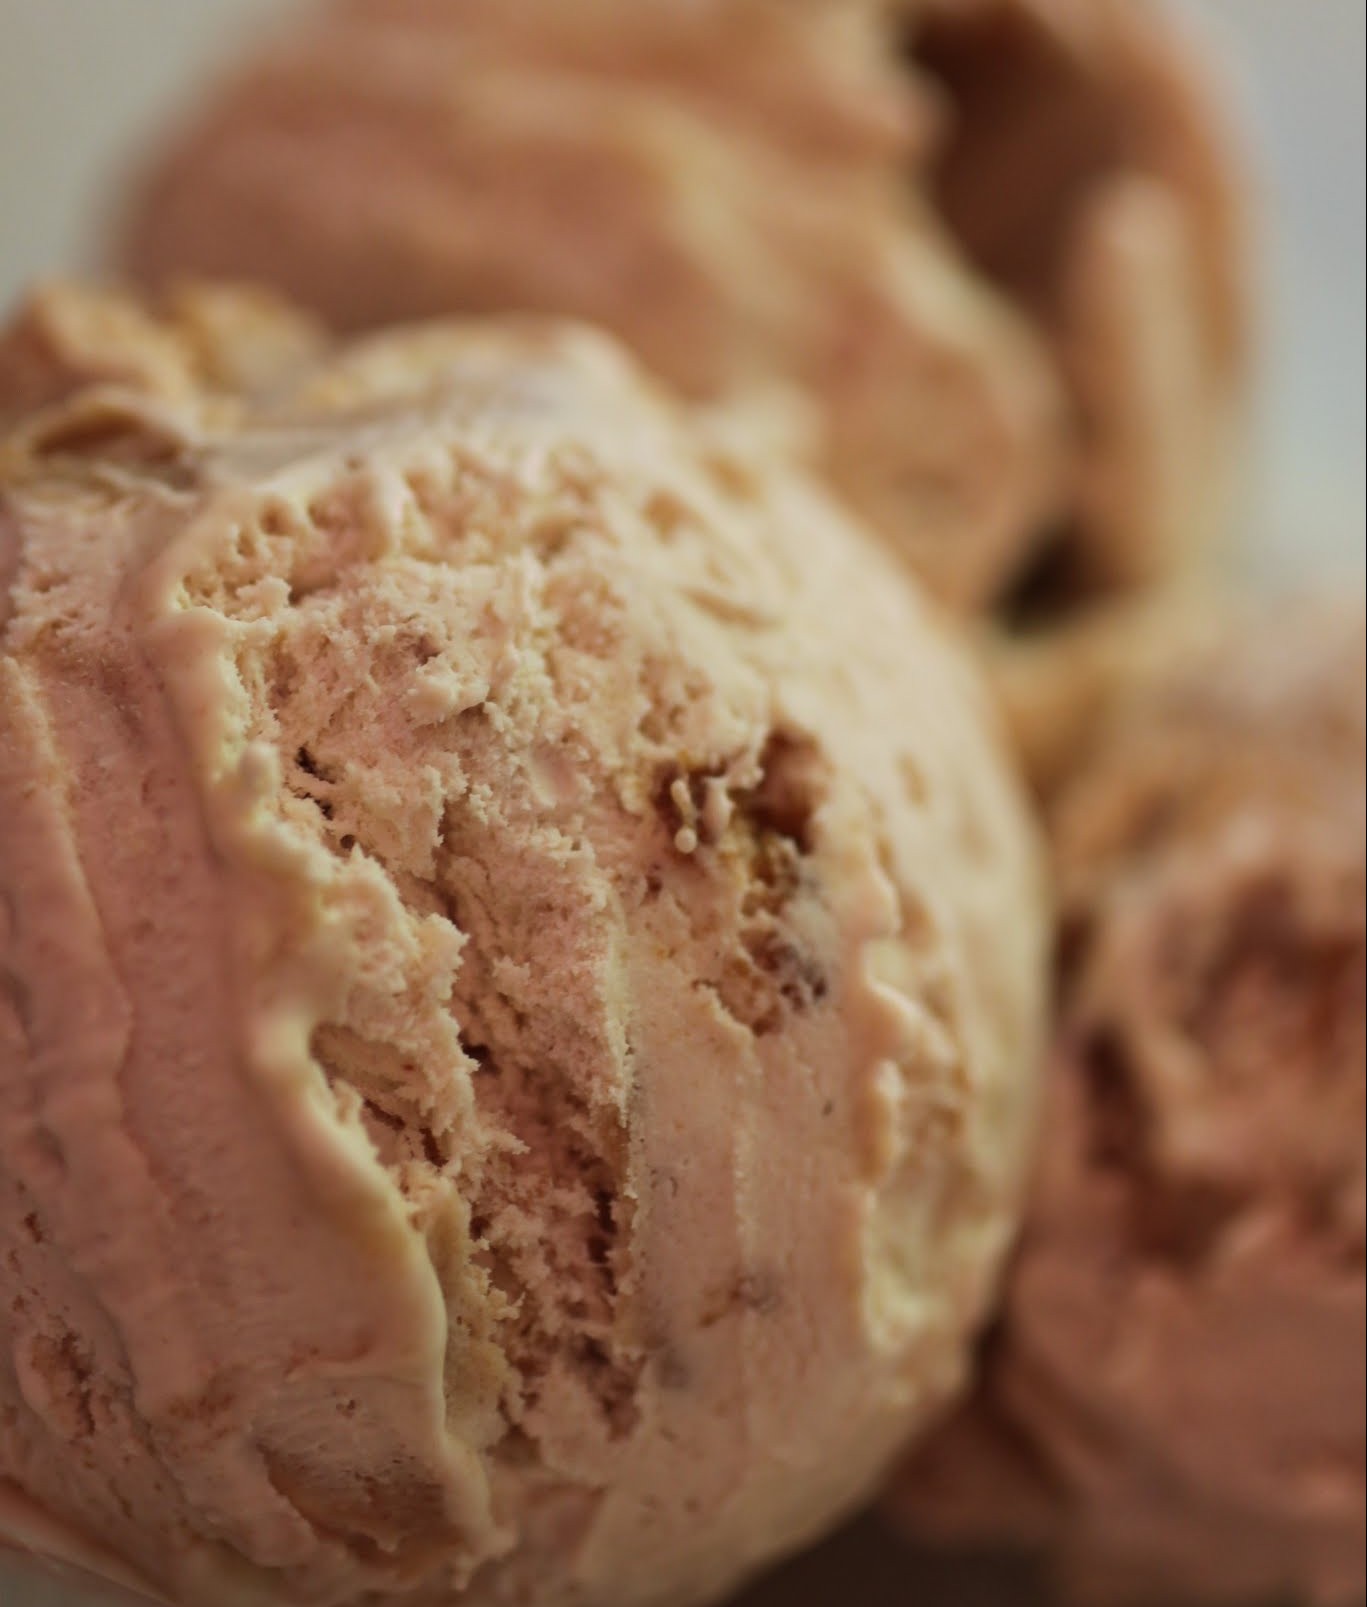
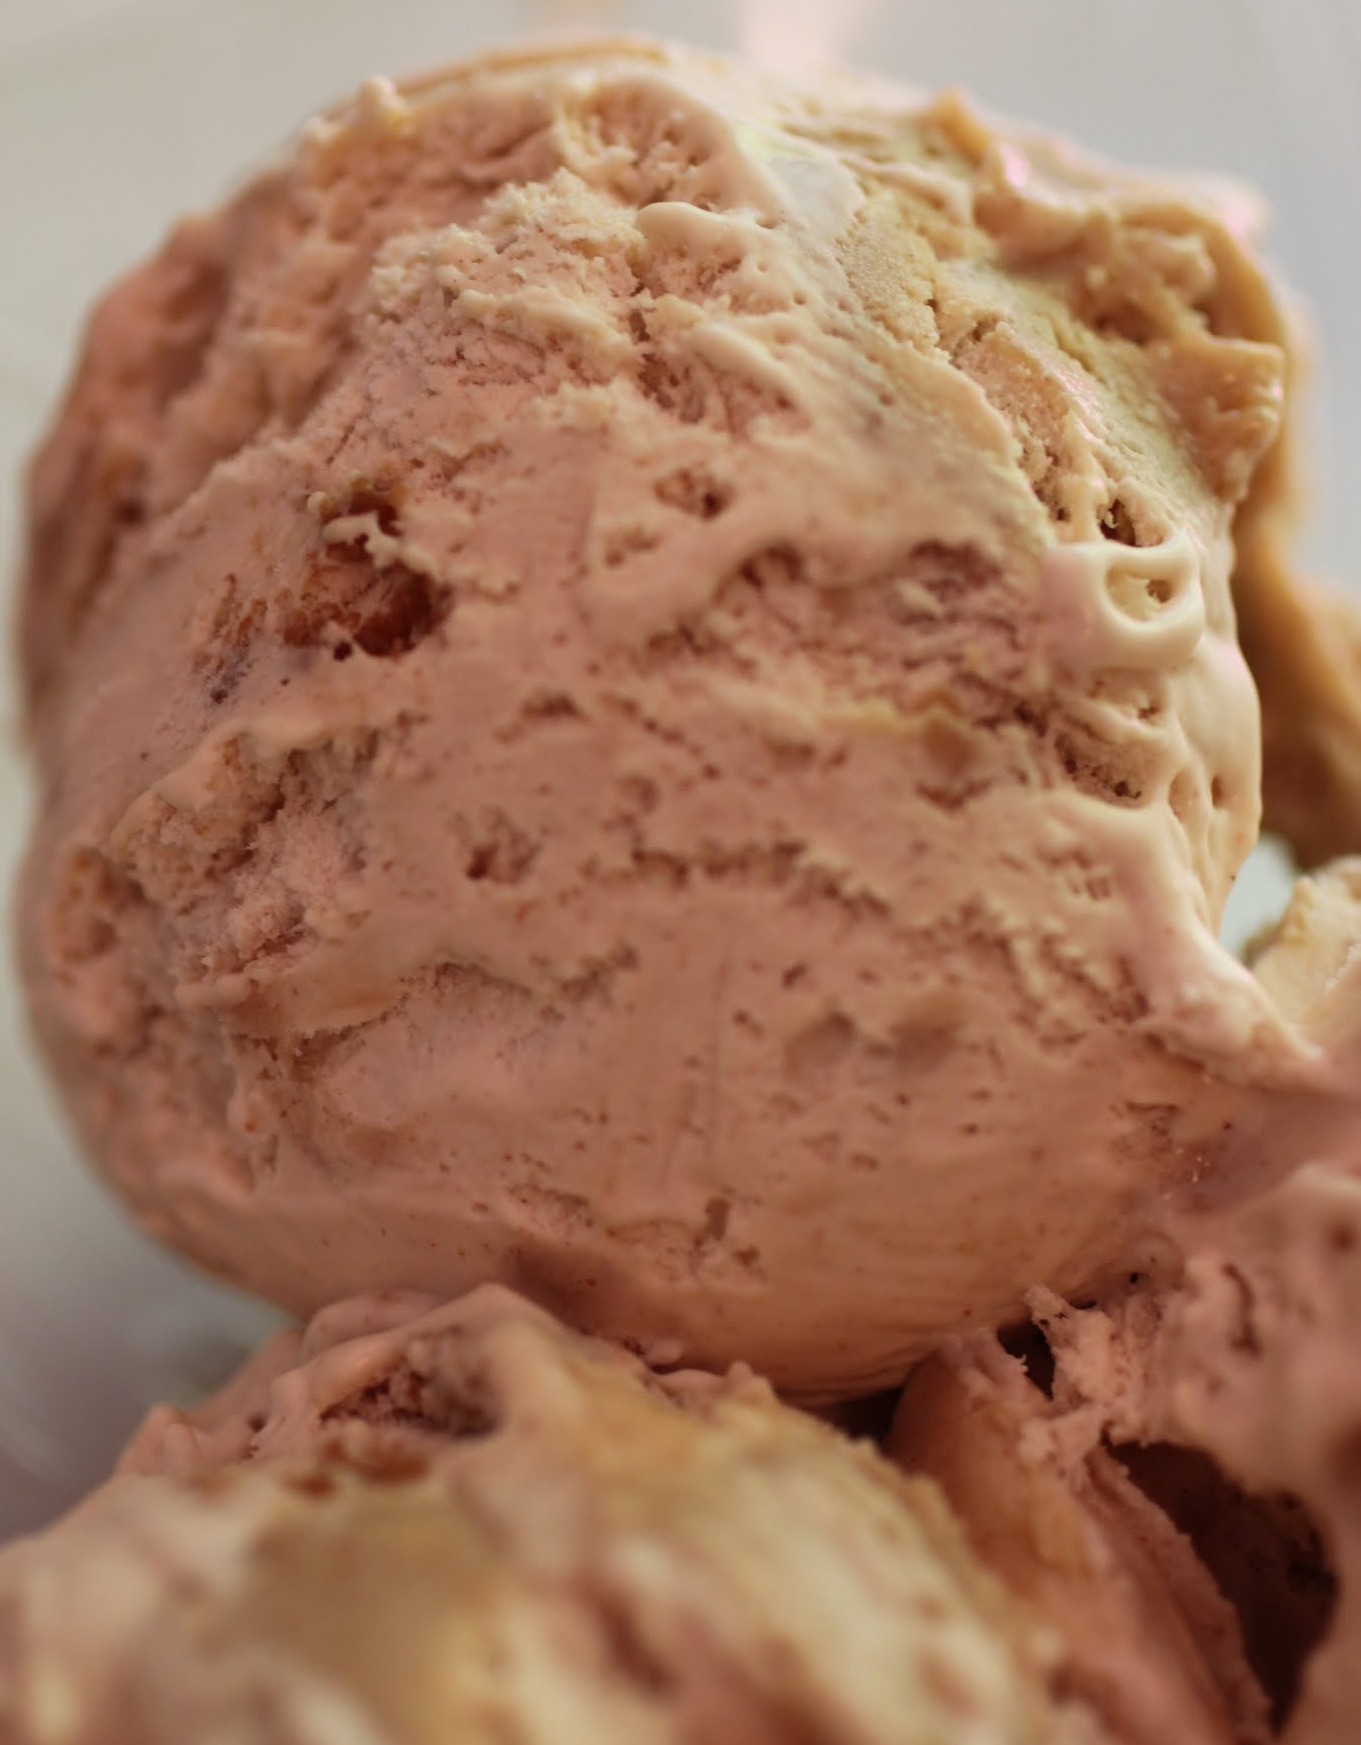
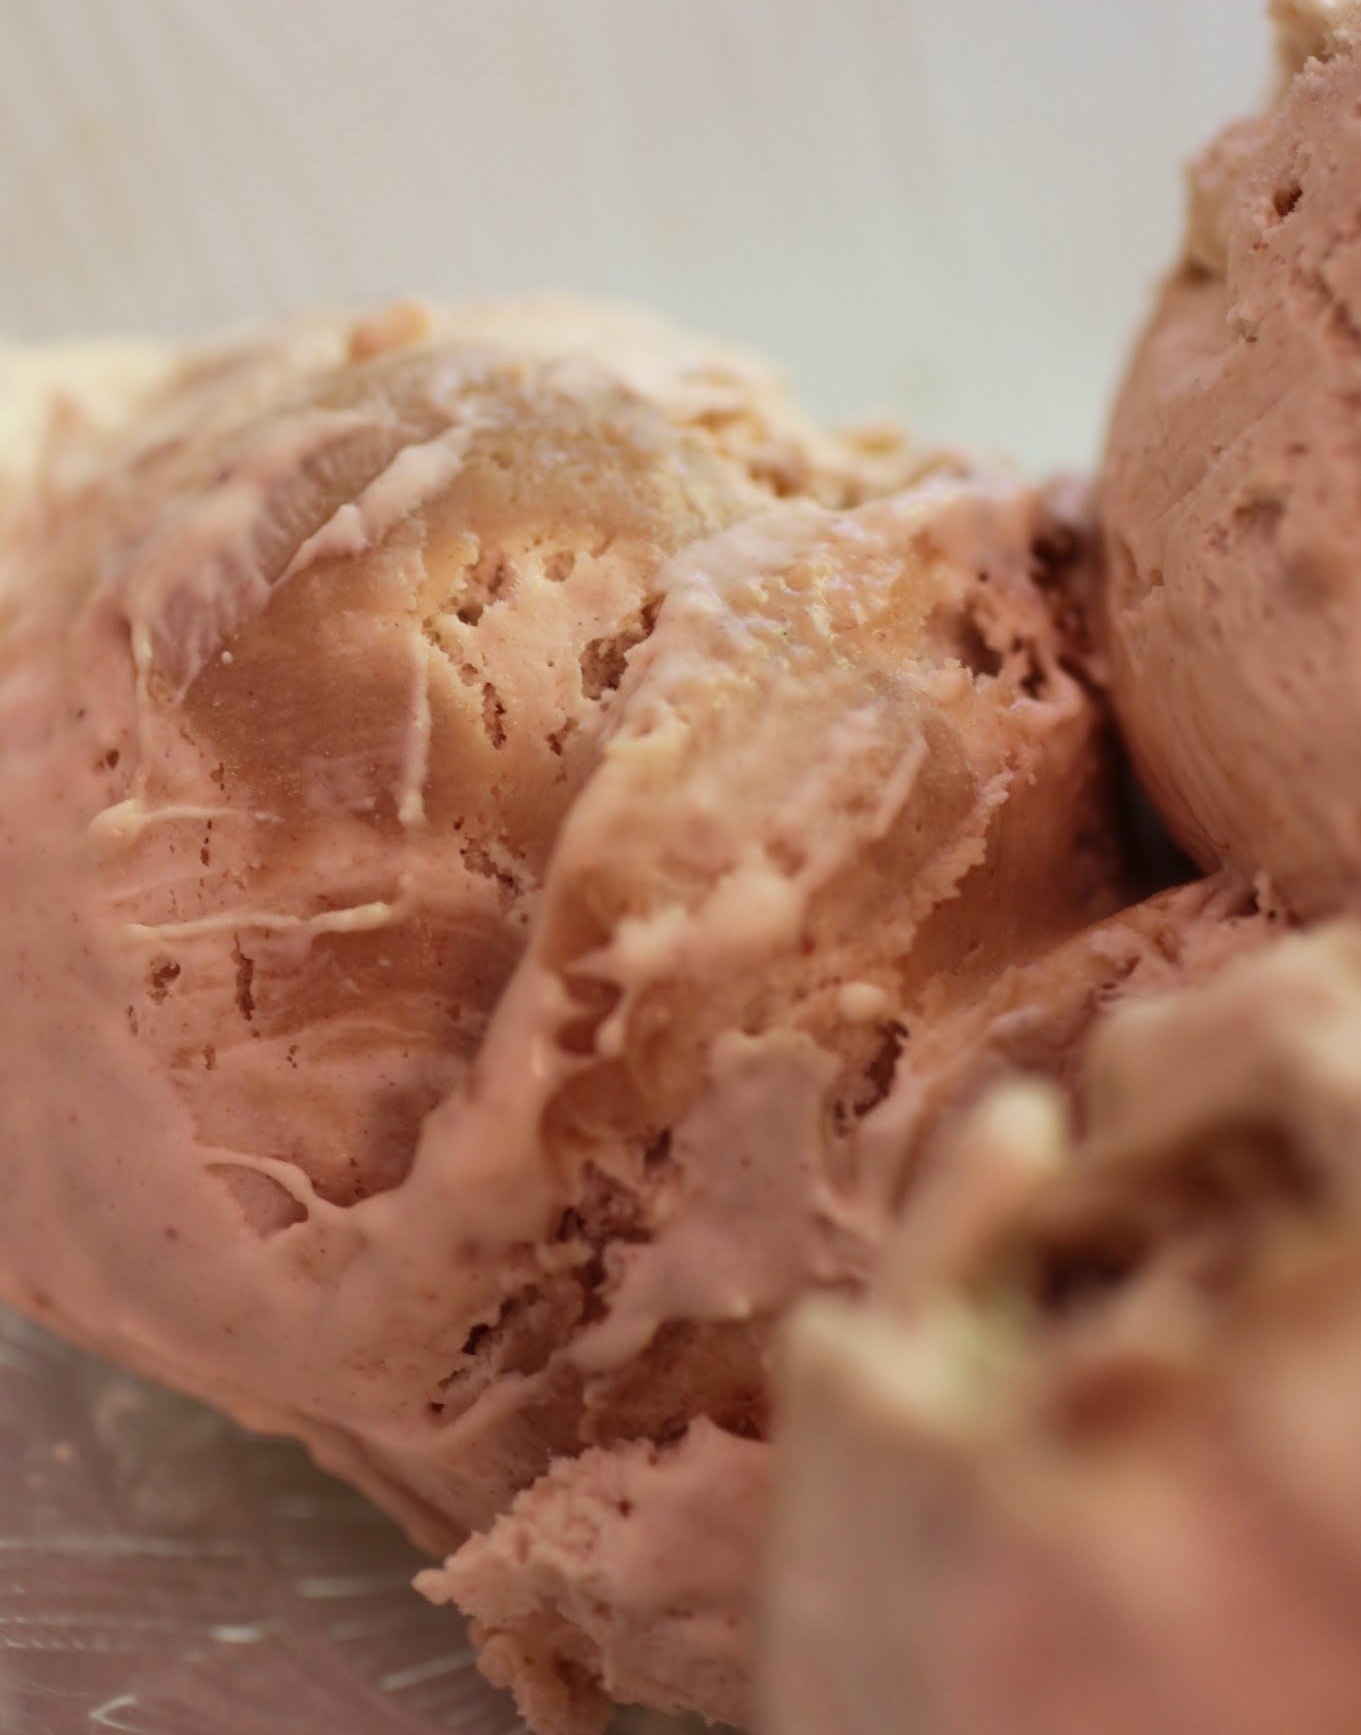
There is so much I could do with these, but given the recent 90-degree temps, I decided to start with ice cream. Intensely peanut buttery, creamy ice cream with a few crunchy mix-ins thrown in for good measure.
Yep, the peanut butter cookie chips got mixed into this to provide just the right crunch, as did peanut butter chips. The result is a peanut butter lover’s dream. Add a hot day, a beach, and a giant cone. You’re all set.

And did I mention that no ice cream machine is required for this? I don’t know about you, but most people don’t make enough ice cream annually to justify a big honking machine taking up valuable cabinet space. I mean, I admit it. I buy most of my ice cream. Unless I have the opportunity to make this amazing madness.
If you’re looking for cookie chips so that you can make this recipe, they’re sold in a lot of national retailers, like Safeway and Whole Foods. You can get a full list of their retailers here. And then you’re a few short hours away from delicious ice cream!
It’s ice cream season, and I’m excited. And it’s always cookie chip season. Let’s put them together and make miracles happen!
Note: This post is sponsored by Hannah Max Cookie Chips. All opinions are 100% my own.
Ingredients
Instructions
- In the bowl of a stand mixer, beat the condensed milk, vanilla and peanut butter until smooth. Fold in the Cool Whip by hand gradually, leaving a few streaks in the mixture to create a peanut butter ribbon. Gently add the mix-ins and stir again.
- Place in a freezer-safe container or pan and freeze overnight. Store covered.
- Note: this ice cream melts a little faster than churned ice cream, so don’t leave it out on the counter for long!
This looks like a cheesecake. But it’s not. It’s something very, very special.
Hey, it’s almost summer! This time of year, baking blogs undergo a shift as fruit actually becomes available. Like, good fruit. Not the stuff that looks really pretty and tastes like nothing.
This is a partially no-bake dessert that incorporates fruit notes with strawberry jam, but that hasn’t gone all out yet with fresh fruit. Can you use fresh fruit? Or homemade jam? Sure. But I didn’t. I was more about savoring these last few weeks of spring, when school is still in session and we have a whole summer to look forward to.

Anticipation is, after all, much more fun than whatever you’re looking forward to. Like my birthday. I retain the childish hope every year that my birthday will be the best day ever. Somehow, a normal day will stretch out idyllically, full of amazing meals and fun outings and sunshiny skies. Gotta tell you, that’s not exactly how it goes down. Looking forward to something is usually just better than whatever happens.
Unless we’re talking about food. I anticipate a meal at my favorite restaurant, and almost always, it’s just as amazing as I thought it would be. And I have to say, a trip to Baskin Robbins rarely disappoints. So there are some certainties in this cold, cruel world.
I’d like to say that when school lets out in a few weeks, I will be embarking on a fantastic summer. But I’m afraid to have expectations that are too high. I’ll be working on a book over the next few months, getting in some pool time, walking the DC streets in the peak of the summer heat, and ferrying my children to and from camp. I’m expecting ice cream. I’m expecting some nice days. I hope that’s not out of reach!

This dessert is definitely in reach, which is kind of unfortunate if you’re trying to avoid awesomeness. I’m not, so it’s all good. The base is a graham cracker crust that I’ve tricked out with chocolate chips and cocoa. On top is a magical filling, made up of pudding mix, condensed milk, and Cool Whip. It’s pretty great. The whole thing gets rounded out with strawberry jelly and a generous sprinkling of mini chocolate chips.
If you’re into cool desserts, especially ones that nobody’s ever tried before, this is it. It’s creamy, it’s easy, and most importantly, it tastes delicious. And it’s the perfect transition toward summer, as we all anticipate what comes next.
We all need something to look forward to, but if you can, make the present count as much as the mythical future. It’s all part of your life! A life that includes fantastic pie.
Ingredients
Instructions
- Preheat the oven to 350. Coat a 10-inch springform pan with cooking spray. Set aside.
- In a medium bowl, melt the butter and mini chocolate chips in the microwave for 30 seconds. Stir until smooth. Add the graham cracker crumbs, cocoa, and brown sugar, stirring until the crumbs are sandy.
- Press the crumb mixture into the pan and bake for 15 minutes. Remove from the oven and cool.
- Make the filling. In a bowl, combine the sweetened condensed milk and water, stirring until smooth. Add the pudding mix and beat for a minute or two.
- Place the bowl in the refrigerator and chill for five minutes.
- Remove the bowl from the fridge and fold in the Cool Whip. Pour the mixture into the springform pan (on top of the baked crust) and chill for one hour until set.
- Spread the strawberry jam evenly over the chilled pie in a thin layer. Sprinkle on the mini chocolate chips.
- Keep the pie in the refrigerator, chilled, until you're ready to serve. Slice into wedges.
-How does available space get filled so fast?
-Why doesn’t healthy food taste like brownies?
-If a tree falls in the forest and we think there’s nobody to hear, did it maybe crush the one person who was out for an early morning stroll?
-How do you keep small children occupied on endless snow days when you’re all trapped together in the house?
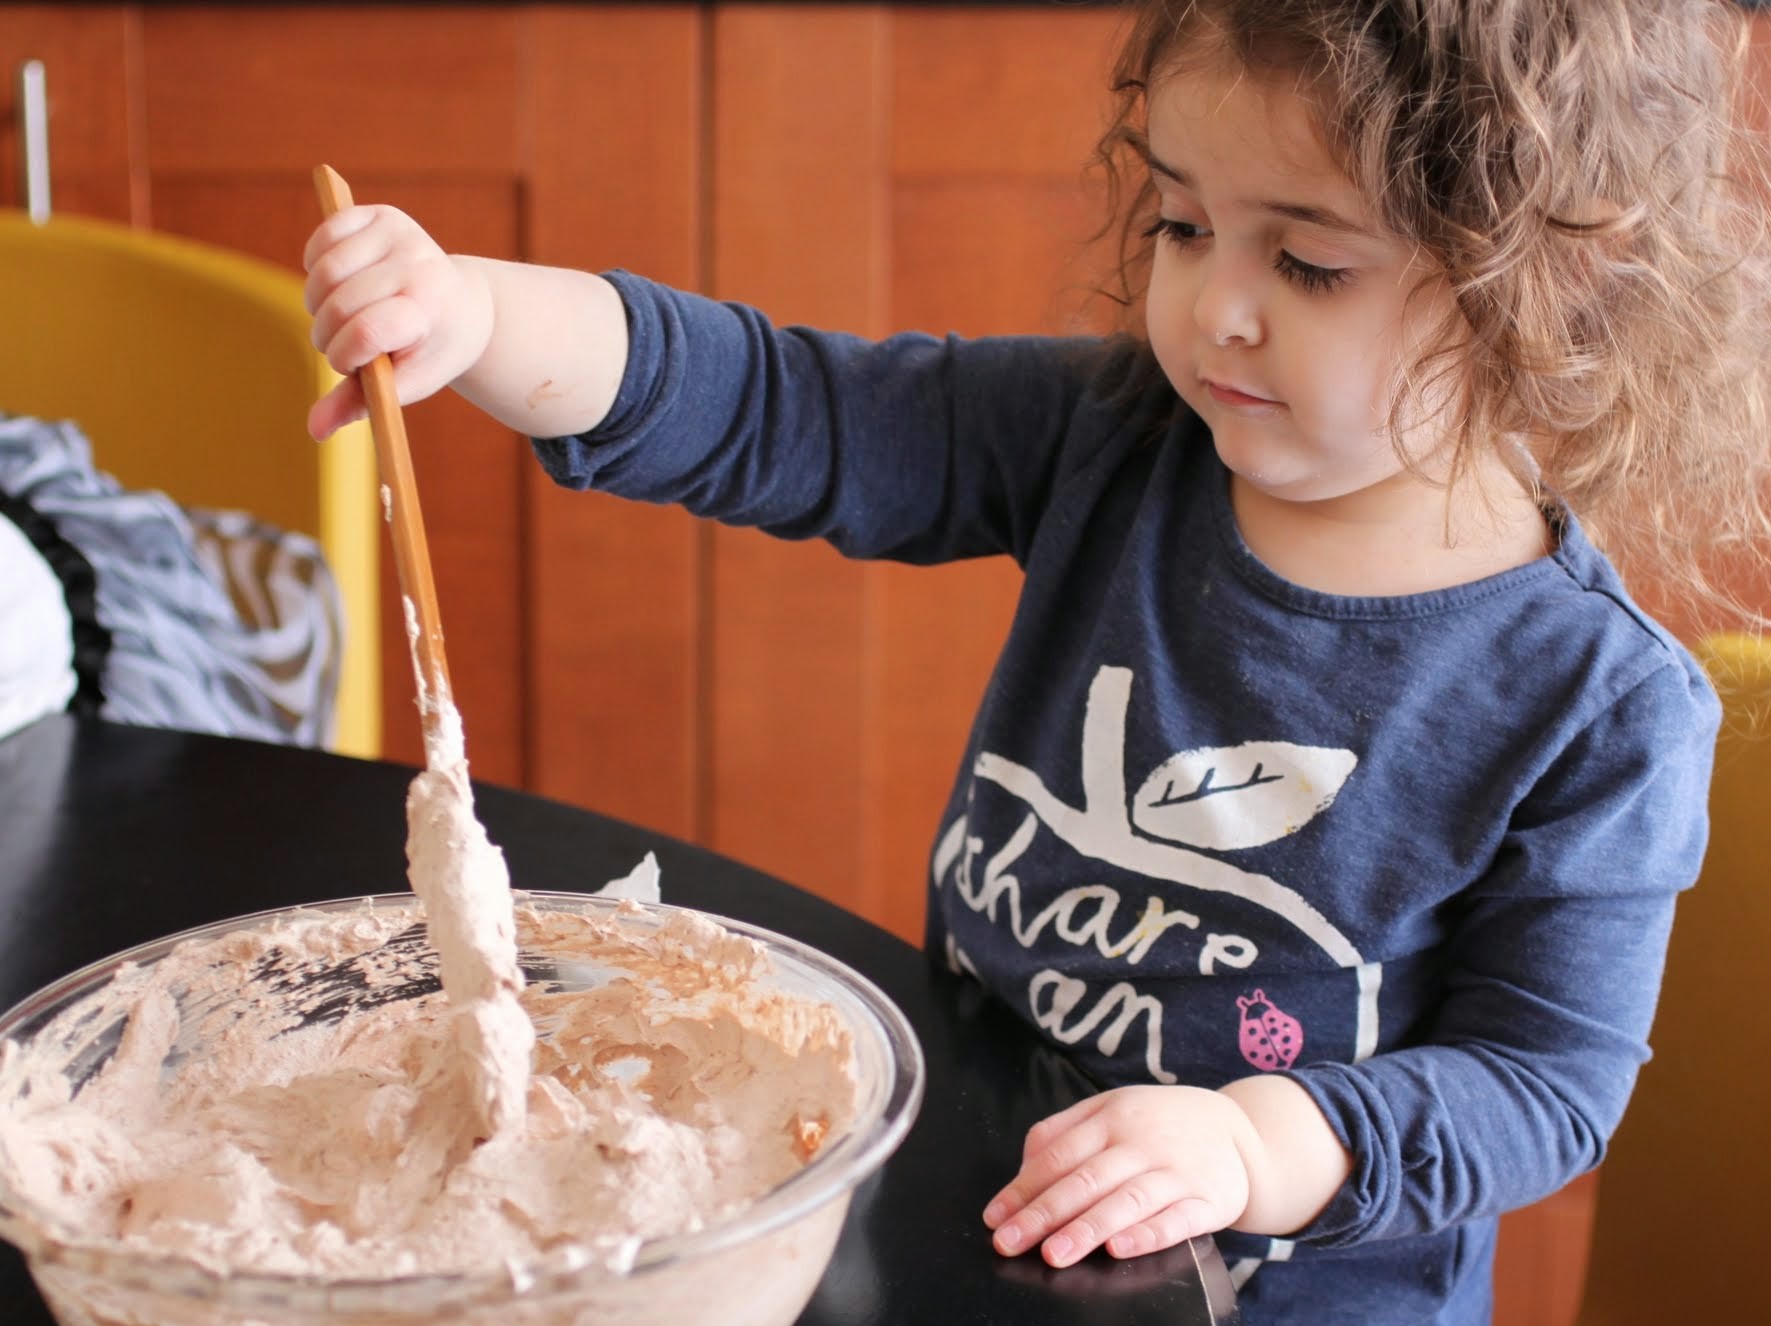
I have very few answers, but the last one has to be projects, projects, projects. Keep those little hands busy!
Everyone’s different, and here’s my confession of the day: I am a better mom when I do the job part-time. In other words, I love my kids, but I also need my teaching job, and not just for the big bucks. It keeps me sane. Teenagers are fun to work with. And it also helps me appreciate my time with little sticky-handed people at home more.
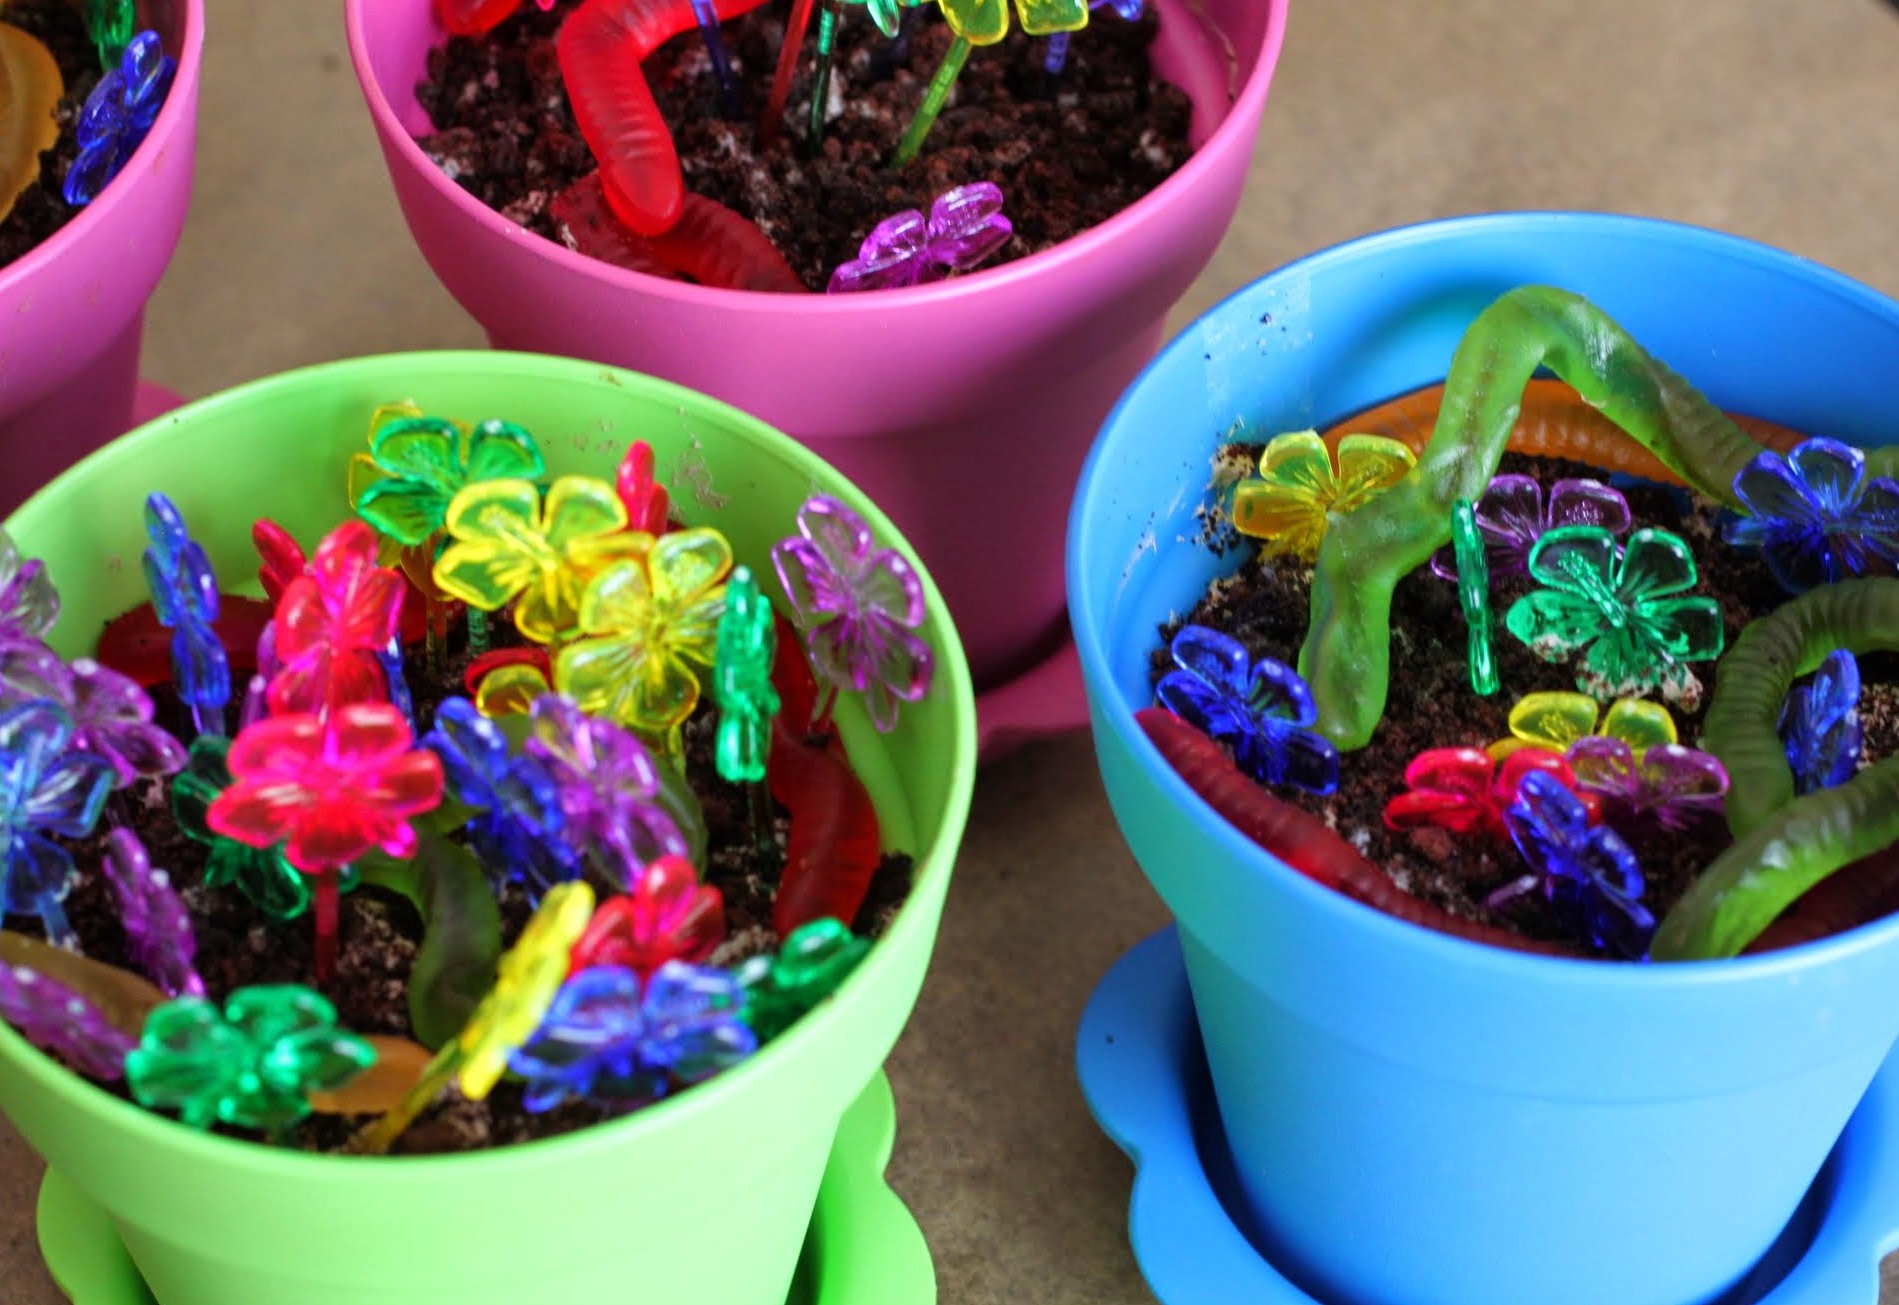
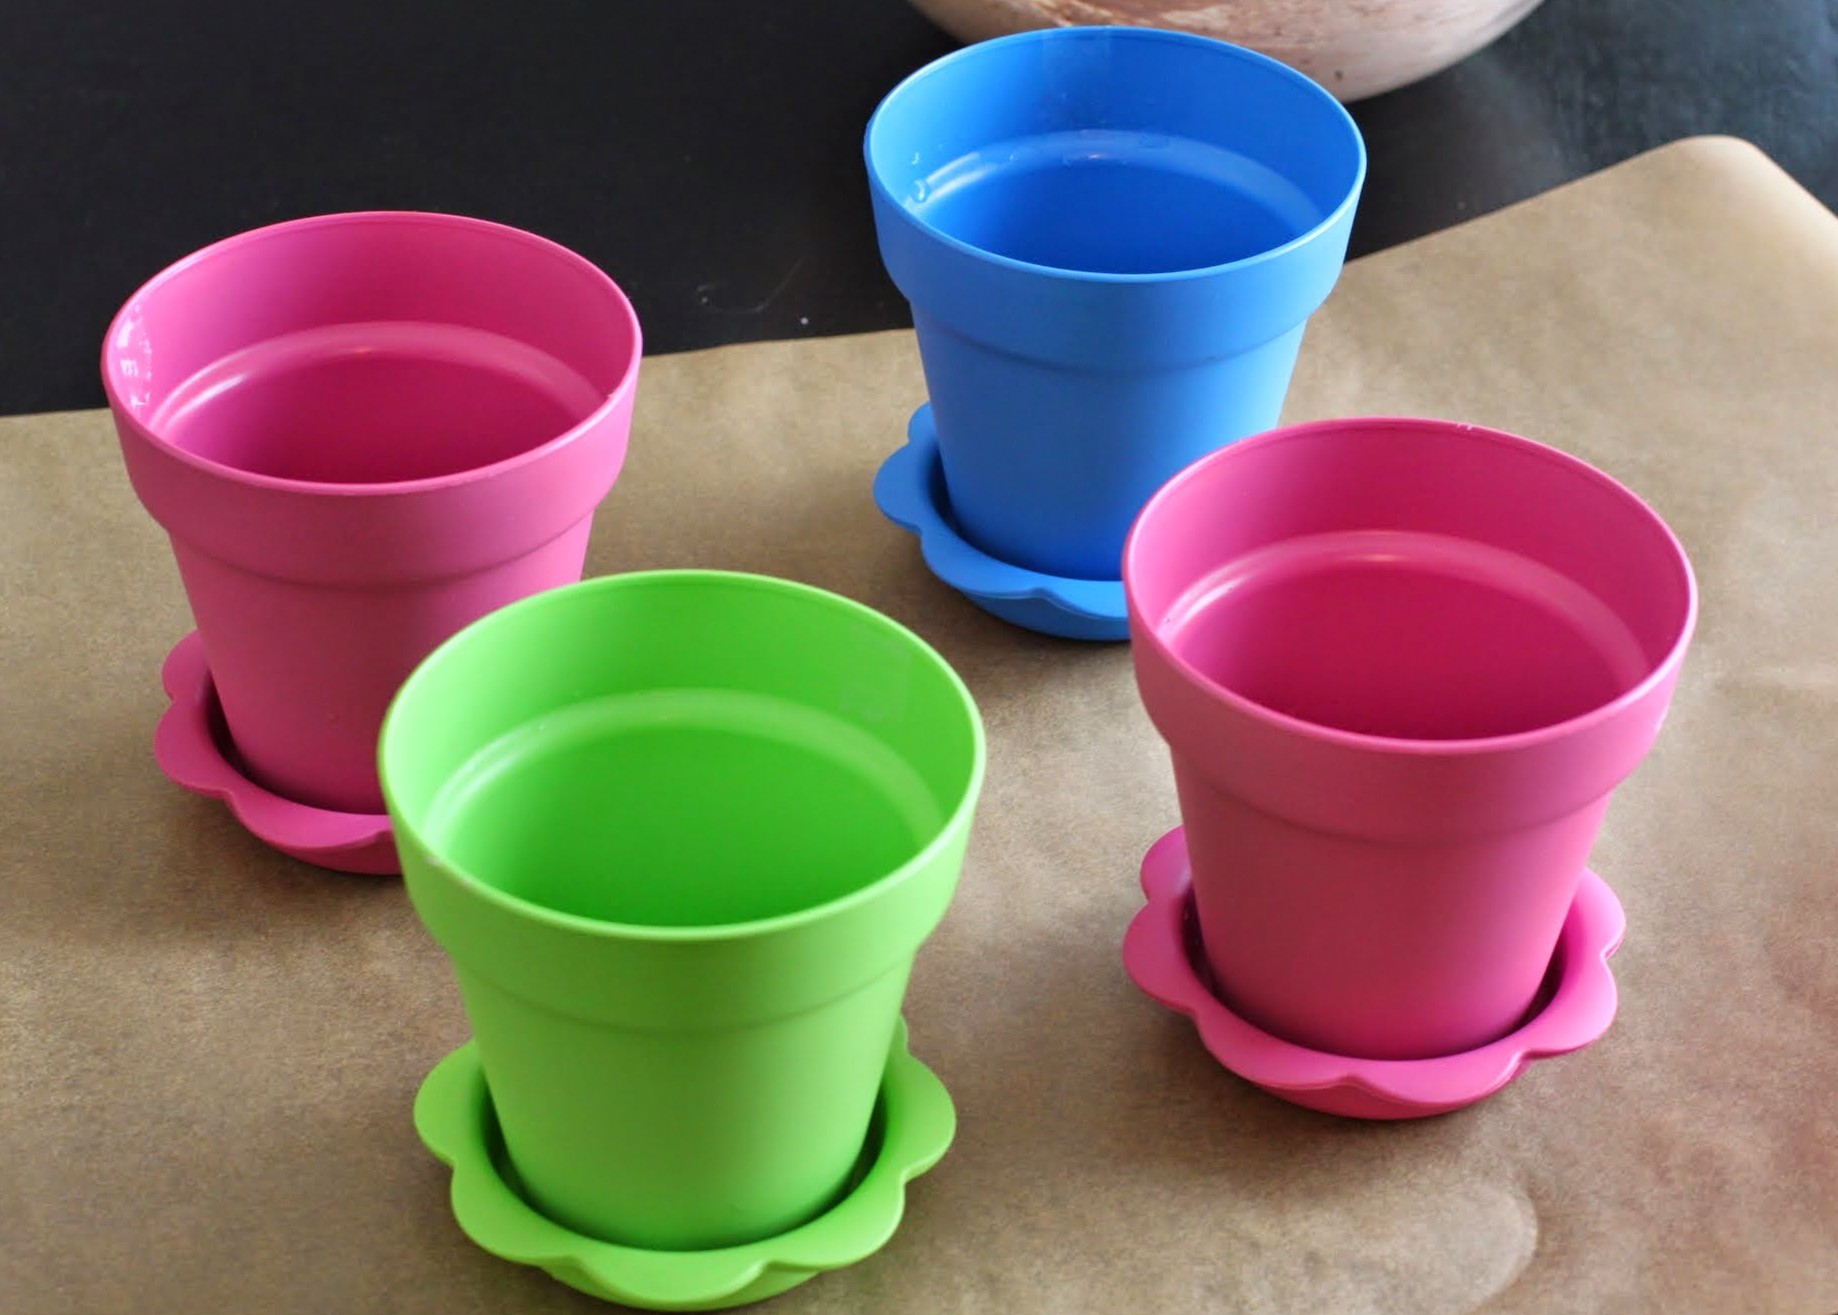
On a recent series of snow days, I enlisted the help of my gang to make these flowerpots. Don’t be alarmed: these pots have never been used for anything but food! Don’t use ones you find in your garden shed. Did I need to say that?
I chose springy colors because, well, a girl can wish. After that, the fun begins! The cookies and cream mousse is simplicity itself. You melt chocolate and fold it into Cool Whip.
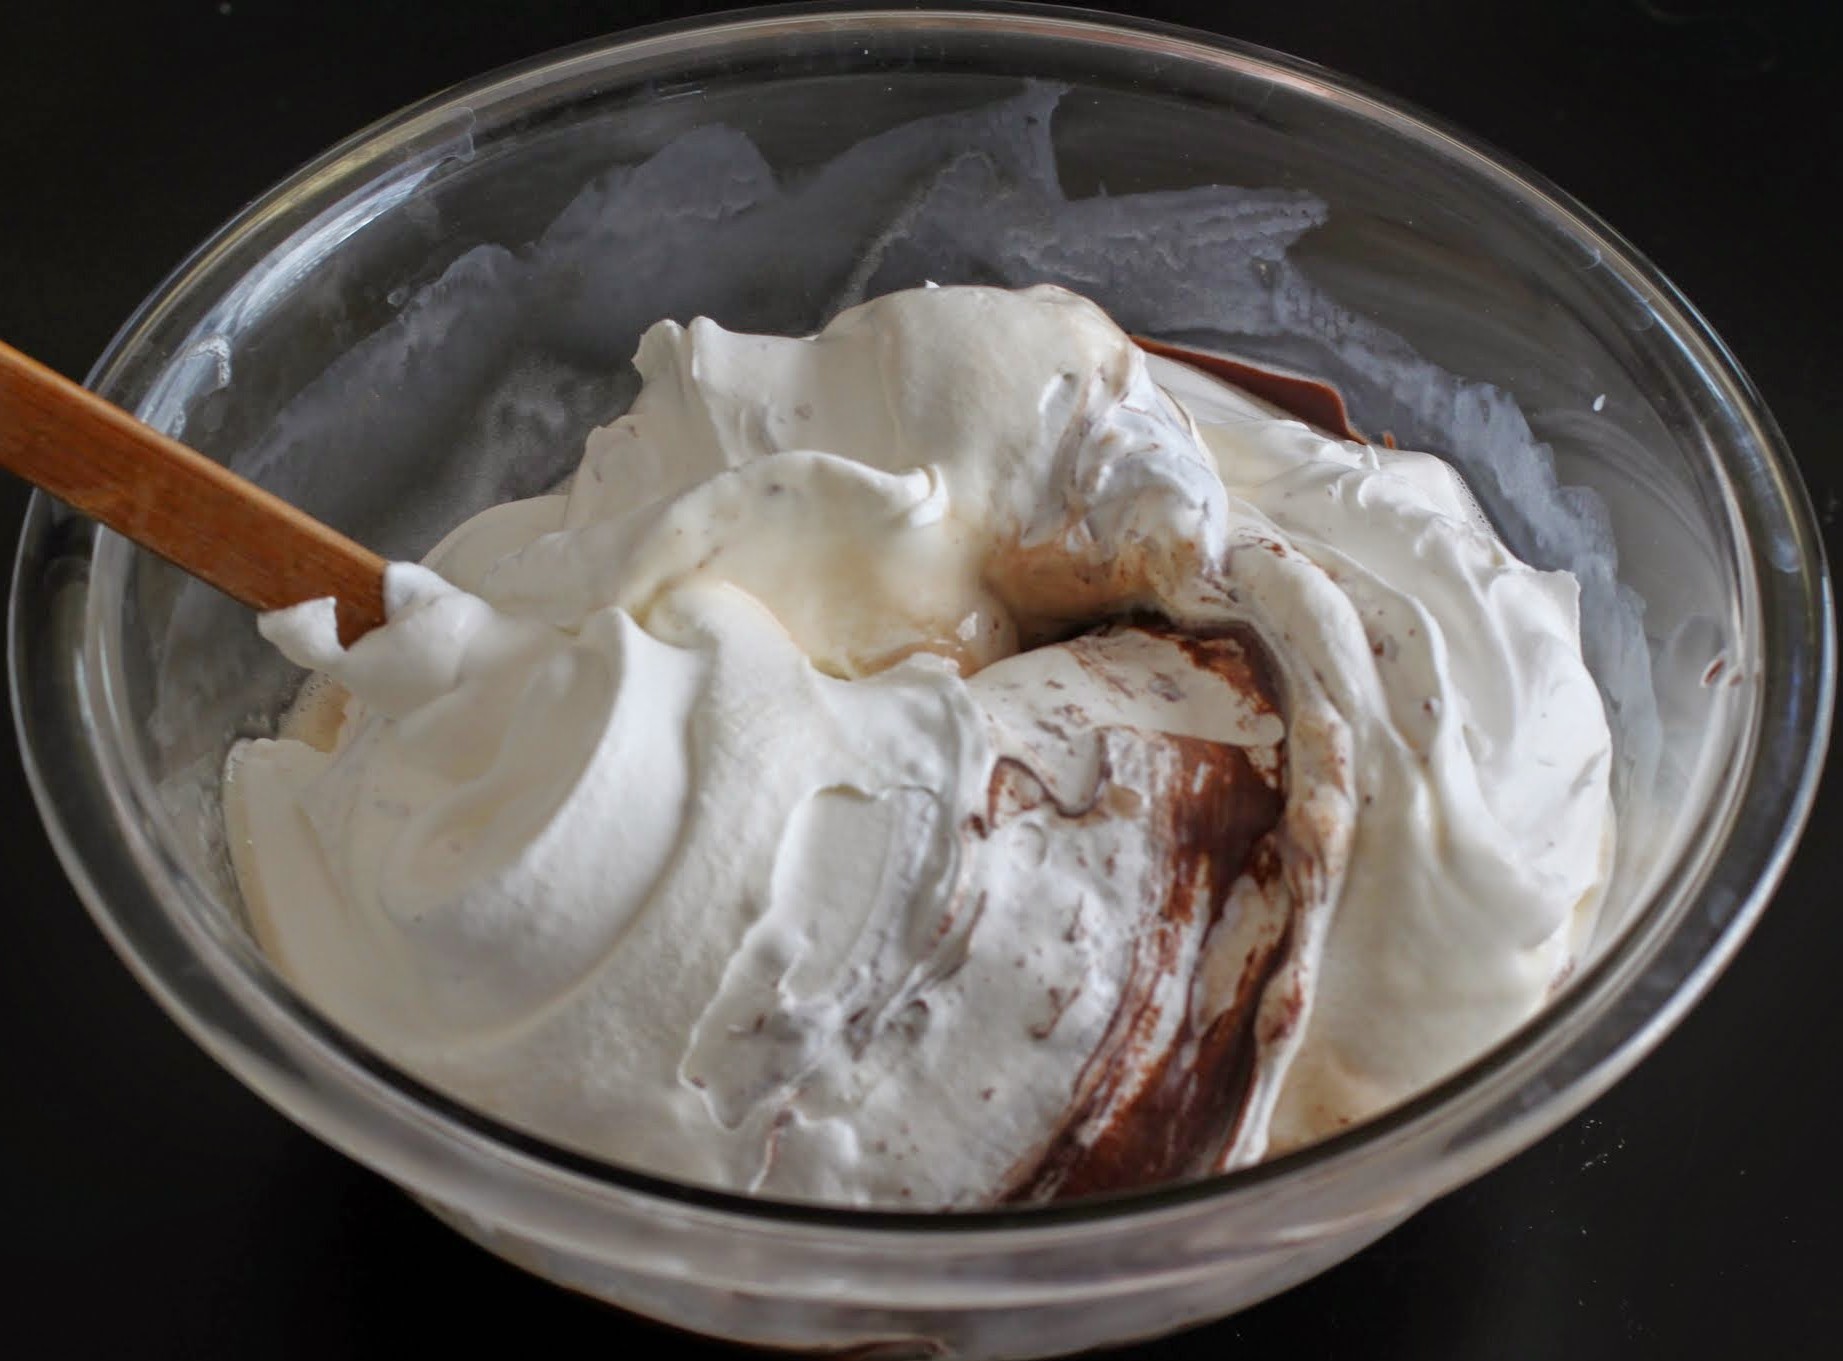
Once that’s done, you mix it up well and add crushed Oreos. Stirring is the fun part!
And you have to let everyone have a turn.
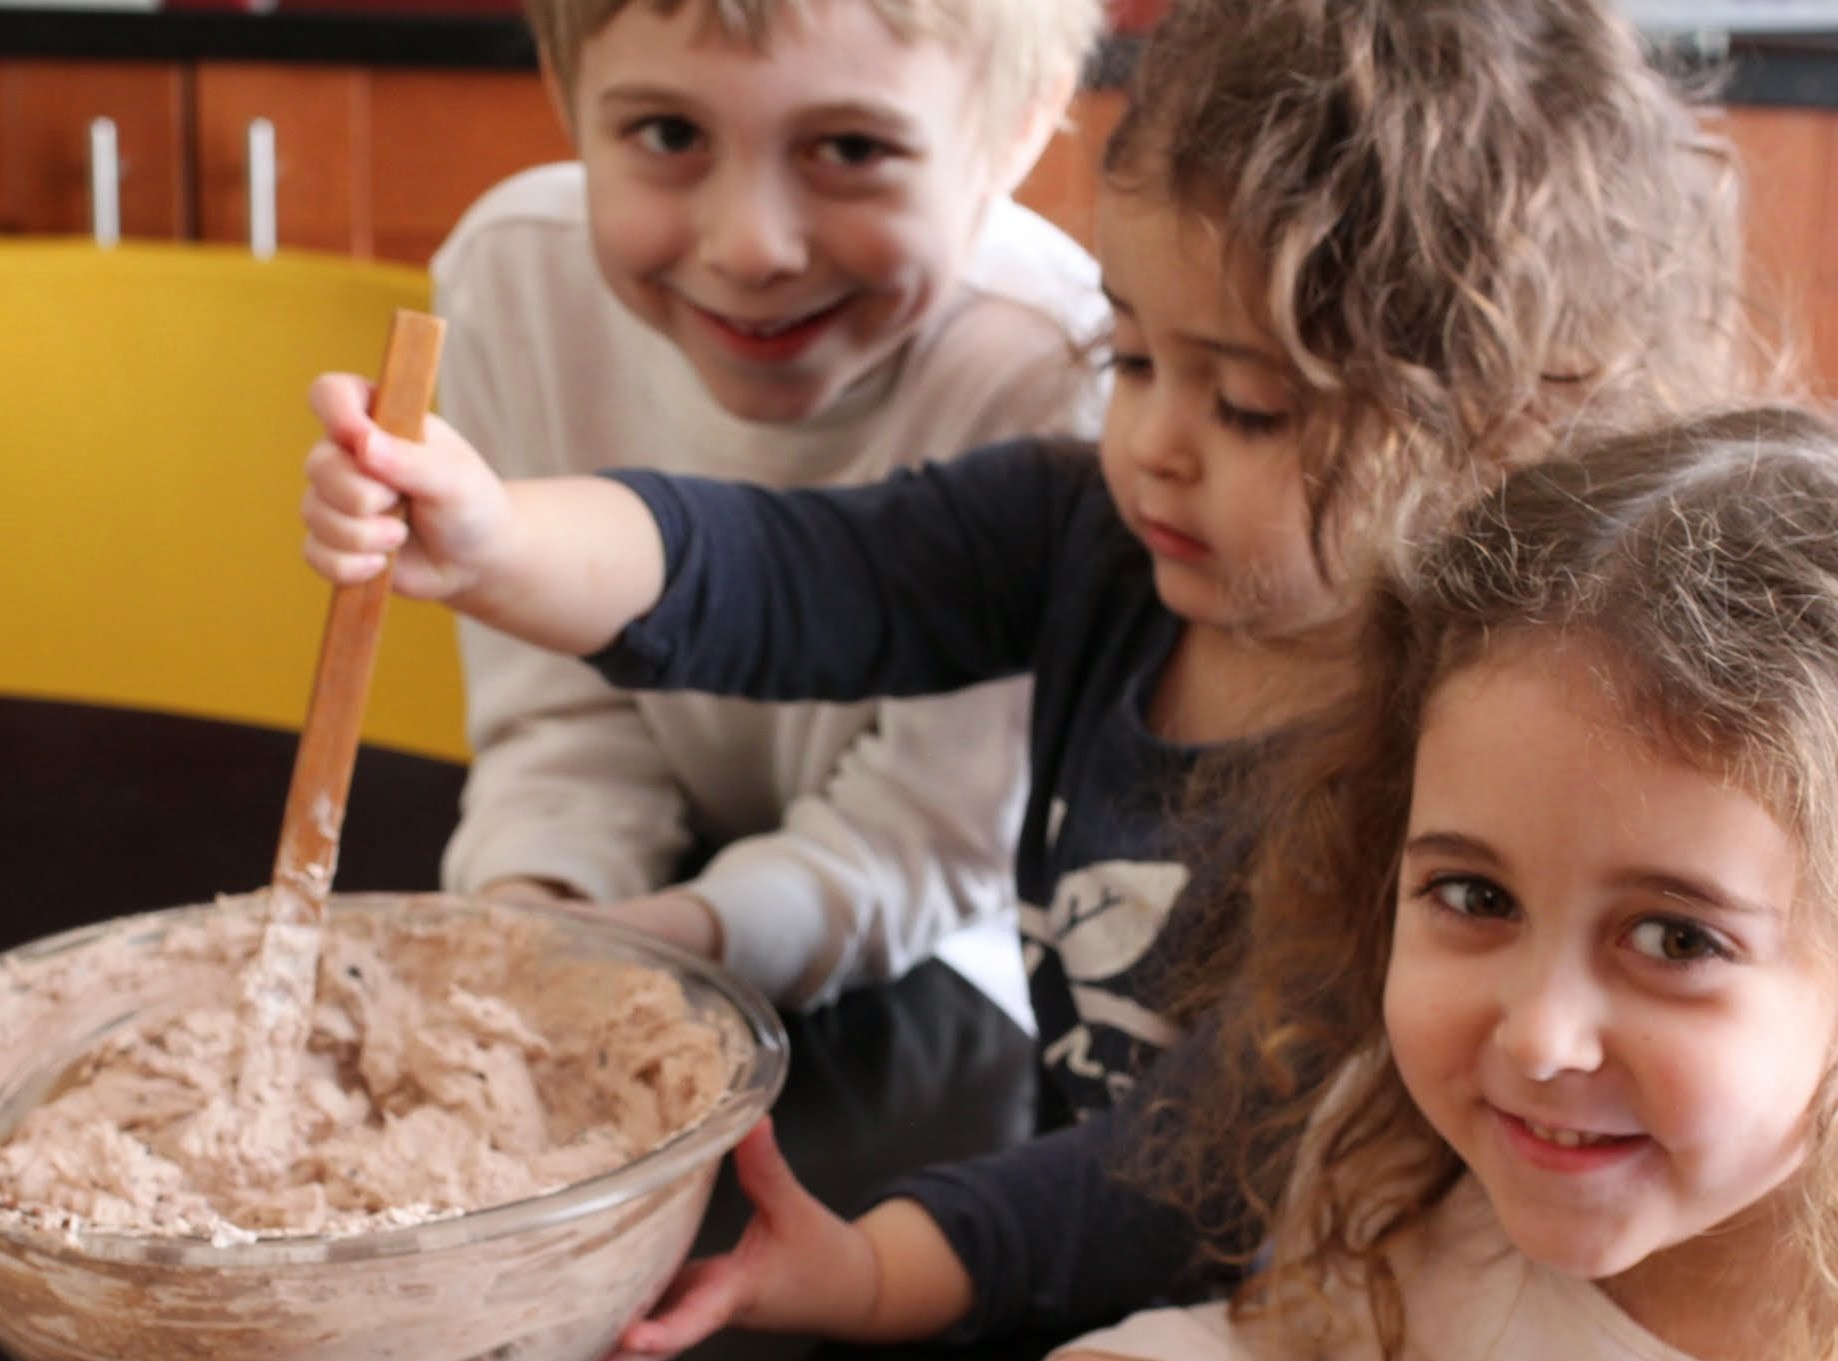
Once the mousse is done, you begin filling your flowerpots. You can fill them as high as you like. I dolloped out generous helpings, but then again, I had a lot of helpers. Not just my own kids, either. Some other kids showed up at some point. I’m not sure how that happens, but my house is a magnet for crumb-crunchers.
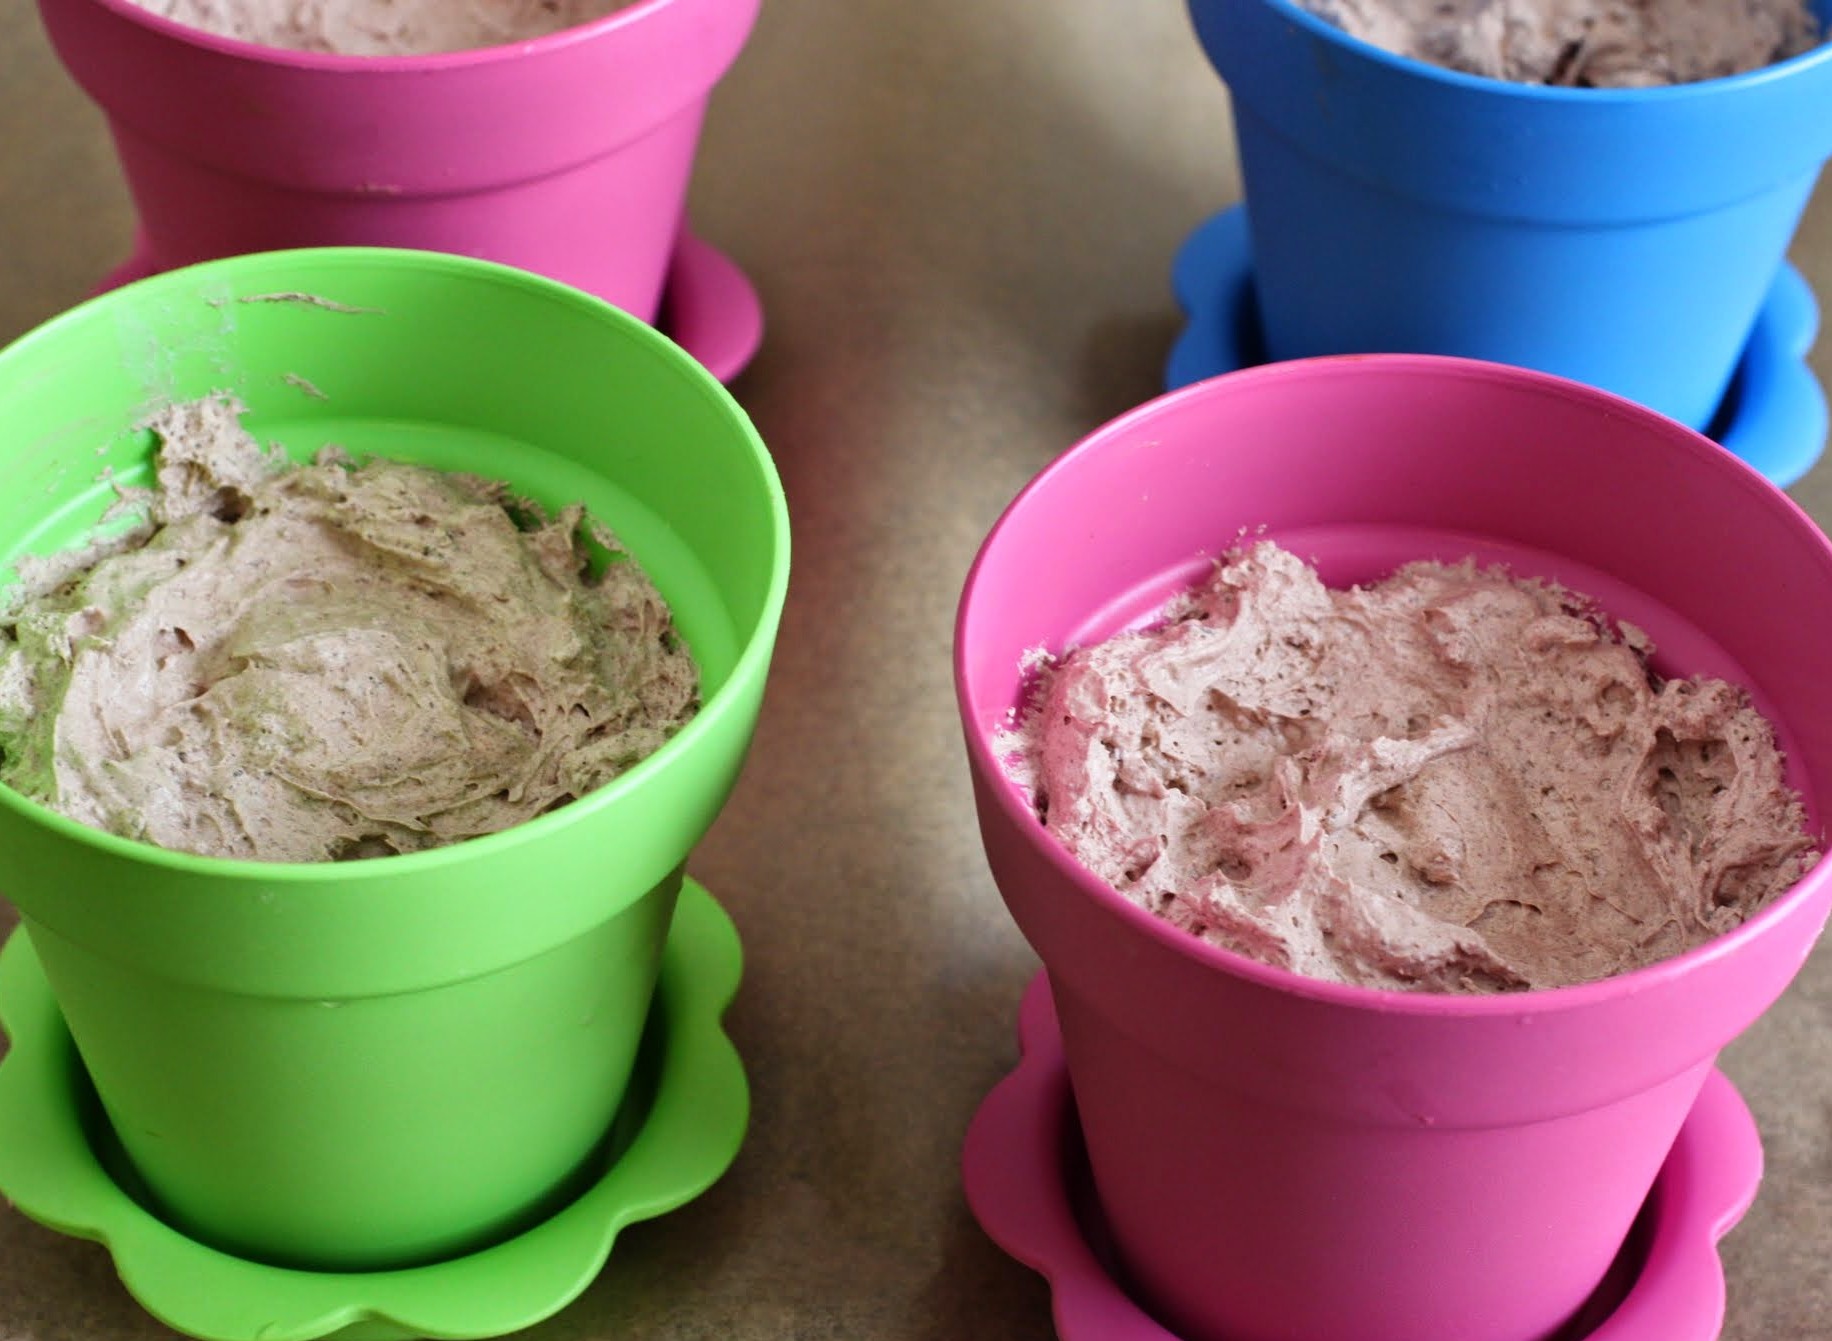
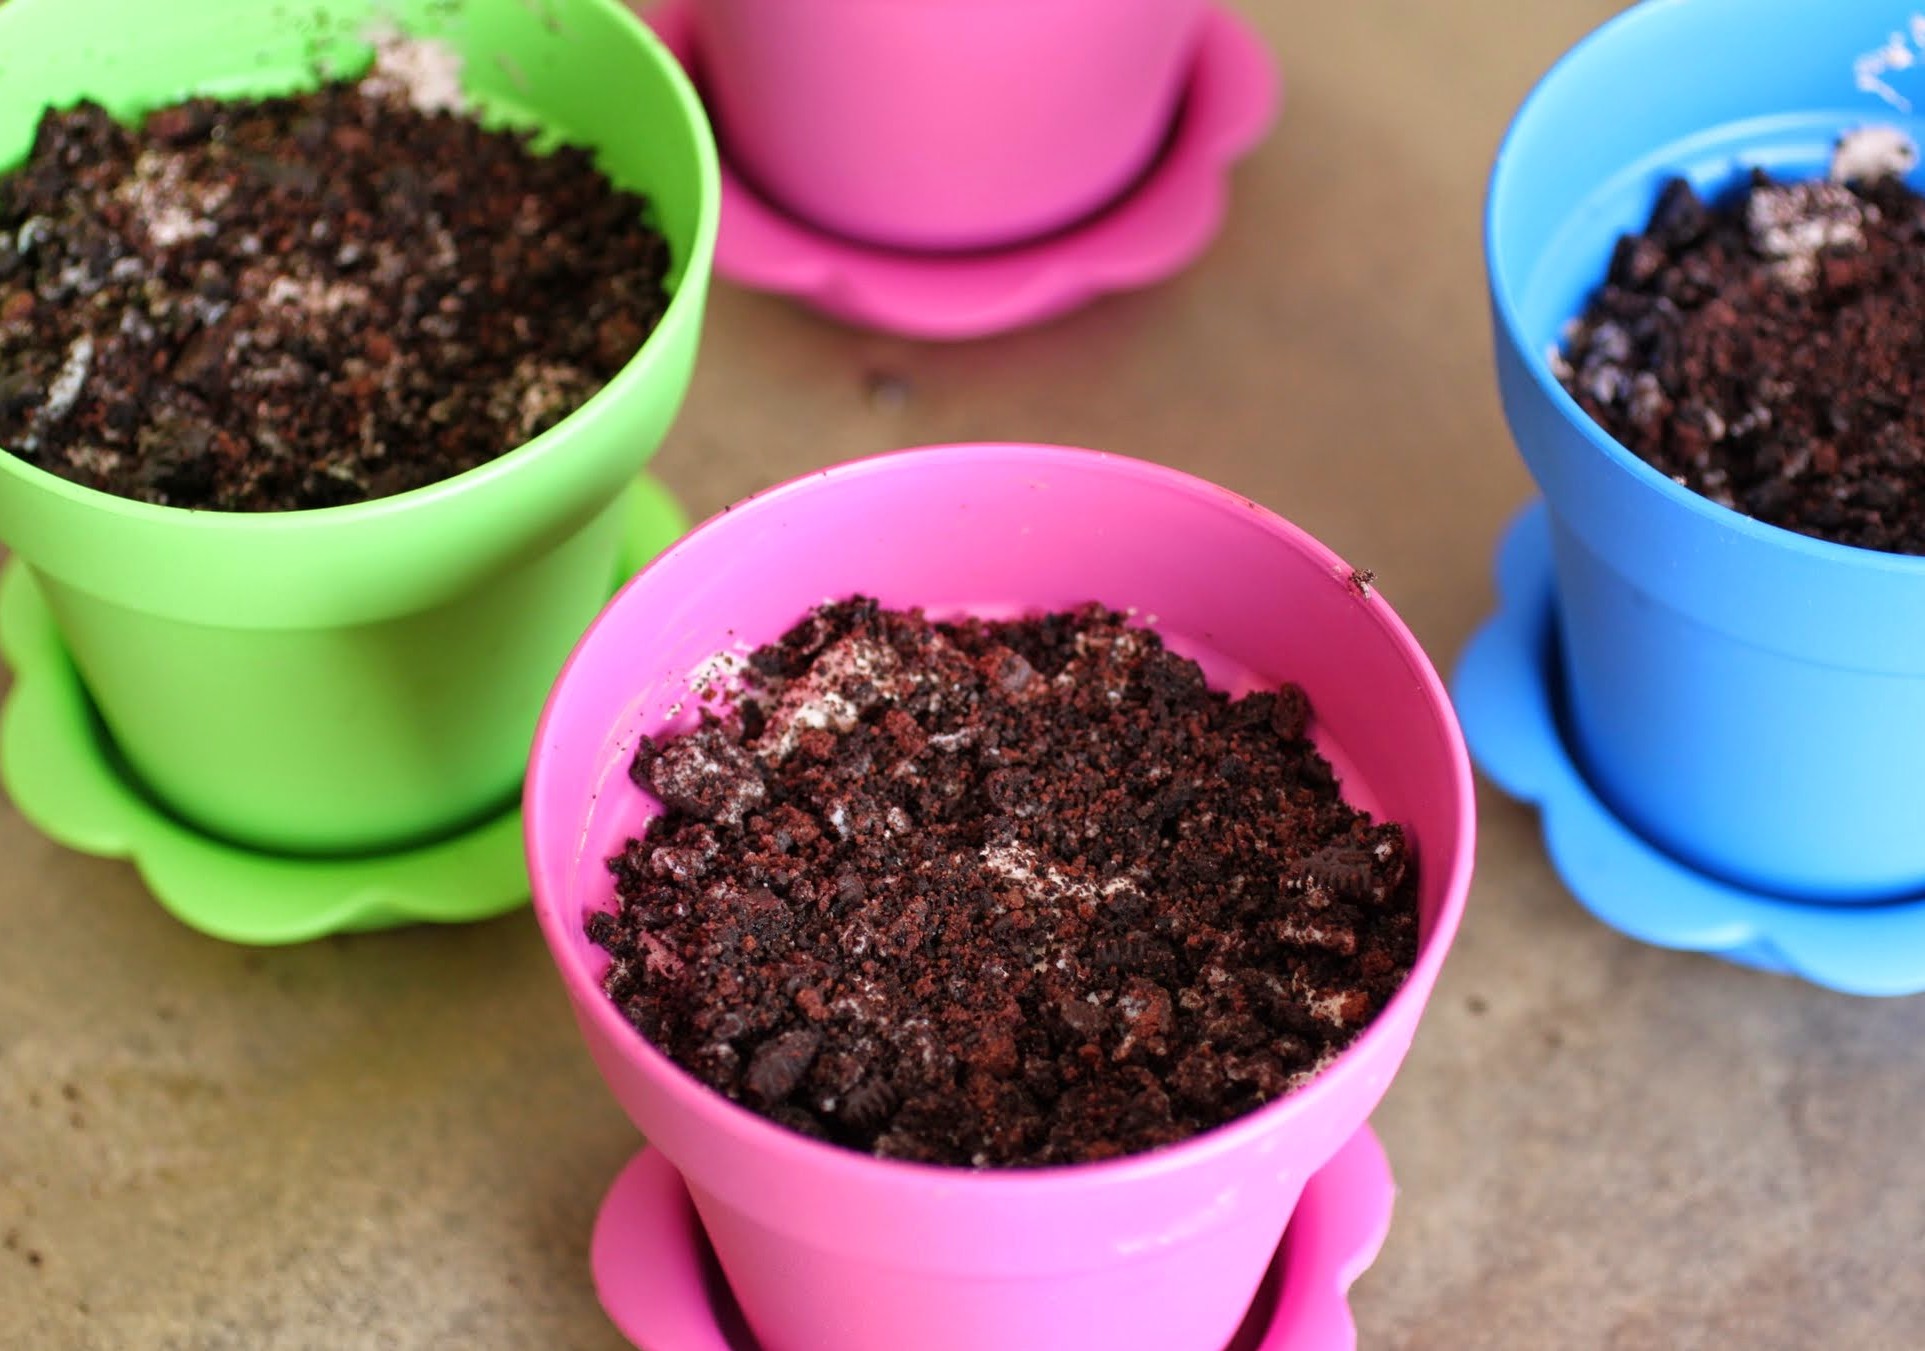
Make sure the mousse in the flowerpot is evened out on top before adding your Oreo “dirt.” It looks just like dirt, by the way. Very appetizing.
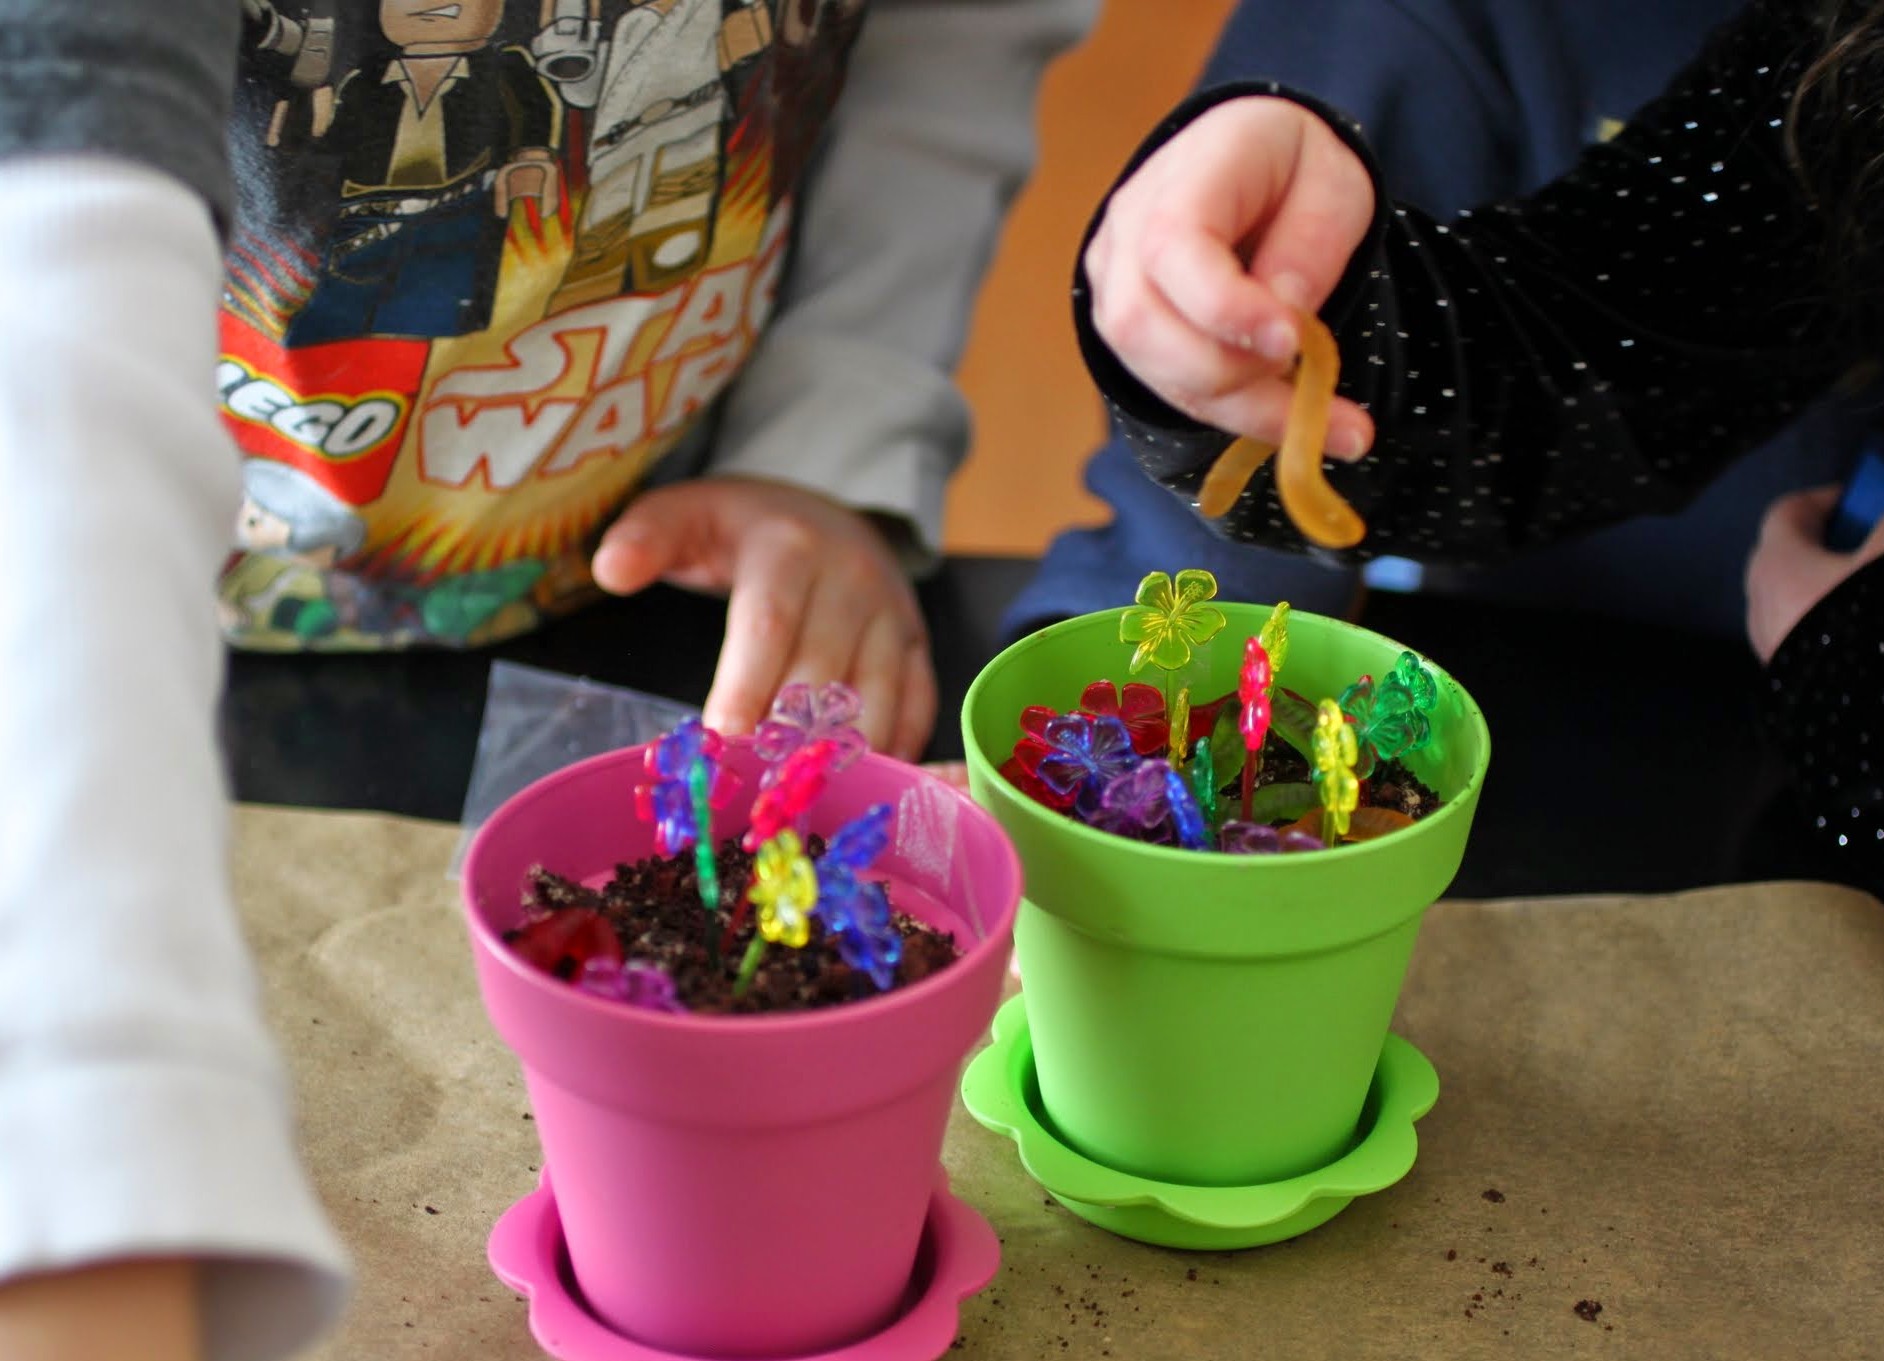
Then comes your garnish in the form of gummy worms (many of which were eaten in the process of making these, oops) and some lovely floral cocktail sticks. It’s what I had. You can use the same, or be really ambitious and make edible flowers.

The kids got a little too enthusiastic with their garnishes, by the way. But whatevs.
And when they were done, they were proud. And sugared up. And hyper. And I was a puddle on the floor.

But now, faithful readers, I’m back at work, i.e. the magical place where I can go to the bathroom by myself and even (gasp!) finish a sentence. It’s glorious.
Hey, I don’t have any answers. Life is tough and full of puzzling conundrums. But I do know that doing a project with kids is enough to take down even the best of mothers, so I’m proud to be still standing with cookies and cream mousse in hand. I mean, flowerpot.
Ingredients
Instructions
- In a microwave-safe bowl, melt the chocolate chips for 2 minutes. Stir until smooth.
- Add the Cool Whip and fold the melted chocolate into the Cool Whip until there are no streaks remaining. Stir in the crushed Oreos. Note: you can crush the Oreos in a food processor or by hand, using a plastic baggie and a rolling pin.
- Spoon the mousse into the flower pots, evening out the top. Sprinkle the rest of the crushed Oreos on top, putting on enough to make the top resemble dirt.
- Garnish with gummy worms and flower cocktail sticks as desired.
- Store in the refrigerator.
]]>
My obsession with fro yo is all in the toppings. You go fill your cup with lots of frozen goodness, but then you can dump whatever you want on top. I do that totally logical thing where I get a bucket full of fat-free yogurt and then proceed to pile on the chocolate. Lots of chocolate. And sometimes brownies or cheesecake, too. It’s like a make your own sundae party, any day of the week!
My thing is mix-ins. Ice cream should have lots of crunchy, frozen chocolate mix-ins to be amazing. So I made this peanut butter version to satisfy both the daily peanut butter craving and the need to cool off with lots of goodies.
The peanut butter base is very, well, peanut buttery. Be warned! This is not for people who just want a hint of that flavor. It’s very strong. If you love peanut butter, that’s a good thing. If not, well, yeah. Go buy the Breyers version that tastes vaguely like coffee and vaguely like peanut butter and isn’t a rock star.

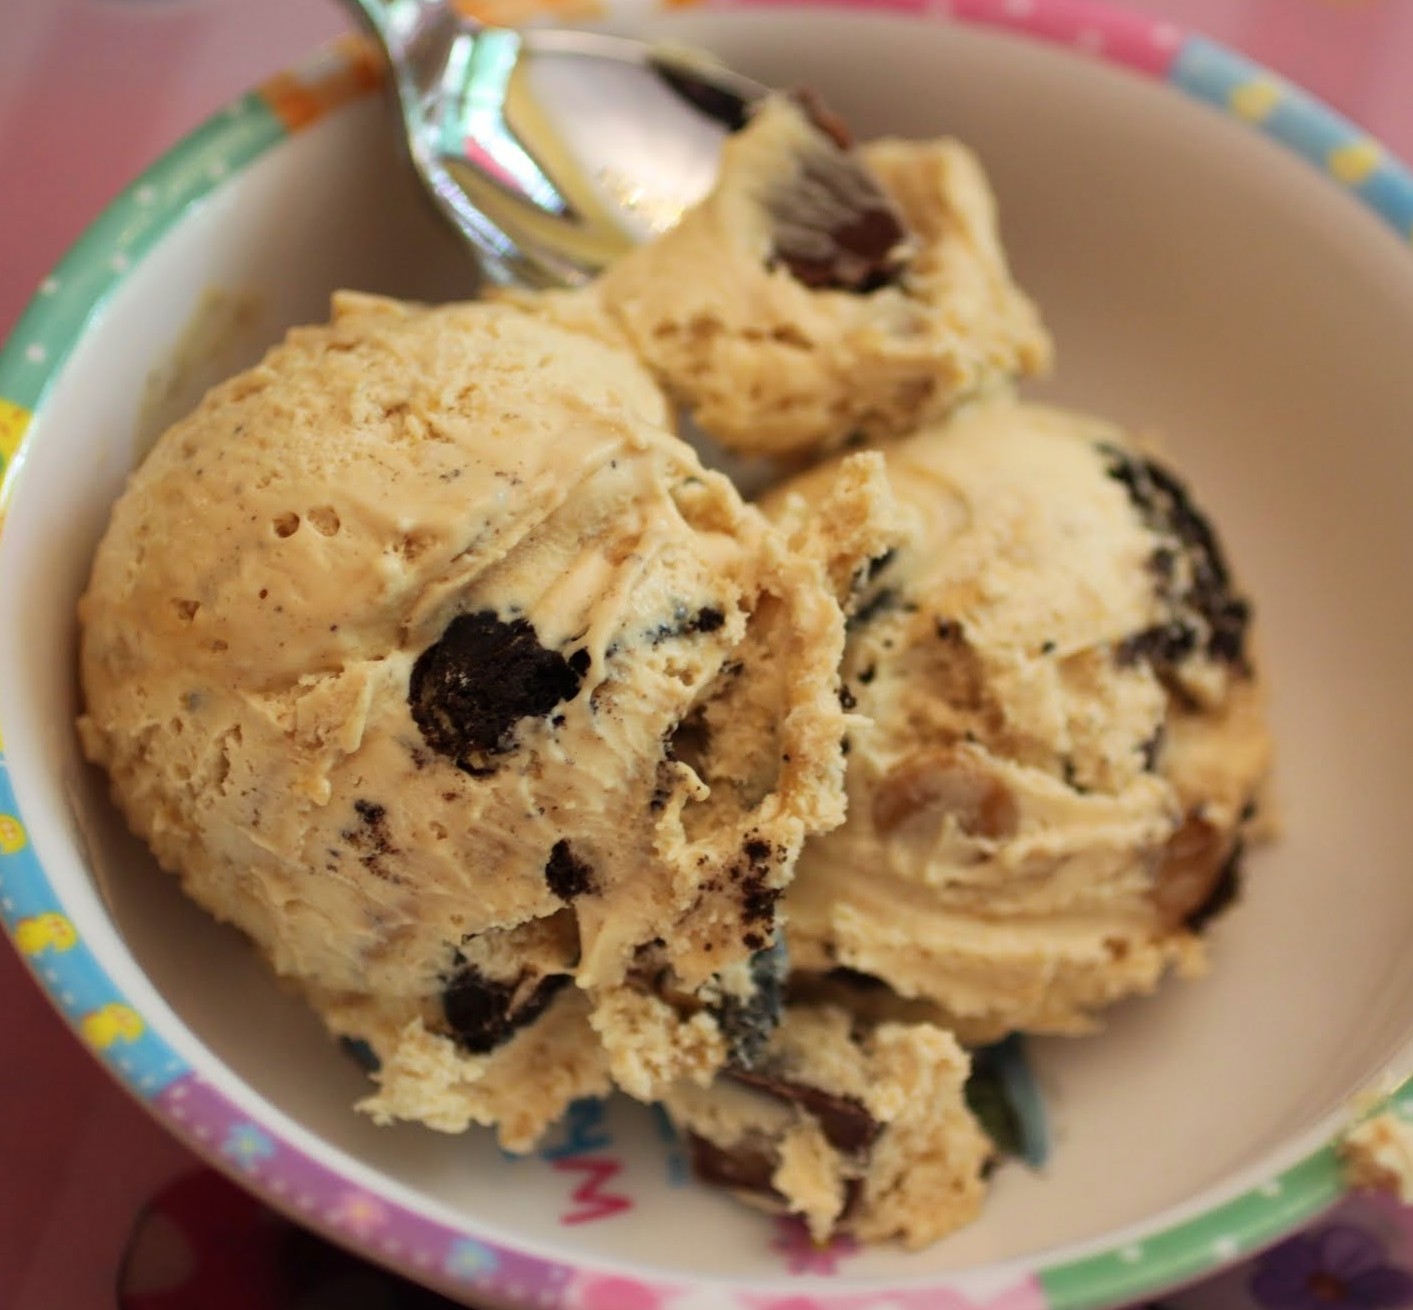
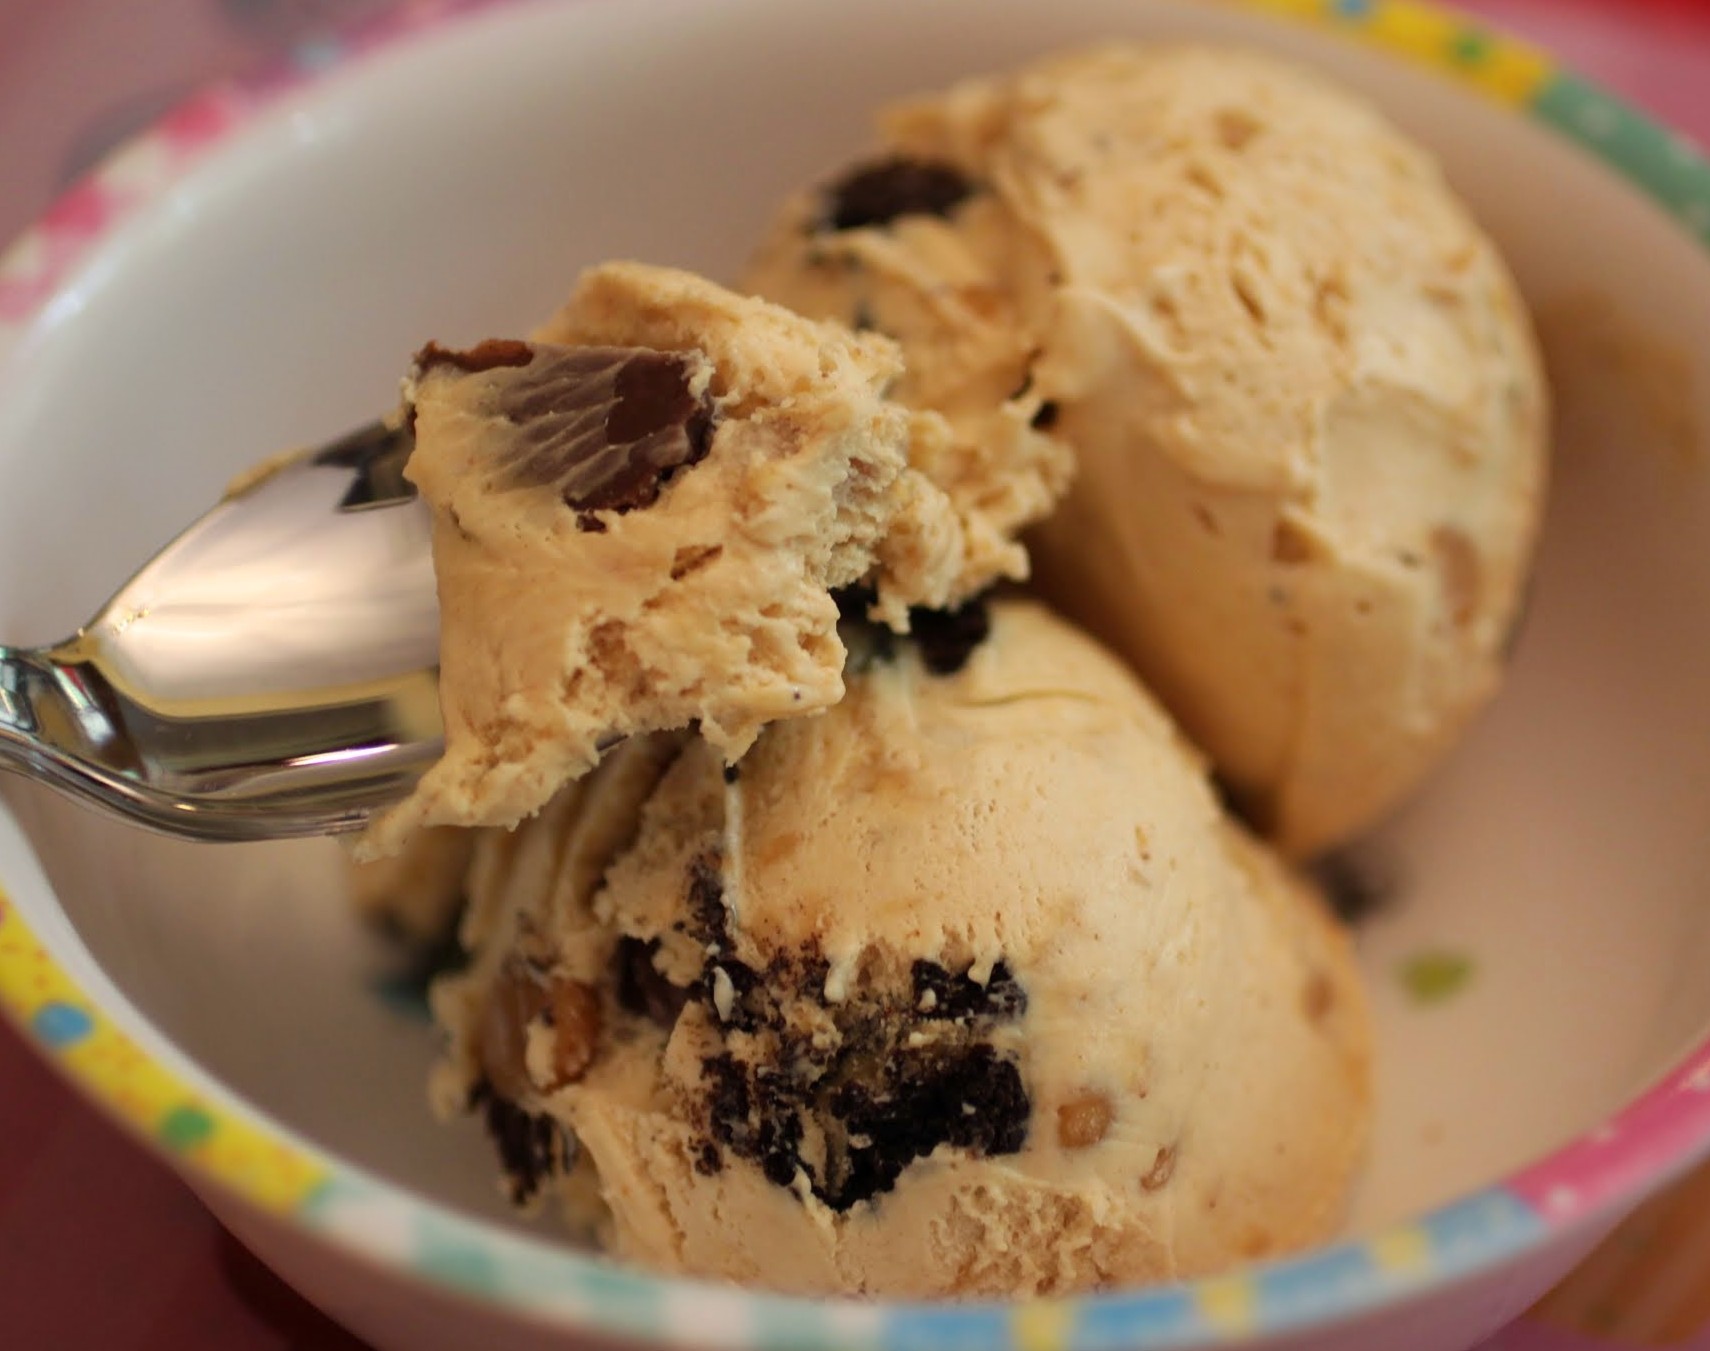
I filled this ice cream with a lot of good stuff. Mini Reese’s Oreos. Mini Reese’s cups. Peanut butter chips! I think my heart rate just went up.
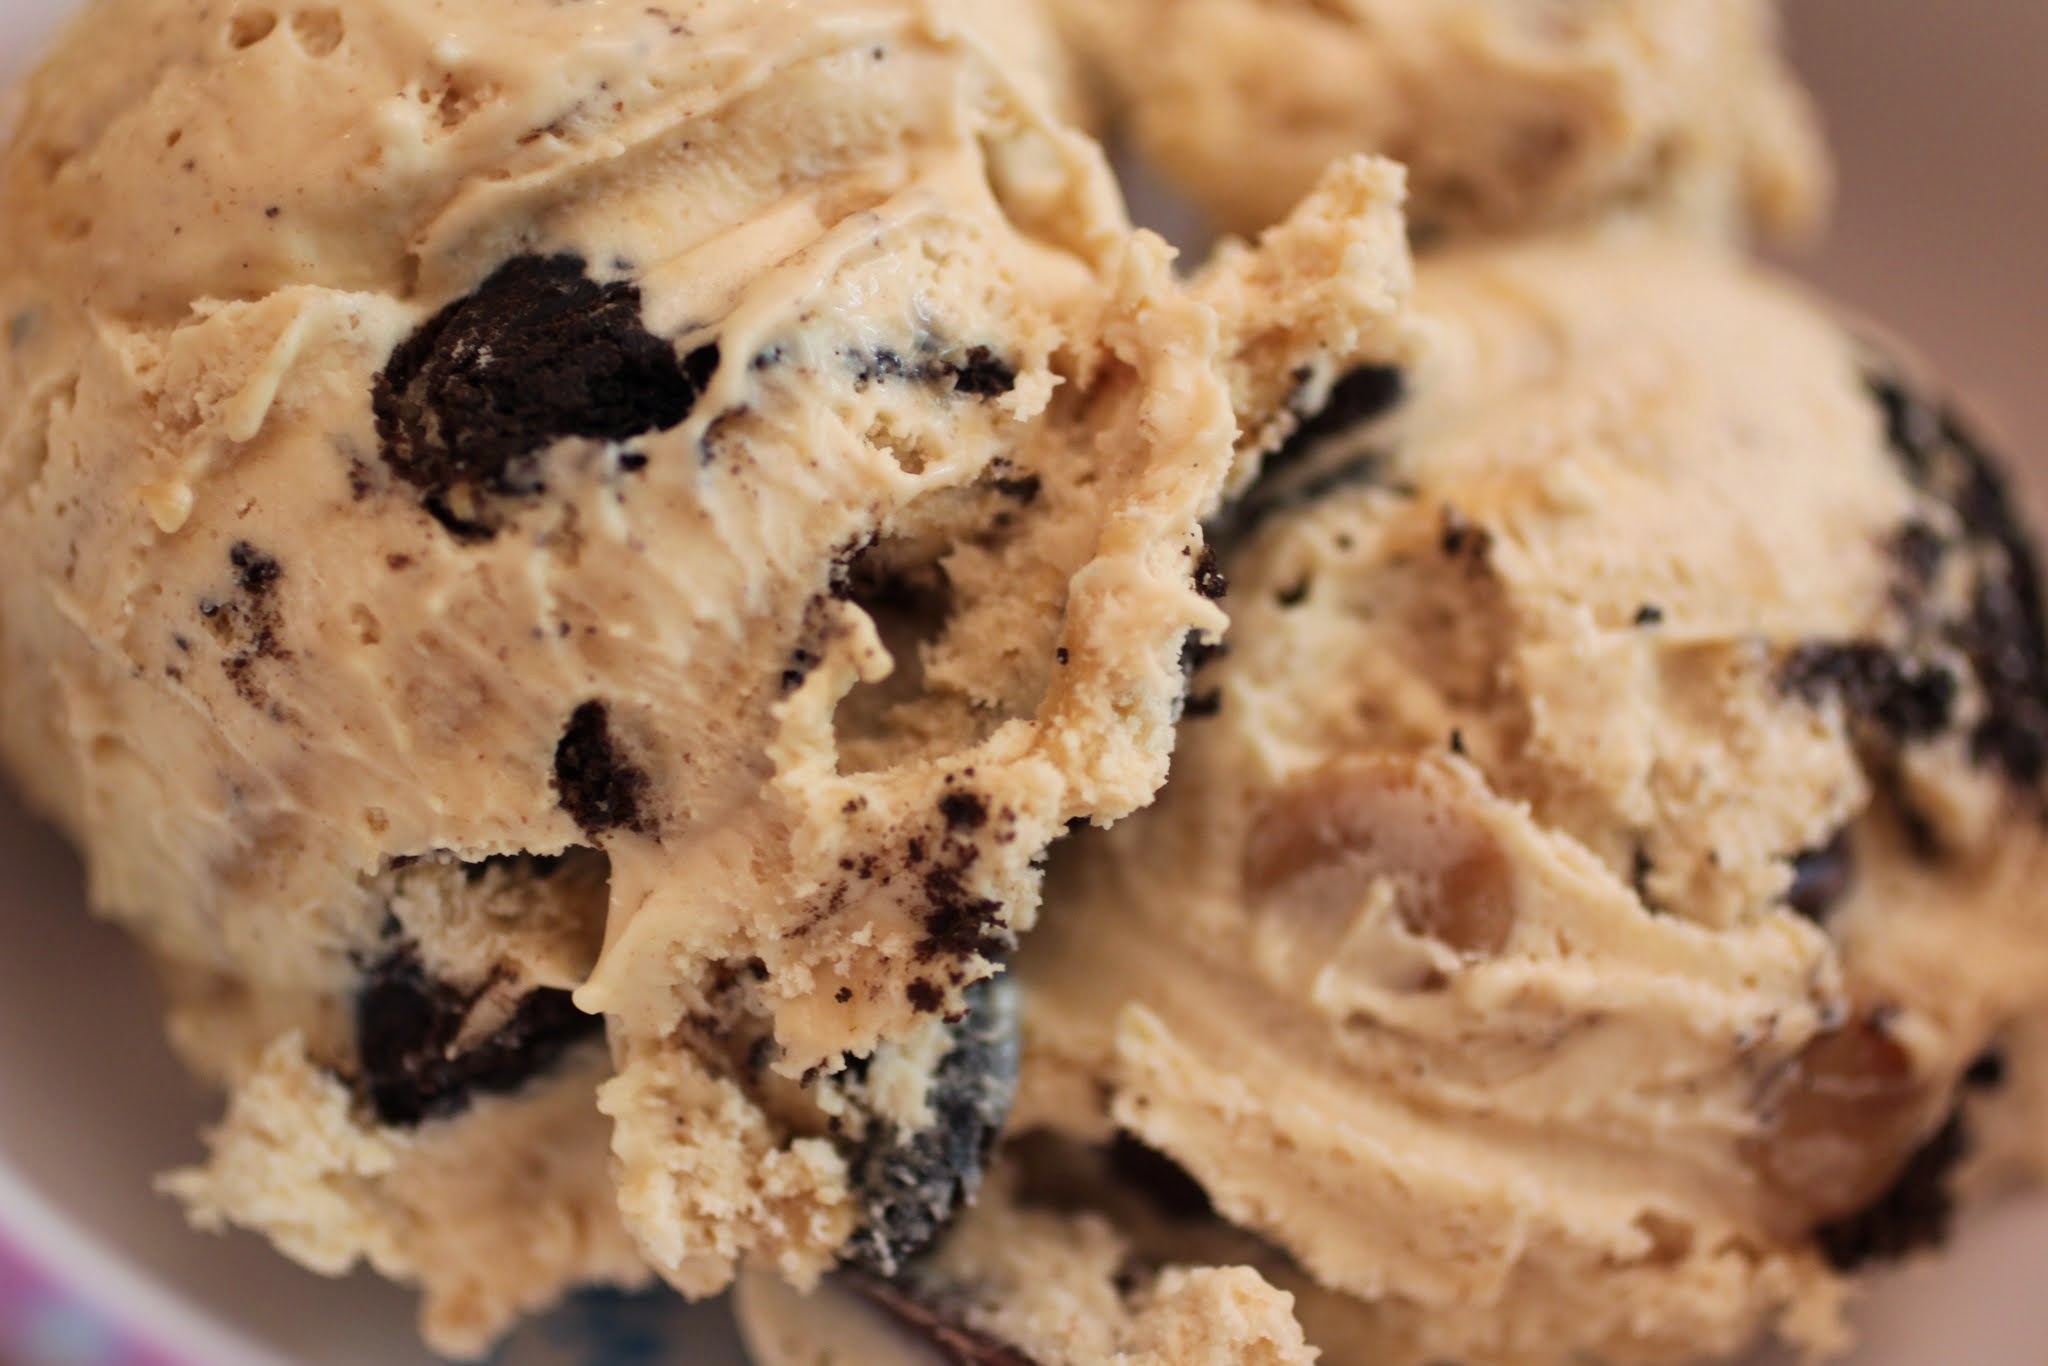
You have to break the little Oreos apart a bit and cut the mini PB cups in half. That way, these mix-ins are quite literally everywhere, tantalizing you with their crunchy goodness. Plus, the Oreo crumbs give this an added cookies and cream feel. Honestly, it’s the best of all ice cream worlds!
I don’t bother with ice cream machines. Just so you know. I bought my mom one at some point and now she can’t find it. So I do the no-churn method, and it works just fine! You can used sweetened condensed milk with pretty much any base of your choice. For instance, you could put in a cup of cream cheese instead of the peanut butter and have a cheesecake ice cream. But I like this better!
There’s a lot of summer left in me! And in you, too. Frozen should be a dessert phenomenon, not your body temperature or even worse, the temperature outside. Keep the ice cream days coming!
Ingredients:
- 14 oz. sweetened condensed milk (I used fat-free)
- 1 teaspoon vanilla
- 1 cup peanut butter (creamy)
- 16 oz. Cool Whip (I used light)
- 1/2 cup peanut butter chips
- 1 cup Reese’s minis, chopped in half (not miniatures)
- 1/2 cup Reese’s mini Oreos, broken in half
Instructions:
In the bowl of a stand mixer, beat the condensed milk, vanilla and peanut butter until smooth. Fold in the Cool Whip gradually, making sure that no streaks are left in the mixture. Gently add the mix-ins and stir again.
Place in a freezer-safe container or pan and freeze overnight. Store covered.
Note: this ice cream melts a little faster than churned ice cream, so don’t leave it out on the counter for long!
]]>I’m not really sure how to classify this dessert. My grandmother, who taught me how to make it, called it a cake. In fact, she made it for my grandfather’s birthday every year. But darn it, whenever I make it, I just see a pie. So we’ll go with that. Sorry, Grandma.
Whatever you call it, this dessert is fabulous and easy to make. It’s one of those happy recipes that is mind-numblingly simple to create but that will still impress the masses. Impressing your fans is important. You want people to think that you worked so much harder than you did.
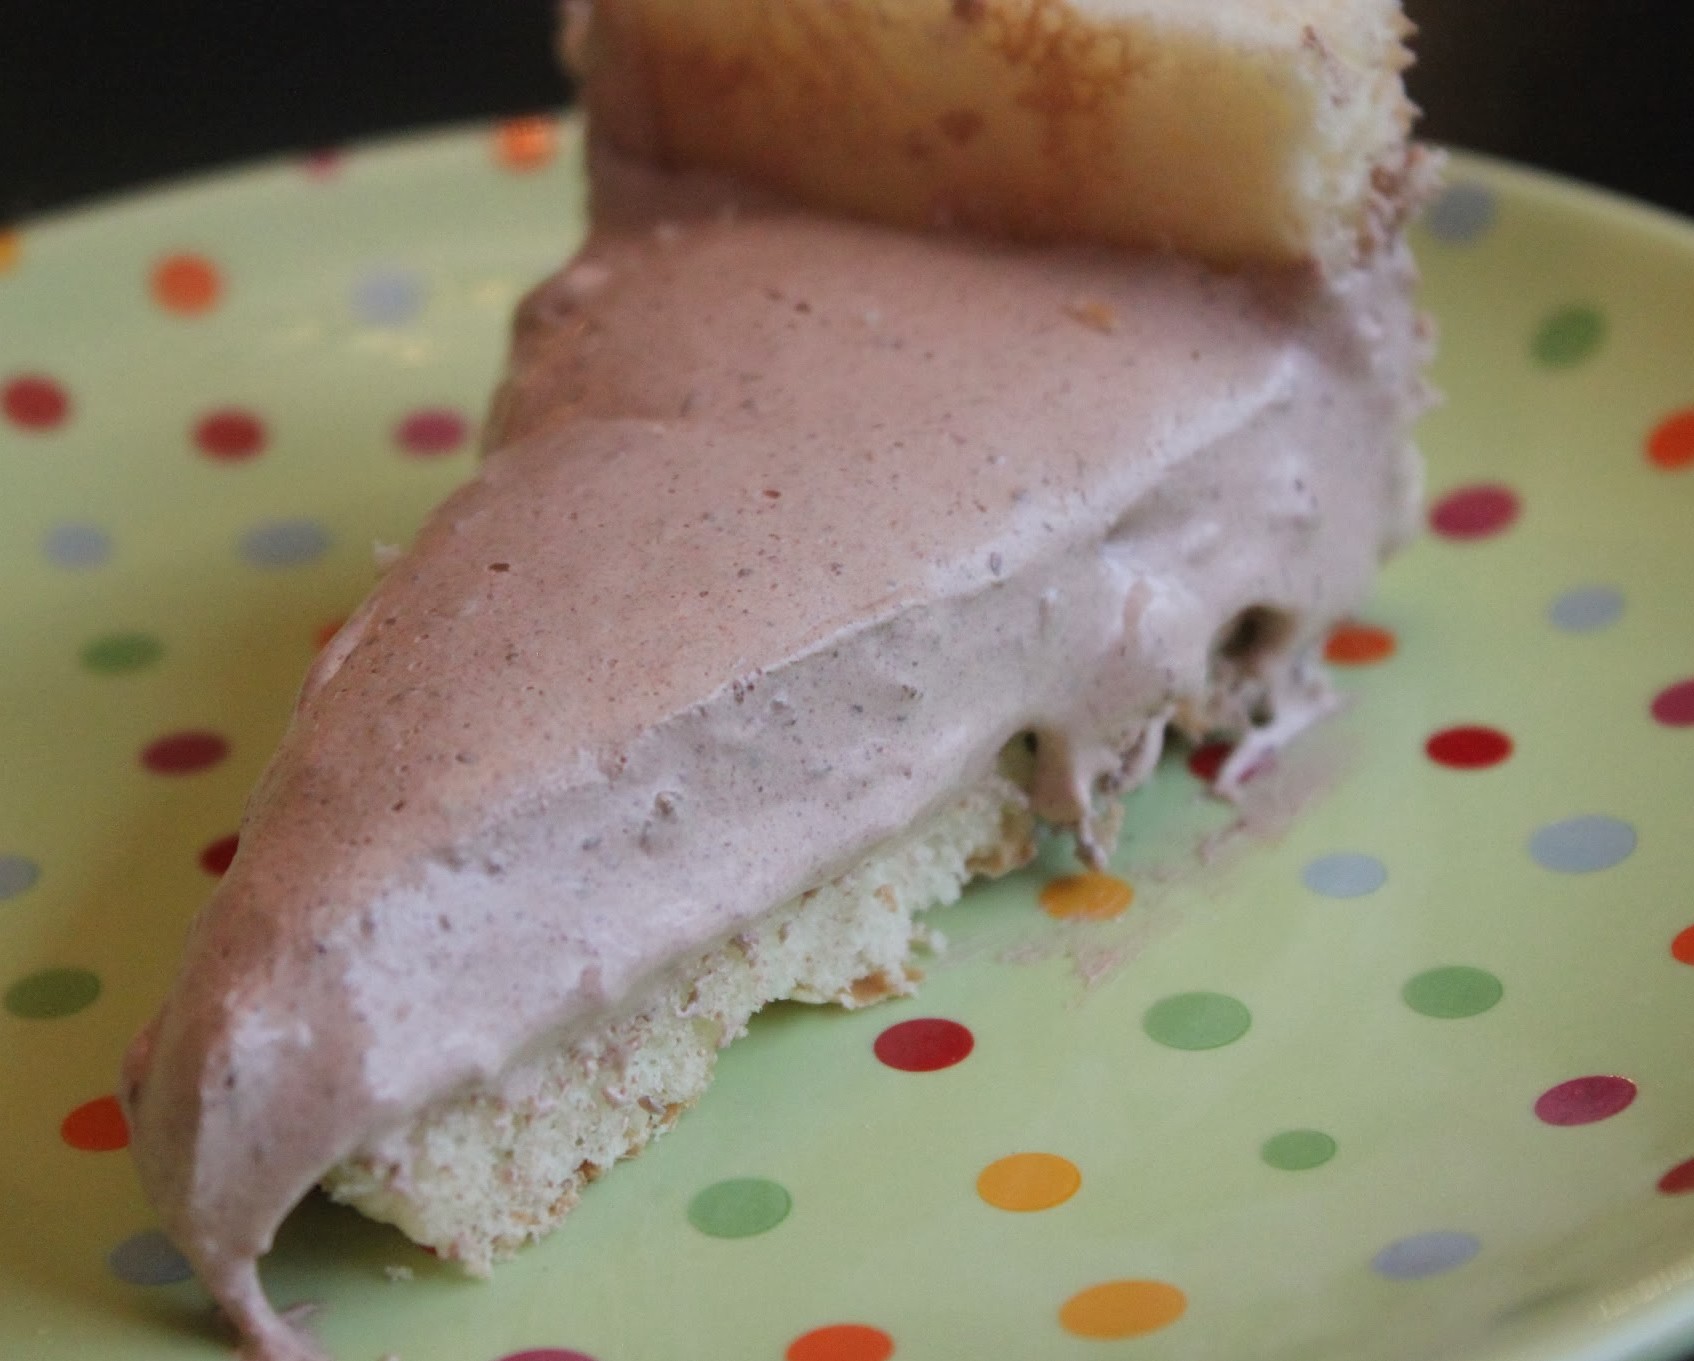
If you’ve seen my peanut butter brownie trifle recipe, then you’re familiar with this mousse base. It’s a great solution for people who don’t like to eat traditional mousse because of the raw egg factor but who still want to have that dessert experience. The answer is to combine thawed Cool Whip (in this case, light) along with melted chocolate chips and to let the mixture chill and set.
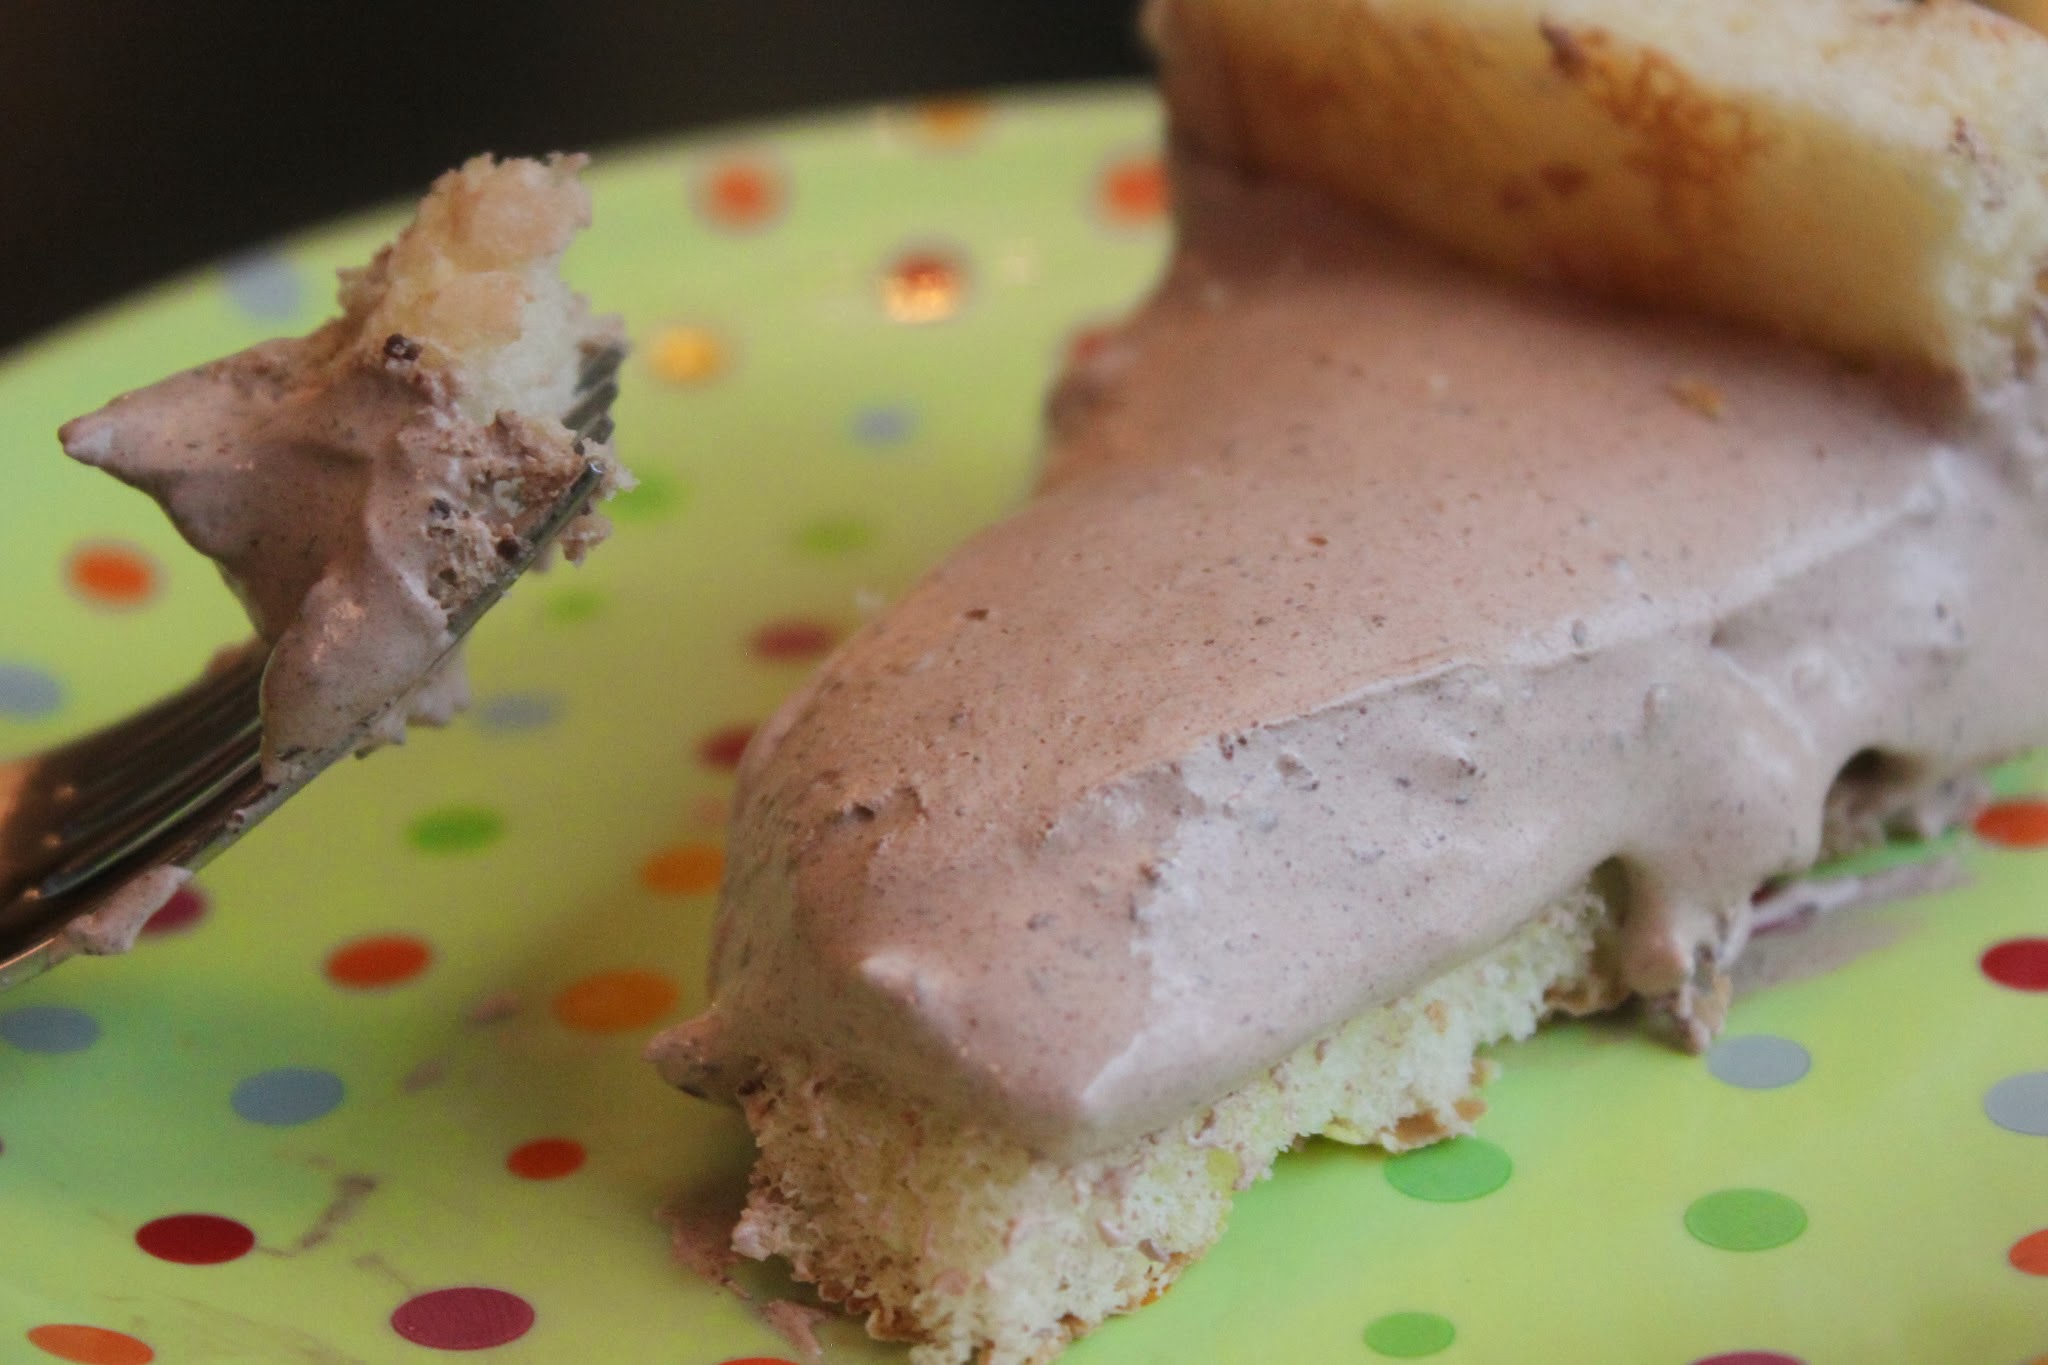
The pie is made in a springform pan with lady fingers forming the mousse’s crust, or outer shell. Lady fingers are typically stored in your grocer’s bakery section. When I went to my local supermarket, I had to ask the bakery to get some out of the back storage for me. But fear not: they still exist, and you can find them!
How you place the lady fingers is up to you. You need to evenly cut a bit off the bottom of the cookies and then you either put the cut side down to make them sit flat against the pan, or you can flip them the other way for a straight edge. That’s what I did, but my grandmother used to prefer the scalloped edge, so she’d put the cut side down, like this:
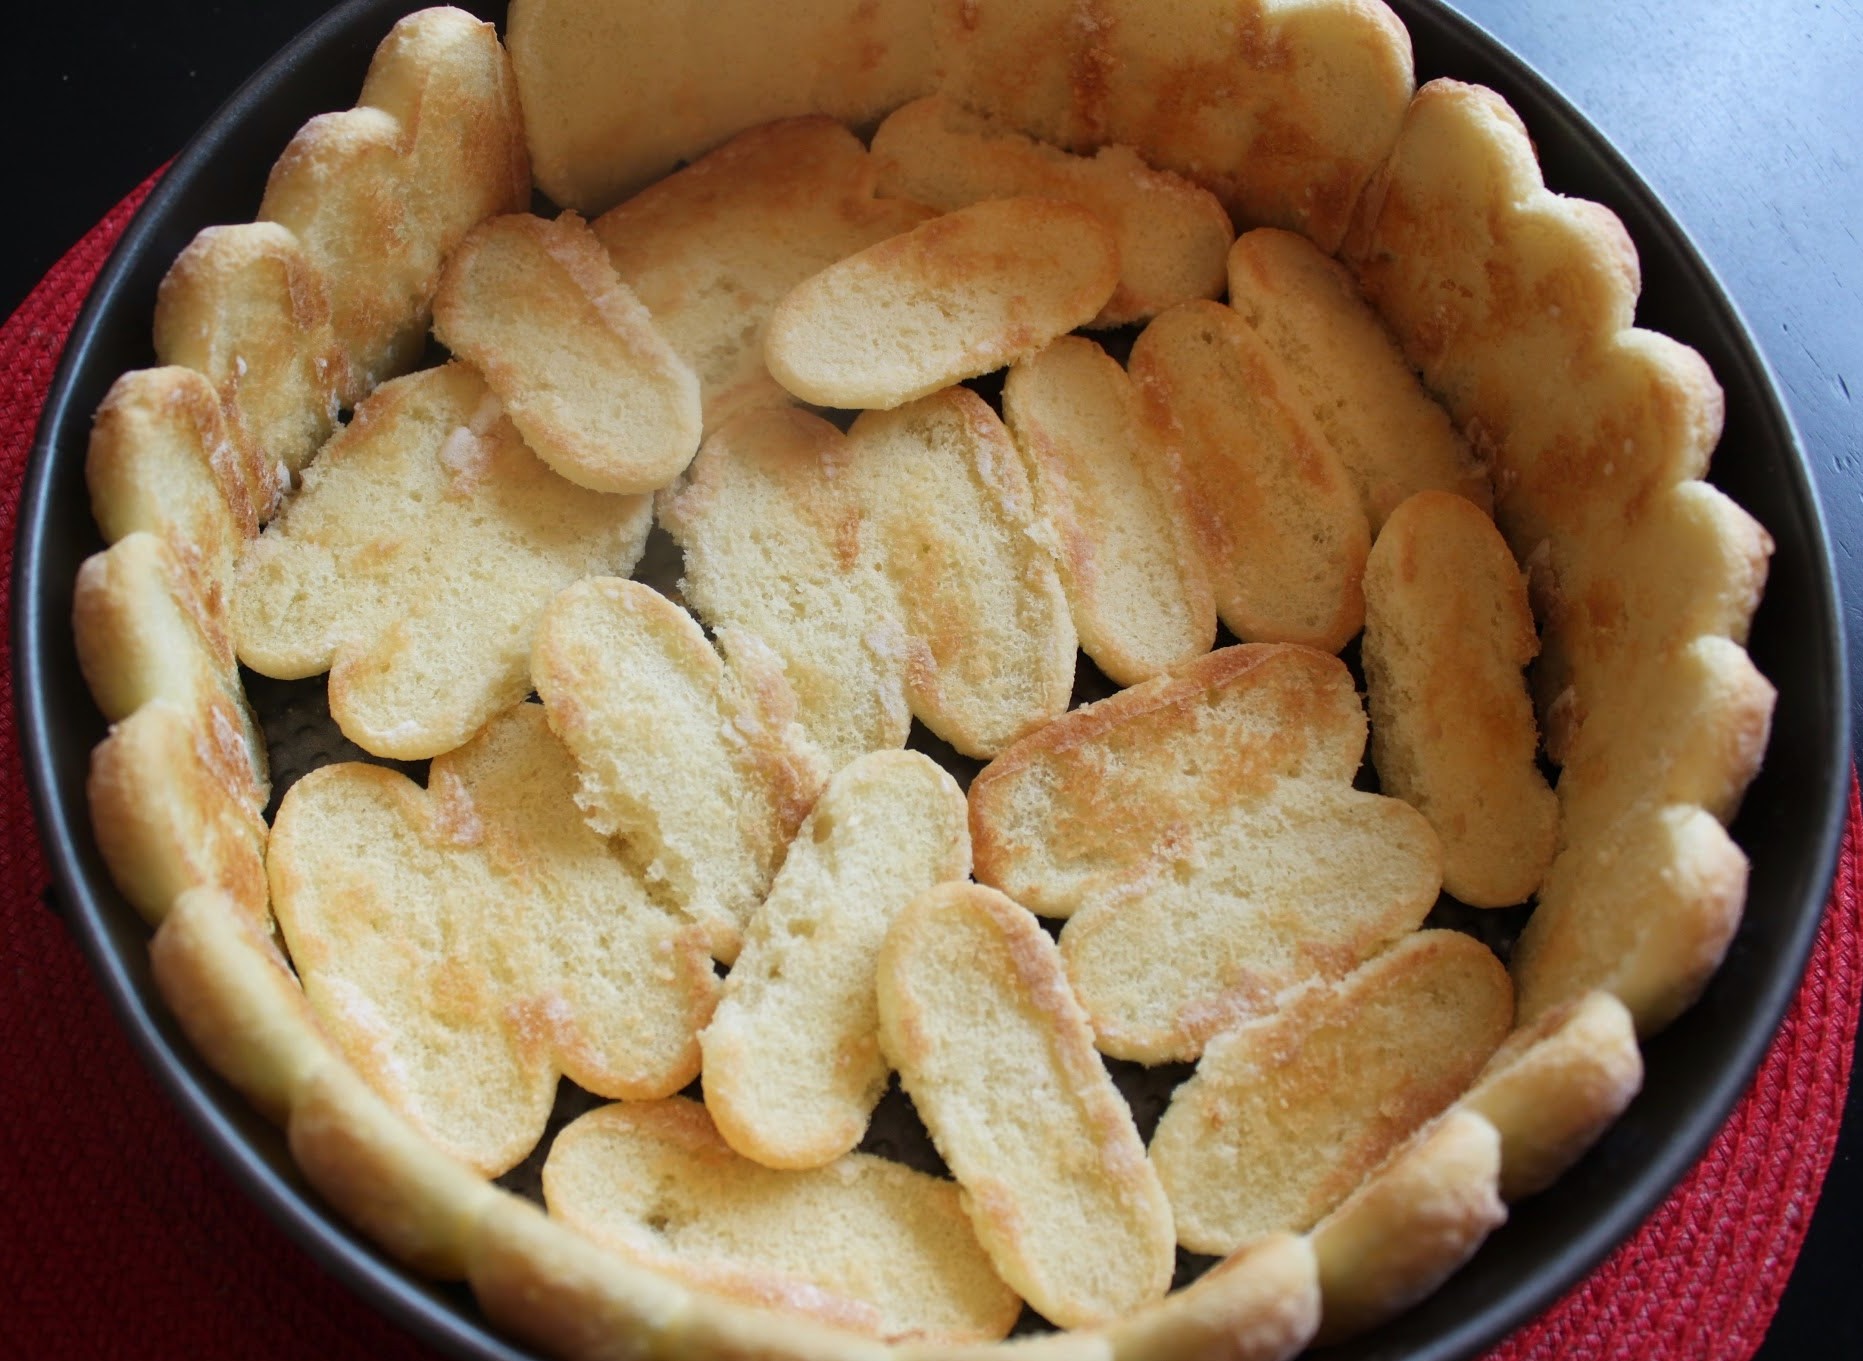
Anyway, you line the lady fingers along the sides of the pan, and then you fill in the bottom with your remaining cookies. The spongy texture of the lady fingers absorbs the mousse really well and reminds me a little of ice cream cake.
Once you’ve made your filling and set up the lady finger crust, pour the filling into the pan and then let it chill for at least a few hours, though overnight is better. When the mousse sets, it’s ready to eat!

People will be super impressed with your culinary skills. They’ll think it looks so pretty and impressive, and will never guess how little time you spend making the mousse. And all of that ease and deliciousness will give you more time to do what really matters in life: play with kids, read magazines, take a bath, or just stare into space. Why not?
Ingredients:
- 8 oz. (1 cup) semi-sweet chocolate chips, melted
- 16 oz. Cool Whip (I used light), thawed
- 2 packages lady fingers
Instructions:
Line a springform pan with lady fingers, starting with the sides and then filling in the bottom (see post above for more specific instructions).
In a microwave safe bowl, melt the chocolate chips. Heat for two minutes, and then stir. If the chocolate isn’t melted, heat in 30-second intervals, stirring after each interval, until the chocolate is melted and smooth. Be careful not to burn the chocolate.
Working in batches, add the Cool Whip gradually to the chocolate, stirring after each addition until the two ingredients are smoothly incorporated. There should be no white streaks in the bowl.
Once the mousse is ready, pour it into your lady finger crust.
Place the mousse in the fridge and chill for several hours or overnight.
Serve when ready! Keep the pie in the fridge when it’s not being served.
]]>
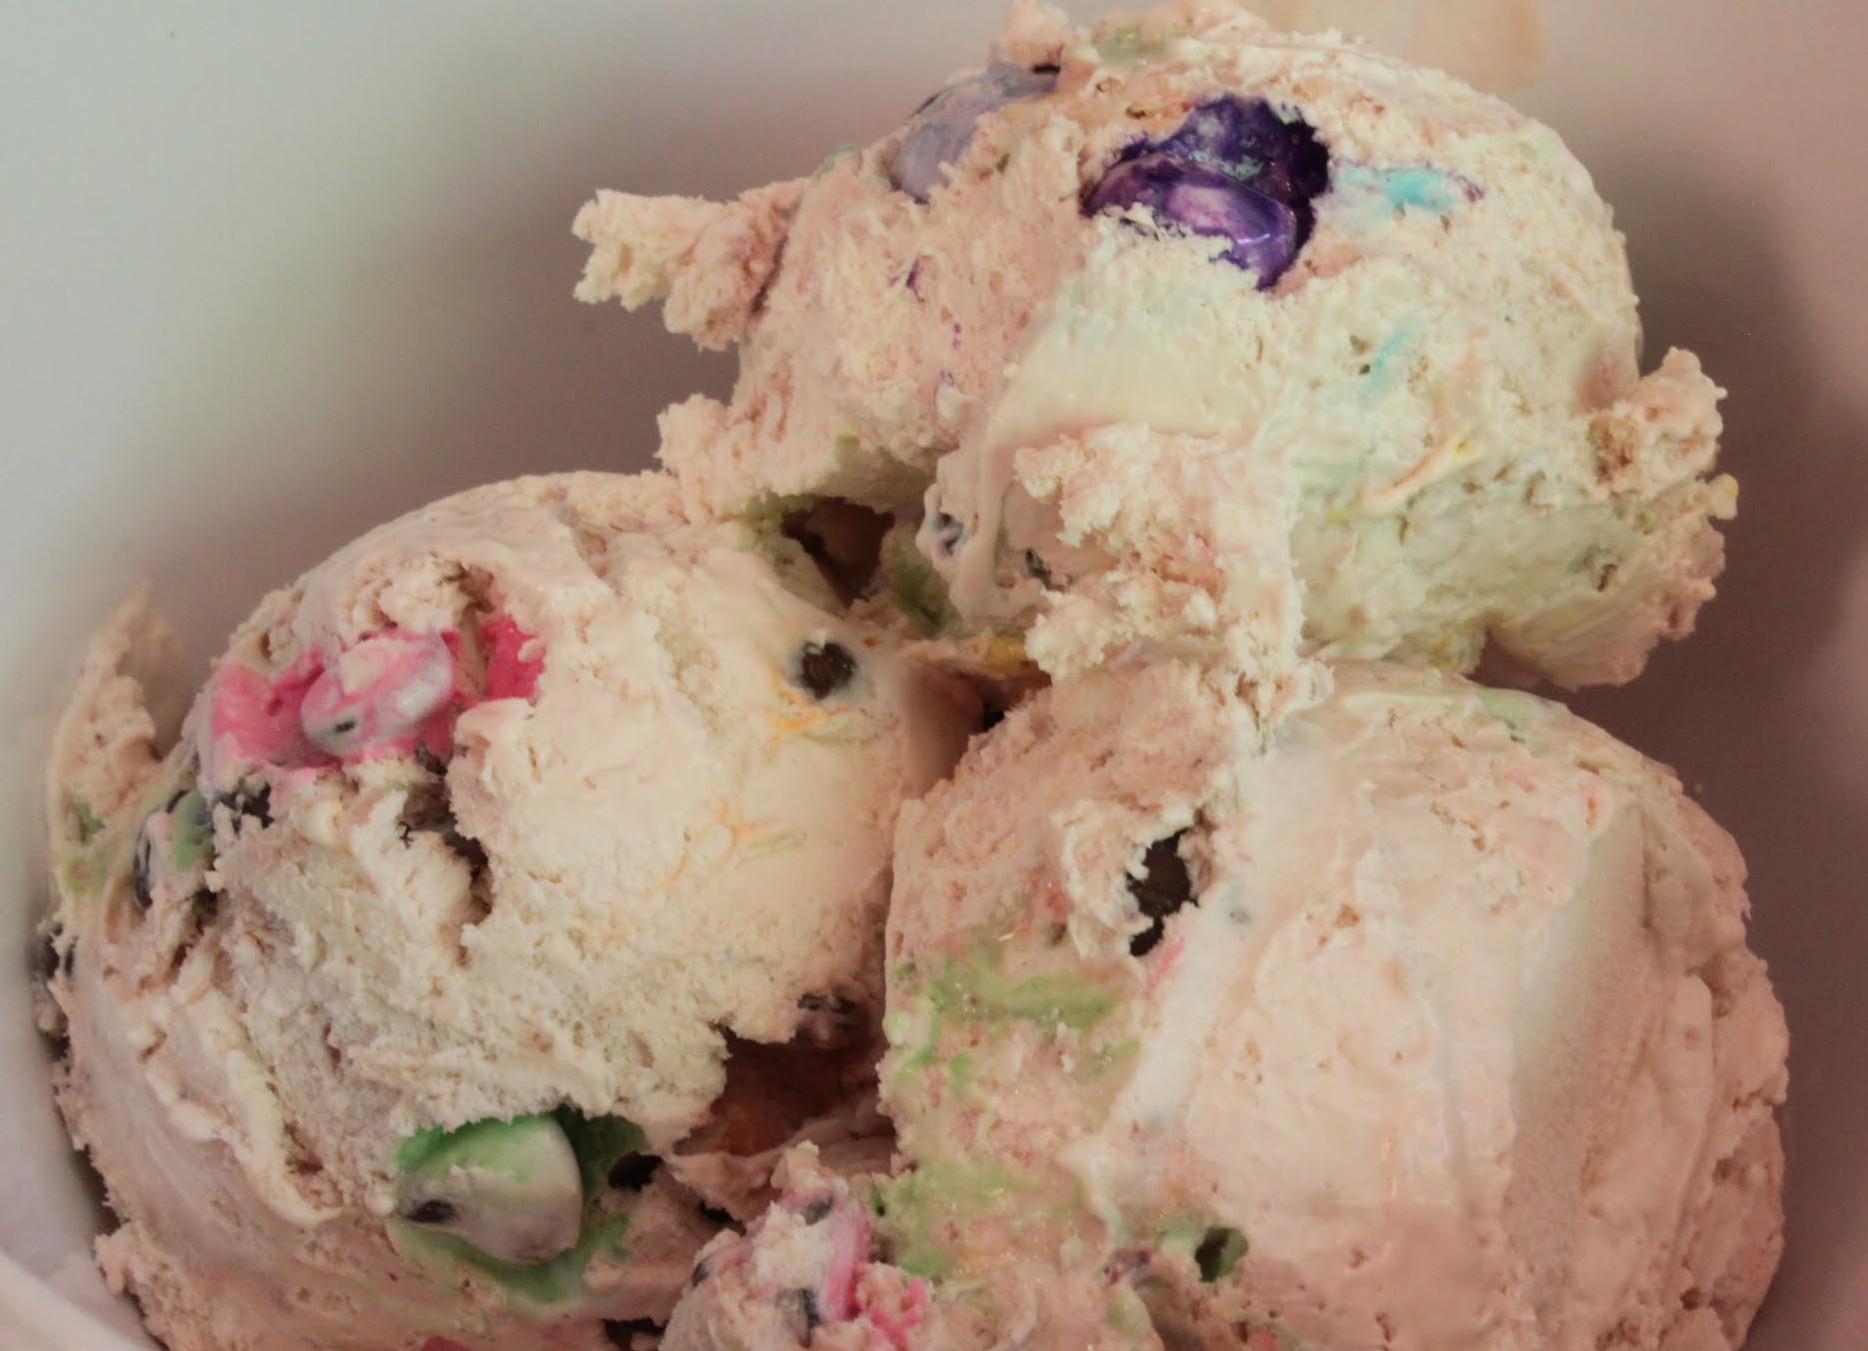
Do I buy most of my friends? Heavens, no. But two of my pals, good old Ben and Jerry, like it when I spend my hard-earned cash on them. So I try to be a loyal buddy.
Over the years, Ben and Jerry’s flavors have gone through quite a rotation. They’ve taken away some of my absolute favorites, and I’ve been very vocal on their website about bringing those flavors back. But thank the powers above that my very favorite is still in existence. It’s known as Everything But The…
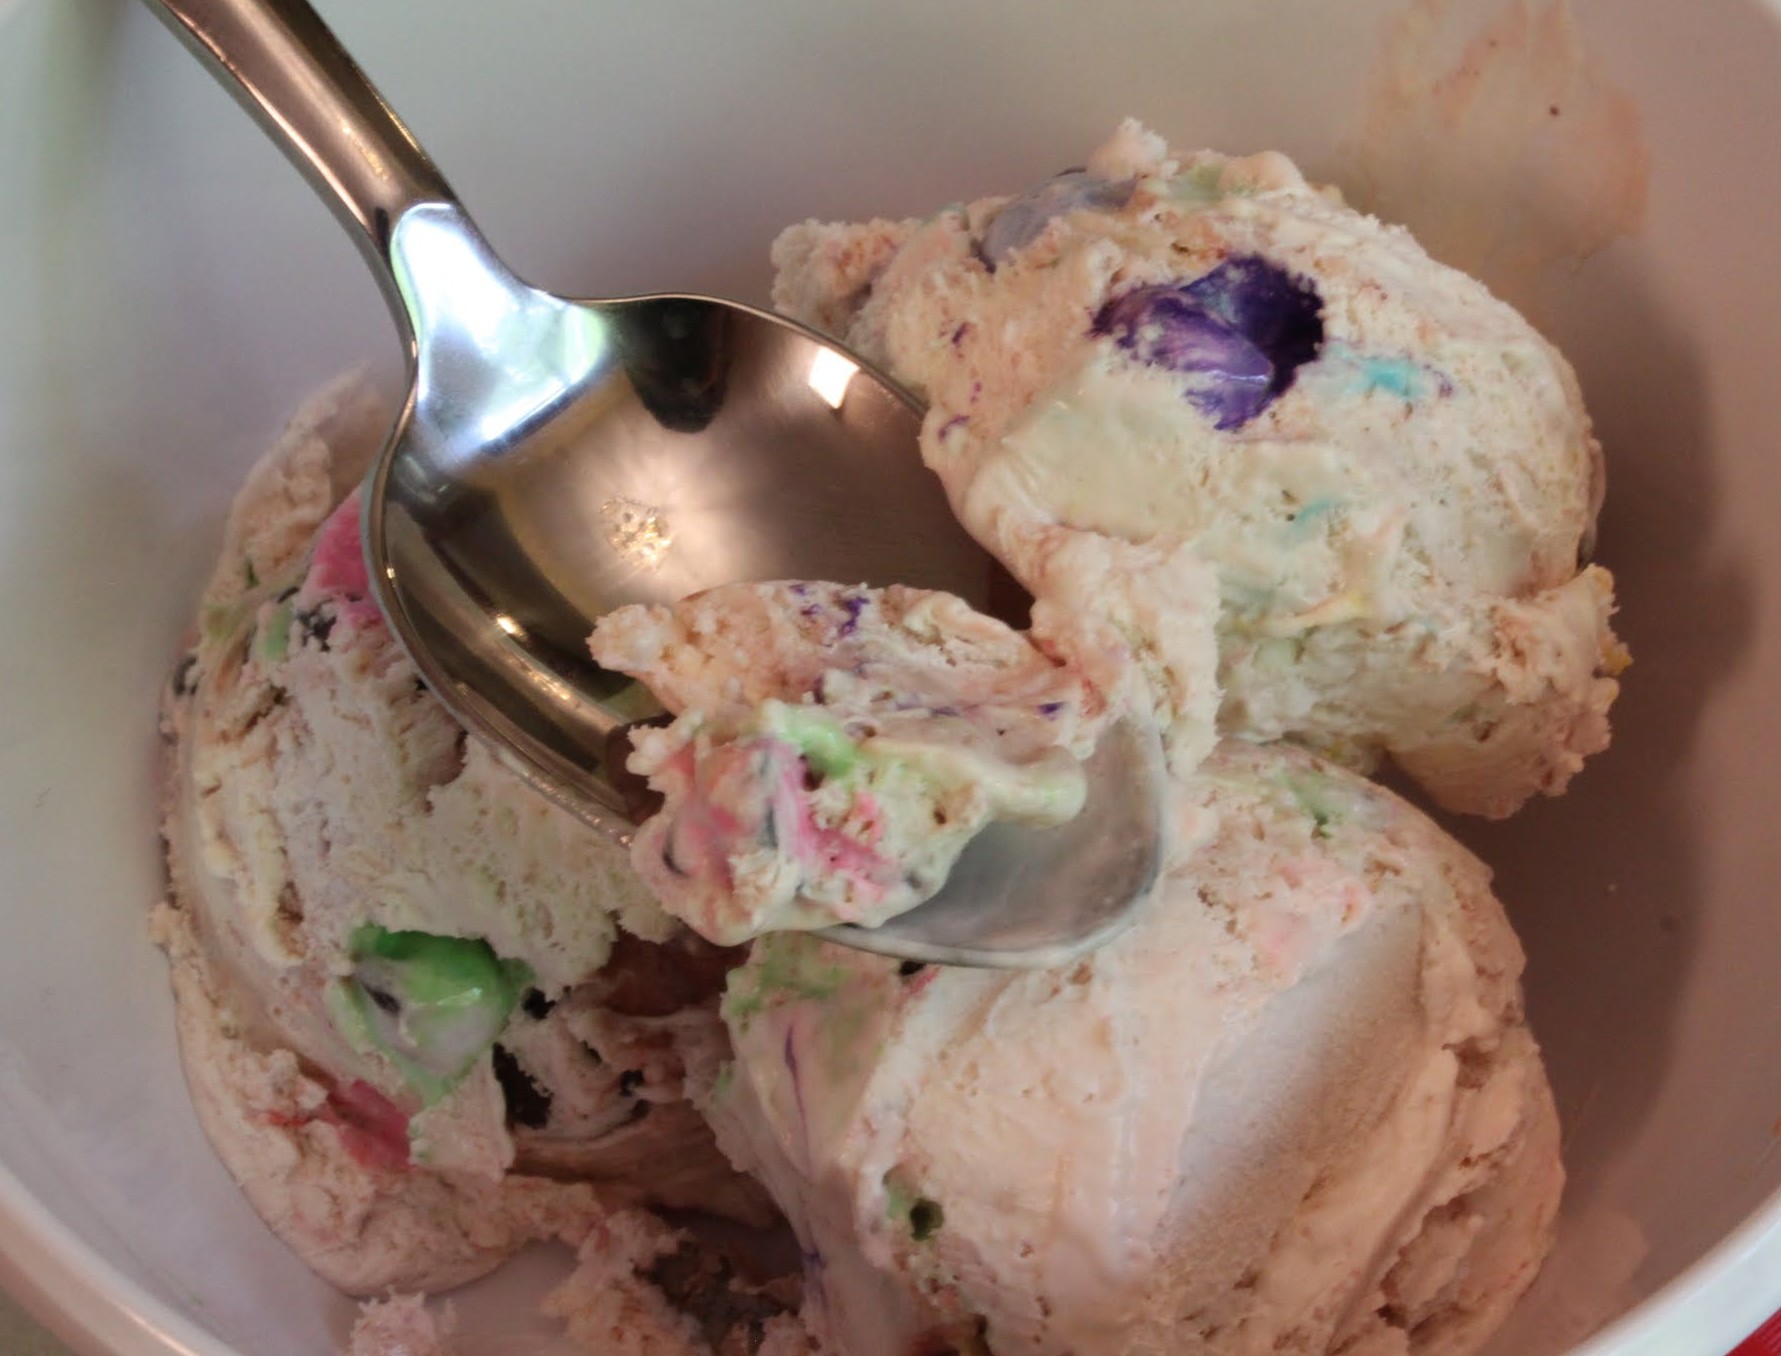
No, I didn’t cut off in the middle of the sentence. That’s the flavor. But we all know that expression ends with the words “kitchen sink.” In baking, that’s a term we use to describe the scientific process by which we take all the leftover crap in the house, dump it into a batch of whatever, and call it a night.
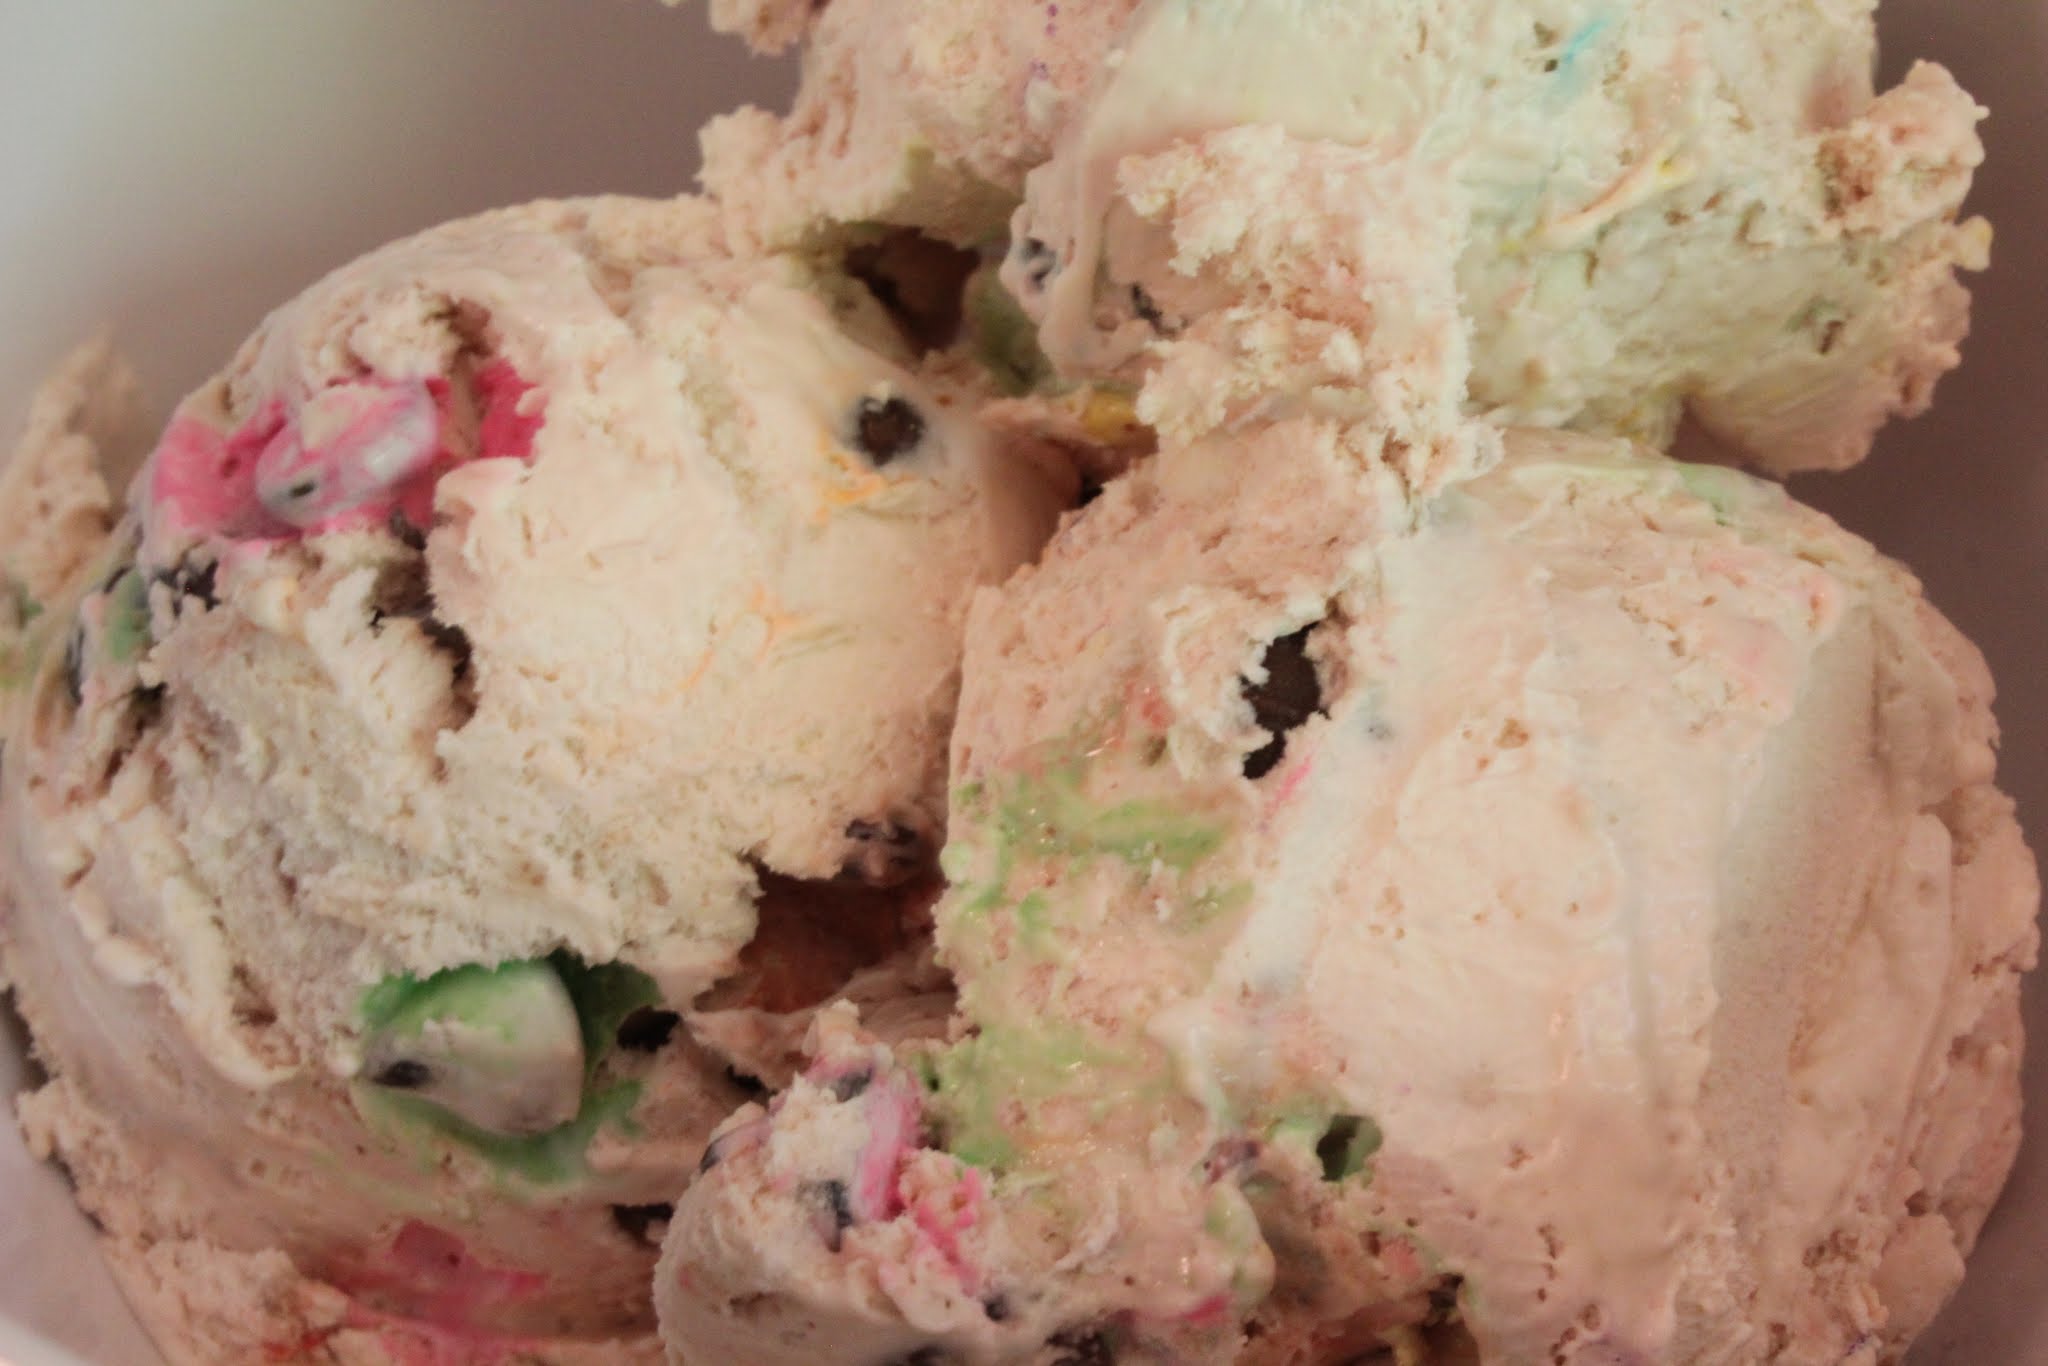
So here it is, folks! No, not the same kind as Ben and Jerry. I had a bunch of stuff in my freezer (M & Ms, chocolate chips, rainbow chips) and they all went into the ice cream. But since the base is vanilla, add whatever you want! Caramel. Peanut butter cups. Brownie chunks. Sprinkles. The field is yours. Play away!
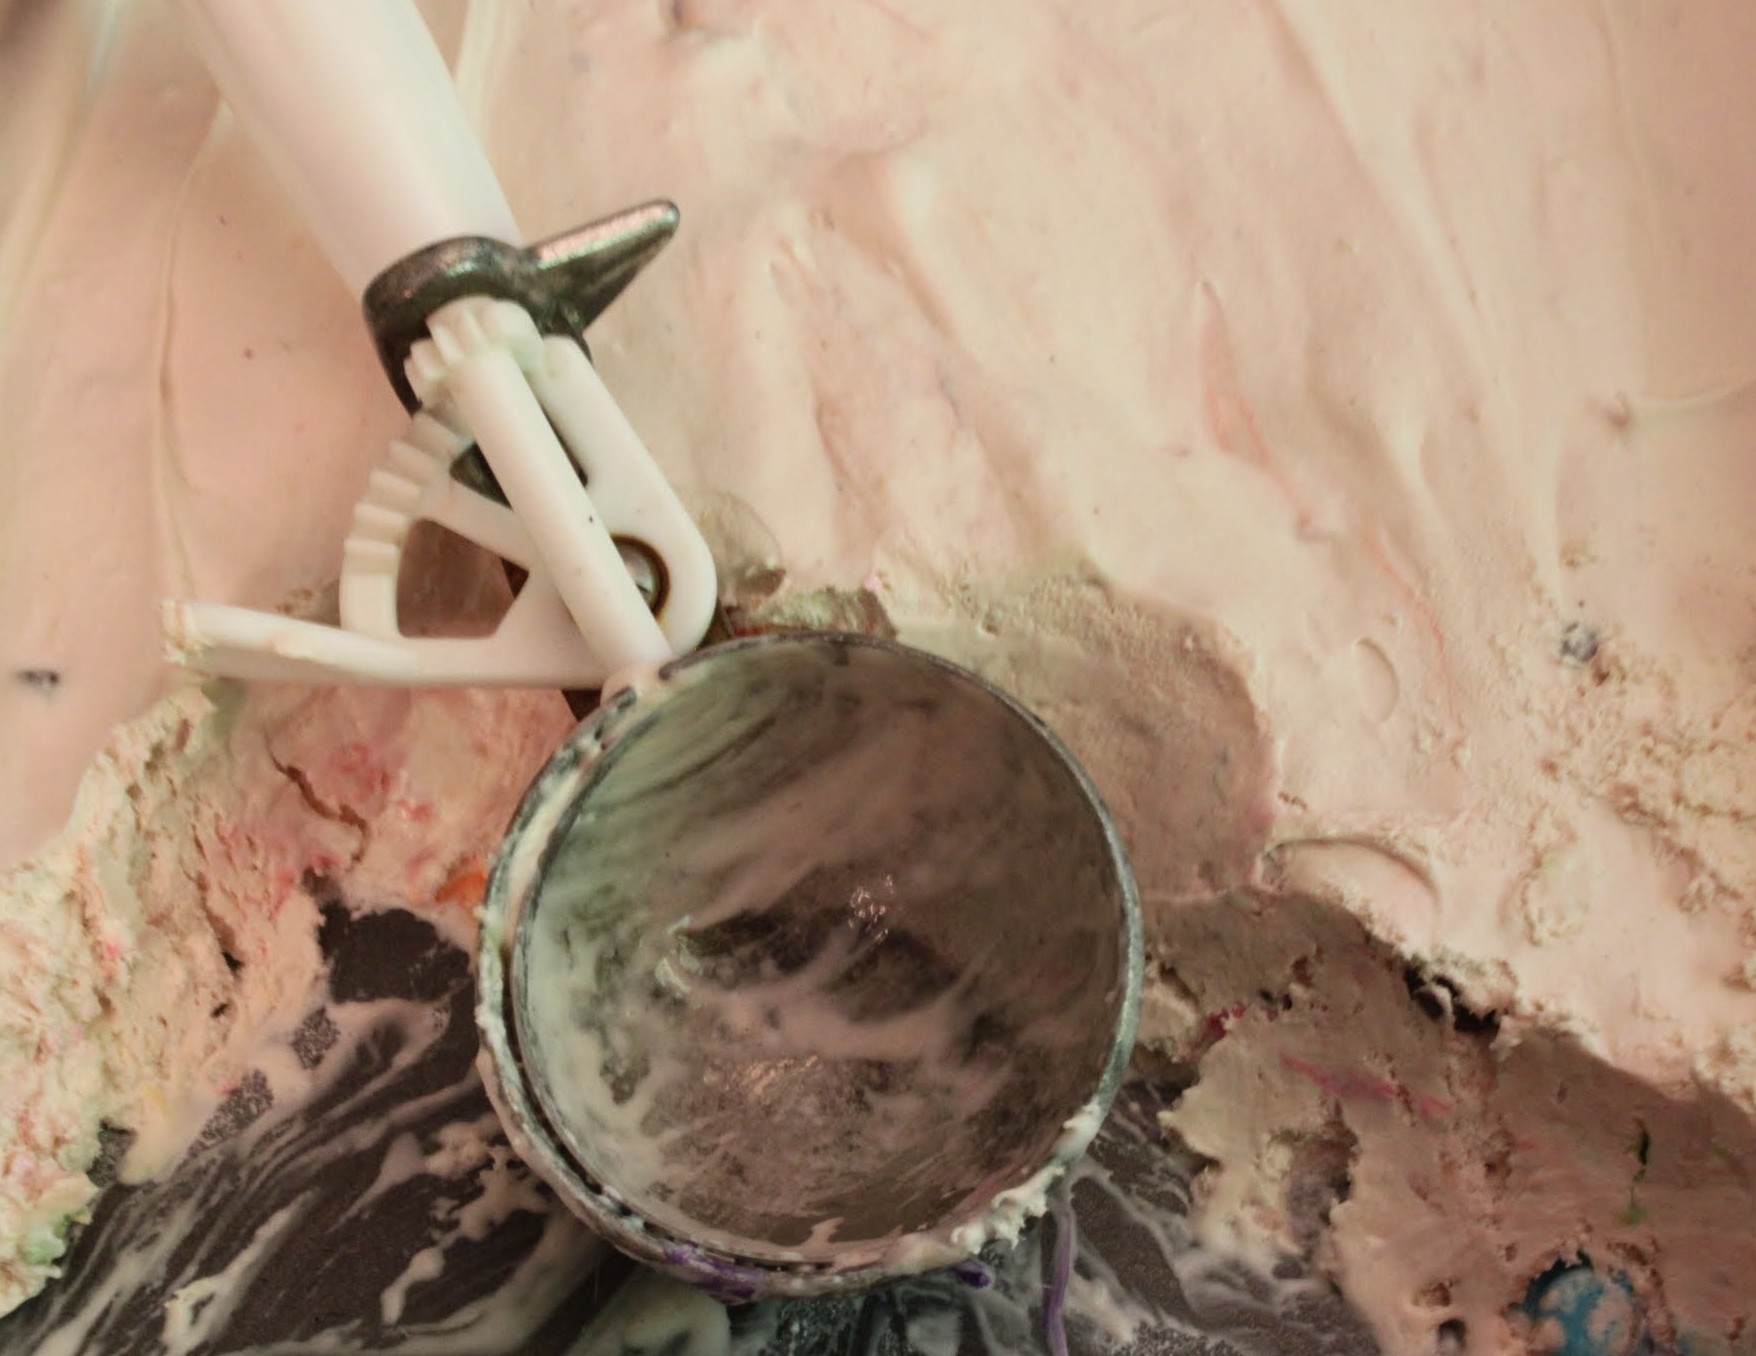
The best part about this ice cream is that it comes together in two seconds. If you don’t want to use Cool Whip because you are a snob, then just use heavy whipping cream. You’ll have to whip it, by the way. I use light Cool Whip here because it’s easy. I like easy.
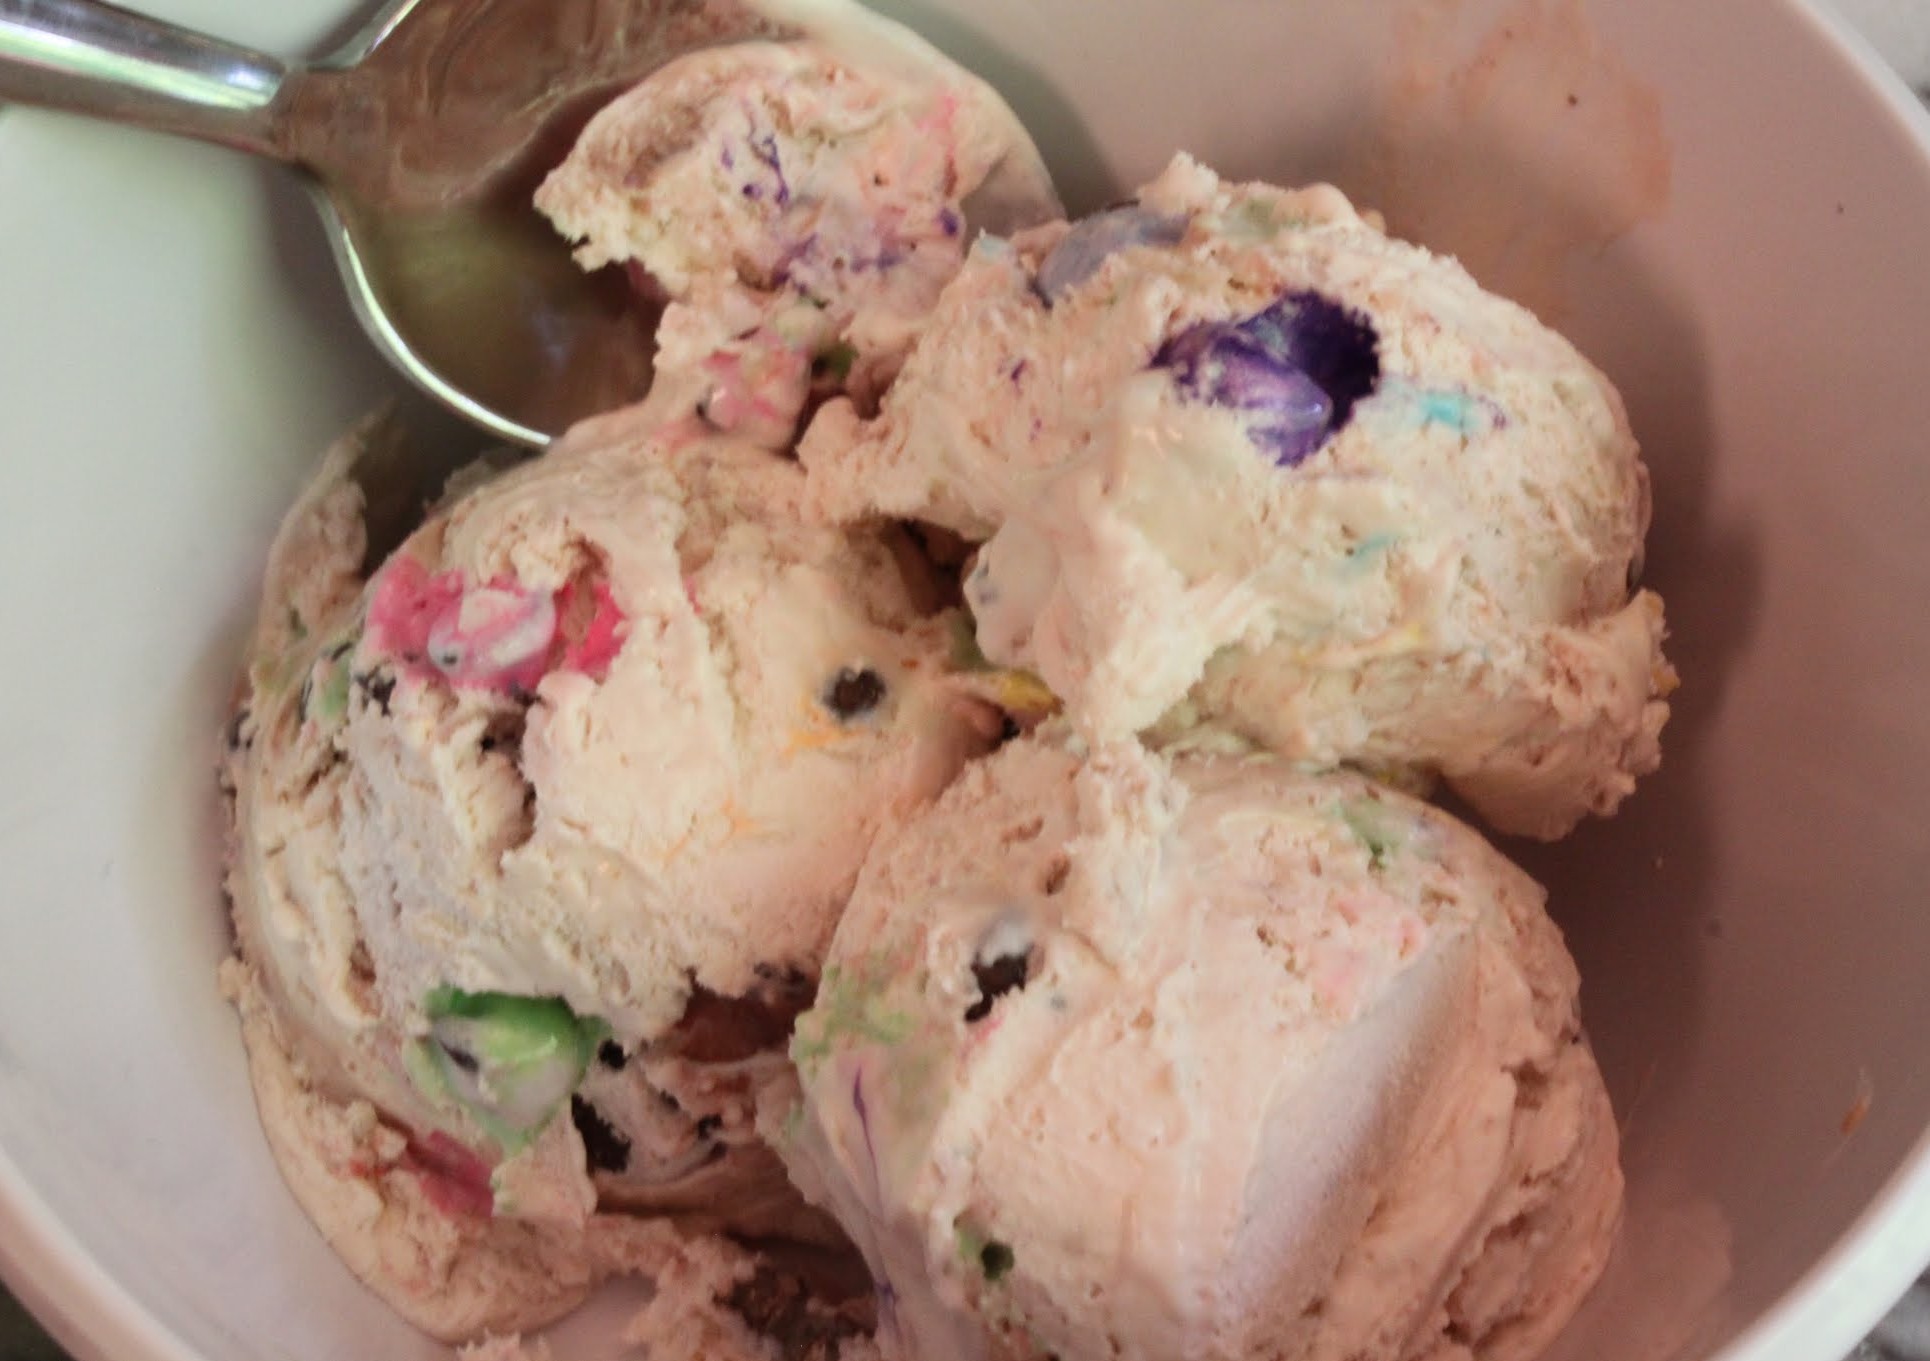
My kids like this stuff. It’s colorful and full of candy that bleeds color everywhere. And it’s ice cream. Case closed.
Seriously, is any time of year better than this? What beats ice cream? Really. What?
Summer is the time, folks. Eat the cold treats while you can! And stay tuned for my Beach Week next month. I’ll be posting boardwalk-themed treats based on my delightful experiences at the Eastern Shore. But for now, I hope this ice cream hits the spot!
Ingredients:
- 8 oz. cream cheese, softened to room temperature (I used light)
- 14 oz. sweetened condensed milk (I used fat-free)
- 1 teaspoon vanilla
- desired “kitchen sink” mix-ins
- 16 oz. Cool Whip (I used light)
Instructions:
In the bowl of a stand mixer, beat the cream cheese until smooth. Gradually beat in the condensed milk.
Take the bowl out of your mixer. Add the vanilla and mix-ins, and then slowly fold in the Cool Whip until everything is combined.
Put in a freezer-safe container or pan, cover, and refrigerate overnight. Enjoy!
]]>