Okay, that was kind of harsh. But really, I don’t forget to wear green on purpose. I barely own anything green. I’m more of a black and gray kind of person with my clothing choices. That way, everything matches!
But with food? That’s a different story altogether. I love me some green food, and when there’s a holiday to be celebrated, that’s even better. These pistachio cookie cups are the perfect festive treat!

Let’s get back to the wardrobe for a minute, because I have often been mistaken for a vampire, thanks to my color choices. You see, I wear a lot of black. A lot. It’s partly because yes, it matches everything, but it also expresses my deep disapproval of winter and mourning for summer. Once the seasons change, the sundresses can come out of hiding!

Thanks to genetics and rigorous sunscreen usage, I have extremely pale skin. My students have accused me of being a vampire, and I don’t bother contradicting them. After all, fear can work to a teacher’s advantage. The contrast of very dark hair with my regularly ashen hue is definitely a motivator for the black clothing preference as well. It’s an exercise in contrast.
So yeah, when tomorrow rolls around, there will probably be no green. I won’t even pull out a green scarf because, nope, don’t have one. Or a pin. Does anyone in my generation wear pins anymore? They mainly serve to make holes in jackets.
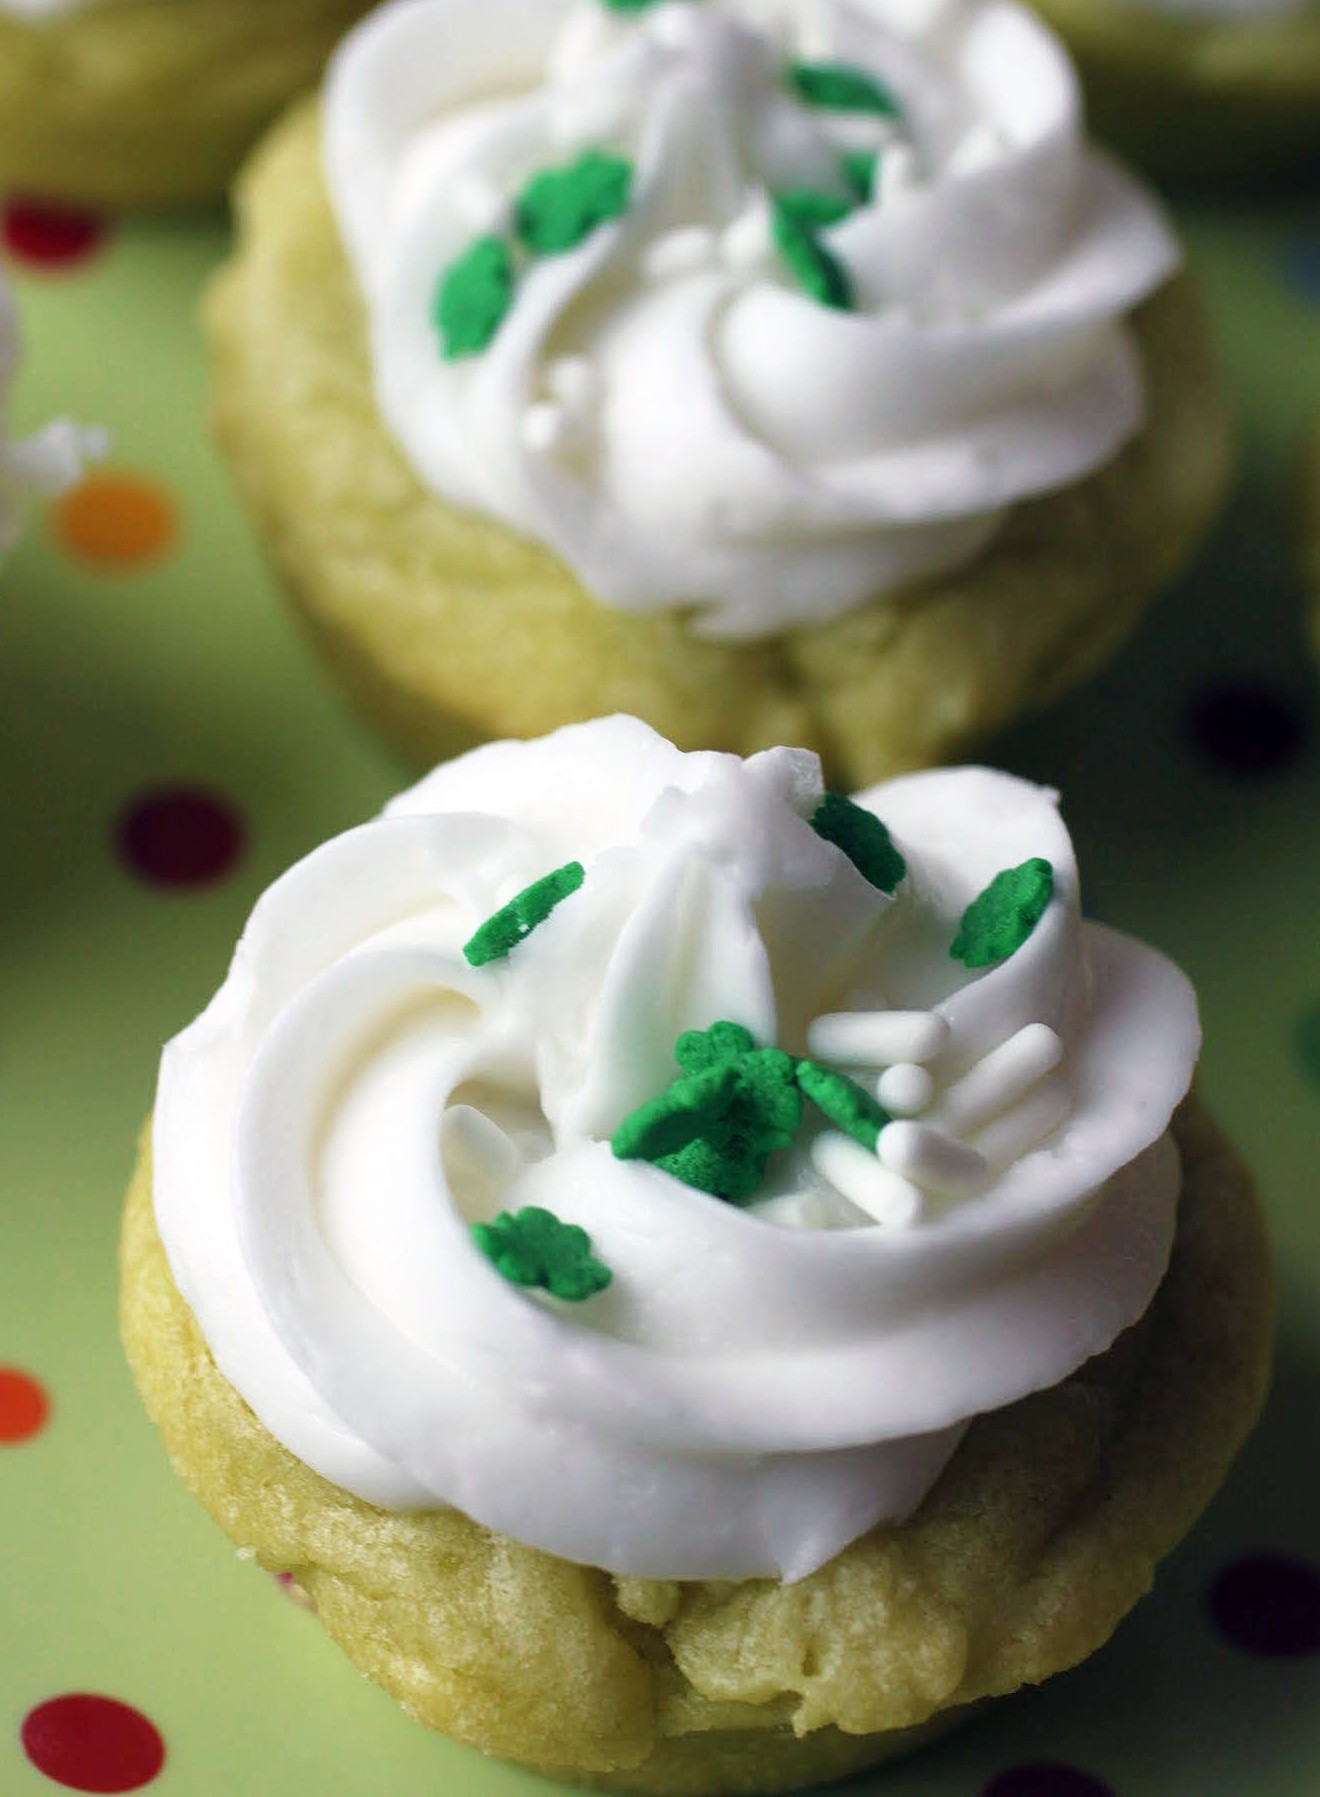
Here’s hoping that nobody pinches you come tomorrow if you forget your green. If you walk around armed with pistachio cookie cups, they’ll like you too much to hurt you!
These are so easy to make. The base is a yellow cake mix, to which you add pistachio pudding mix and other basic ingredients. Then you bake them in mini-muffin molds and frost. Watch how easy this is to do!
I told ya. Easy. If you head to the store after work, these will be done in less than an hour. In the recipe, I use bought frosting to speed things up. You could use the kind that comes in tubs, or you could do my favorite hack, which is to buy a container of vanilla frosting from your favorite local bakery.
Happy St. Patrick’s Day to all. May it be a pinch-free day full of fun, laughter, and green food!
Ingredients
Instructions
- Preheat the oven to 350. Coat a mini-muffin pan with cooking spray. Set aside.
- In a bowl, combine the first five ingredients. Mix well until a dough forms.
- Spoon the dough into the prepared muffin pan. Bake for 10-12 minutes until set and golden at the edges. Cool completely.
- When the cookie cups are cool, mix the almond extract into the frosting. Using a star tip, pipe swirls onto the cookie cups. Add sprinkles. Allow the frosting to set.
- Store in an airtight container.
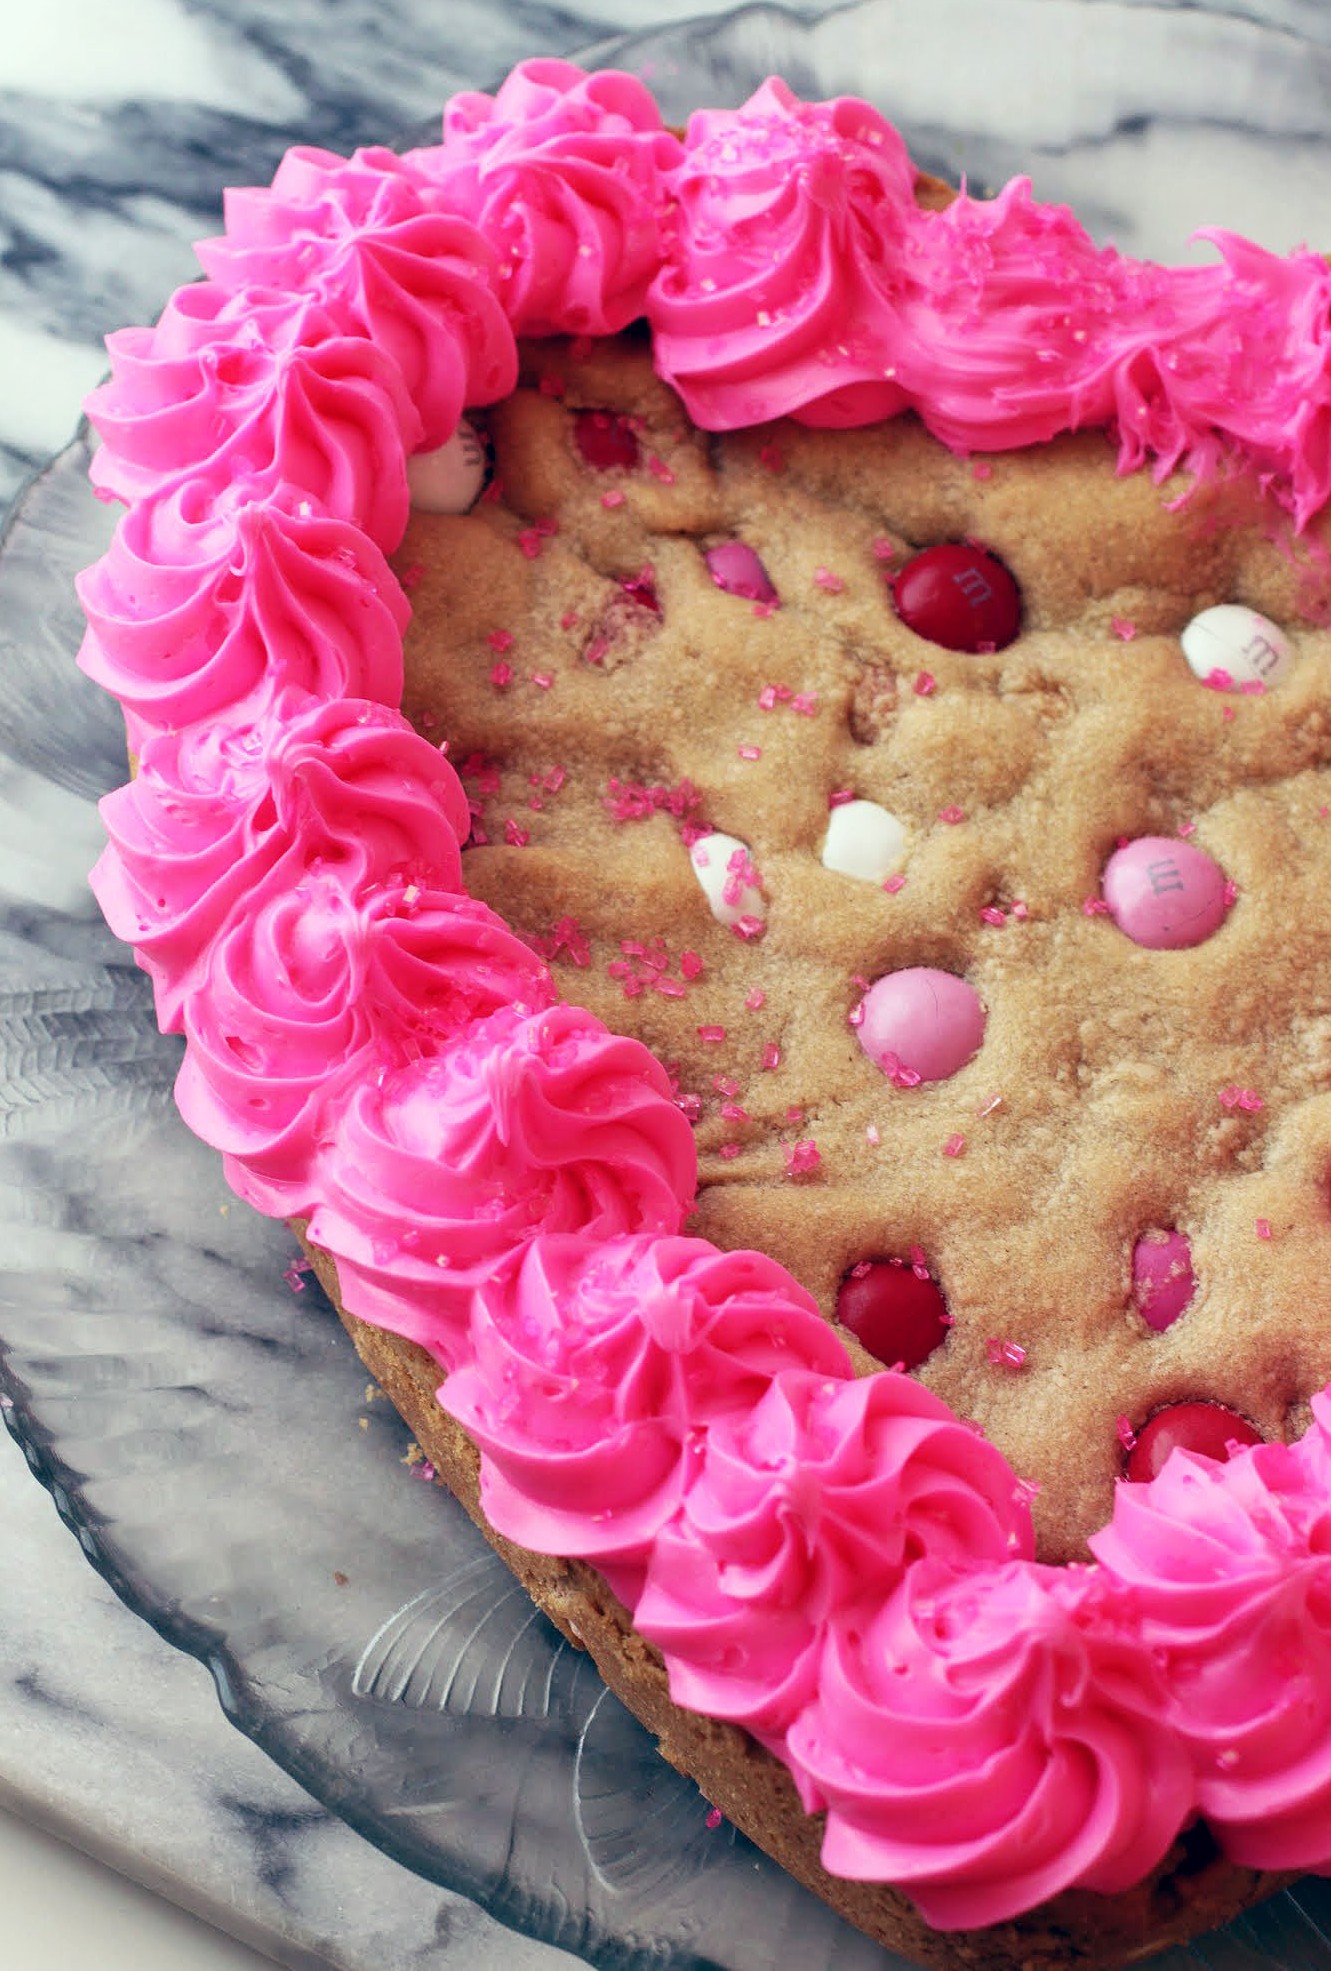
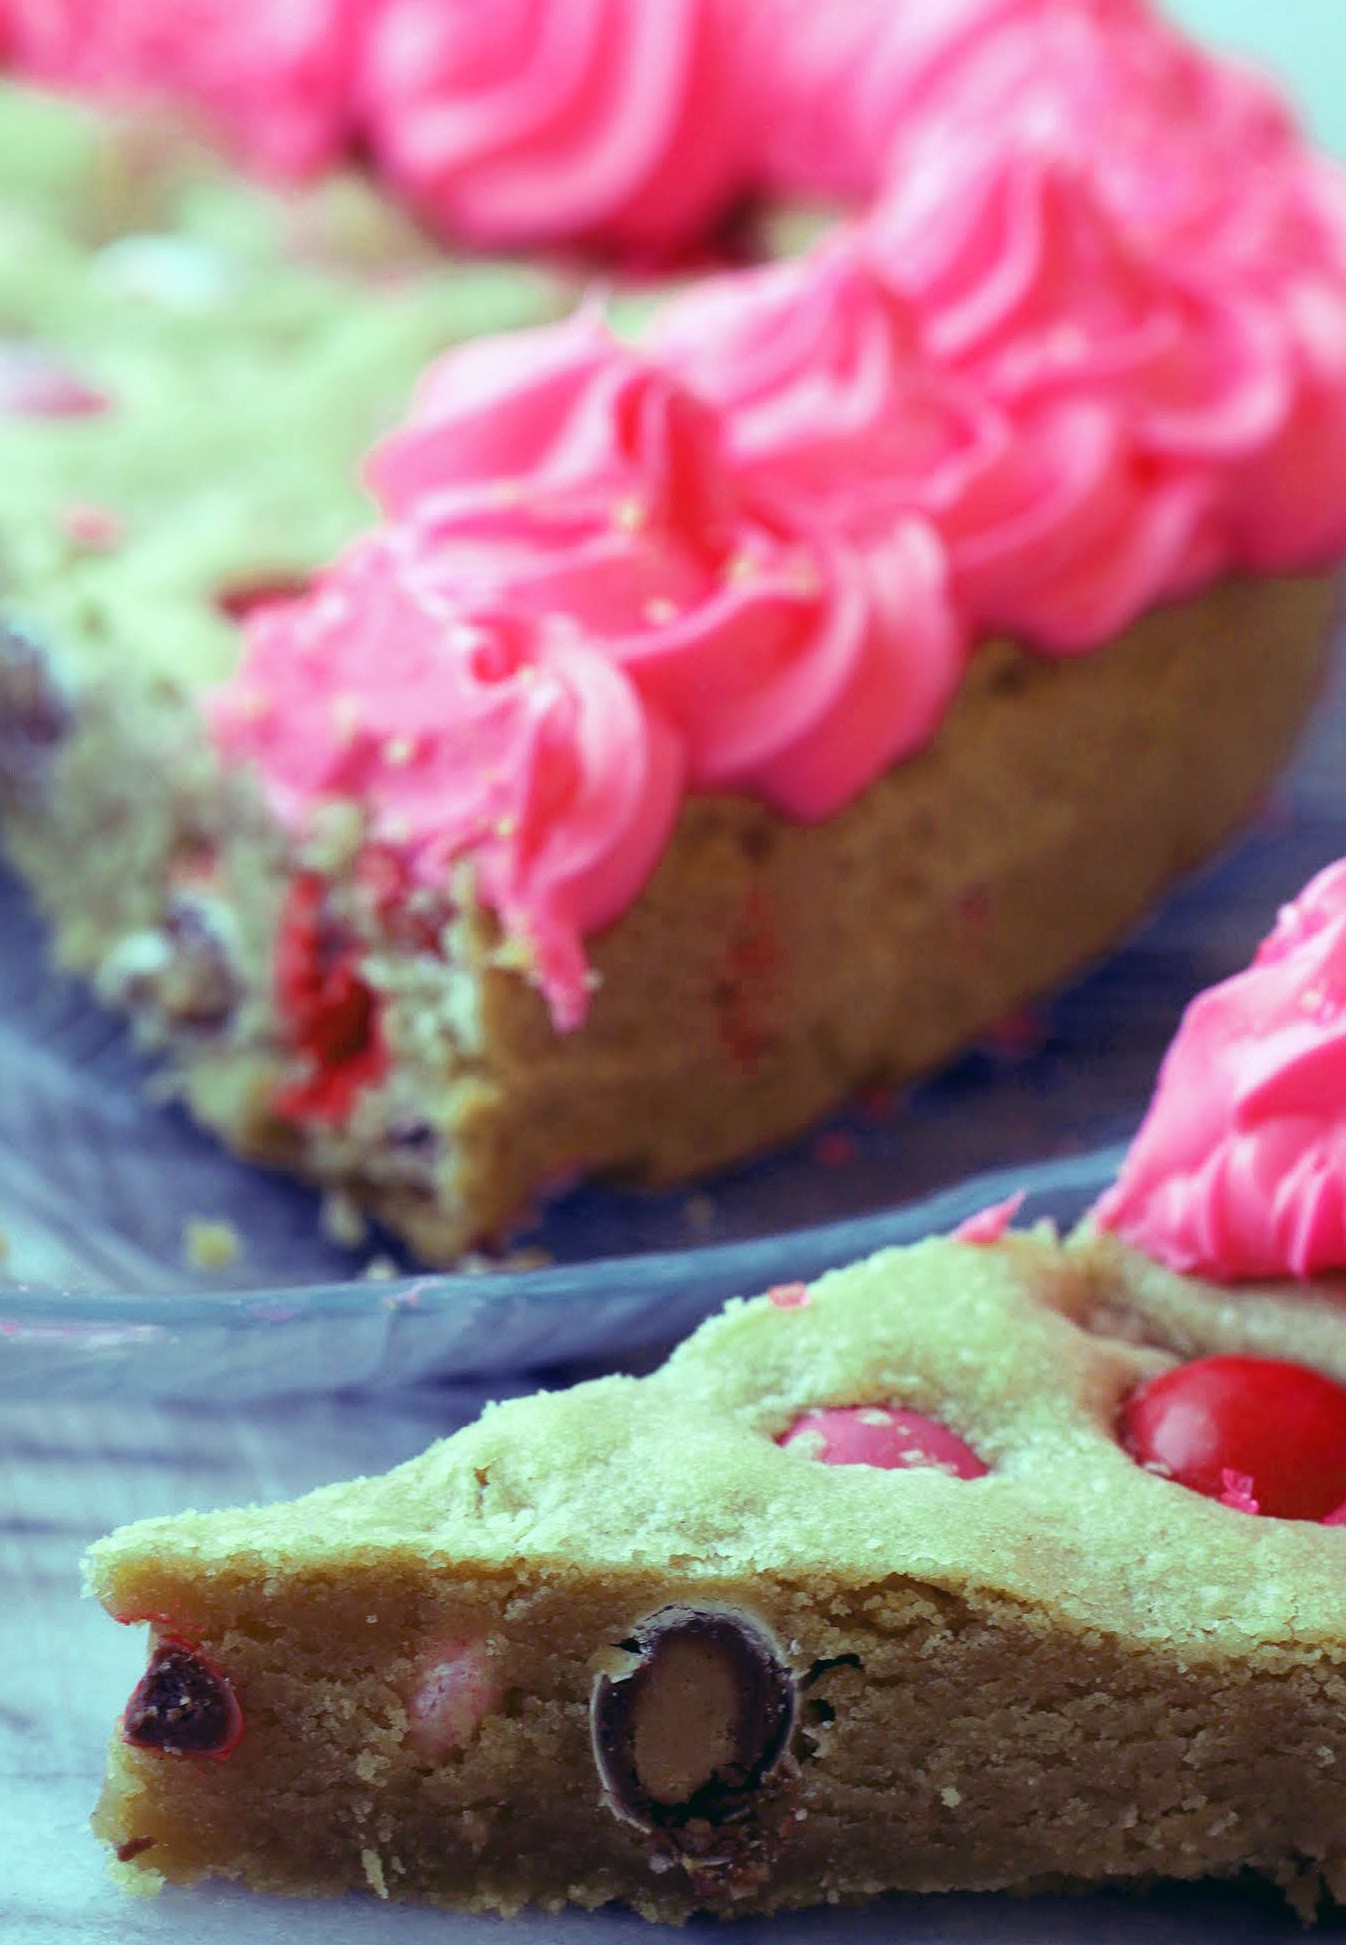
If I had to decide what to bake somebody on Valentine’s Day, which I don’t (see below), I’d definitely go for cookie cake. It’s easy and fast, but it just oozes love and chewy delight.
This year for Valentine’s Day, Kenny is getting chocolate and a book. I’ve done enough baking leading up to this heart-shaped day, and we need no more. You feel me? #foodbloggerproblems
Over the course of my not crazy long life, I’ve heard phrases and expressions come and go. One of the more recent (and a growing irritant for me) is the term “conversational snow.” It refers to snow that falls but doesn’t stick anywhere. It’s what I would call “pointless snow,” or if I’m in a better mood, “pretty snow.” After all, it’s a lot more fun to drive home in a light snowfall that isn’t accumulating than in a driving rain.
Another expression that continues to gain momentum? “It is what it is.” I know several people who can’t stand this particular turn of phrase, but it doesn’t bother me that much. After all, how else would you describe something that just cannot be changed?
But I’ll tell you what I can’t stand: “I don’t know what to tell you.” What does that even mean? You say that to someone when they have a problem and there’s no solution, but not much is more frustrating to hear. It’s like an admission of failure.
And finally, nobody likes it when someone says, “That’s the way the cookie crumbles.” Not only is it a stupid expression, but everyone knows that good cookies do not crumble. That’s just a bad cookie.
What is magical is the perfect cookie cake. They sure as heck don’t crumble, and they’re fantastic. On the spectrum of sweets to give your sweetie, this one ranks high.
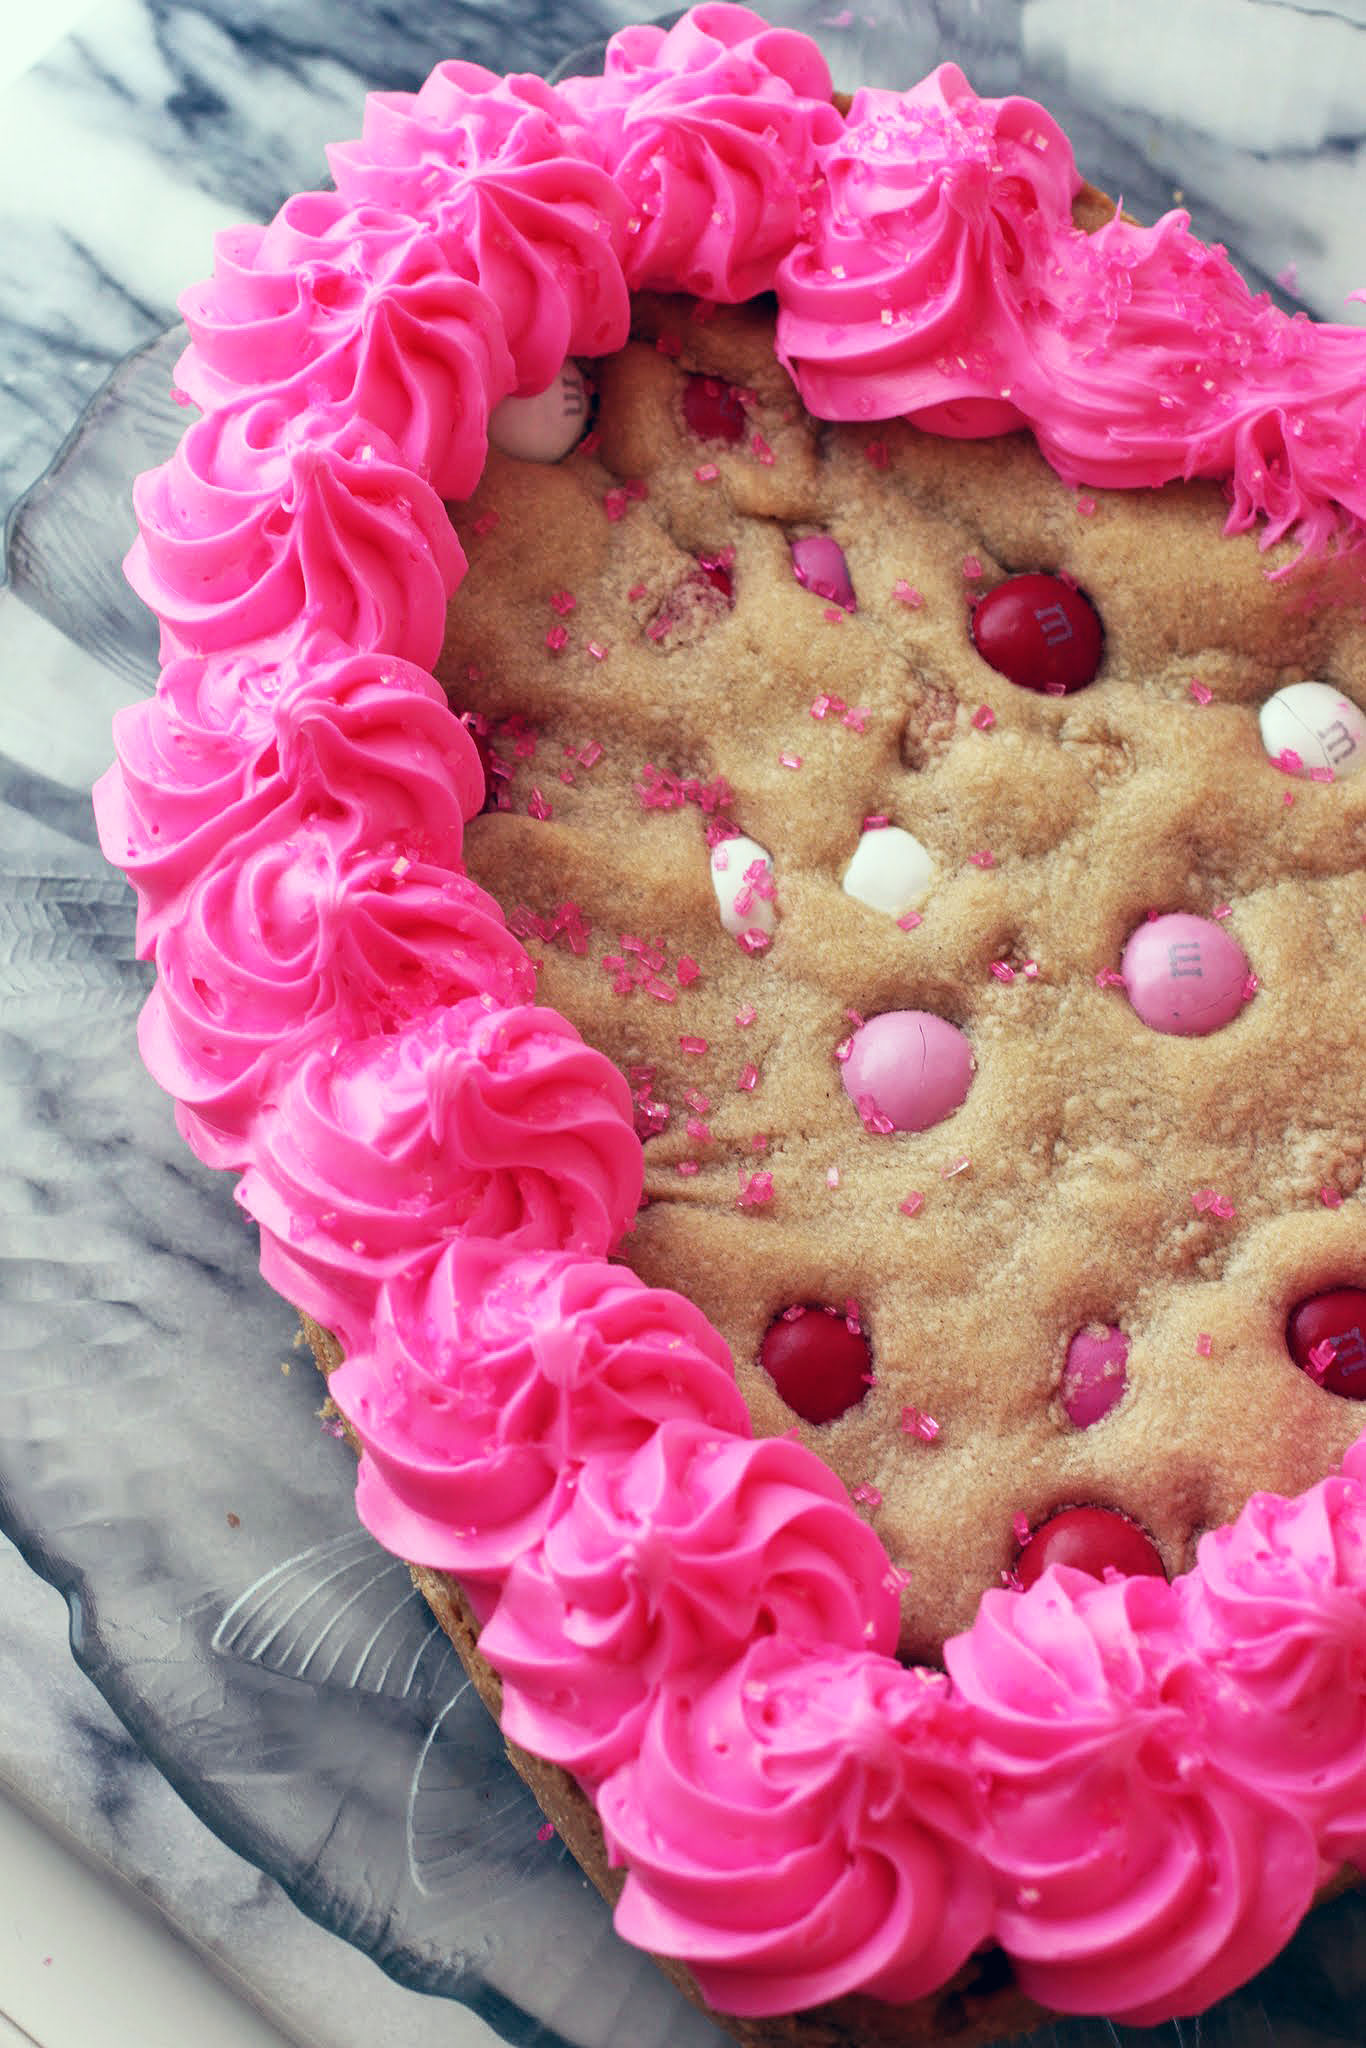
It’s a peanut butter cookie, of course. But even better, it’s filled with delightful peanut butter M & Ms and piped with hot pink frosting. Let the good times roll, everyone!
The only expression I want to hear this weekend is “I love you.” Over and over. Other than that, all the cliched phrases and conversational snow can just go away. Give me a snowstorm and a cookie cake and we’re in good territory!
Ingredients
Instructions
- Preheat the oven to 350. Line a heart-shaped pan with parchment paper cut to fit the bottom and coat with cooking spray. Set aside.
- In the bowl of a stand mixer, beat the eggs, butter, peanut butter, vanilla, brown sugar and sugar until creamy.
- Add the dry ingredients and mix until just combined. Mix in most of the M & Ms, reserving a few for the top.
- Press the cookie dough into the prepared pan and place a few extra M & Ms on top for aesthetics if desired. Bake the cookie cake for 25-30 minutes until set. Cool.
- When the cookie cake is completely cool, carefully remove it from the pan and place on a plate or tray.
- In a medium bowl, mix the food coloring into frosting until the desired shade of pink comes out. Using a star tip, pipe a border around the cookie cake and cover with sugar sprinkles.
- Slice into wedges and serve. Store in an airtight container.
]]>
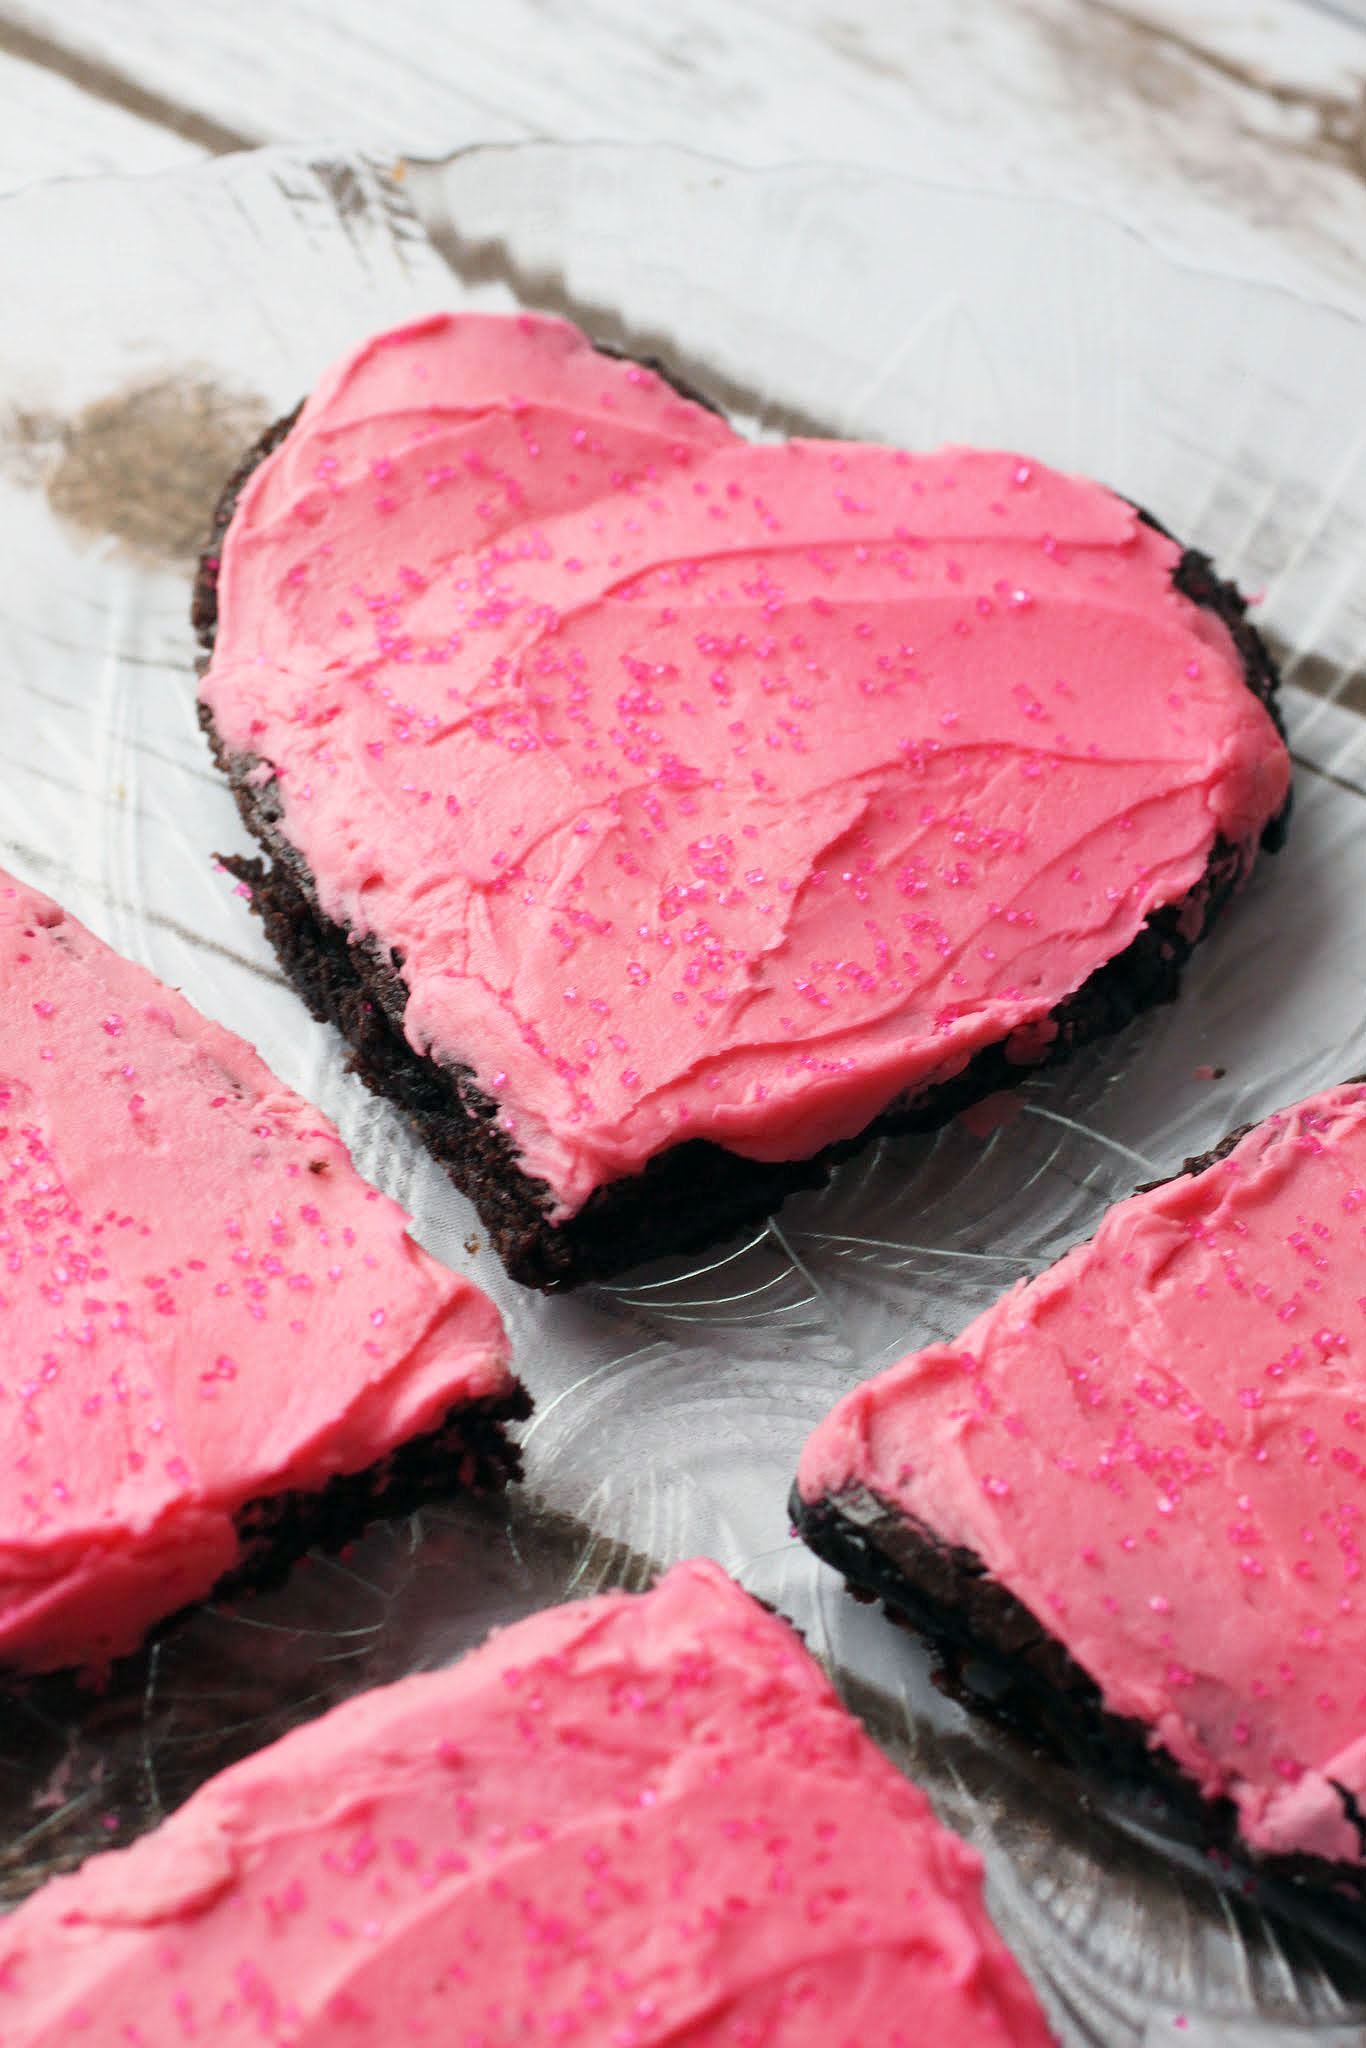
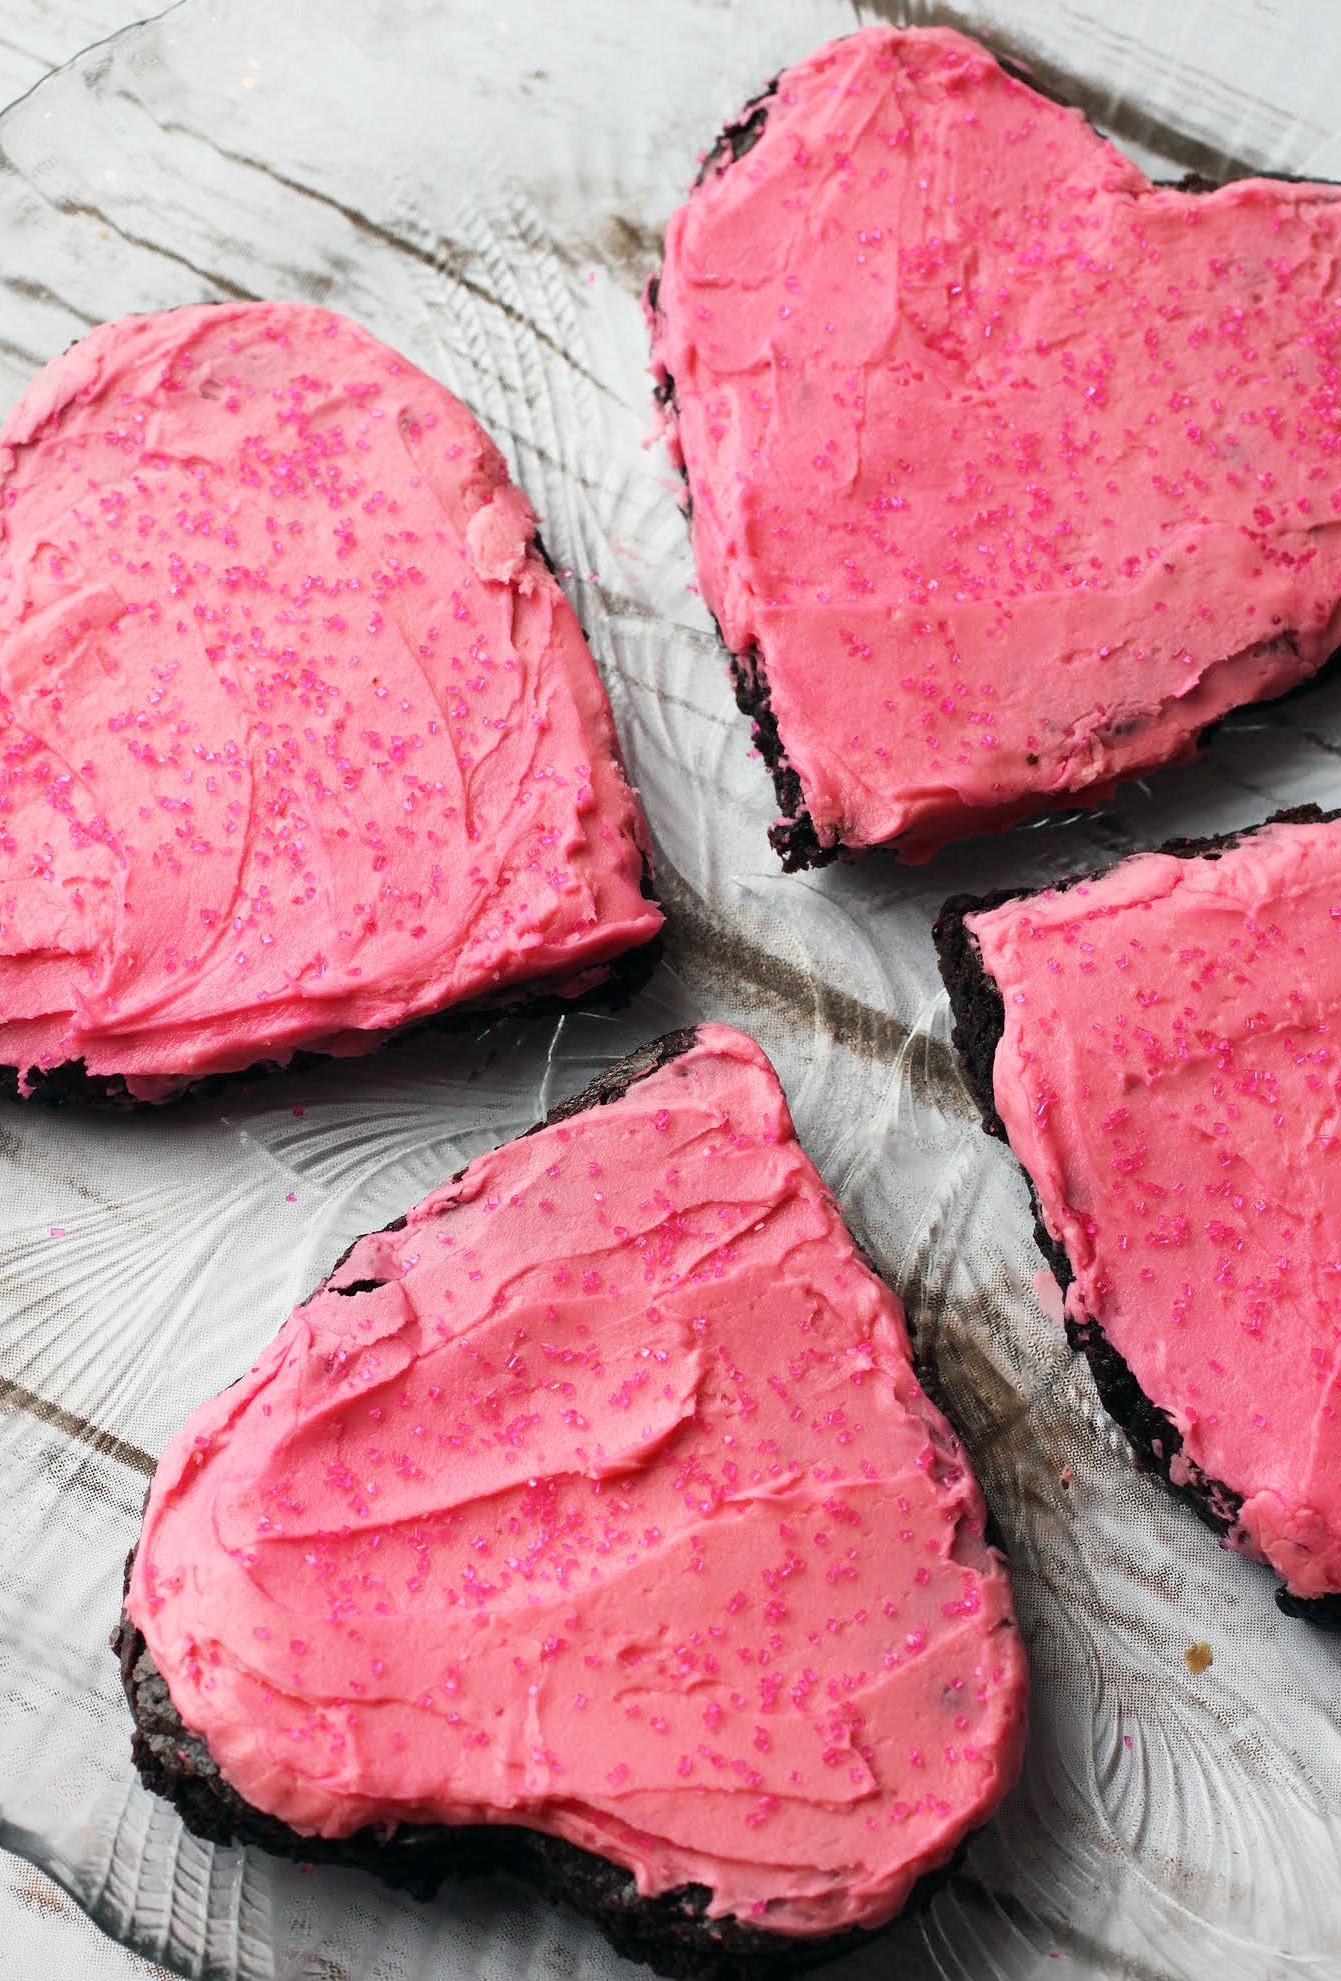
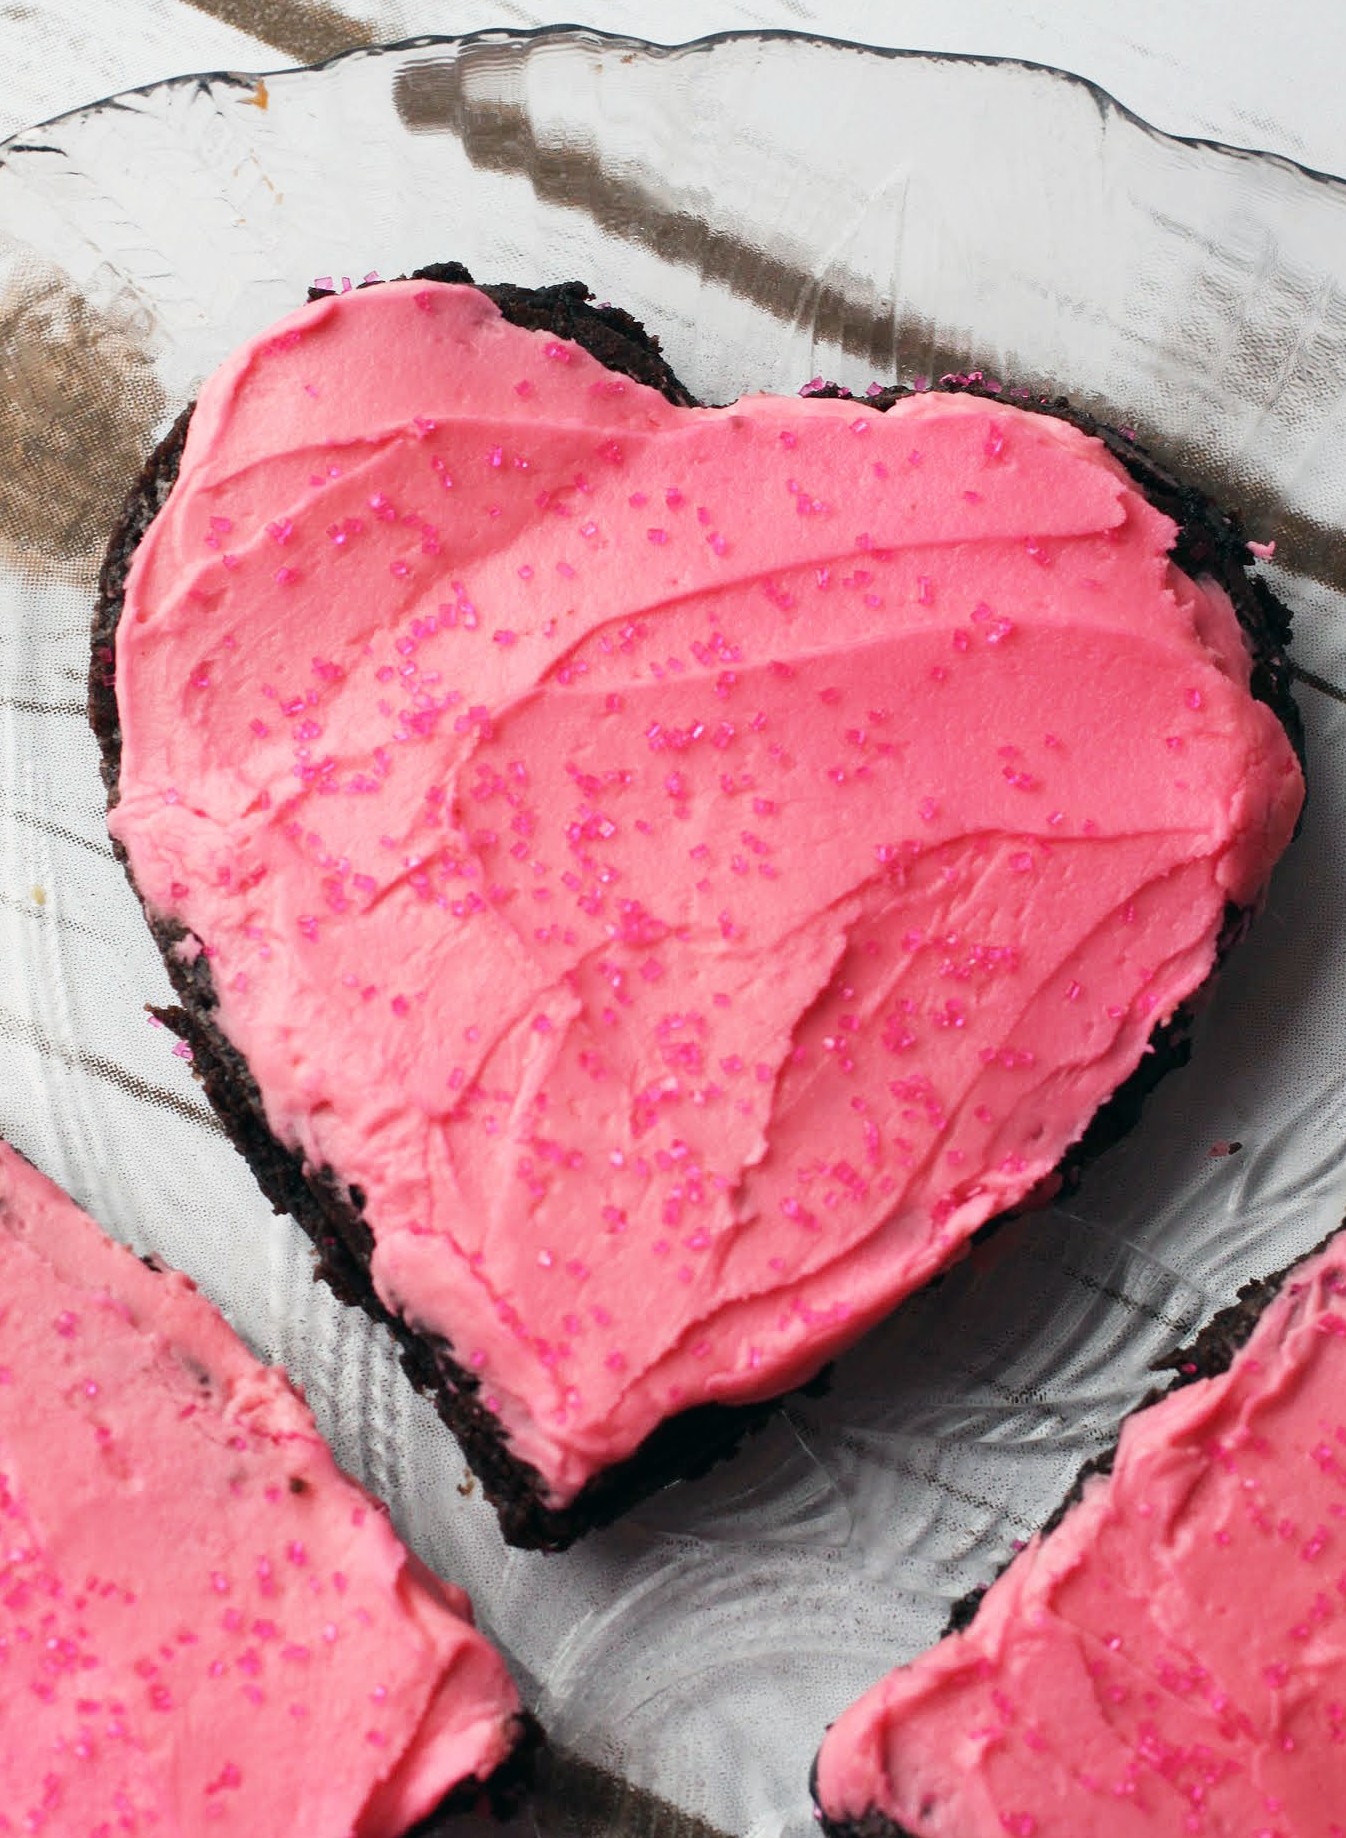
A lot of people make adorable sugar cookies iced beautifully for holidays, but I prefer a brownie to a cookie. So why not do these cutouts instead? Plus, you can eat all the brownie scraps that are leftover from the heart cutouts. It’s a perfect snack!
Has anyone else thought about how ironic it is that a month dedicated to eating healthfully is followed by a month all about chocolate? But hey, I’m not complaining.
There are much better sources for complaint at my local grocery store. Lines that are too long at checkout. Snow that doesn’t get cleared properly from the parking lot. People who bring more than 10 items into the express lane. People who leave their carts in parking spaces instead of returning them. Food products on the shelf for sale at half-price that are actually expired. Is that even legal?
How about we take some action and change things? One day Kenny got so exasperated at the expired cheese being sold that he threw it all into a box lying on the ground and gave it to the store manager. But that’s the only form of resistance I’ve seen.
How many of you have schooled someone in the express lane with too many items? If you have, tell me. And has anyone ever caught anyone else in the act of leaving a cart in a parking lot? That is such a pet peeve of mine!
What are your grocery store pet peeves? I want to know!
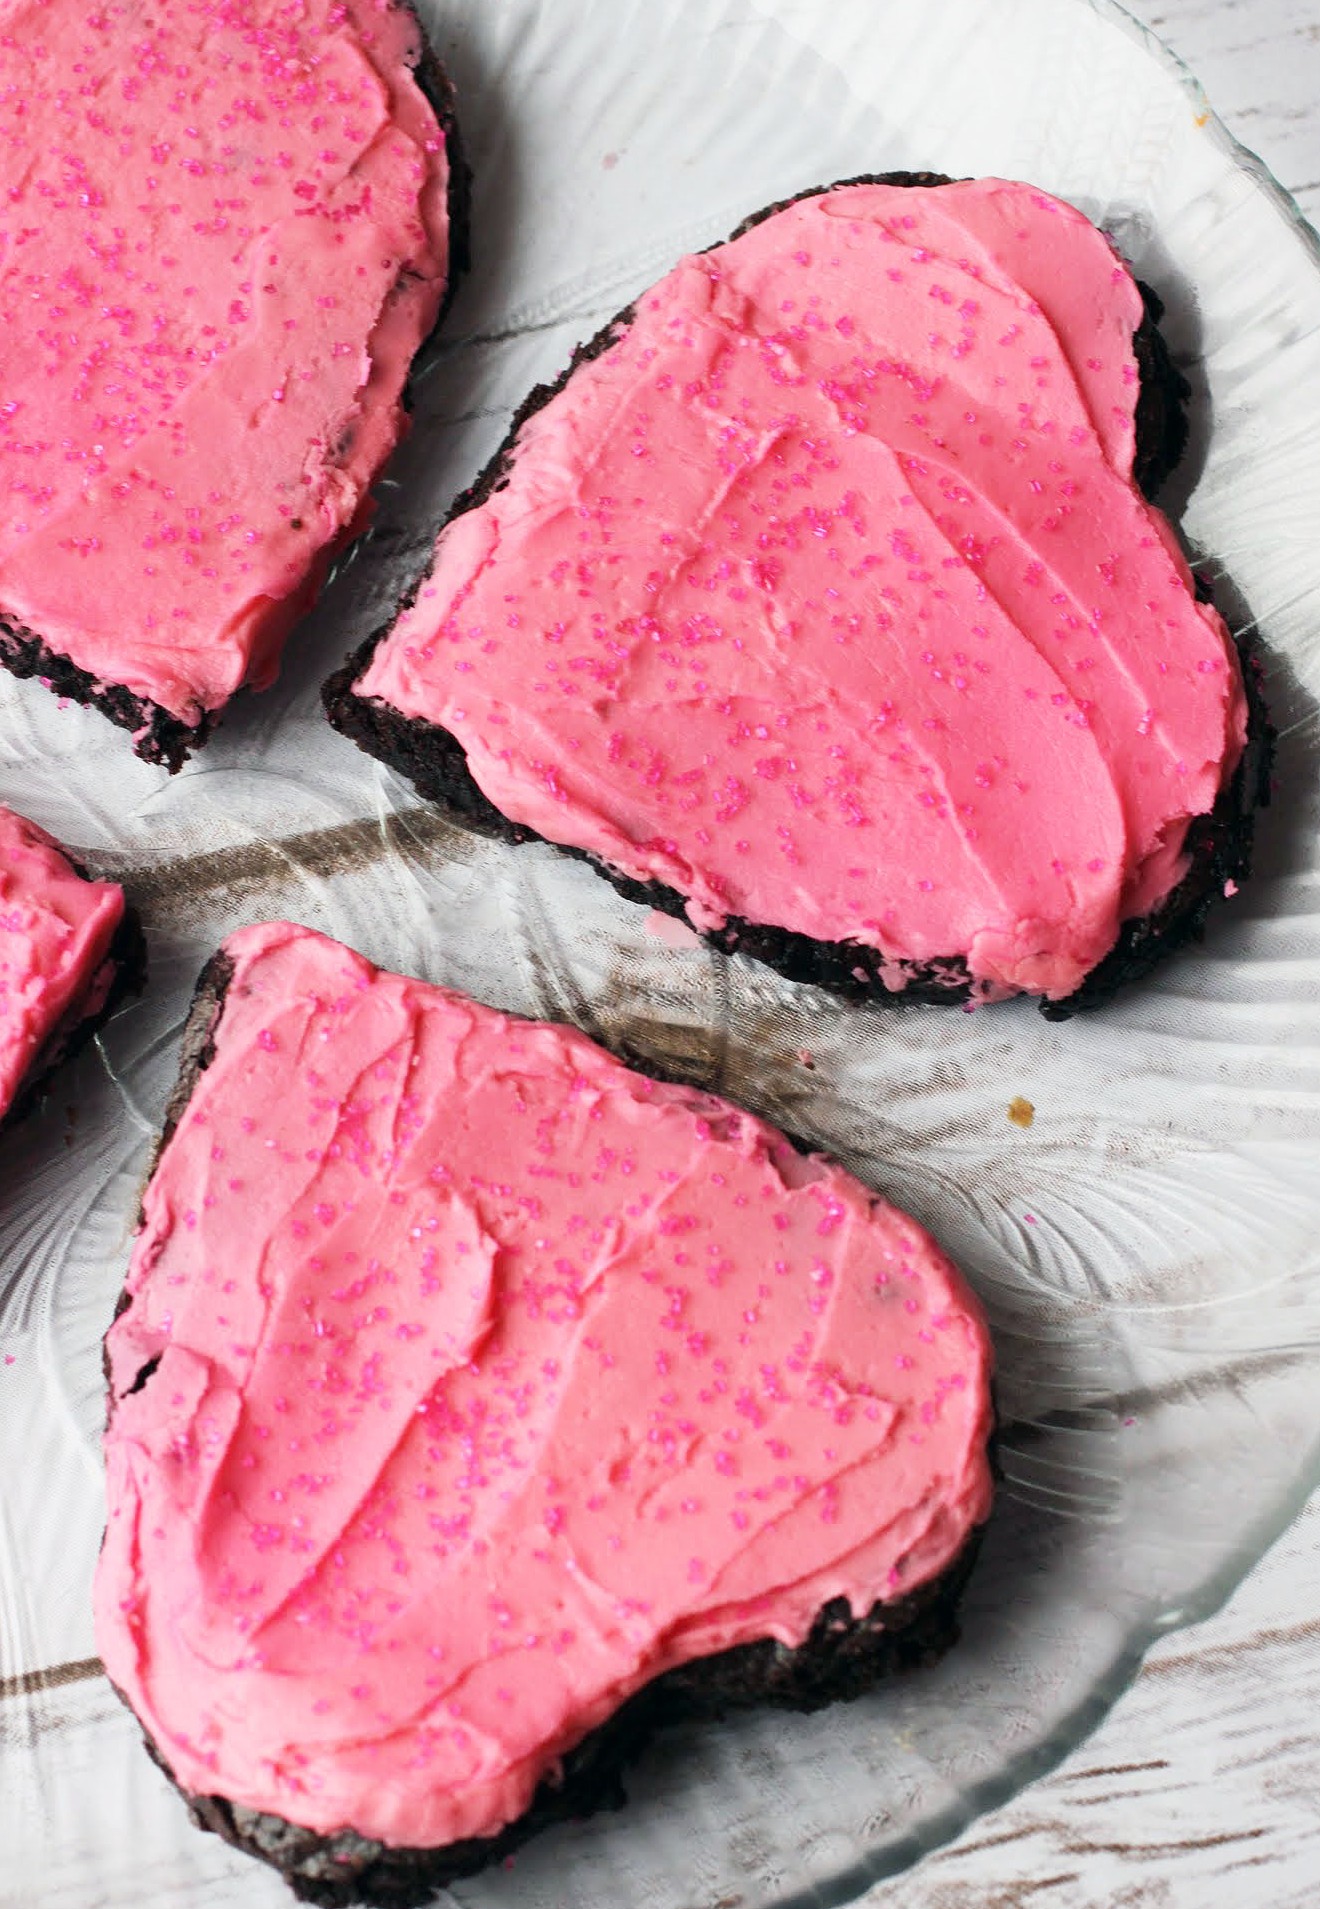
At least the stores have food, which we can use to bake lovely brownie heart cutouts. They’re a snap to make and a huge success, especially with kids. You can even make them with kids. I used my trusty brownie base, but you can also use a mix. It’s simple!
While you’re out there hassling with pet peeves, just look forward to the food you’re coming home to. And if you see grocery store injustice, fight back!
Ingredients
Instructions
- Preheat the oven to 350. Line a 9 x 13 pan with foil and coat with cooking spray. Set aside.
- Melt the butter in the microwave and then stir in the cocoa until it dissolves completely. Add the sugar and stir until combined. Then, add the eggs and vanilla, and stir again until the mixture is smooth. Finally, add the salt and flour and mix again.
- Pour the brownie batter into the prepared pan and bake for 25-30 minutes until the brownies are set. Cool completely.
- When the brownies are cool, mix the red gel food coloring into the vanilla frosting until your desired shade of pink comes forth.
- Using a heart cookie cutter, cut out the heart shapes and place the hearts onto a sheet of wax or parchment paper. Frost the brownie cutouts and add sprinkles.
- Allow the frosting to set. Store covered.
]]>
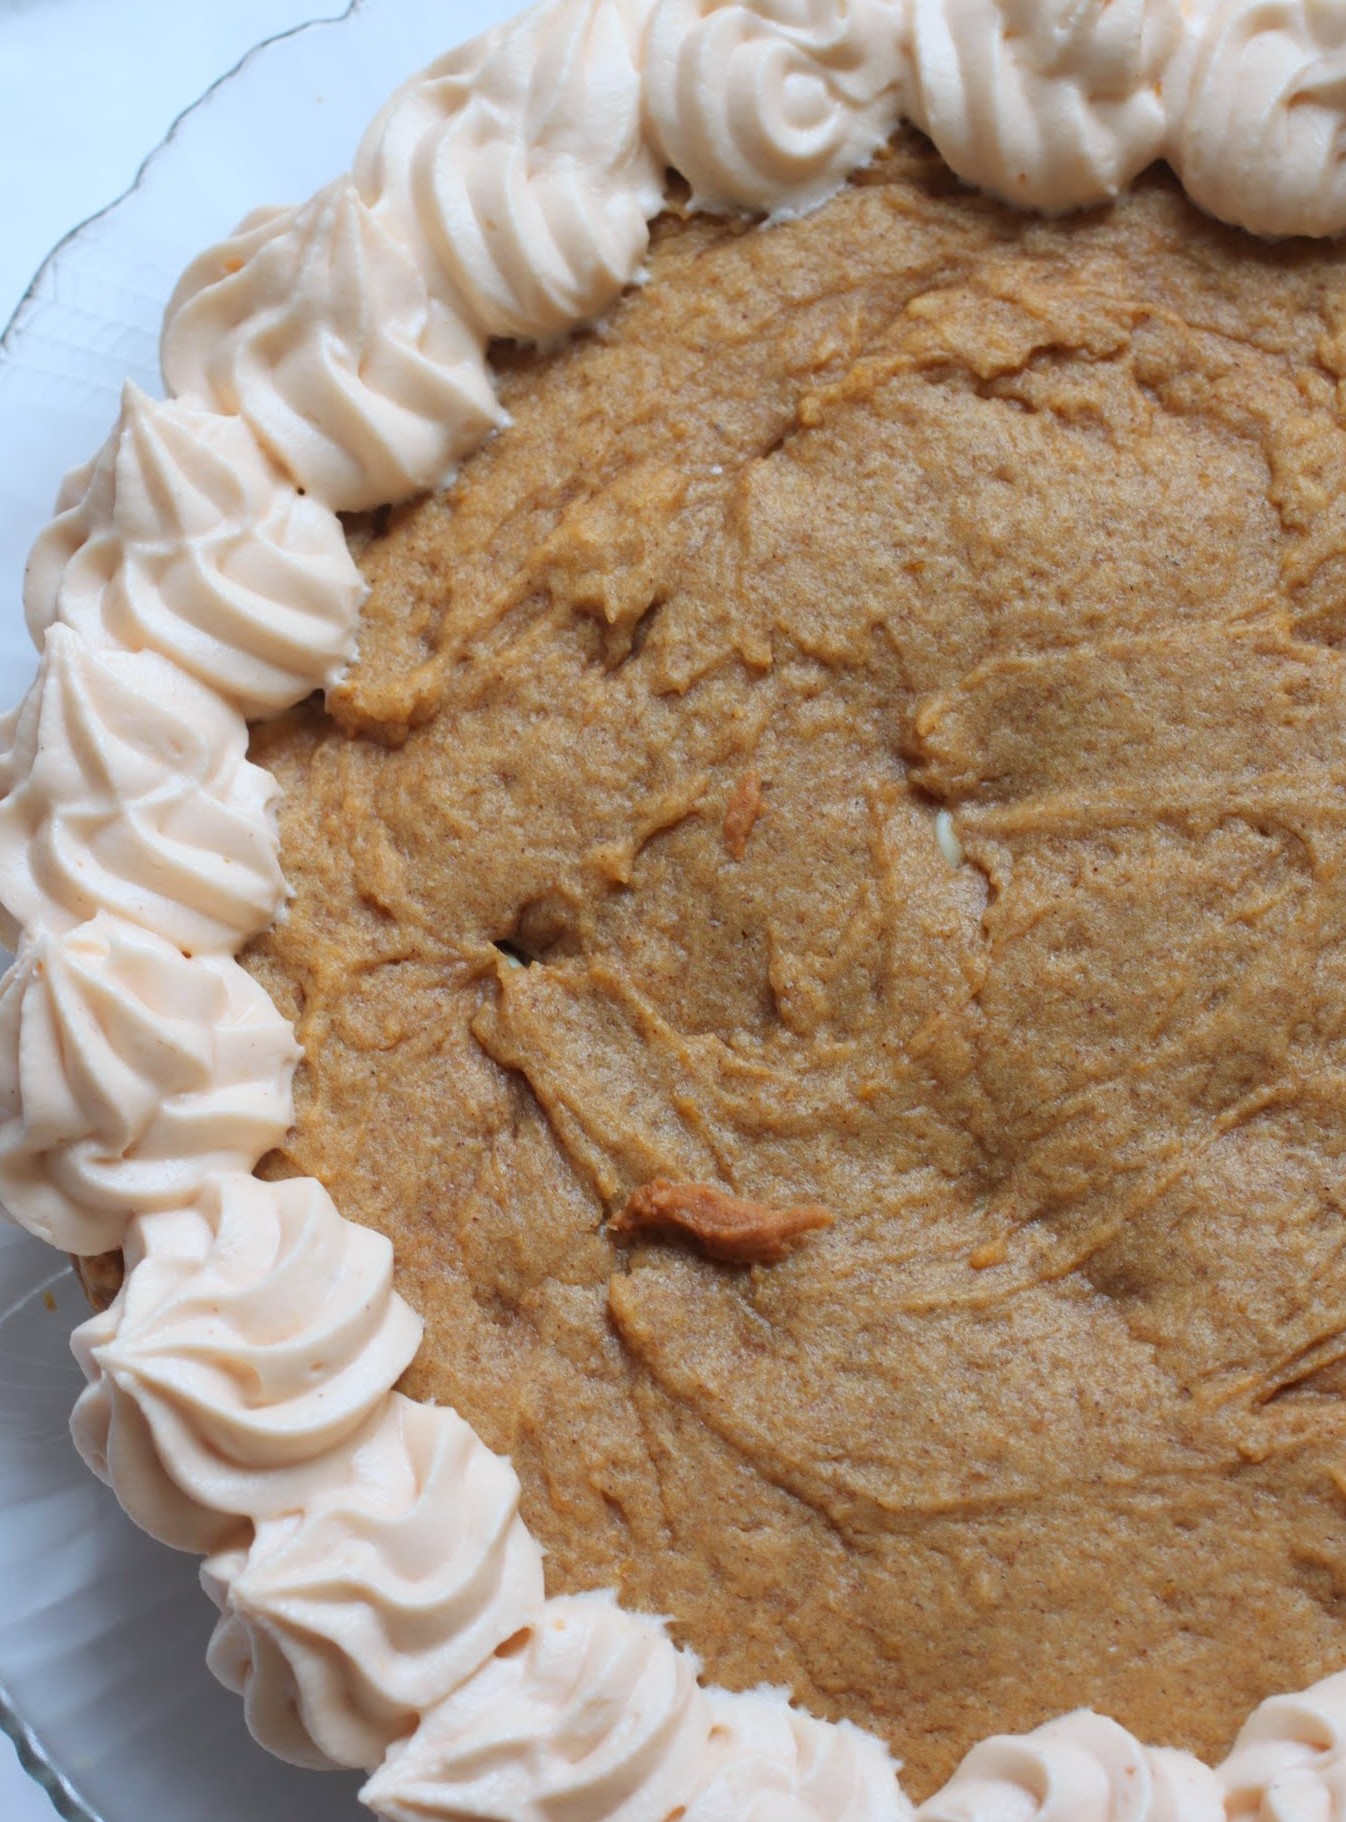
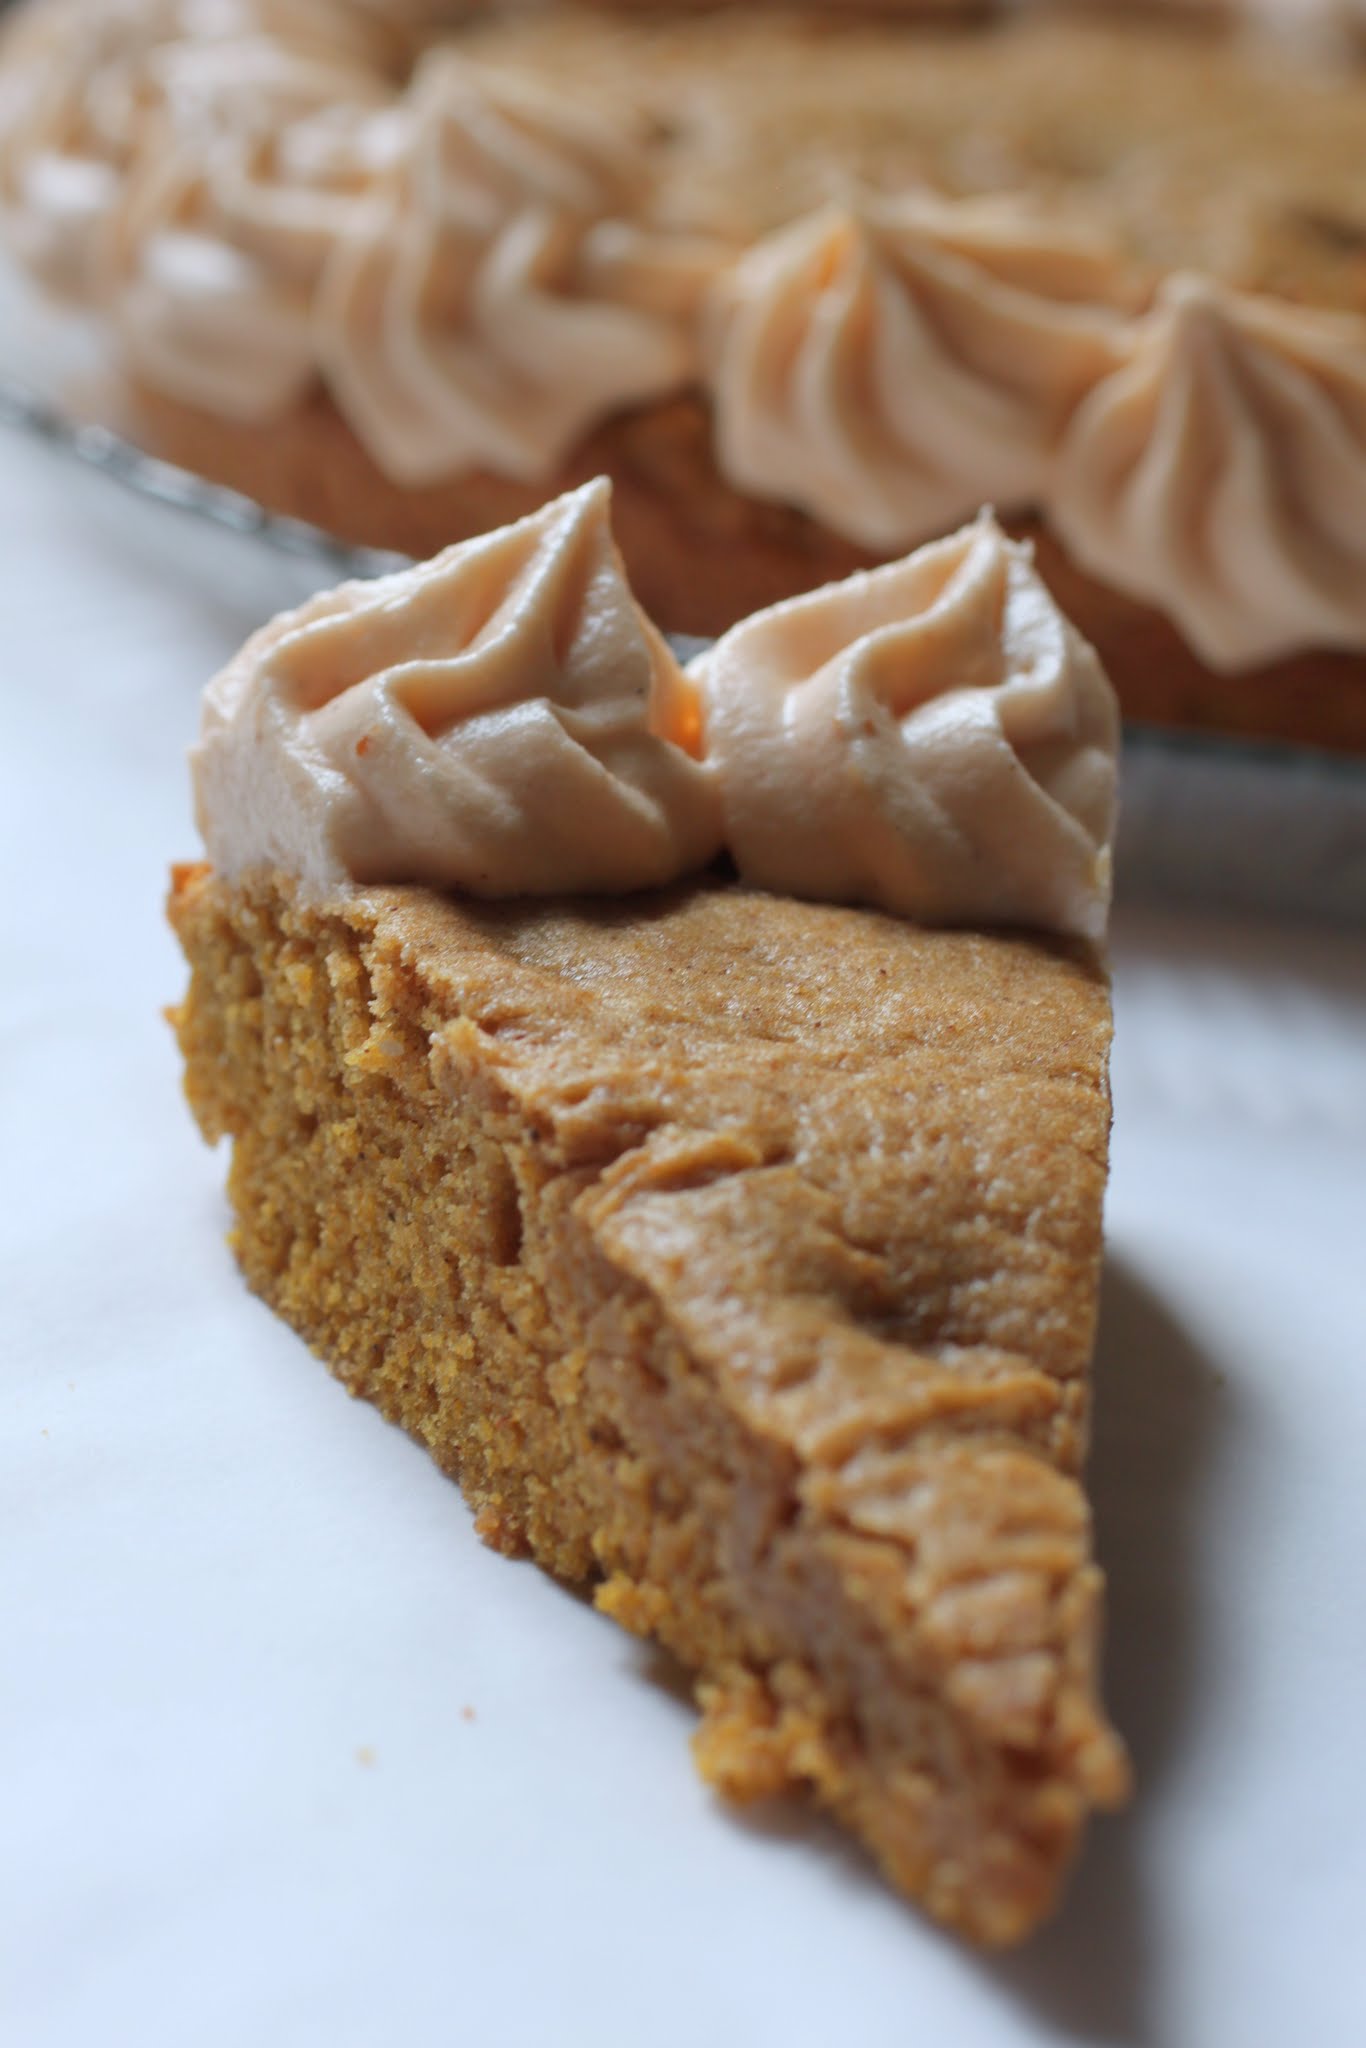
It’s a pumpkin cookie cake, yep. But it also has delightful pumpkin spice cream cheese frosting. It doesn’t get much better than this. Unless somebody happens to have a jet ski handy, because that’s on my bucket list.
Cookie cakes are so superior to plain old cookies. Think about it: no dough chilling time, nice big wedges to dig into, and frosting. Why do you think those cookie cakes at the grocery store always look so tempting?
Actually, everything at the grocery store looks tempting. You know that whole “don’t shop when you’re hungry” thing people tell you? Yeah, thanks. Why do people go to the grocery store? To get food. Because we ran out. So how in holy heck are we supposed to eat before we go? It’s a totally unreasonable expectation. Plus, I enjoy my drool time in the bakery section. Don’t take that away from me.
I’m sure a lot of advice out there is good, but it doesn’t translate practically. For instance, as a woman above 35, I’ve been told to drink a glass of water before all my meals to curb my hunger. But first of all, well, I’m hungry. I wanna eat now. And even if I think ahead and chug my water 30 minutes before a meal, I have to hit the bathroom by the time the meal rolls around. And I’m often teaching classes, so I can’t hydrate and then leave my kids to rush off to the loo. It just doesn’t work that way.
Another common piece of advice is to sleep eight hours every night. Yeah, right. Assuming I get to bed with eight hours of lead time, something will mess it up. One of my kids will wake me up, or my husband will accidentally roll over me (he’s a restless sleeper), or I’ll have to use the bathroom, or a crazy thunderstorm will hit. And then, I’m up. It’s impossible to go back to sleep, because then the mind race begins. If you’re a woman, you know what I’m talking about. The to-do list begins to build until it reaches a fever pitch, and then you’re there, in the dark, staring at the ceiling and counting the bazillions of things you have to do the next day. Eight hours of sleep, my a$$.

Any more wise nuggets out there that really don’t work? Let me know. We can make a whole list and make fun of all the stupid advice out there. Then we can print it out and burn it.
Too far, huh? Sometimes I cross that line. Ahem. Back to cookie cake.
One piece of advice that will never be bad? Eat dessert. Especially if it’s a pumpkin cookie cake blinged out in pumpkin spice cream cheese frosting.
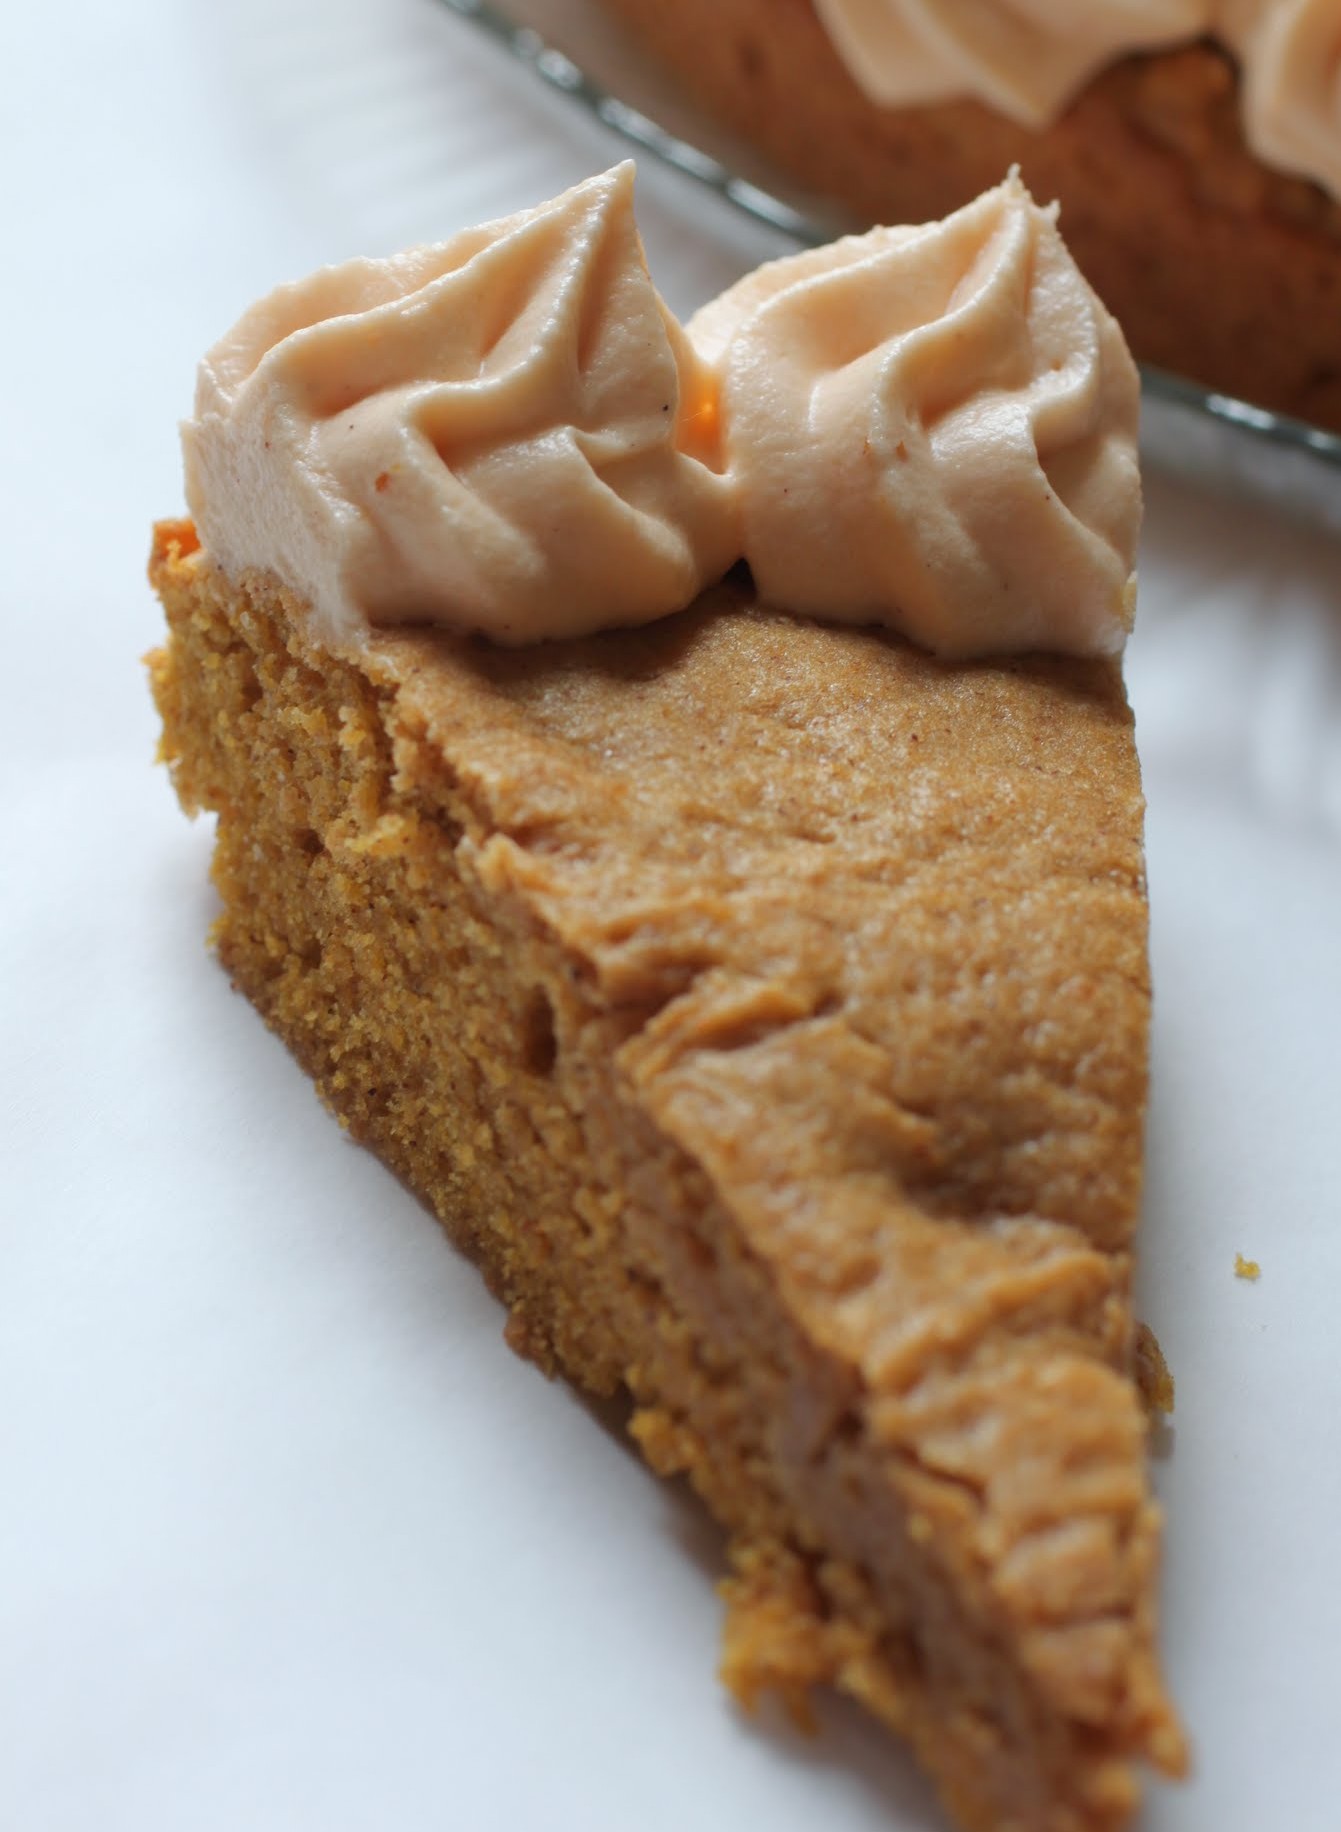
I got the pumpkin spice cream cheese a month ago at the grocery store (Philadelphia makes it) when I was, of course, hungry. All I knew as I grabbed the tub of cream cheese was that it would come in pretty handy sooner or later. And here we are. If you love cream cheese frosting, you’re going to love the pumpkin spice kind even more.
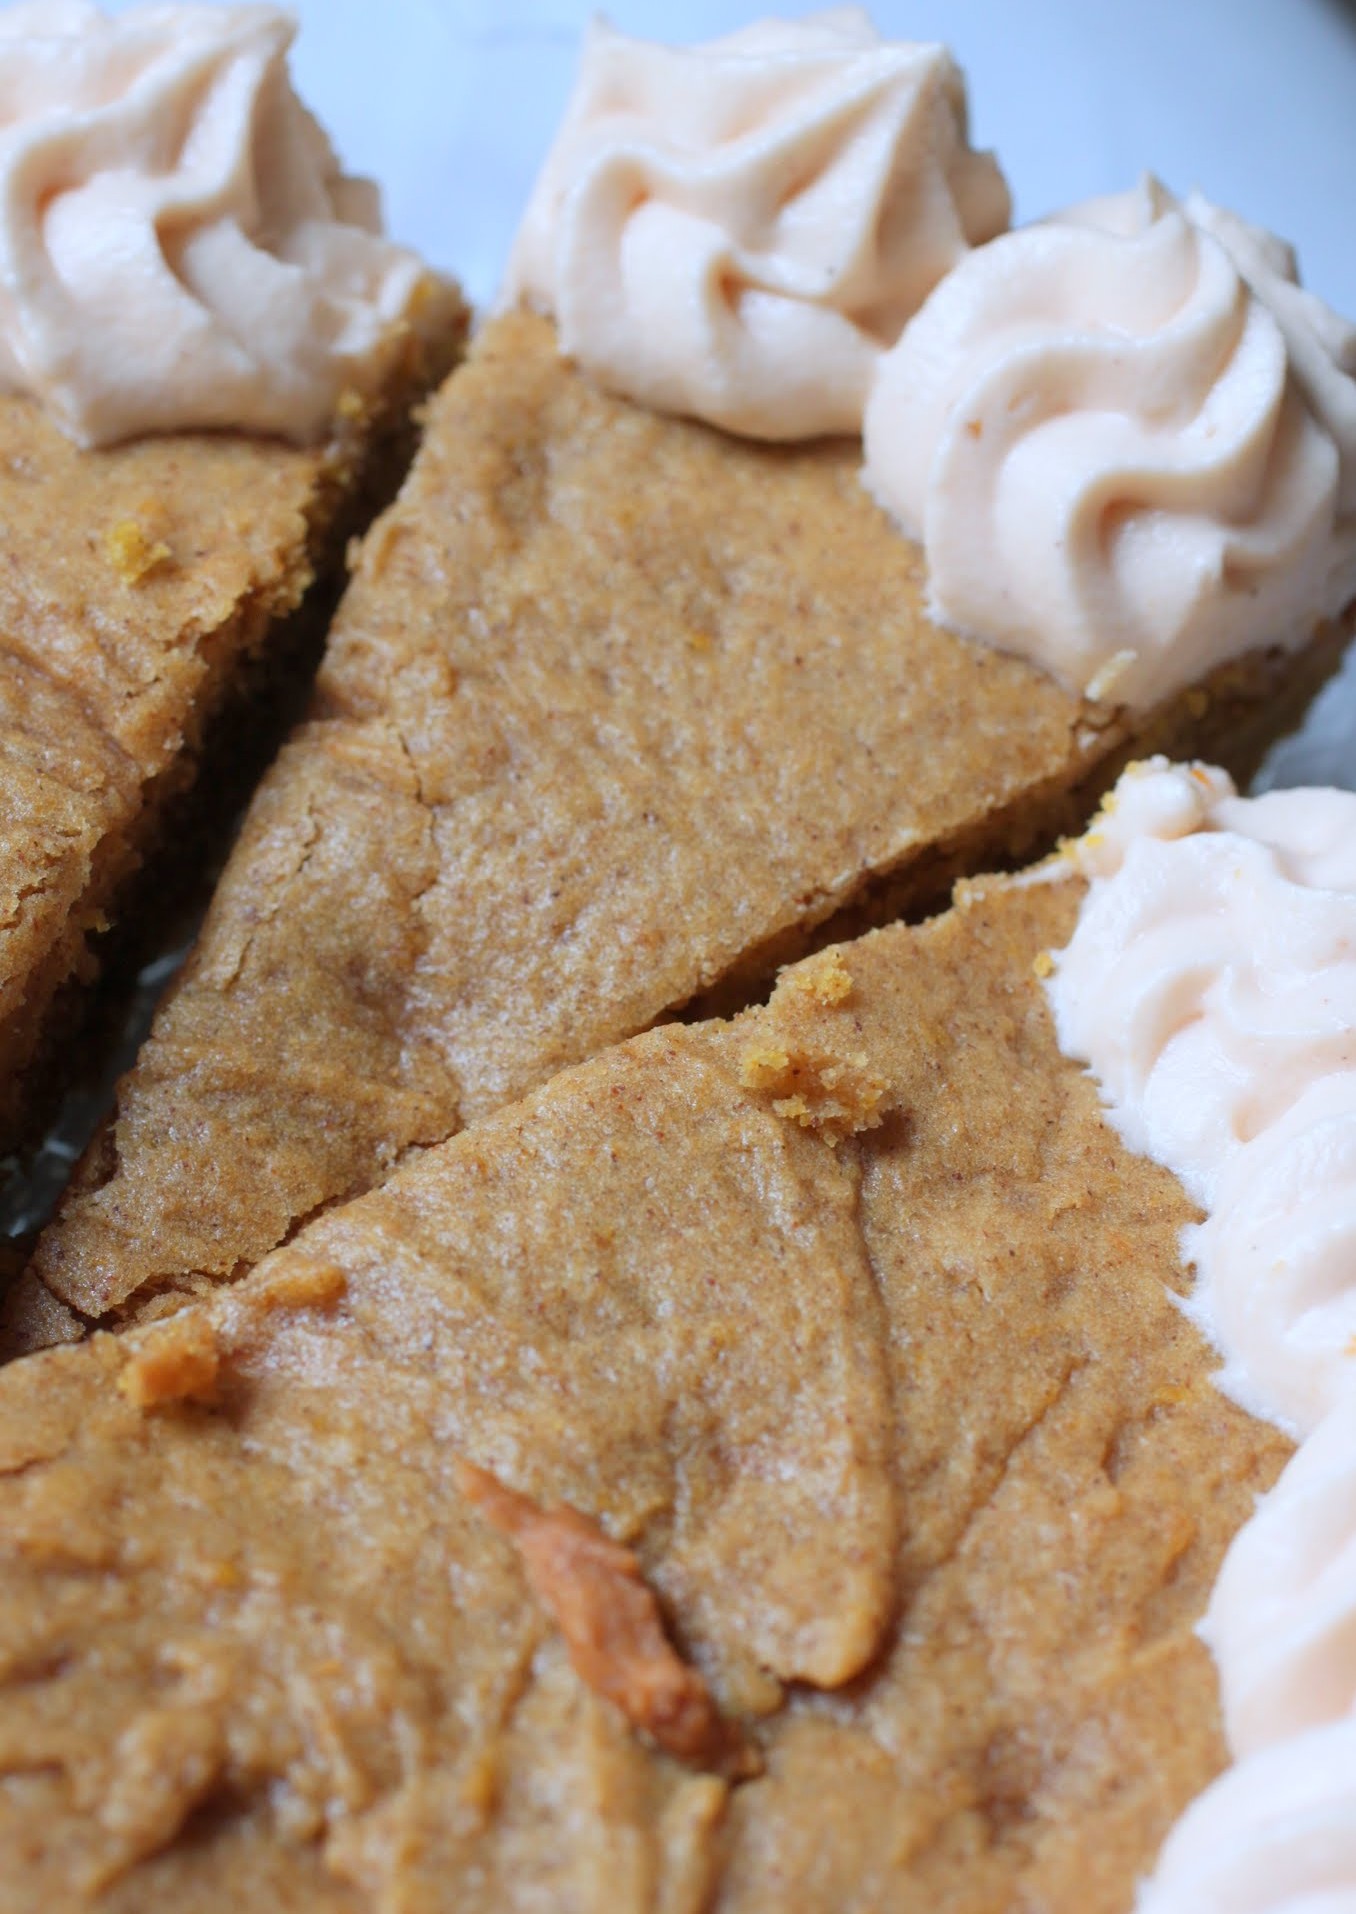
The cookie cake itself is a perfect use for pumpkin cookie dough. You see, because of a high moisture content in the pumpkin, pumpkin cookies never work out if you add eggs. The dough gets too cakey. So yeah, you can eat the dough off your beaters, but more important, this recipe makes for a fantastically dense cookie cake experience. You’ll enjoy it, I promise. And white chocolate chips can never hurt, either, so in they go!
Believe me, I’m the last person to be giving advice, and I’m also not so good at taking it. But some pieces of advice are easier to swallow than others, especially if what you happen to be swallowing is a cookie cake. Trust me on that one!
Ingredients
Instructions
- Preheat the oven to 350. Line a 9-inch round pan with parchment paper. Coat the bottom and sides of the pan with cooking spray. Set aside.
- In a bowl, mix the melted butter and the sugars until smooth. Add the vanilla and pumpkin, stirring until fully combined.
- In a separate bowl, combine the dry ingredients. Combine the pumpkin mixture with the dry ingredients and stir until a soft batter forms. Fold in the white chocolate chips.
- Press the dough into the pan evenly. Bake until golden at the edges and set in the middle, 25-30 minutes. Cool completely. Carefully invert the cookie cake onto a plate.
- Make the frosting. In the bowl of a stand mixer, beat the cream cheese, butter and vanilla until fluffy. Gradually beat in the powdered sugar until the frosting is smooth and spreadable.
- Prepare a piping bag with the tip of your choice. Fill the piping bag with frosting. Decorate the cake as desired.
]]>
I never knew about Hi-Hat cookies until I started reading food blogs. And Julianne is the master, so I learned from her!
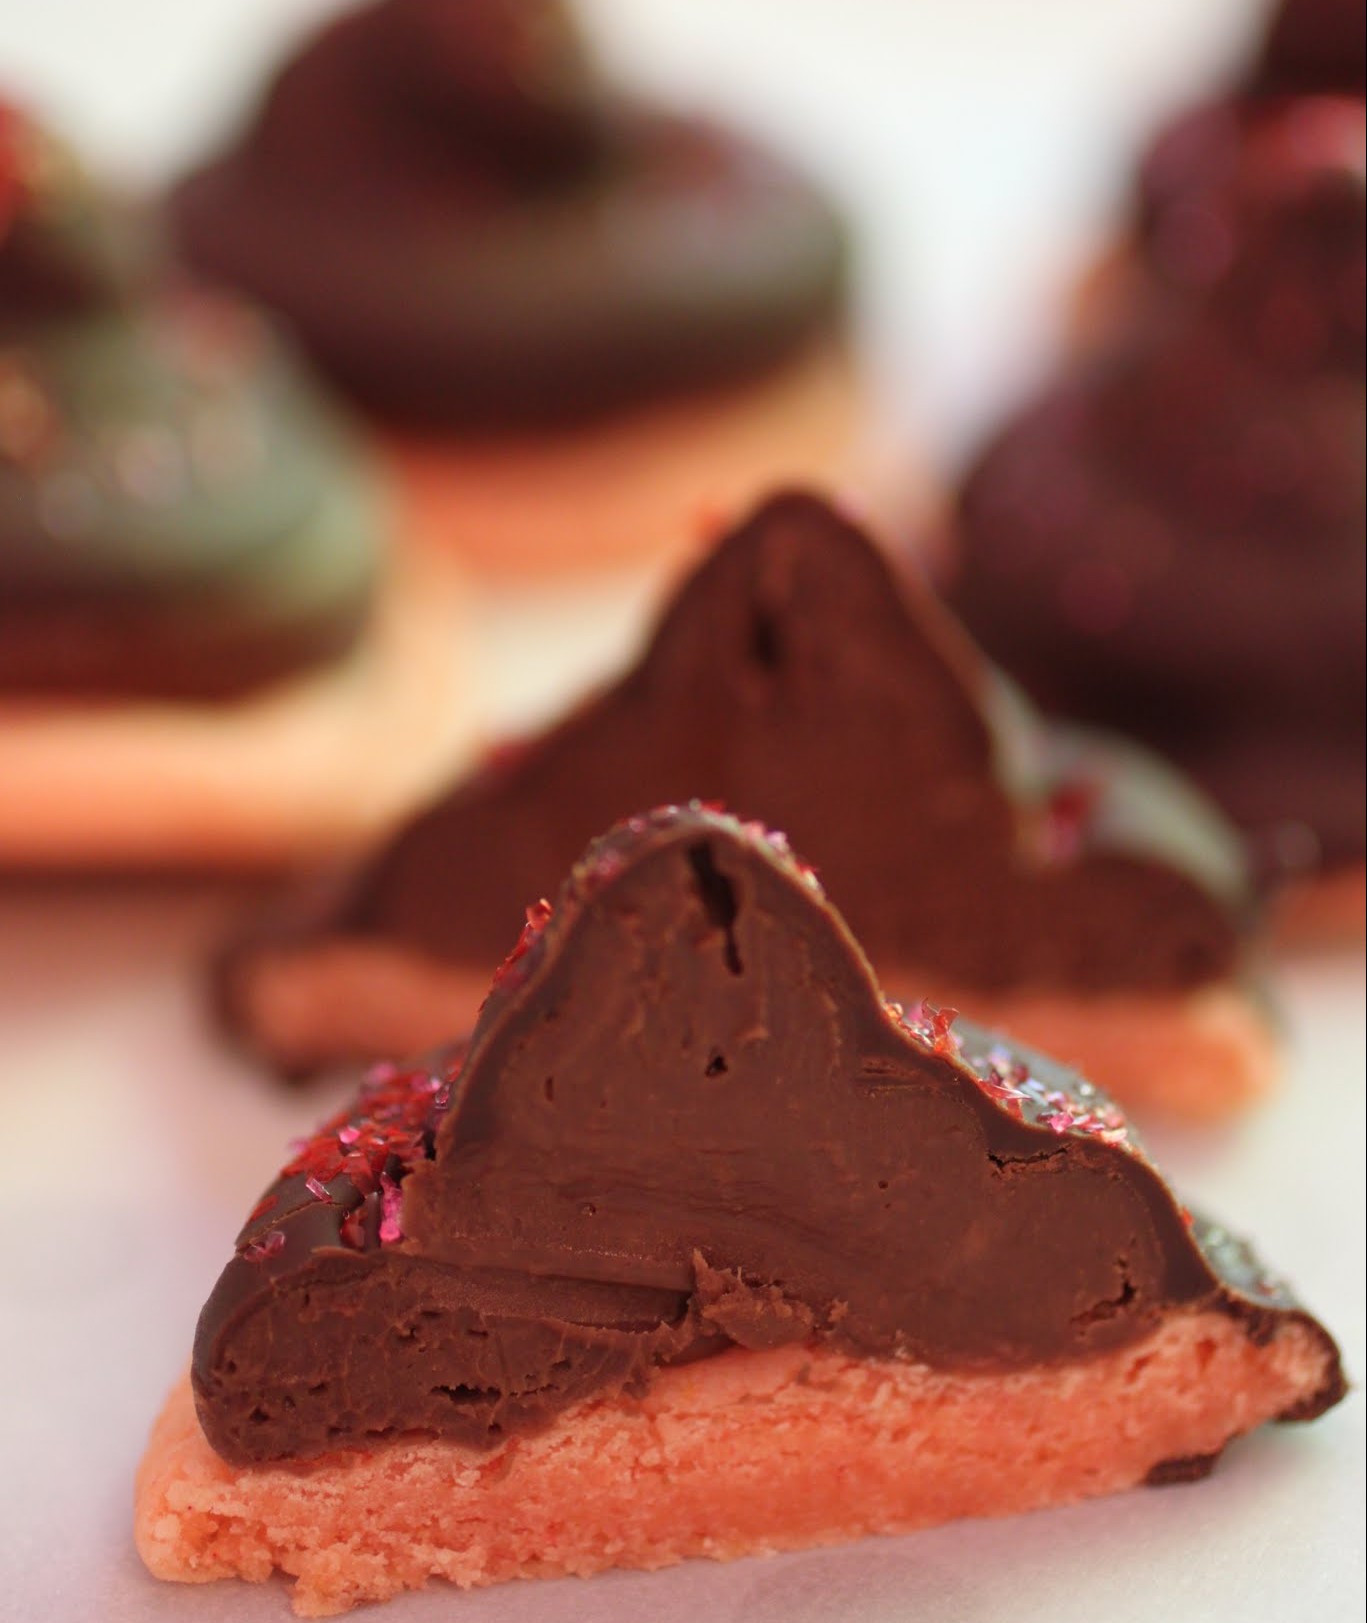
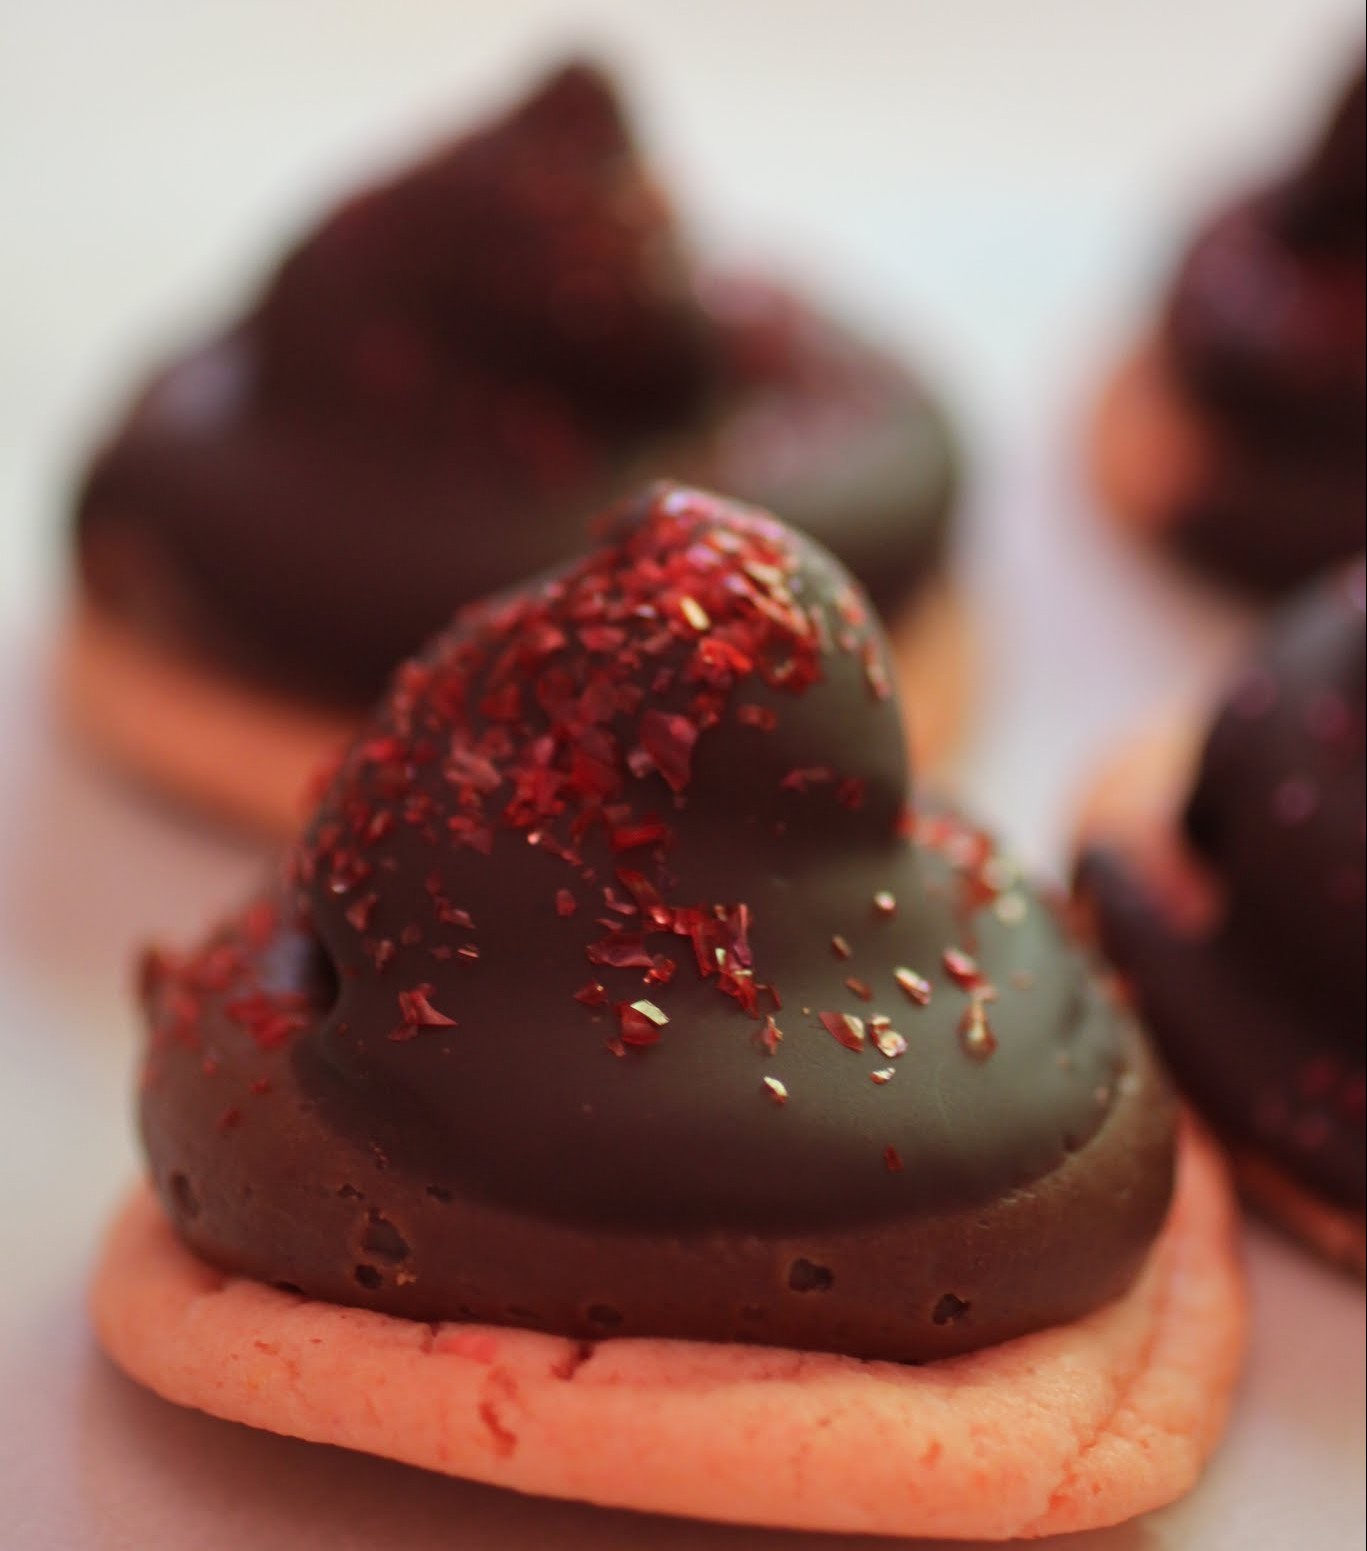
This is my first attempt, so bear with me. For a while now, I’ve been trying to come up with a chocolate-covered strawberry concept in a cookie. Originally, my plan was to do something simpler. But then, how could I resist a hi-hat?

For the past few weeks, work has been raining down on my head at a faster pace than usual. I have research papers to grade, recommendations to write, my classroom to clean out, my desk (!) to organize, and that’s just the beginning. Add to that the normal stuff, like work and blogging and childcare. It’s no wonder that I want to avoid life and just watch episodes of The Mindy Project.
I’ve started watching that show recently, which means I’m behind the rest of the world, as usual. It’s really funny, and I’ve always been a fan of Mindy Kaling. But why on earth did she choose to pretend to be an OB/GYN? If you’ve ever come within 50 feet of that kind of doctor’s office, you know that the show portrays it (and the doctors) with a complete lack of realism. I mean, they seem to just hang out all day on couches talking about life. If I were an OB/GYN, I’d be kind of offended at the portrayal of my profession’s incompetence and laziness.
But I’m not, so the show is pretty funny. And it’s always thrilling to have a female role model who isn’t a size double-zero. Mindy is smart, funny, and she probably works pretty hard to make her life look super fun. So maybe I should write a show about teachers where they never grade papers and spend most of their time chatting in break rooms.
With hi-hat cookies. Let’s not forget the cookies. Have I mentioned that teachers love cookies? Because when these came into work, they were gone in .02 seconds. Maybe it’s all the frosting that’s piled on top.
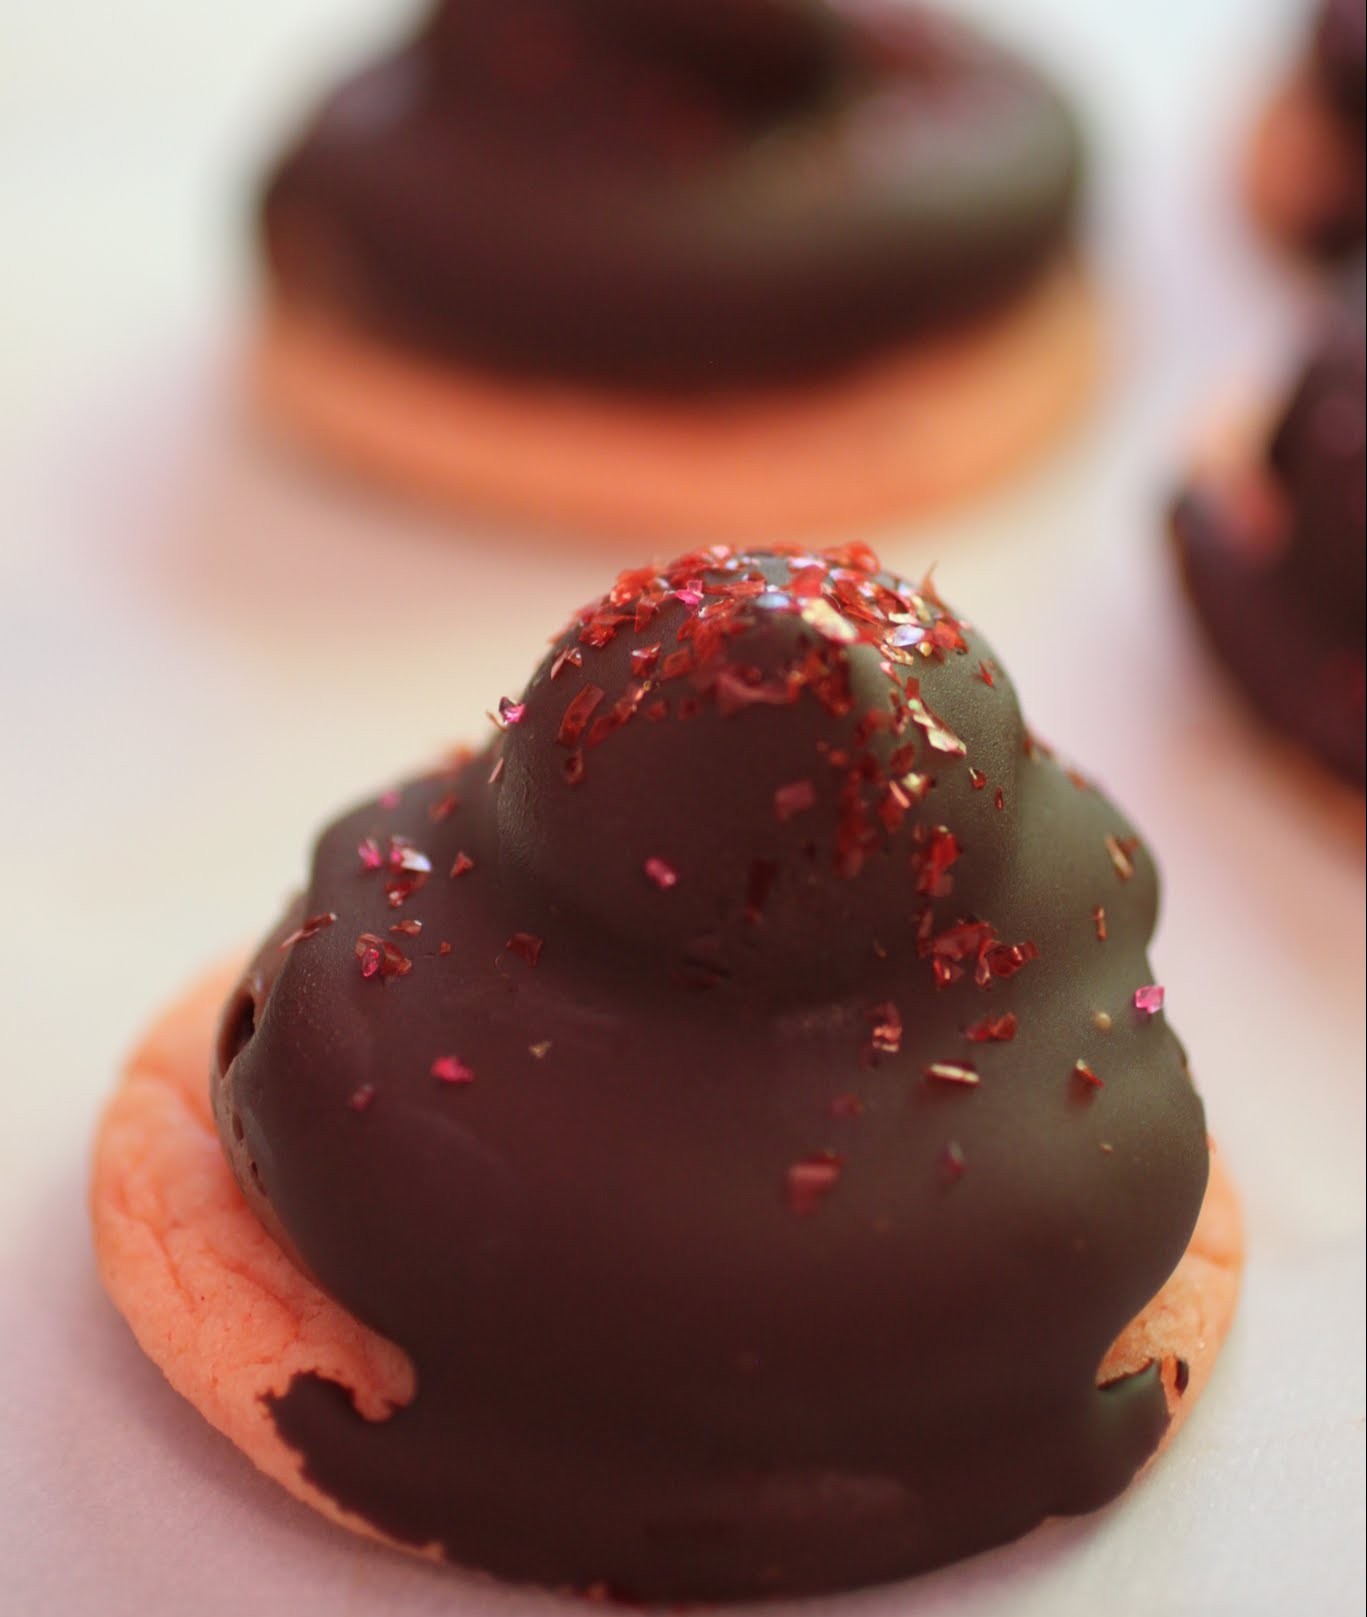
The base of this cookie is a strawberry cake mix. I figure life shouldn’t be that hard, so use shortcuts. Then you pipe a tall swirl of chocolate frosting on the cookie with a round cupcake-sized tip. After some chill time in the fridge, these cookies get dipped in a chocolate topping and then are chilled again to set.
I actually keep mine in the fridge at all times, since I like colder treats. If you keep them at room temperature, make sure your house isn’t stuffy or humid. They’ll melt. But the frosting will be nice and soft! And if you run out of frosting, you can make some simpler cookies, like this:

Either way, these hi-hats do wind up tasting just like a chocolate-covered strawberry on steroids. If you really want to go wild with the sprinkles, you could even do some fun decorating or piping to make them look more festive. Either way, it’s time to try making hi-hats. It’s lots of fun!
Ingredients
Instructions
- Preheat the oven to 350. Line two cookie sheets with silicone baking mats or parchment paper. Set aside.
- In a medium-sized bowl, combine the first 5 ingredients and mix thoroughly until a smooth cookie dough forms. Shape the dough into balls roughly one and a half inches in diameter. Place two inches apart on the cookie sheets.
- Bake for 10 minutes. Remove from the oven to cool.
- While the cookies are cooling, make the frosting. In the bowl of a stand mixer, cream the butter and shortening until smooth. Stir in the cocoa. Add the powdered sugar gradually, mixing until incorporated. Drizzle the milk in slowly while the mixer runs until a smooth, spreadable frosting forms.
- Using a large round tip, pipe a tall swirl onto each cooled cookie, piling the frosting up high (like a soft-serve ice cream cone).
- Refrigerate the frosted cookies for 30 minutes.
- While the cookies are chilling, make the chocolate coating. In a microwave-safe large mug or tall but narrow container, heat the chocolate chips and vegetable oil for 30 seconds. Stir, and then heat for an additional 20 seconds, stirring again. If the mixture is still not smooth, heat for 15 more seconds. Do not overheat, or the chocolate will seize and become unworkable.
- Working quickly, dip each cookie into the chocolate, flicking your wrist as you bring it back up to get off excess chocolate. Place back onto the cookie sheet and, if desired, add sprinkles or other decorations.
- Chill to harden. Store chilled; serve at desired temperature.
]]>
There was a cookie shop (a Mrs. Fields-type place) in the student union of the university where my parents worked. Sometimes, we’d go visit my dad at work, and on a really good day, we’d get a big gingerbread man as a treat. Or at least, it seemed big. If I looked at the cookie as an adult, it would probably be tiny.
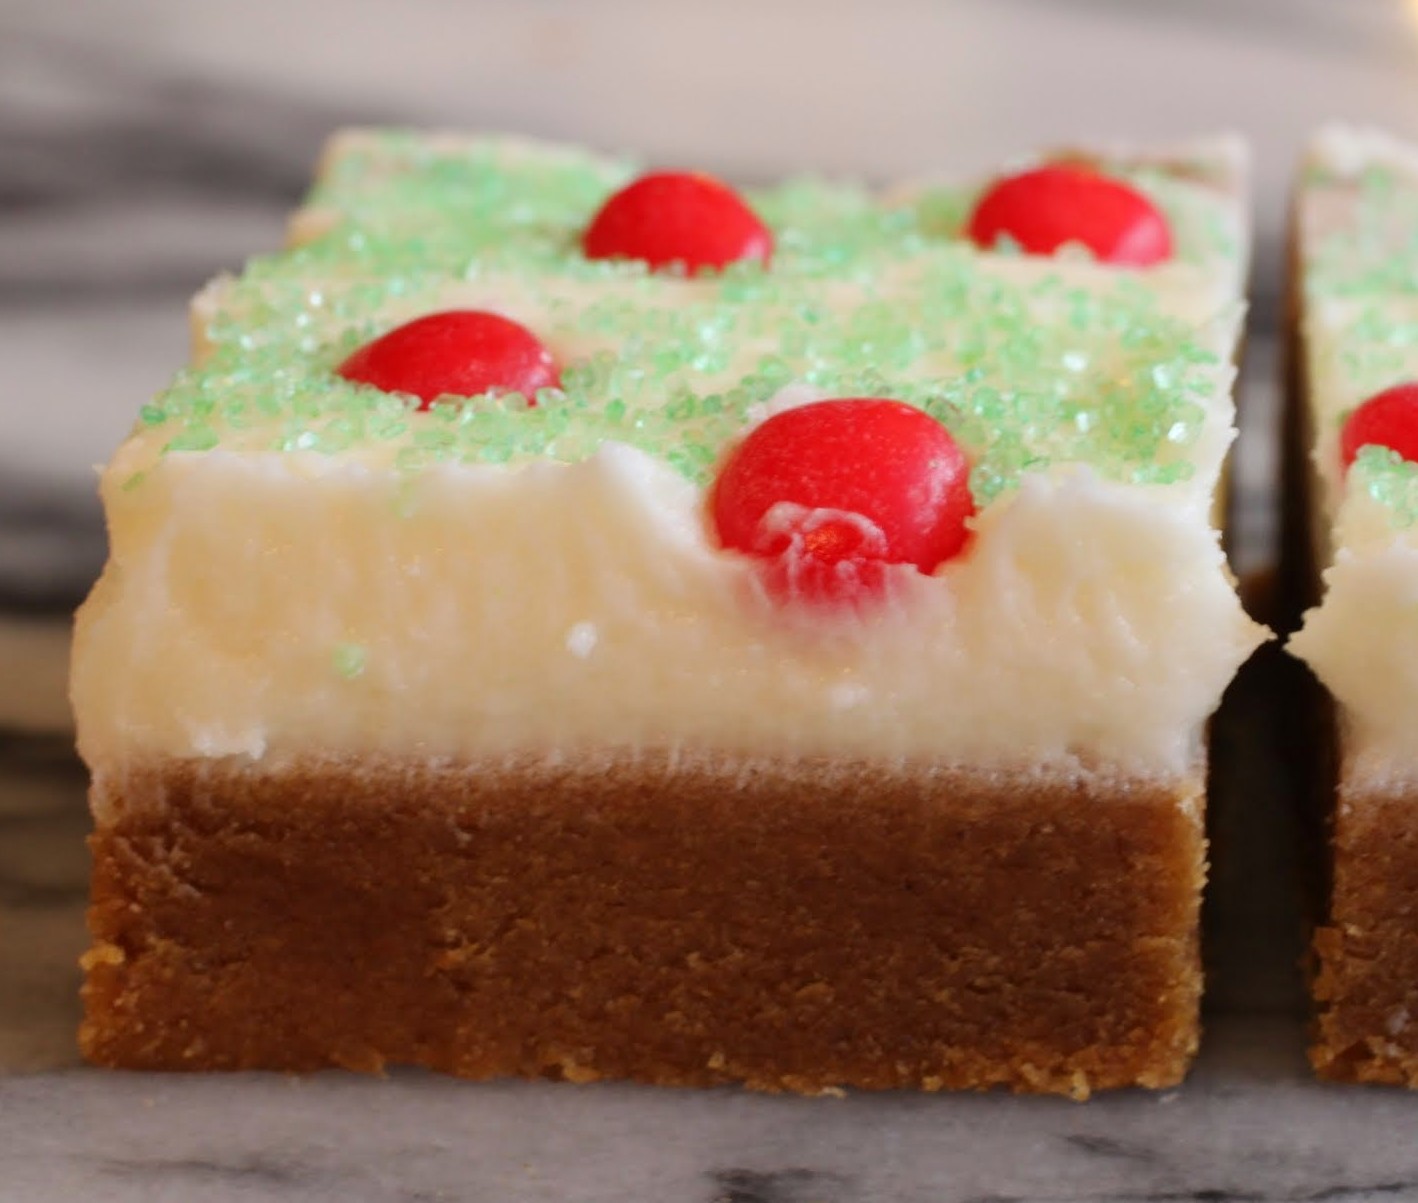
These gingerbread men had red hot buttons. You know, the candy. So as an adult, I don’t like to eat gingerbread if there are no red hots involved. That’s why these delightful gingerbread bars are covered not only in a thick, snowy layer of frosting, but also with red hot candies!
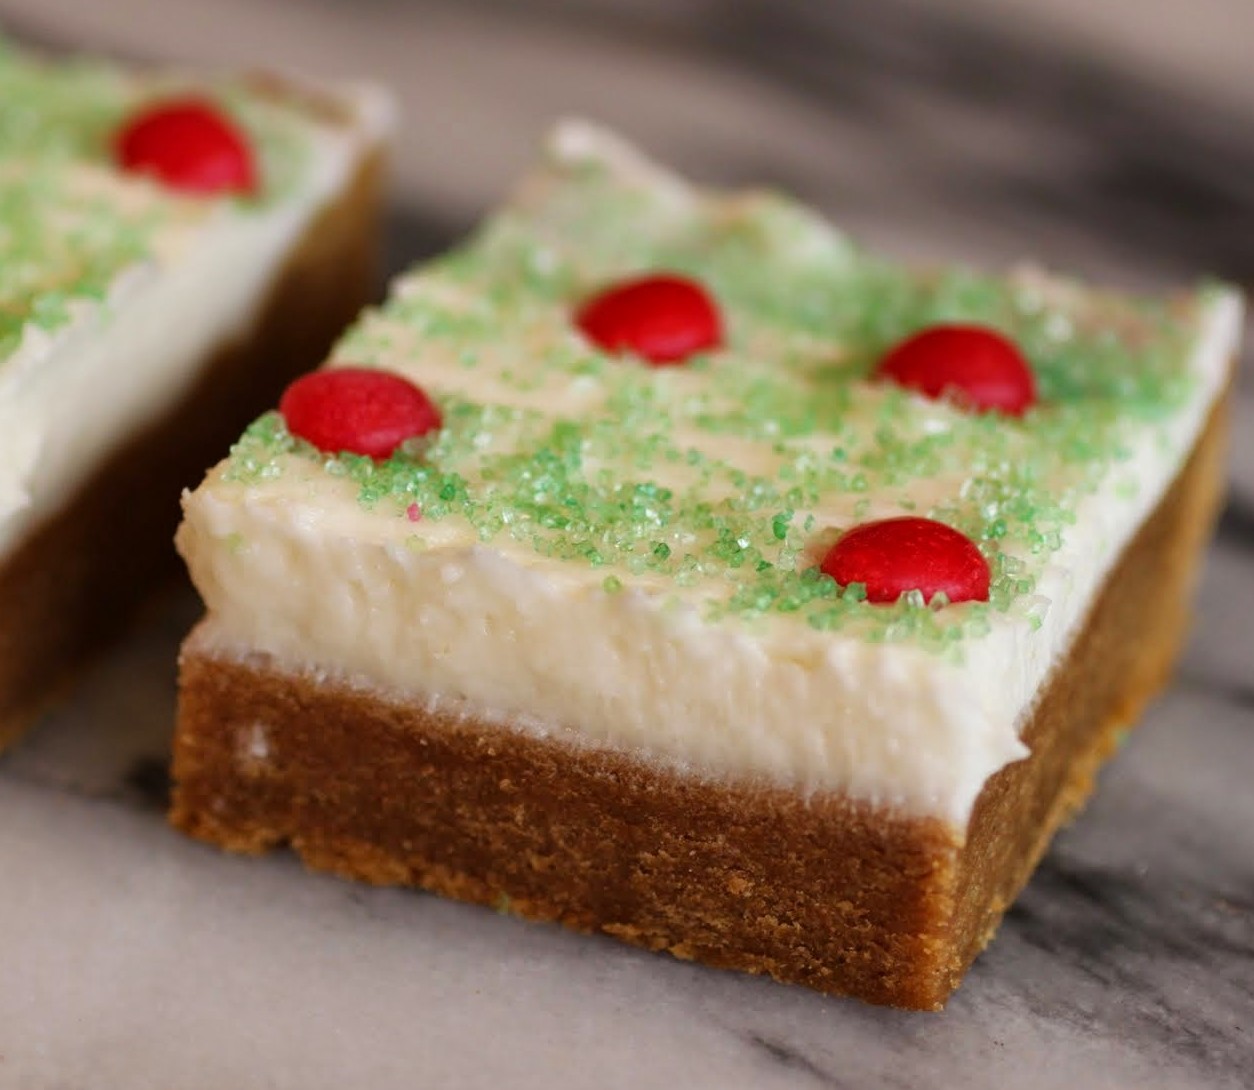
If a brownie had a gingerbread counterpart, this would be it. As much fun as it is to roll out those little guys, this is the low-maintenance version. Same flavor, less work. I’m a fan!
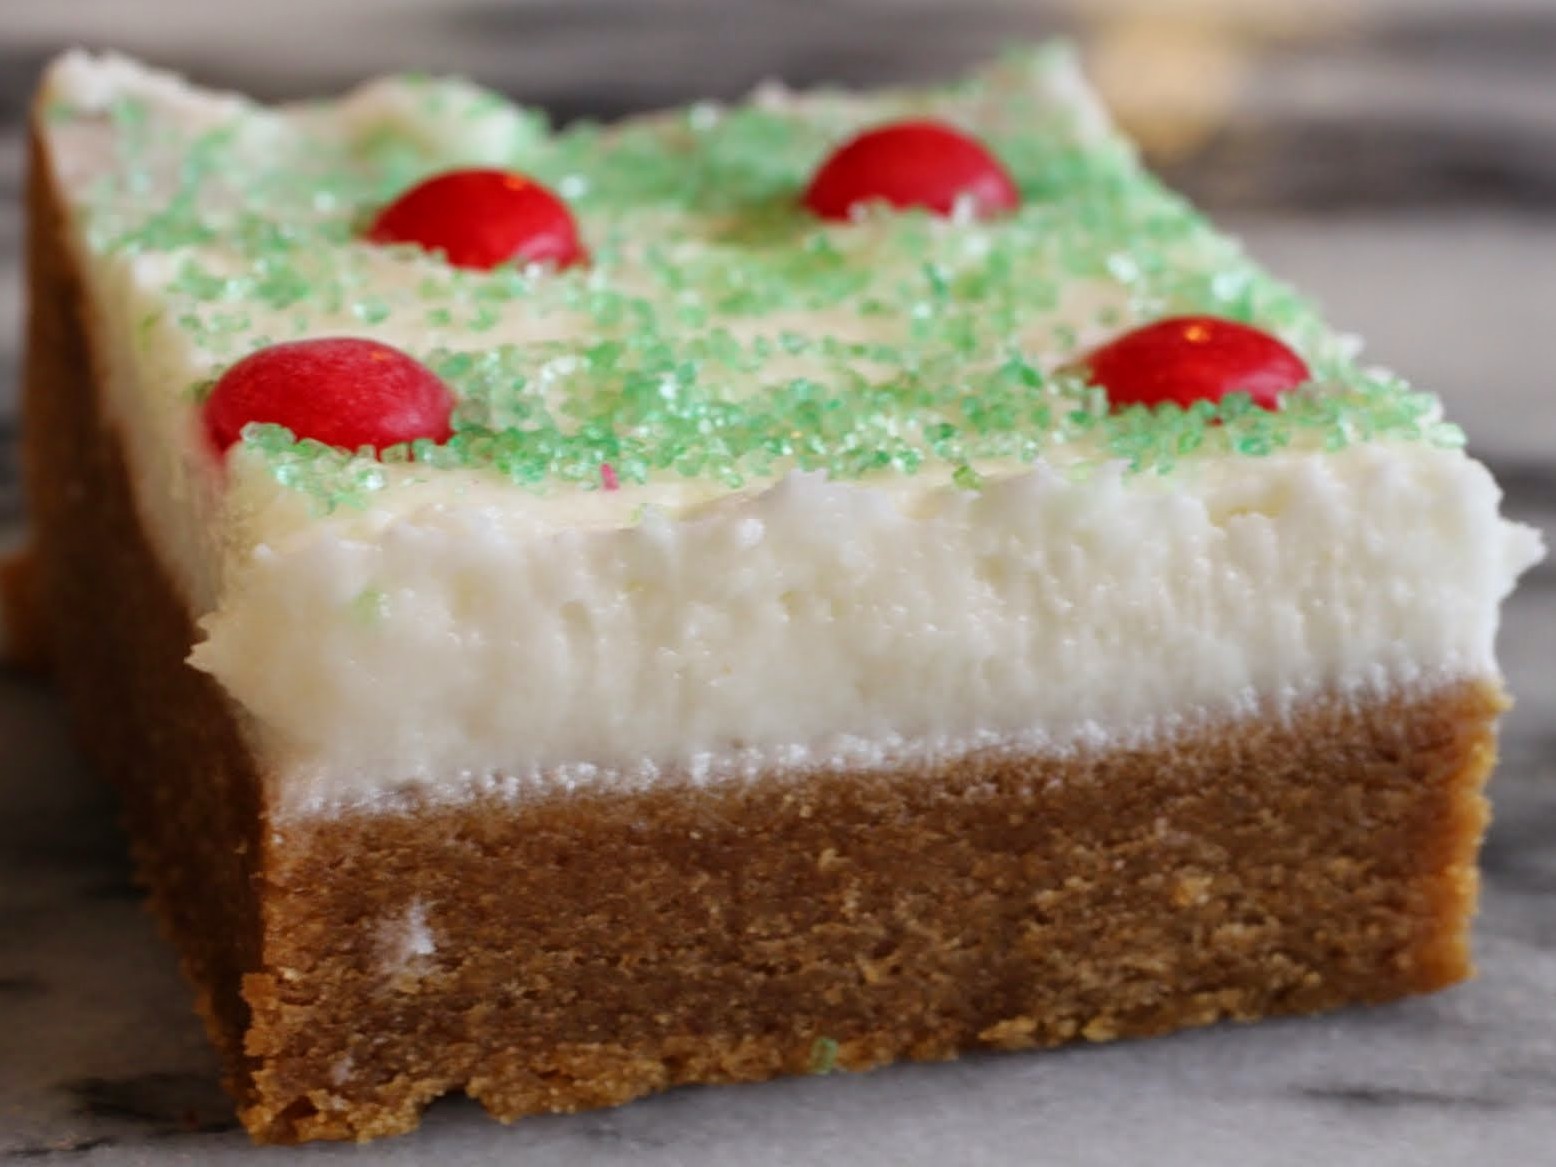
The most surprising thing about these bars is how quickly they bake. They’re pretty much set after 15 minutes in the oven. You don’t want to leave them in much longer, or they’ll get overbaked. That’s the enemy.
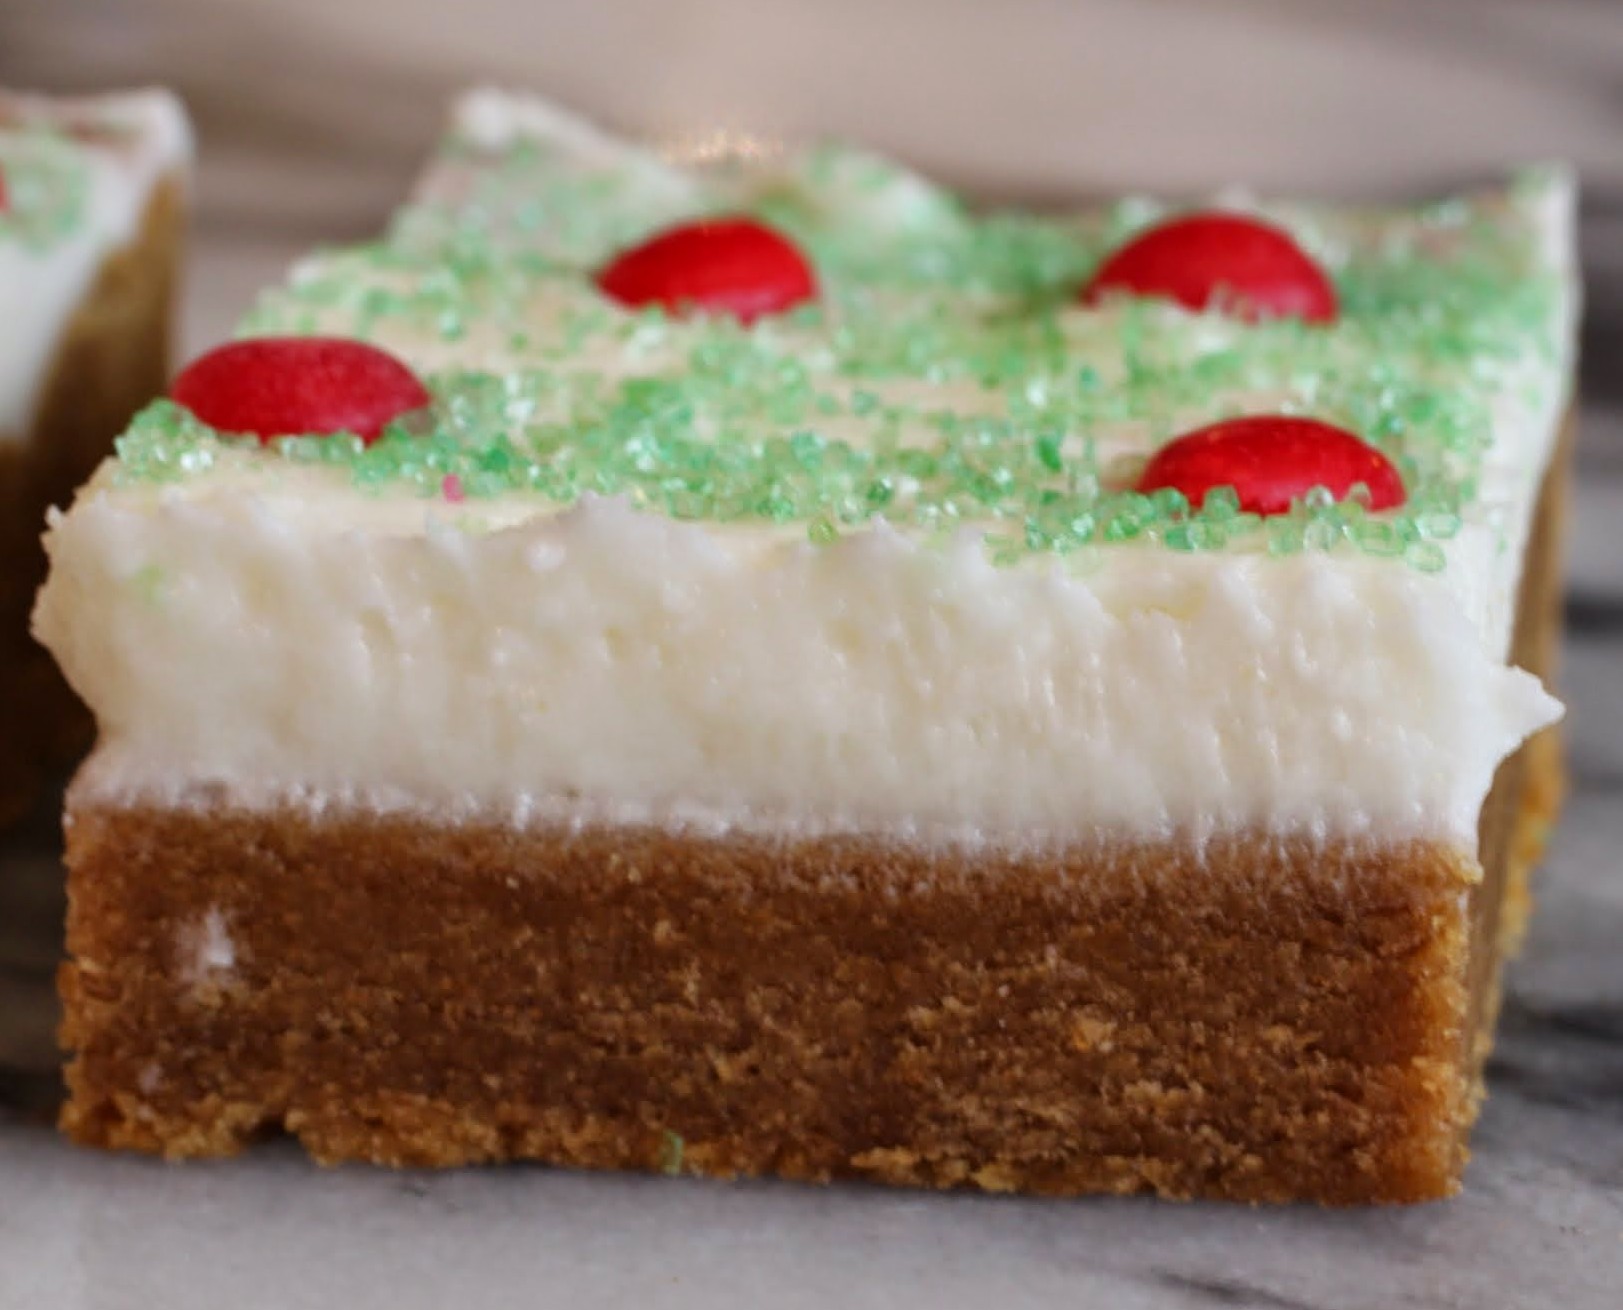
For an easy and different addition to your holiday party circuit this year, give these bars a shot. They might not bring back the childhood joy of biting the head off a gingerbread man, but they’ll sure bring back that taste.
Ingredients
Instructions
- Preheat the oven to 350. Line an 8 x 8 pan with aluminum foil, leaving enough to hang over the sides. Spray with cooking spray. Set aside.
- In the bowl of a stand mixer, cream the butter and sugar with the molasses until smooth and creamy. Add the egg and mix again. Beat in the baking soda, salt and flour gradually, until the dough forms.
- Spread the dough in the prepared pan, patting it down. Bake for 15 minutes. Cool completely.
- When the bars are cool, make the frosting. Cream the butter and shortening until smooth. Add the powdered sugar gradually along with the vanilla. When the powdered sugar is added, mix in the milk. Whip for a few minutes until completely smooth.
- Spread the frosting on the bars. Add sprinkles and other decorations as desired!
- Let the frosting set; cut into squares and store in an airtight container.
]]>
My mom used to say that to me when I was growing up and I’d be all miserable because the girls in my class were mean evil witches. My goodness, when it comes to psychological torture, girls have it down pat. I’m still bowled over by the behavior my classmates exhibited toward me when I was a kid, and I kind of wonder how they live with themselves today. Are they telling their own kids to go out there and make fun of the kid in class who doesn’t have the perfect designer outfit?
Anyway, I could write about this forever, so I’ll pause here and talk about the proverbial lemonade from lemons thing. Or in this case, brownie truffles from an epic fail.
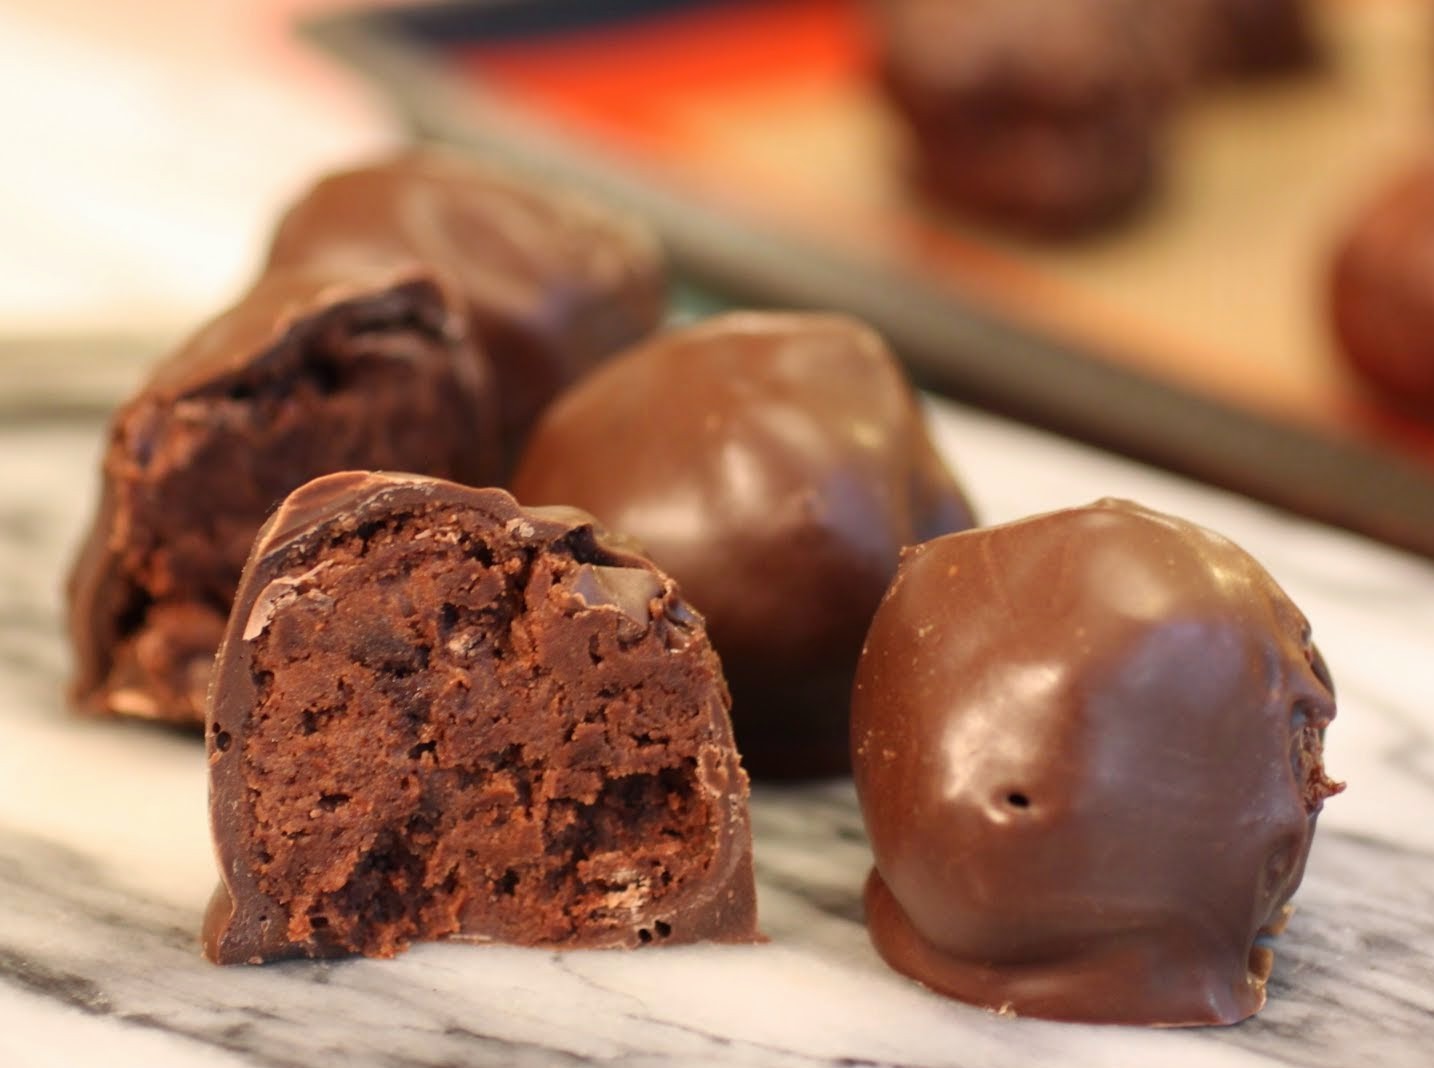
I was testing out another recipe yesterday and it just tanked. I’ve been working on developing the Bronut (my brownie/donut mashup, premiere date TBD) and I couldn’t get them out of my donut pan in one piece. So instead of smacking myself on the forehead, I dug the brownies out of the pan, mashed them up with frosting, shaped them into balls and dipped them in chocolate melts. Voila! Brownie truffles!
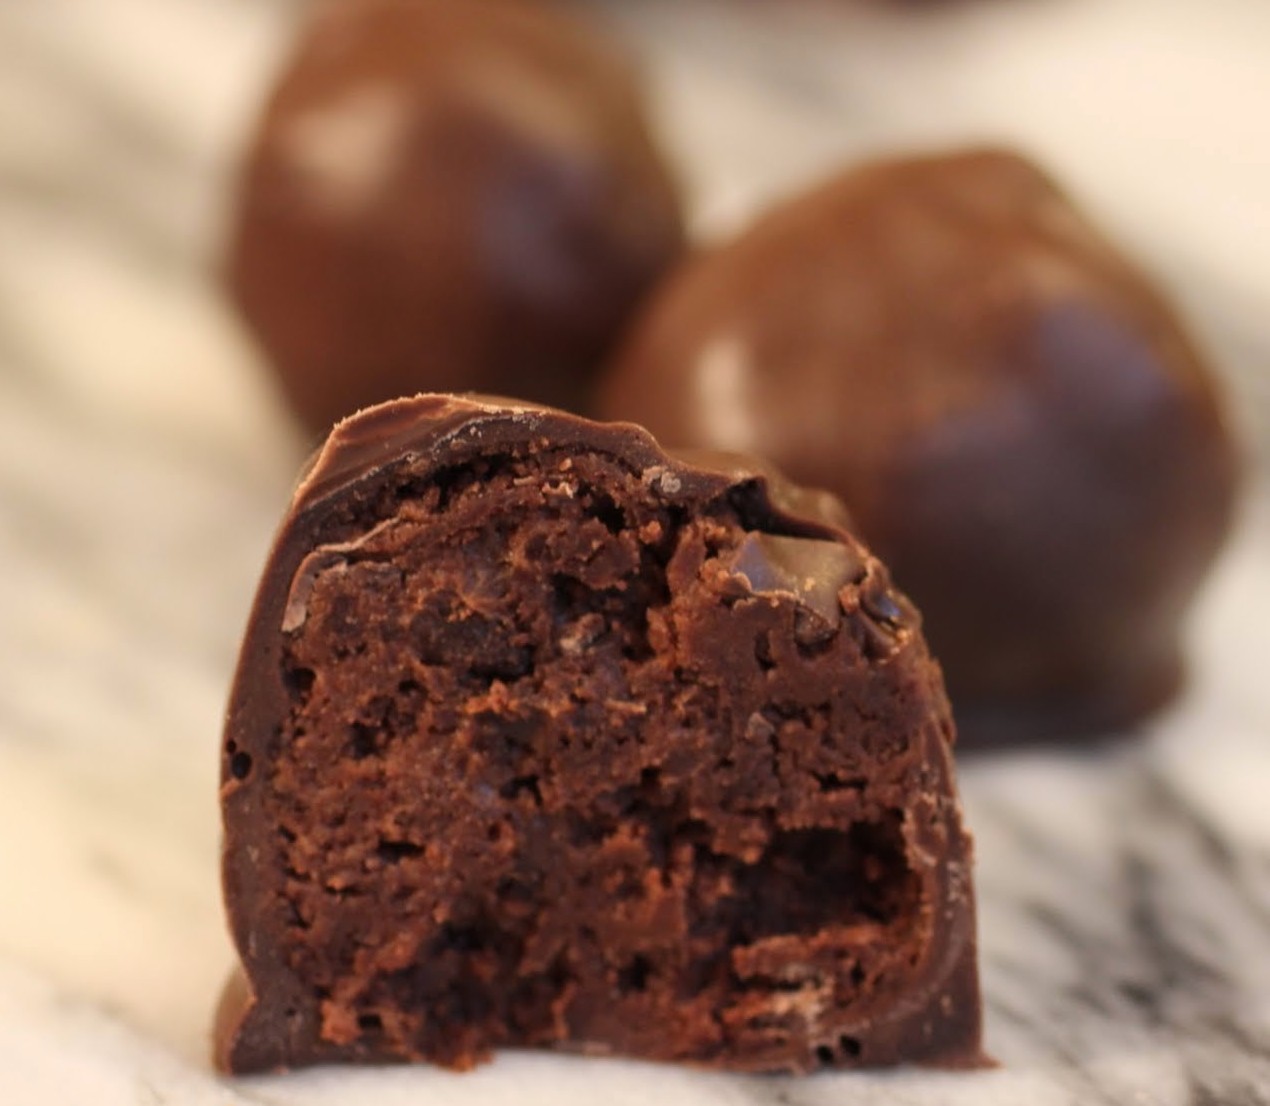
And very high quality ones, too. This brownie recipe is my all-time favorite for fudgy factor. So you can be sure that these truffles are rich.
And gluten-free. My first test batch had oat flour in it. Unfortunately, I think my next batch is going to use flour. But these truffles are safe for all tummies!

We all love truffles. And basically, this is a brownie pop without the stick. I don’t like to fool with sticks unless I have a ton of time, which I don’t. So you get to hold this in your hands and revel in the fudge overload. You can make your own chocolate frosting, but again, we all are short on time. I did my favorite time-saving trick of heading to my local bakery and buying a small tub of their chocolate frosting. That way, you don’t have to deal with the stuff in a can (I’m not the biggest fan of that taste), and you can still cut down on steps.
Remember, every problem is an opportunity. I’m grown up now and I’d flatten any of those mean girls with all the sassiness in my adult arsenal if I could, but the truth is, I’m stronger and a better person because of what they put me through. And these brownie truffles are equally formidable.
Ingredients
Instructions
- Preheat the oven to 350. Line an 8 X 8 pan with foil and spray it with cooking spray. Set aside.
- In a medium-sized bowl, mix the cocoa into the melted butter until it dissolves. Add the sugar and stir again. When the sugar is incorporated, mix in the vanilla and eggs. Add the salt and oat flour, mixing until just combined. Fold in the chocolate chips.
- Spread the batter in the prepared pan and bake for 30 minutes.
- Remove the pan from the oven and let it cool.
- When the brownies are cool, crumble them with your hands into a medium-sized bowl. Add the frosting and mix until the brownies and frosting are fully combined. It will be very sticky.
- Place the mixture in the freezer for 20 minutes until chilled and easy to handle.
- Line a cookie sheet with a silicone baking mat or parchment paper. Quickly roll the brownie mixture into balls and place onto the cookie sheet.
- Refrigerate the truffles for at least 30 minutes.
- When you're ready, melt the chocolate according to package directions. Dip each truffle into the chocolate, covering it fully.
- Using a fork, pick up the truffle and let the excess melted chocolate drip through the tines. Place on the cookie sheet.
- Decorate as desired. Allow to harden.
- If you want a fudgier truffle, store in the refrigerator. Otherwise, keep in an airtight container.
]]>
And boy, did I eat a lot of them. I’d hover near the kitchen, waiting for them to bring out the brownies. And in later years, I experienced that same frosting on cakes because I tracked down the bakery and bought a lot from them. Until they shut down. Cue dramatic sad music!
Since then, I’ve been on a quest to make fudge frosting. And you know what? Finding a recipe that works ain’t so easy. Turns out that people love chocolate frosting and dark chocolate frosting, but the kind that sits like fudge on cake and yet is still magically spreadable? Not so simple. I’ve had so many fudge frosting fails that it’s no longer particularly a happy topic for me.

Until I ran across this baker’s recipe. She has all these fudge frosting tutorials. I felt renewed hope and had to try it!
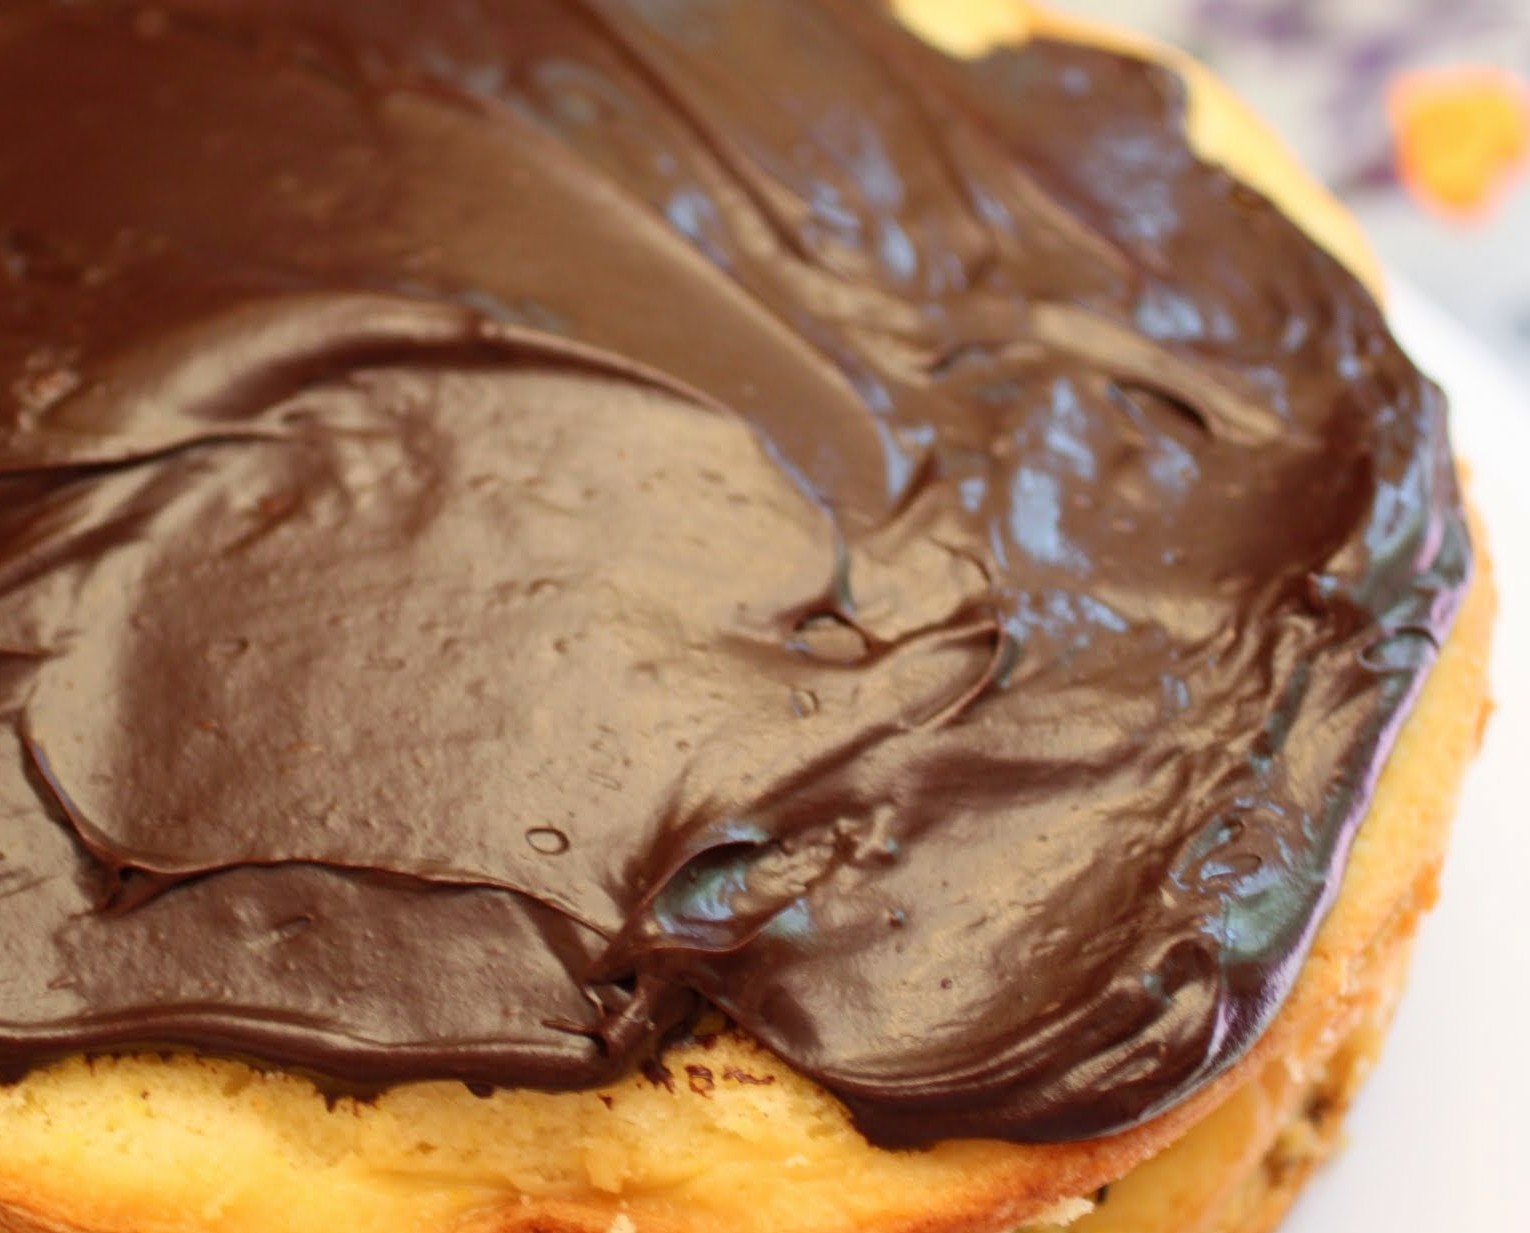
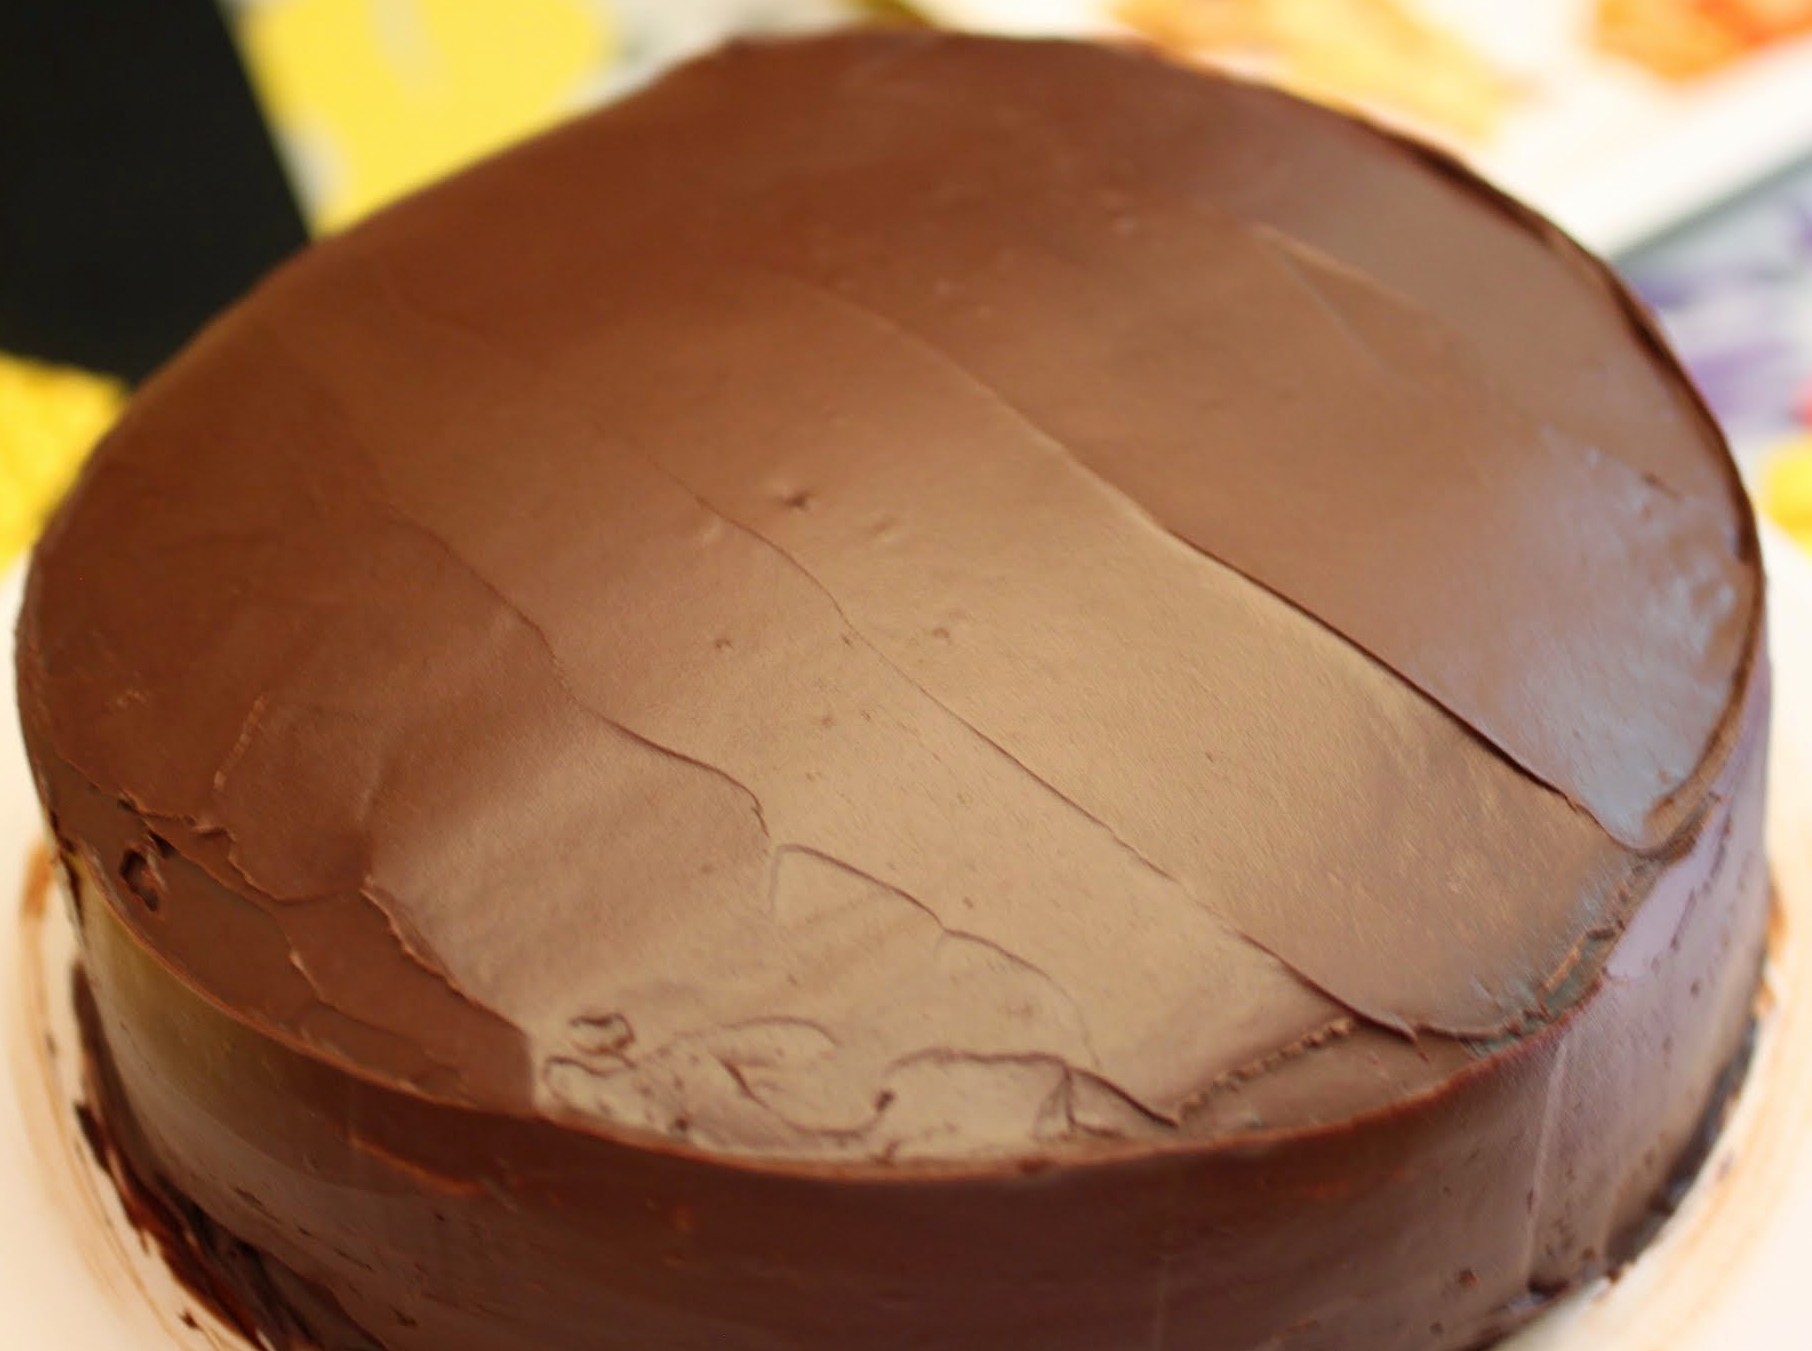
Bottom line: this frosting is very thick and fudgy, but there are a few caveats. For one, you need to refrigerate it to make it thicker and spreadable. If you don’t, it has a drippier consistency. Leaving it out to thicken would help, but I didn’t have that much time, so I chilled the whole bowl for about 30 minutes. When it was time to ice this cake, no problem! Here it is in the middle of the smoothing process:
Also, even thicker, this stuff is hard to pipe. I’m pretty sure it will need more chill time if you want to make piping easier. But the good news is, the final result is delicious. This frosting sets up beautifully and stays creamy and thick. One of our friends told me that it was just like his grandmother’s frosting, which he hadn’t eaten since he was a kid. I took that as a compliment.
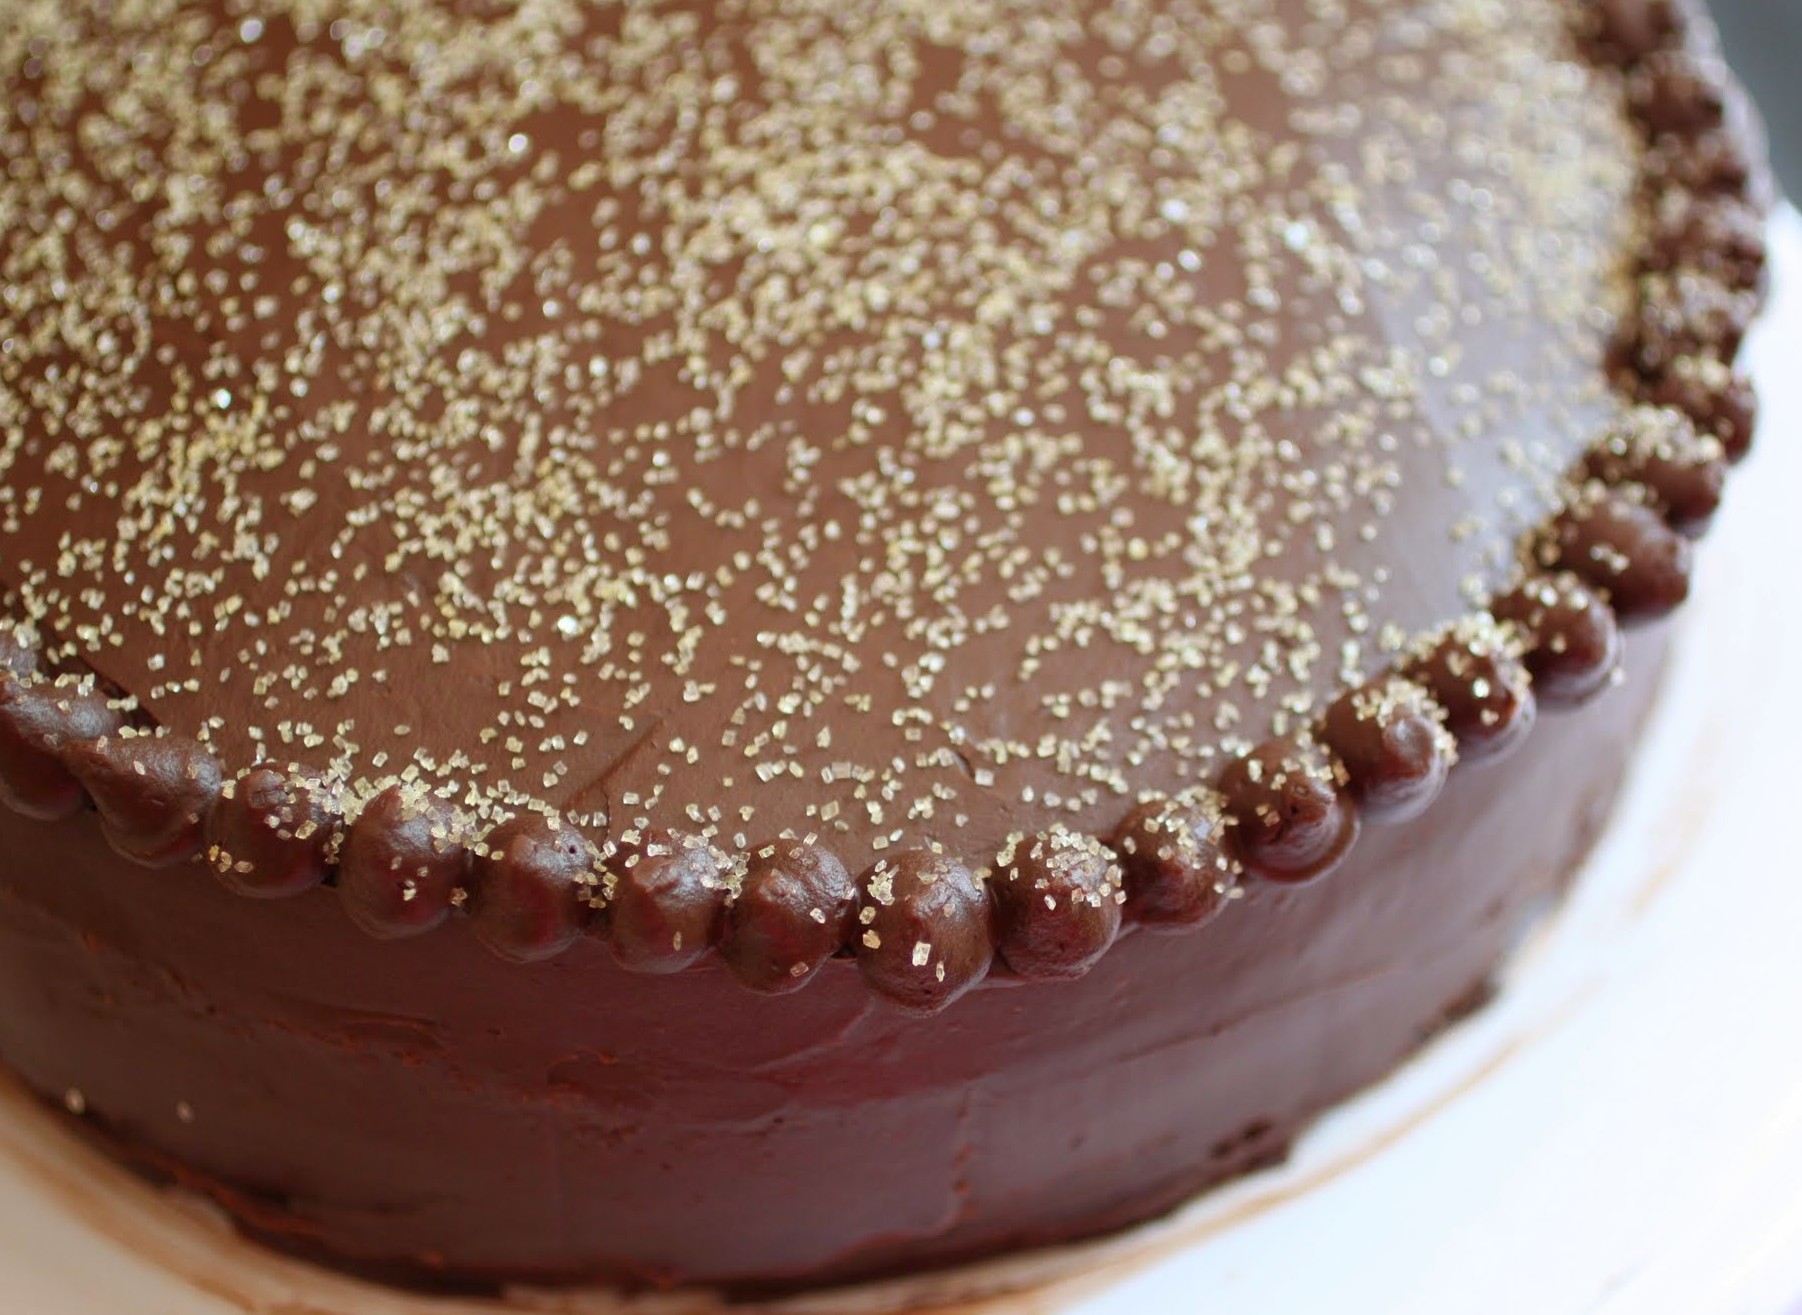
Enjoy this foray into fudginess! I used my frosting on my brother-in-law’s birthday cake, but this would work just as beautifully on brownies or as a filling between sandwich cookies. Let your imagination run free!
Ingredients:
- 4 cups semi-sweet chocolate chips
- 1/2 cup hot water
- 1 cup unsalted butter, softened
- 1/2 cup powdered sugar
- 1/4 cup light corn syrup
Instructions:
In the microwave, melt the chocolate for 2 minutes and 30 seconds. Stir until smooth. Transfer the chocolate to the bowl of a stand mixer.
Add the hot water and beat until fully mixed. The mixture will look really odd at first, but it will smooth out. Add the butter and beat again until incorporated. Do the same with the powdered sugar. Finally, mix in the corn syrup.
Give the frosting time to thicken to the desired consistency, or speed up the process by chilling the bowl in the refrigerator, checking every 15 minutes or so.
Frosting can be stored in the refrigerator in a covered container. However, you will have to bring it to room temperature and beat it again to bring it back to the desired texture.
]]>