I mean, it’s too sudden. We’re at 90 one day and then 60 the next. I cannot. Has Mother Nature ever heard of transitions? And by the way, could she just stop with the hurricanes already?
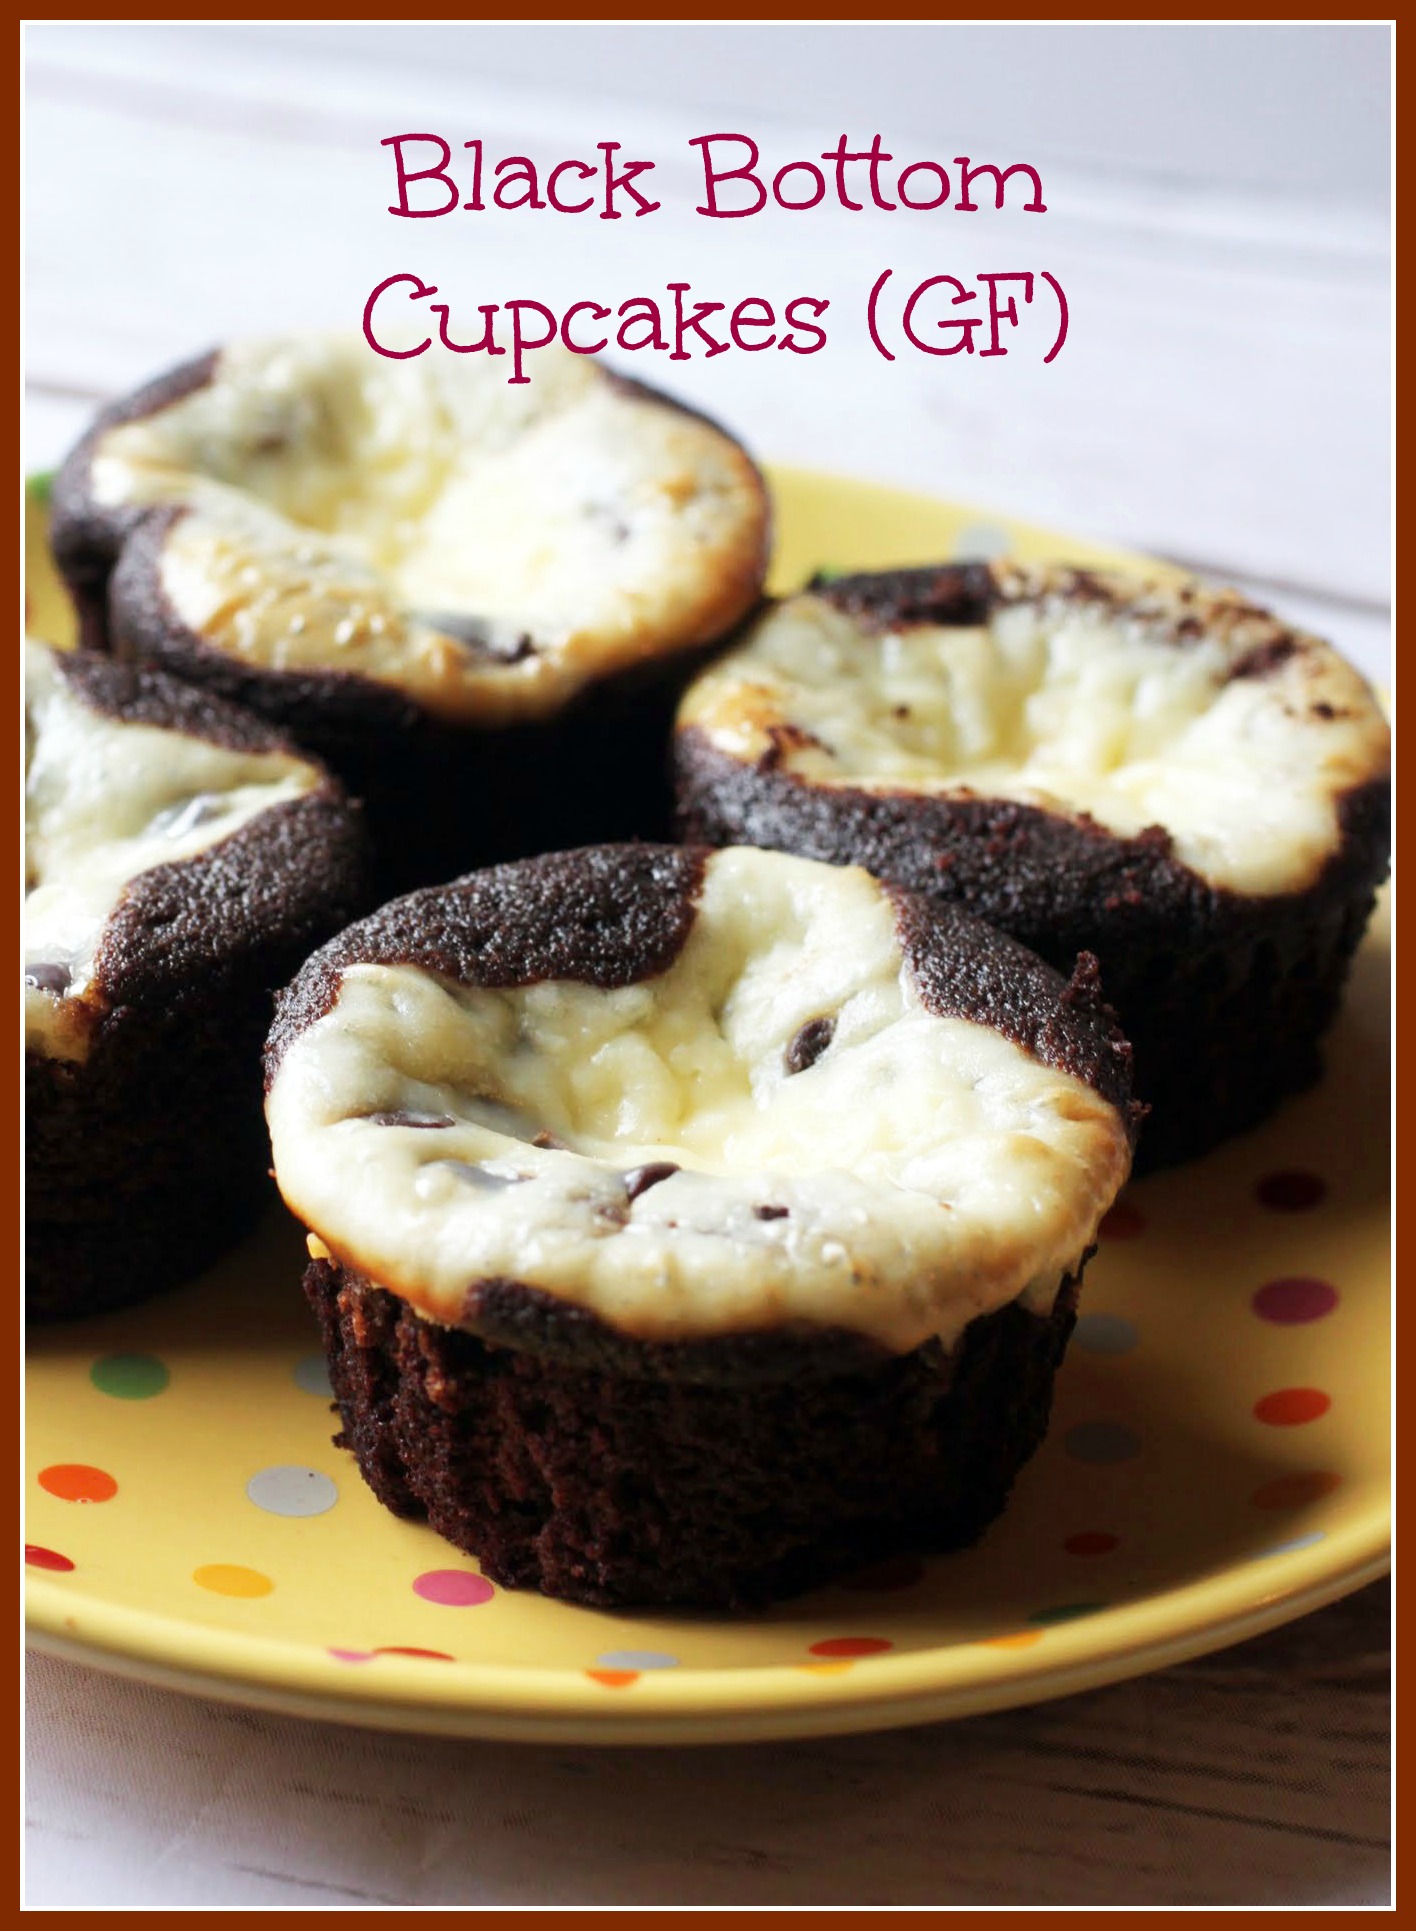
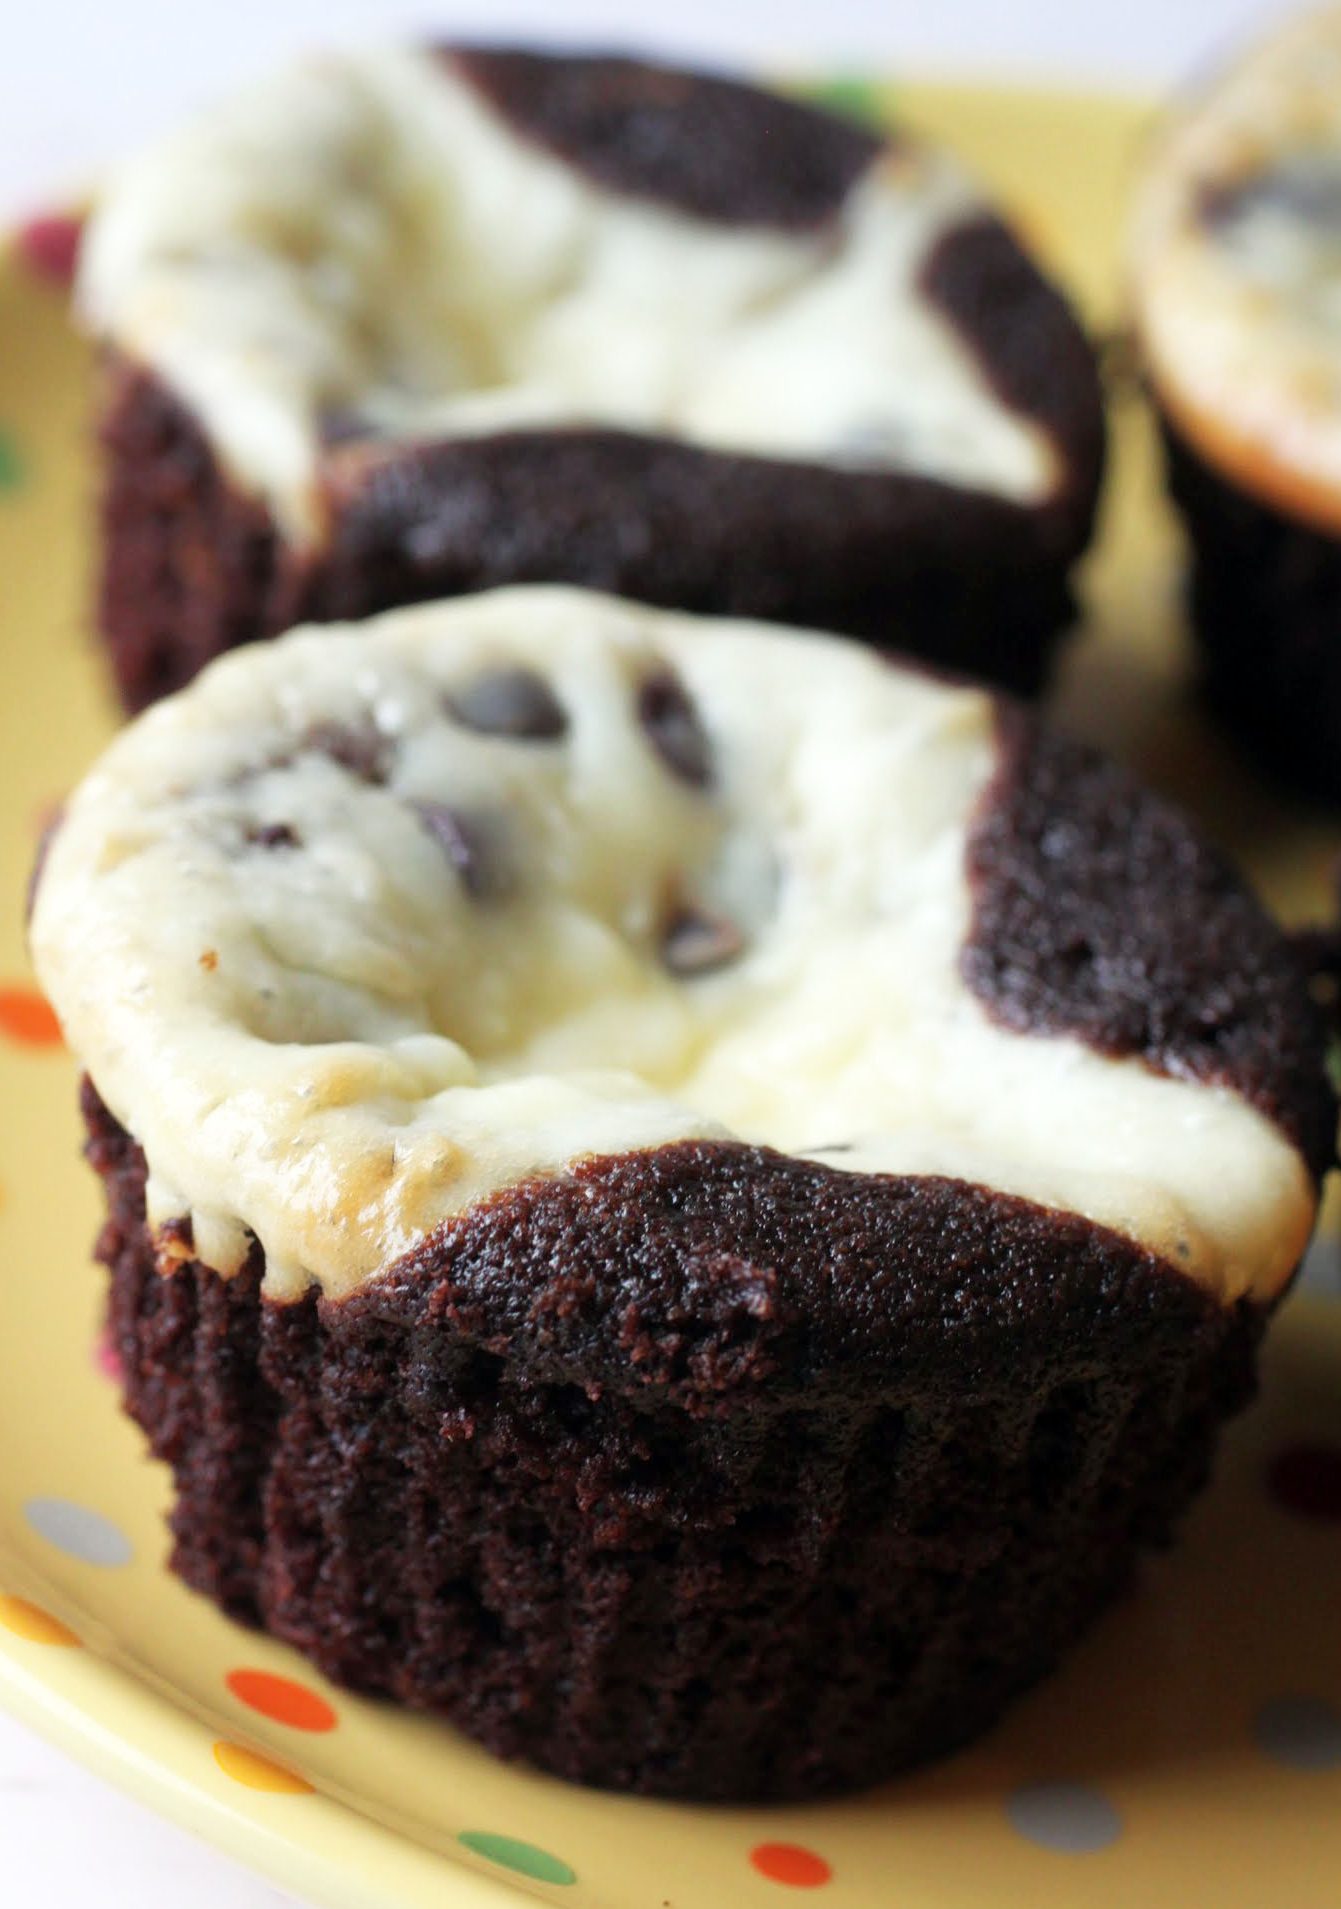
Since I don’t want to spend today talking about the weather, I’ll talk about something far more relevant instead. My blog’s been around for going on three years now, but I’ve never made black bottom cupcakes. Once this occurred to me (in the middle of the night, mind you, and it woke me up), I had to correct that immediately. I also had to make them gluten-free, just to make up for the oversight of never putting a chocolate cupcake stuffed with chocolate chip cheesecake filling onto this site.
A few weeks ago, you may remember that I fell over and injured my foot. Well, it’s all better now, but it’s been a pain-ridden time. Either I was walking funny or I hit something on the way down, because my back has been spasming nonstop. A few days ago, the relief began to seep in, but there’s still some pain.
The combination of all this plus the stress of the Jewish holiday season (it lasts a month) has made me very neglectful of anything but family or work. In other words, I’ve been ignoring the blog world and social media, and I’m sorry about that. But as my blog friends have taught me, there’s only so much anyone can handle before the nervous breakdown begins. Mine is scheduled for November, by the way. I have to hold it together until then. Winky face.

Seriously, I’ve spent a lot of time thinking about the concept of “good enough.” That’s a really tough standard for me to find acceptable in myself. In other people, it’s usually fine. But for me, I want to be the best. I’m not sure where this overdeveloped sense of competition came in, but I’m pretty sure it was born out of insecurity earlier in life. As an adult, I’ve been set on standing out and setting a standard of excellence.
I’m still driven that way, but I’ve pulled back from that on JAB. I will never be the best baking blogger, or even in the top several hundred. That’s okay. This site began as both an experiment and a hobby, and I’m okay keeping it there.
While I might not be on the Internet much, my desserts are as lovely as ever, I assure you. You’ll never know that these cupcakes are GF, and they’re also not that much of a nutritional wasteland.
The cake base of these cupcakes is positively virtuous: a chocolate cake that is vegan with no butter or eggs. The cheesecake filling is made with lowfat cream cheese and only about 1/3 cup of sugar, which means it’s not too sweet. You can eat a couple of these and not feel bad about it at all!

I’ve been in a tough place for the past couple of months, but I have hope that things will slow down and that I’ll stop waking up in the middle of the night thinking about black bottom cupcakes. Until that happens, I’ll just have to keep baking. Enjoy the fruits of my sleepless labor, friends!
Ingredients
Instructions
- Preheat the oven to 350. Line a muffin tip with cupcake liners and spray lightly. Set aside.
- In a small bowl, beat the cream cheese and sugar until creamy. Add the egg and stir again until smooth. Mix in the chocolate chips. Set aside.
- In a large bowl, combine the oat flour, sugar, cocoa, baking soda and salt. Add the water, oil, vinegar and vanilla. Beat until well combined.
- Fill each cupcake liner halfway with the cake batter. Add a teaspoon of the cheesecake filling to the top of each cupcake. This recipe will yield 18 cupcakes, so you may have to bake in batches.
- Bake for 20-25 minutes until the cheesecake begins to turn golden at the edges. Cool completely. Store chilled.
Well, unless you’re mashing up two things that are great separately and gross together, like steak and whipped cream. No, thank you. But when the mash-up combines the best of both worlds, mama is happy.
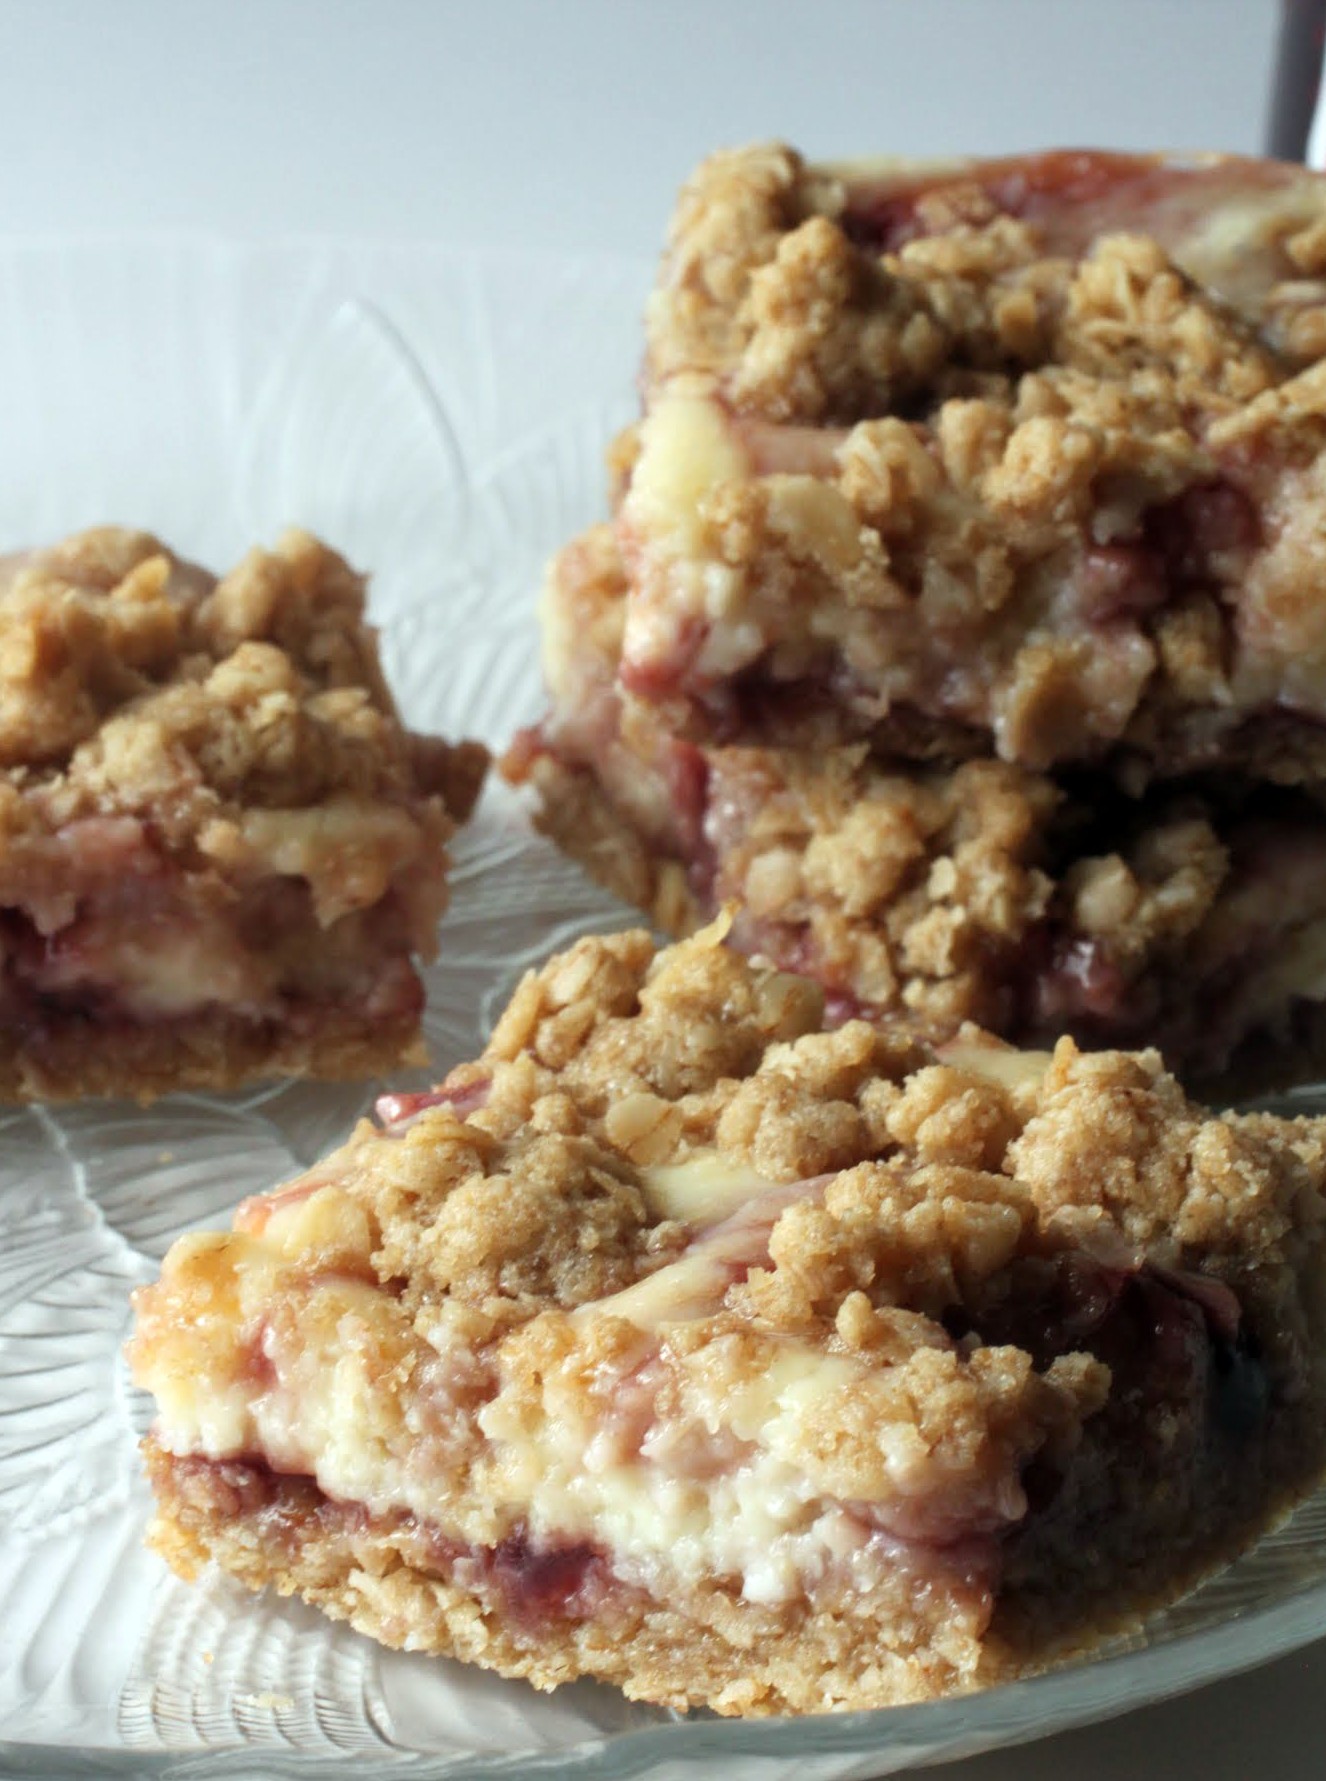
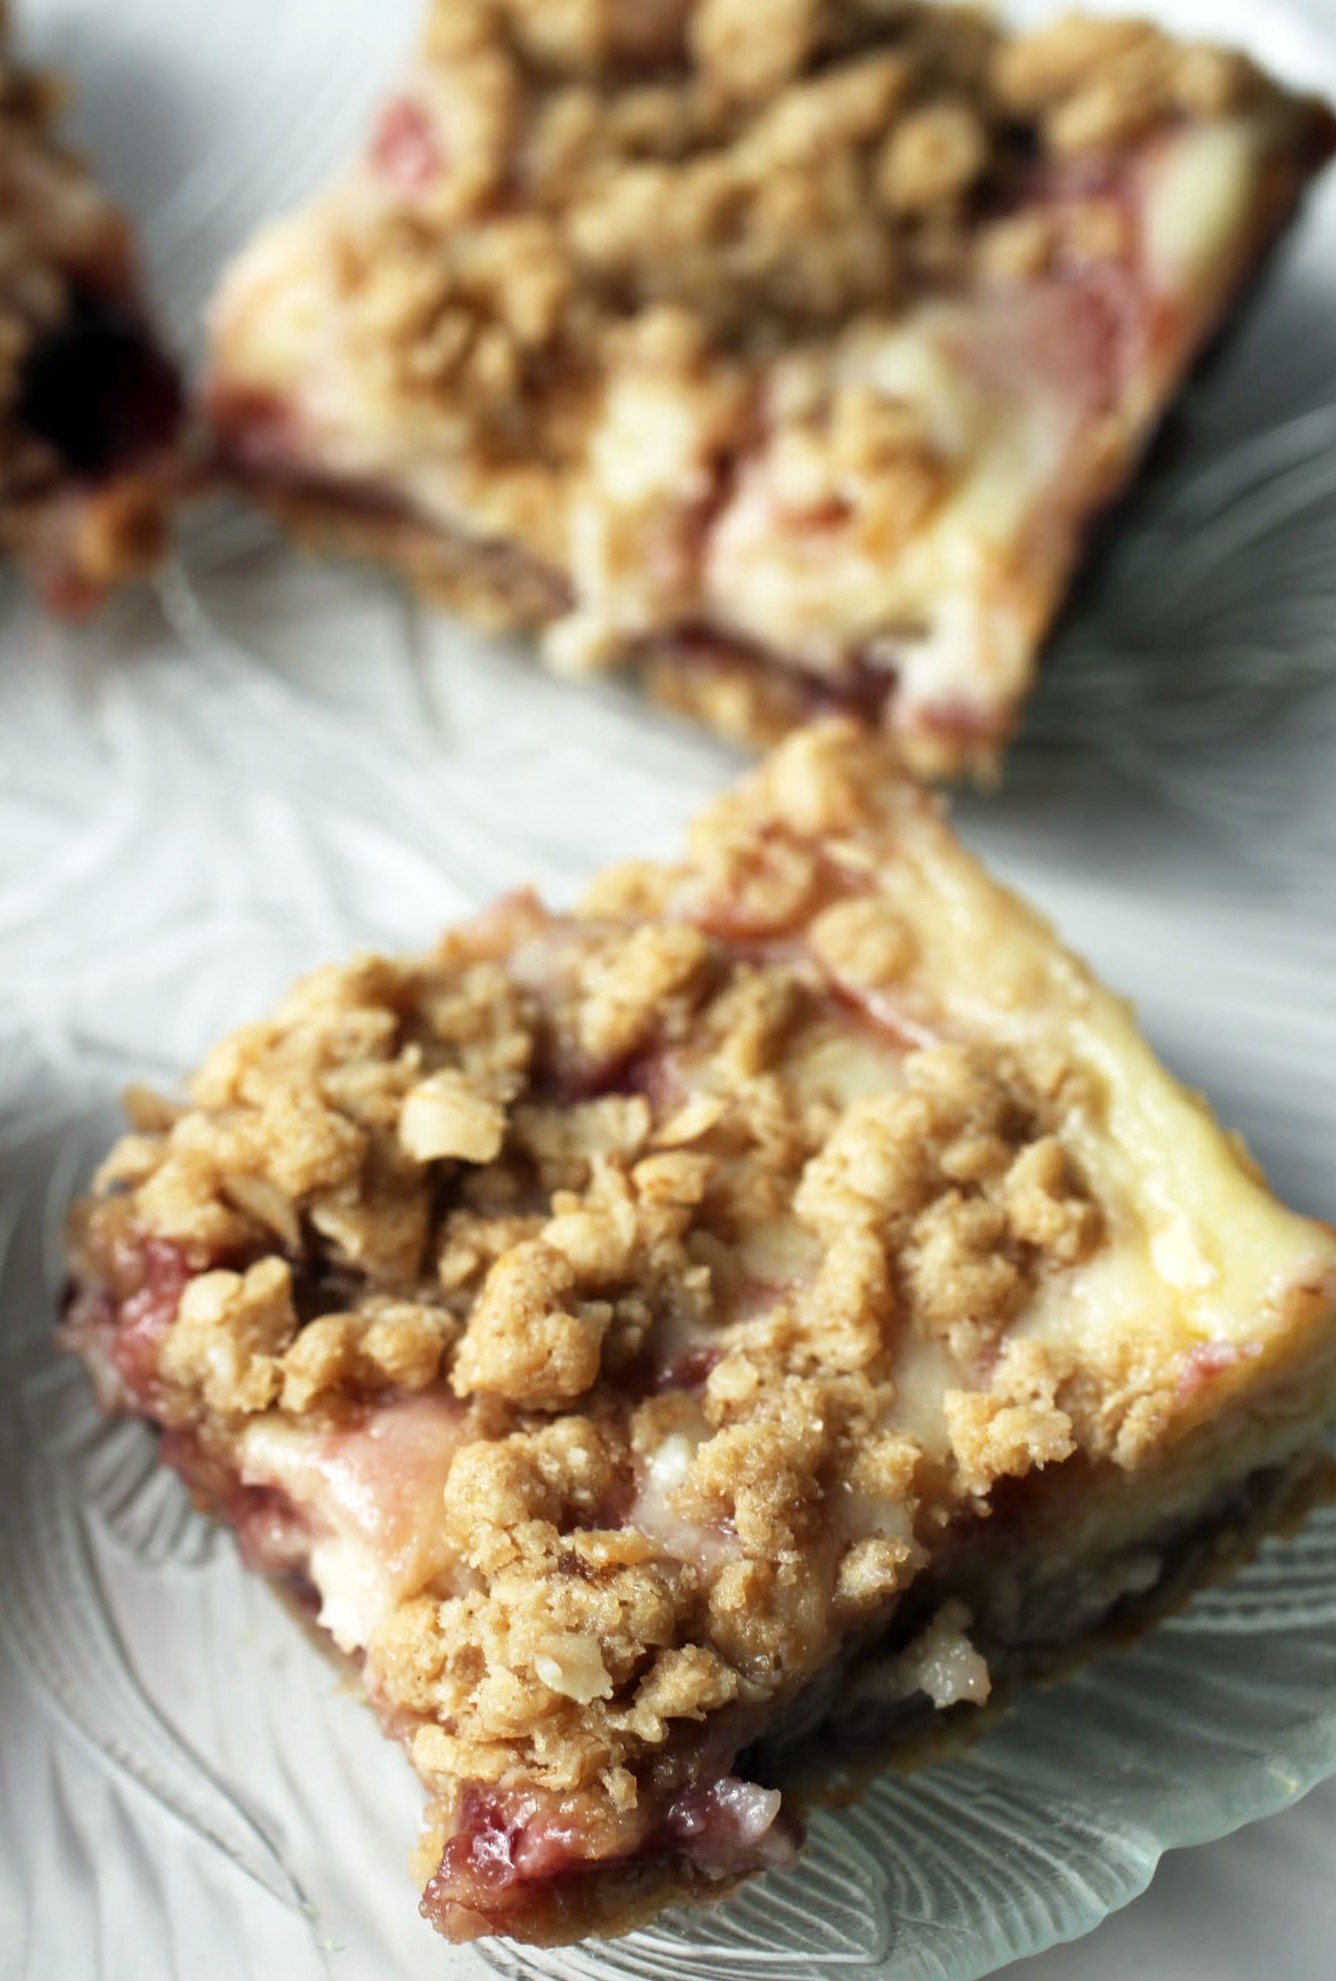
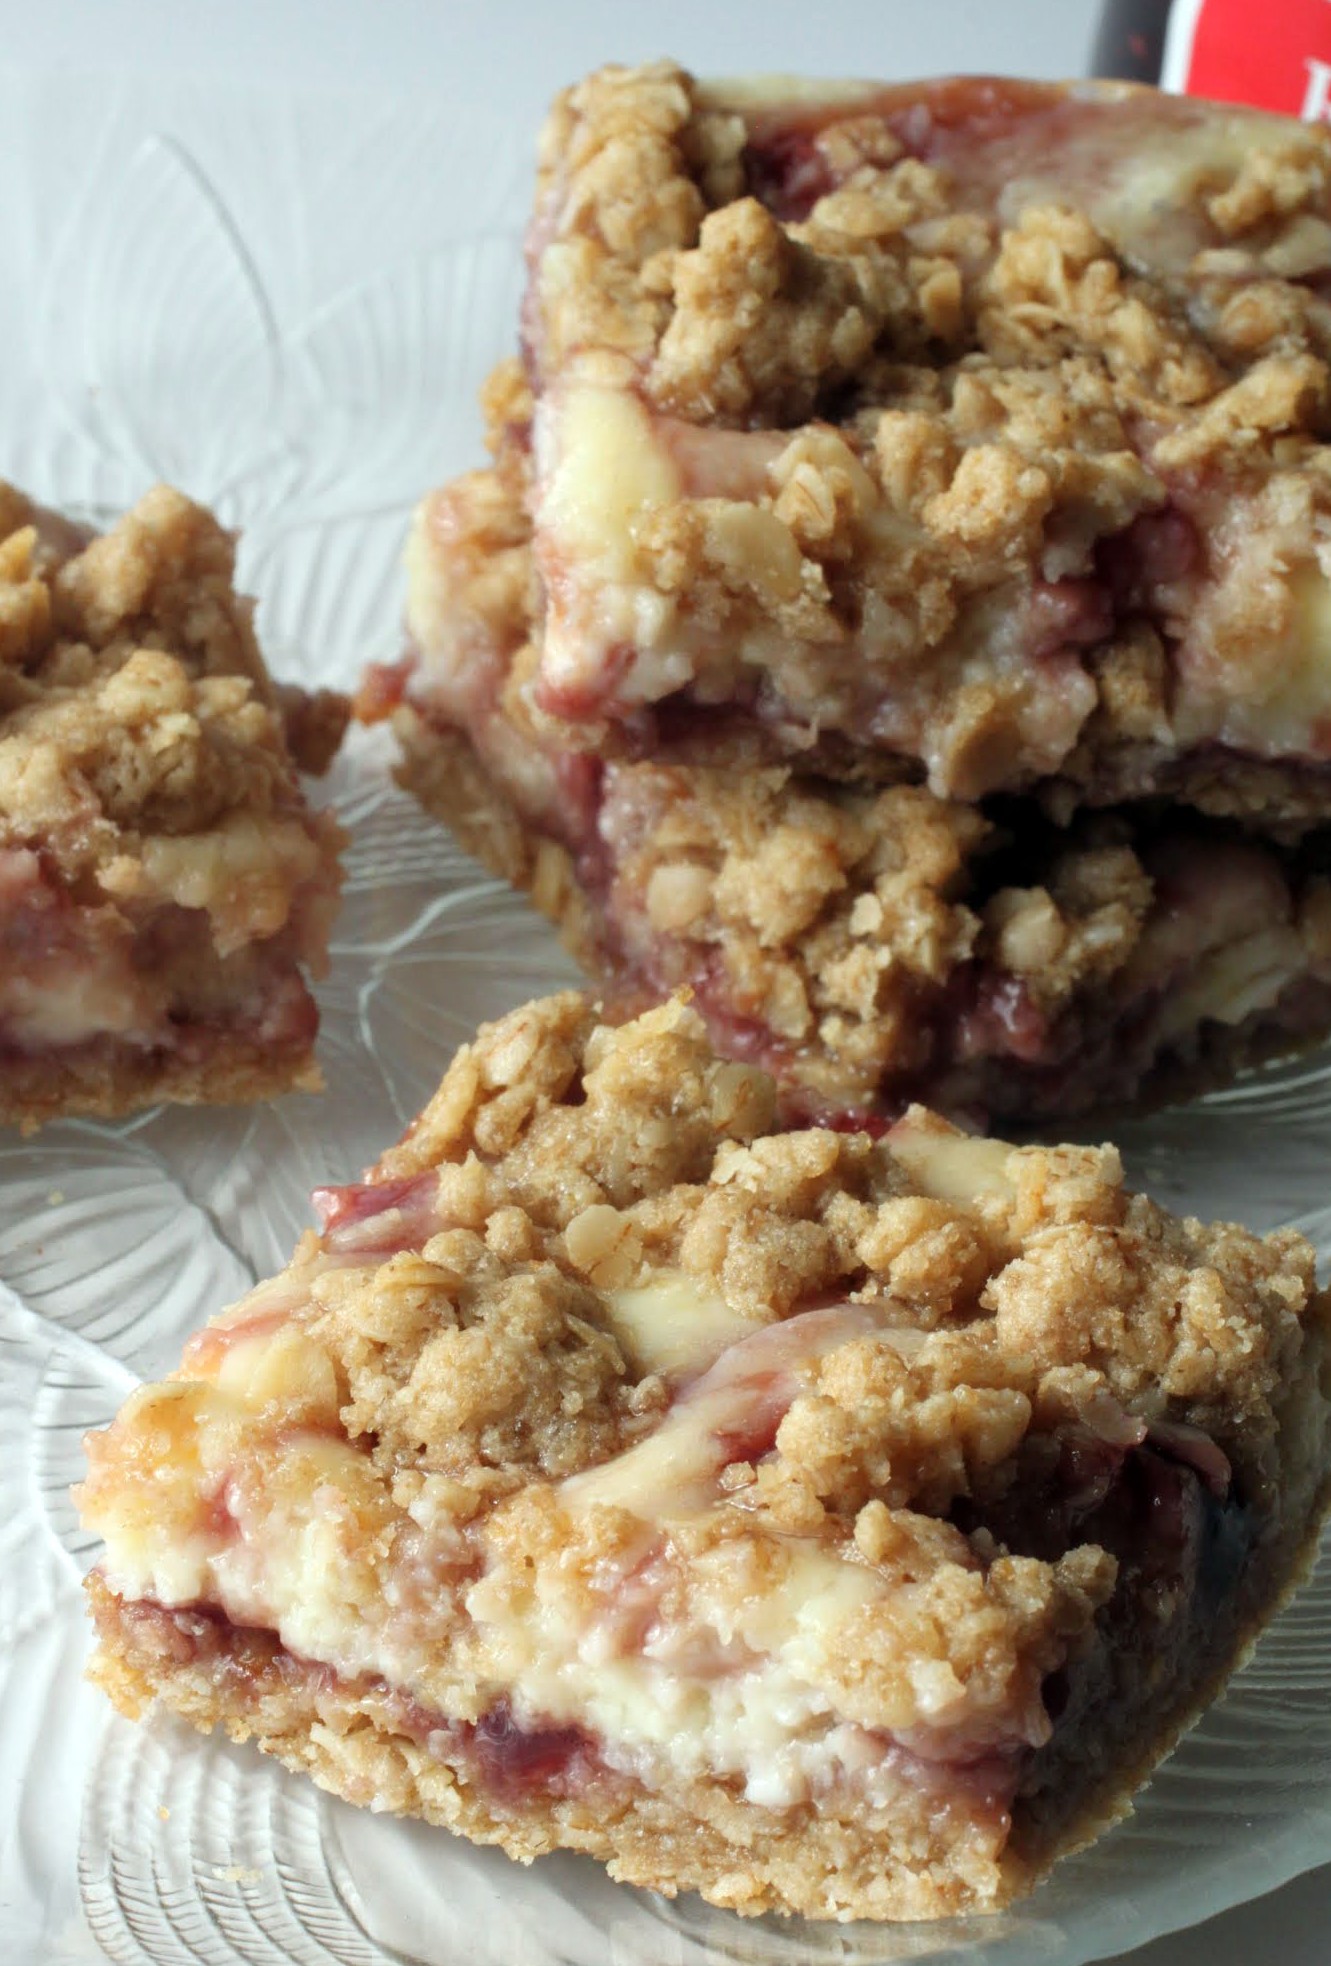
What could be better than a raspberry crumb bar, you wonder? How about a raspberry crumb bar with cheesecake filling? Do I have your attention now?
The school year starts in two weeks and I’m in overdrive, but I have to pause and fulfill my civic duty. Yep, that’s right. Jury duty calls!
This is the fourth time I’ve ever been on jury duty, and the second time in two years. Lest you think I am a star juror, banish that thought from your mind. That’s not it. I must have some kind of force that emits rays to jury selection people. Otherwise, my popularity makes no sense.

Years ago, I was called to a six-week jury trial at the beginning of summer. They took four days to make a selection, and the whole time I was really worried that I would lose my entire summer vacation to our justice system. Thanks to the powers above, I wasn’t selected and my summer remained intact. But close call!
Kenny was also called to jury duty a few weeks ago, and he was so excited. Unlike me, he’s never served before, so it was a novelty for him. He went very happily and waited to be called, and…nope. They dismissed him around noon. But he can feel good that he’s off the hook for another few years. Maybe.
Whenever I have jury duty, snacks are important. They keep me cheerful during the monotonous hours of waiting for something to happen. The thing is, though, the snacks have to be easily packed. That’s where these bars come into play!
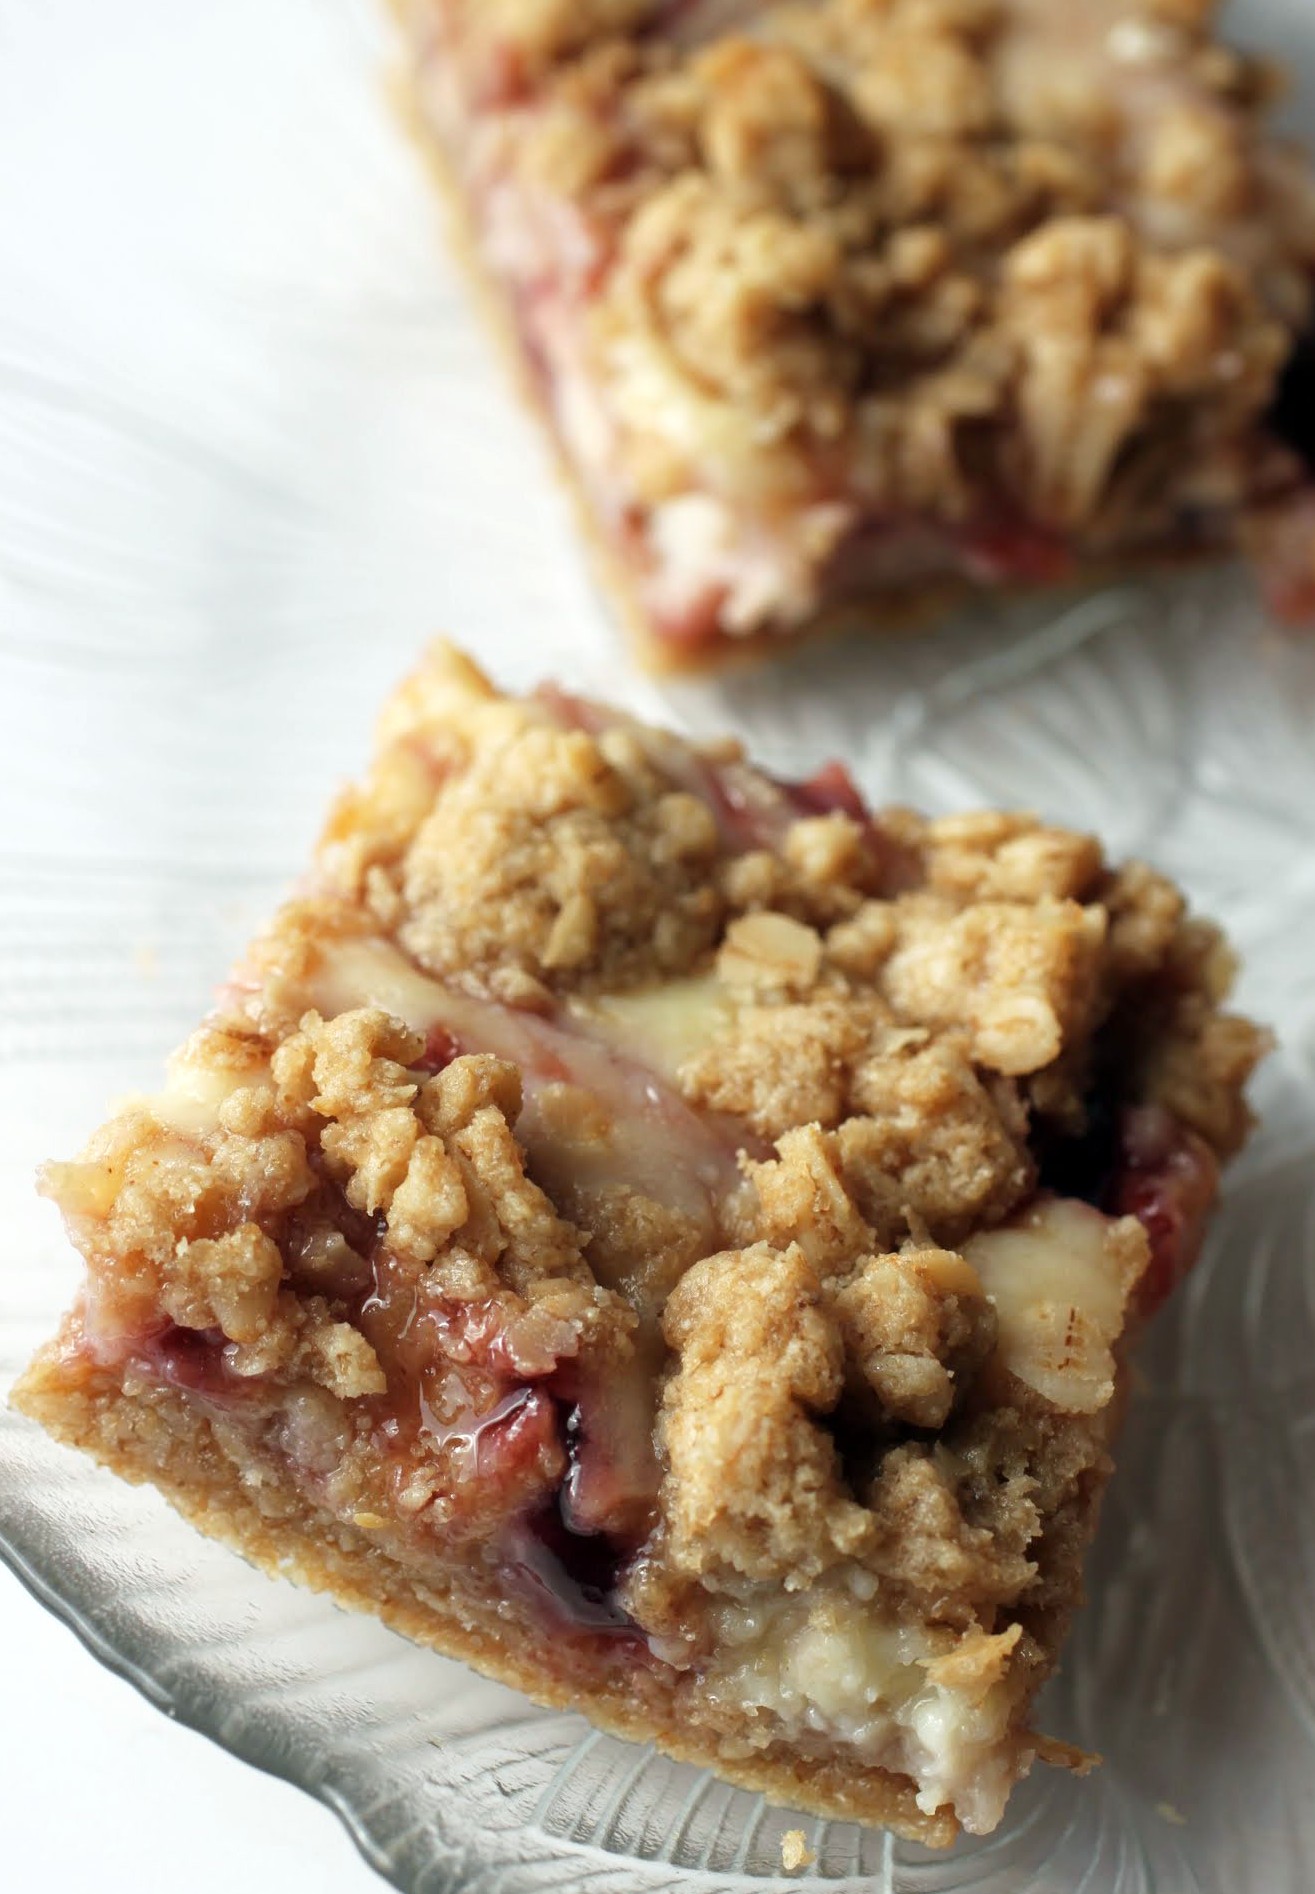
The bottom and top are made of the same crumbly oat mix (gluten-free, of course). I like to double up on the raspberry jam by first spreading some over the bottom layer, pouring in the cheesecake filling, and then dolloping some more on top, swirling it with a knife. And on top? Those miraculous crumbs!
I might have to do my civic duty for the umpteenth time in my relatively young life, but I’ll do it happily as long as I’m kept fortified. These raspberry cheesecake crumb bars should do the trick!
Ingredients
Instructions
- Preheat the oven to 350. Line an 8-inch square pan with foil and coat with cooking spray. Set aside.
- In a large bowl, combine the oats, oat flour, brown sugar and salt. Add the melted butter and mix until crumbly.
- Set aside about 1/2 to 3/4 cup of the mixture. Take the remaining crumb mixture and press it firmly into the prepared pan.
- Spread the 1/2 of the raspberry jam over the bottom layer.
- In a medium bowl, make the filling. Combine the cream cheese, egg and sugar, mixing well until smooth. A fully softened cream cheese is ideal (I leave mine on the counter for an hour) to prevent a lumpy batter.
- Pour the cheesecake filling over the bottom layer. Take the remaining raspberry jam and spoon it onto the filling in even intervals. Use a knife to gently swirl the jam into the cheesecake filling.
- Crumble the remaining oat mixture over the filling layer evenly.
- Bake for 20-25 minutes until golden. Cool completely. Chill overnight.
- Cut into squares and store in an airtight container.
My family, of course. My kids are still at that age when they want me around all the time, so I’ve been peeling them off me as I head to the car to go to work. It’s a nice feeling, being wanted. I know they won’t always feel that way, so I’m enjoying that. And Kenny is my rock, the one who listens to me talk endlessly when I’m decompressing after a long day.
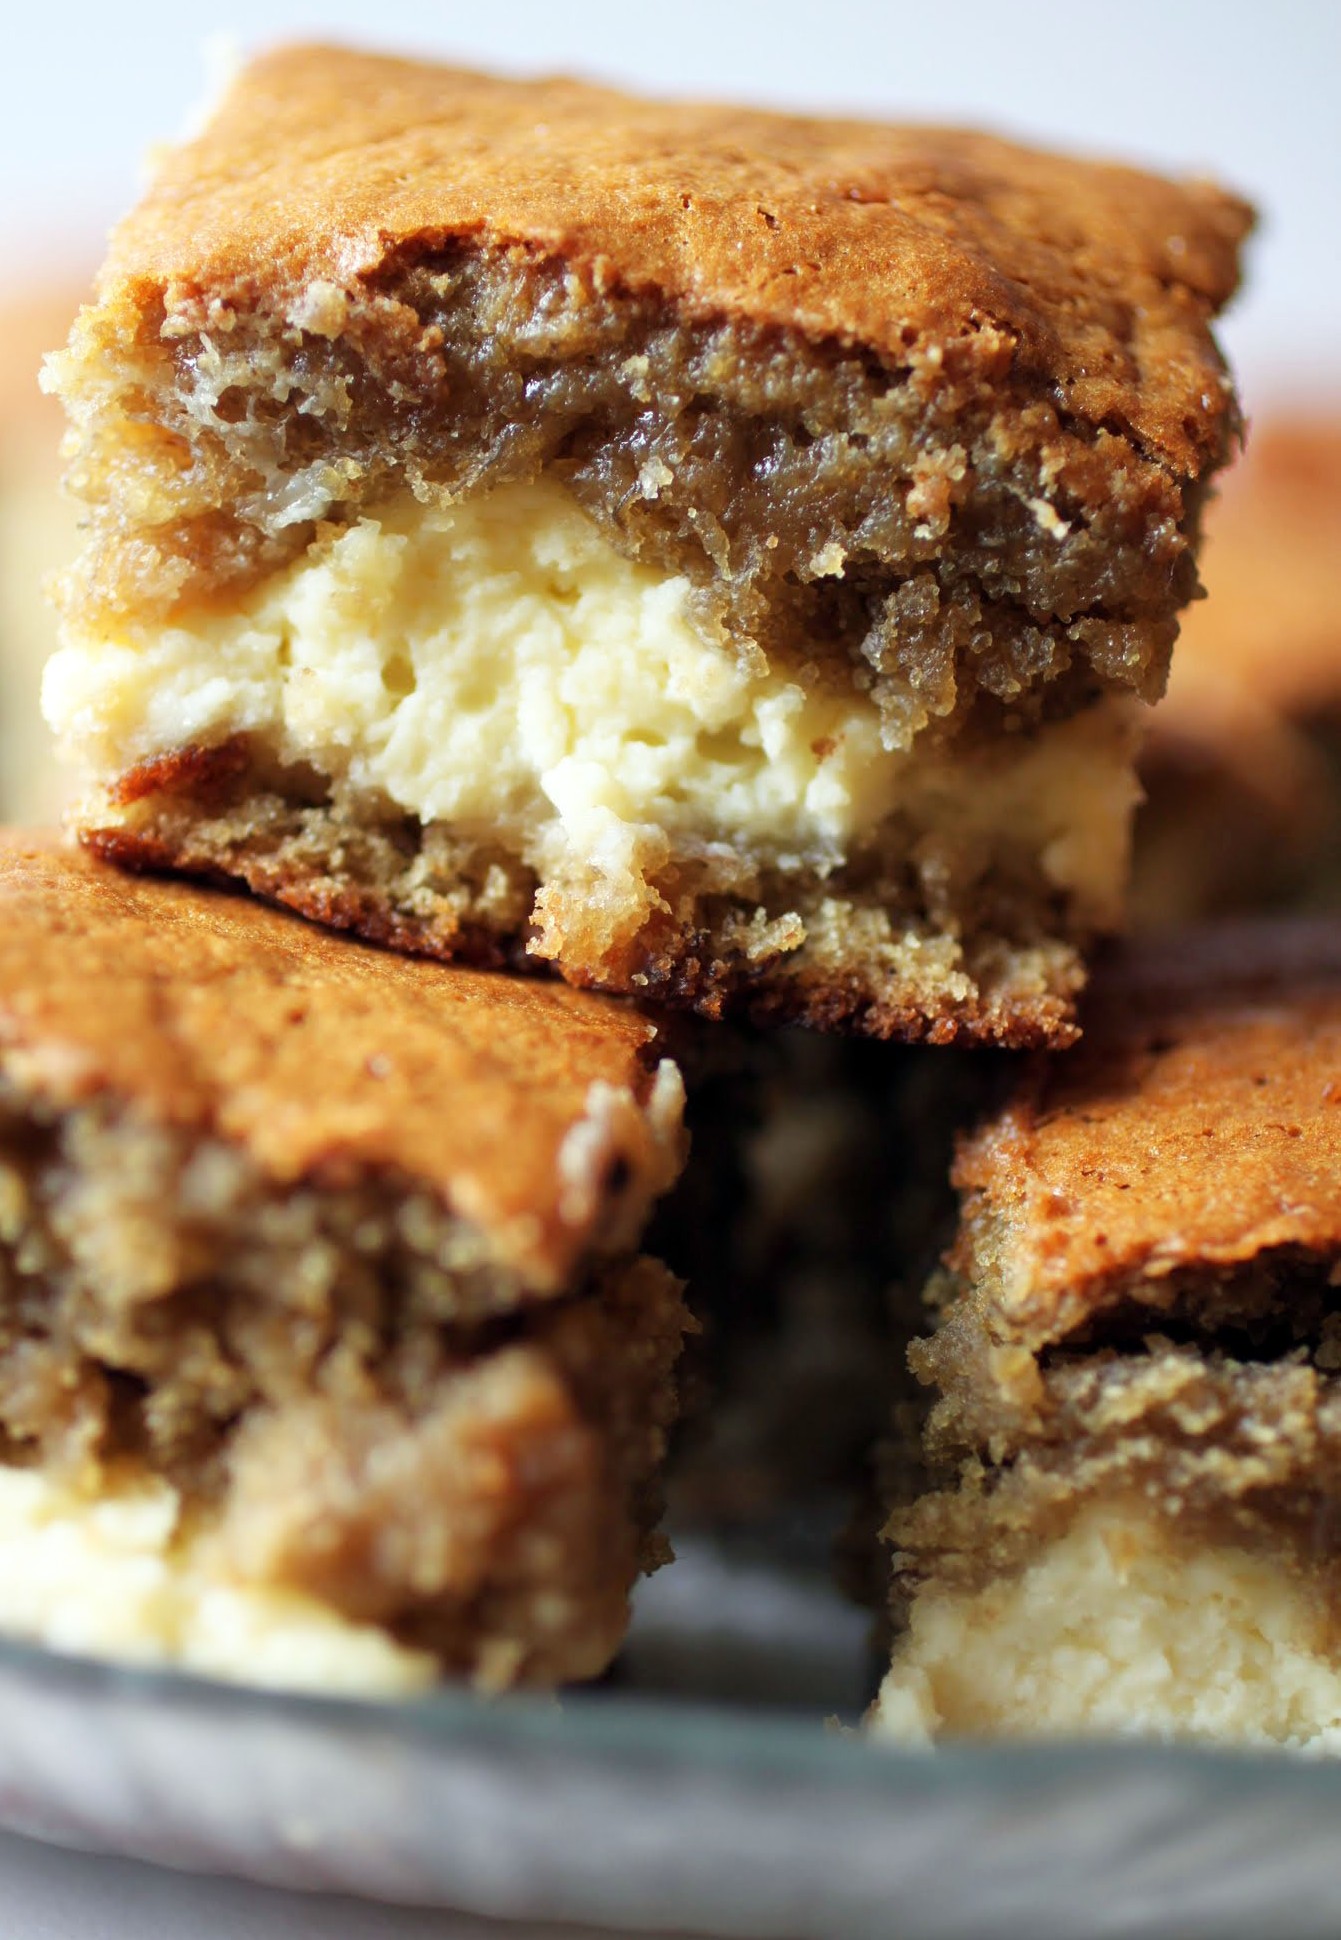
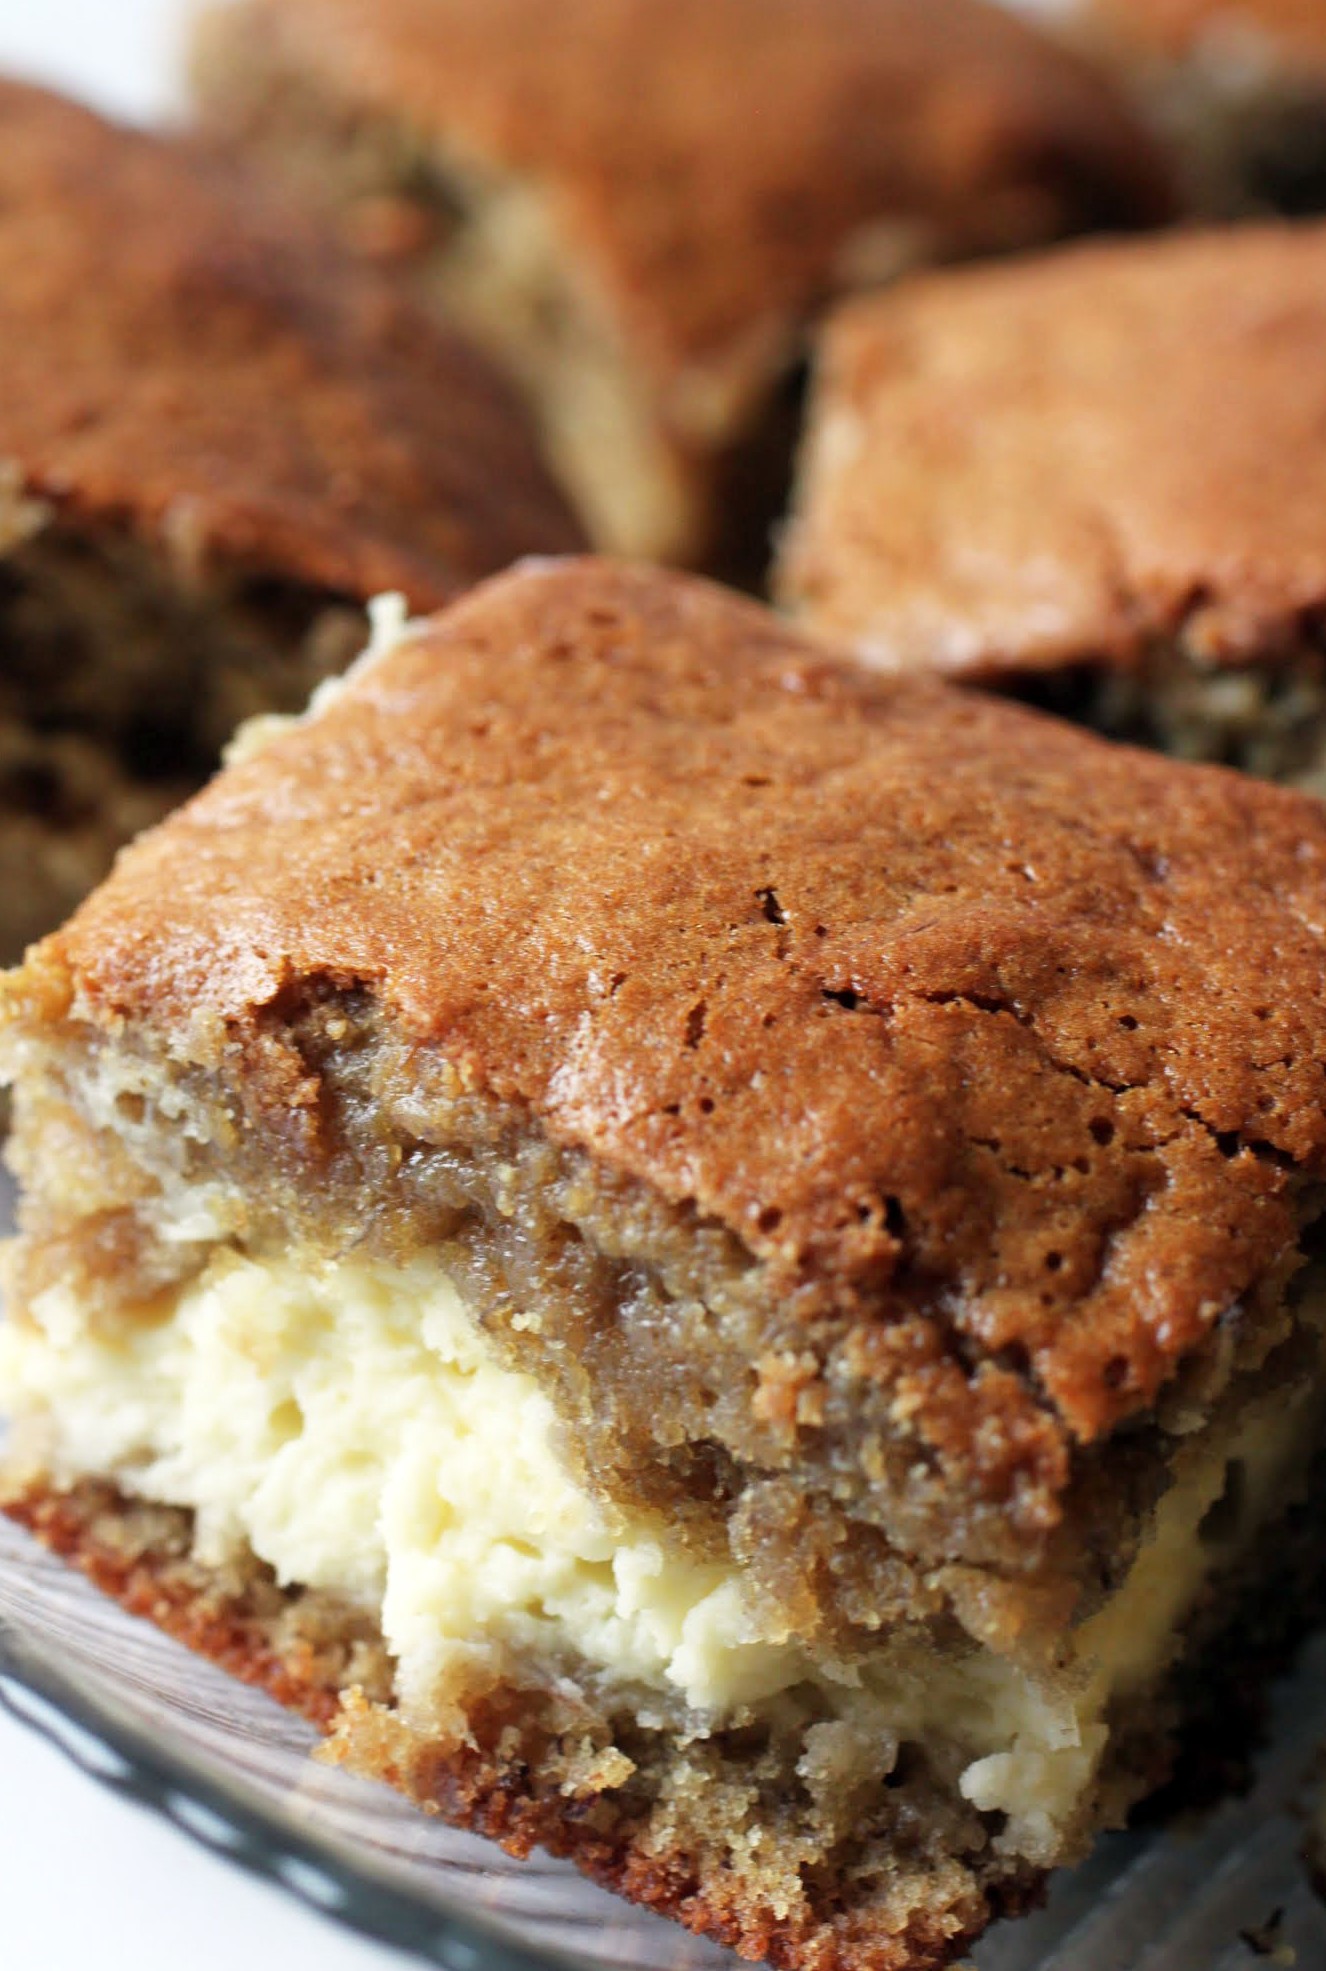
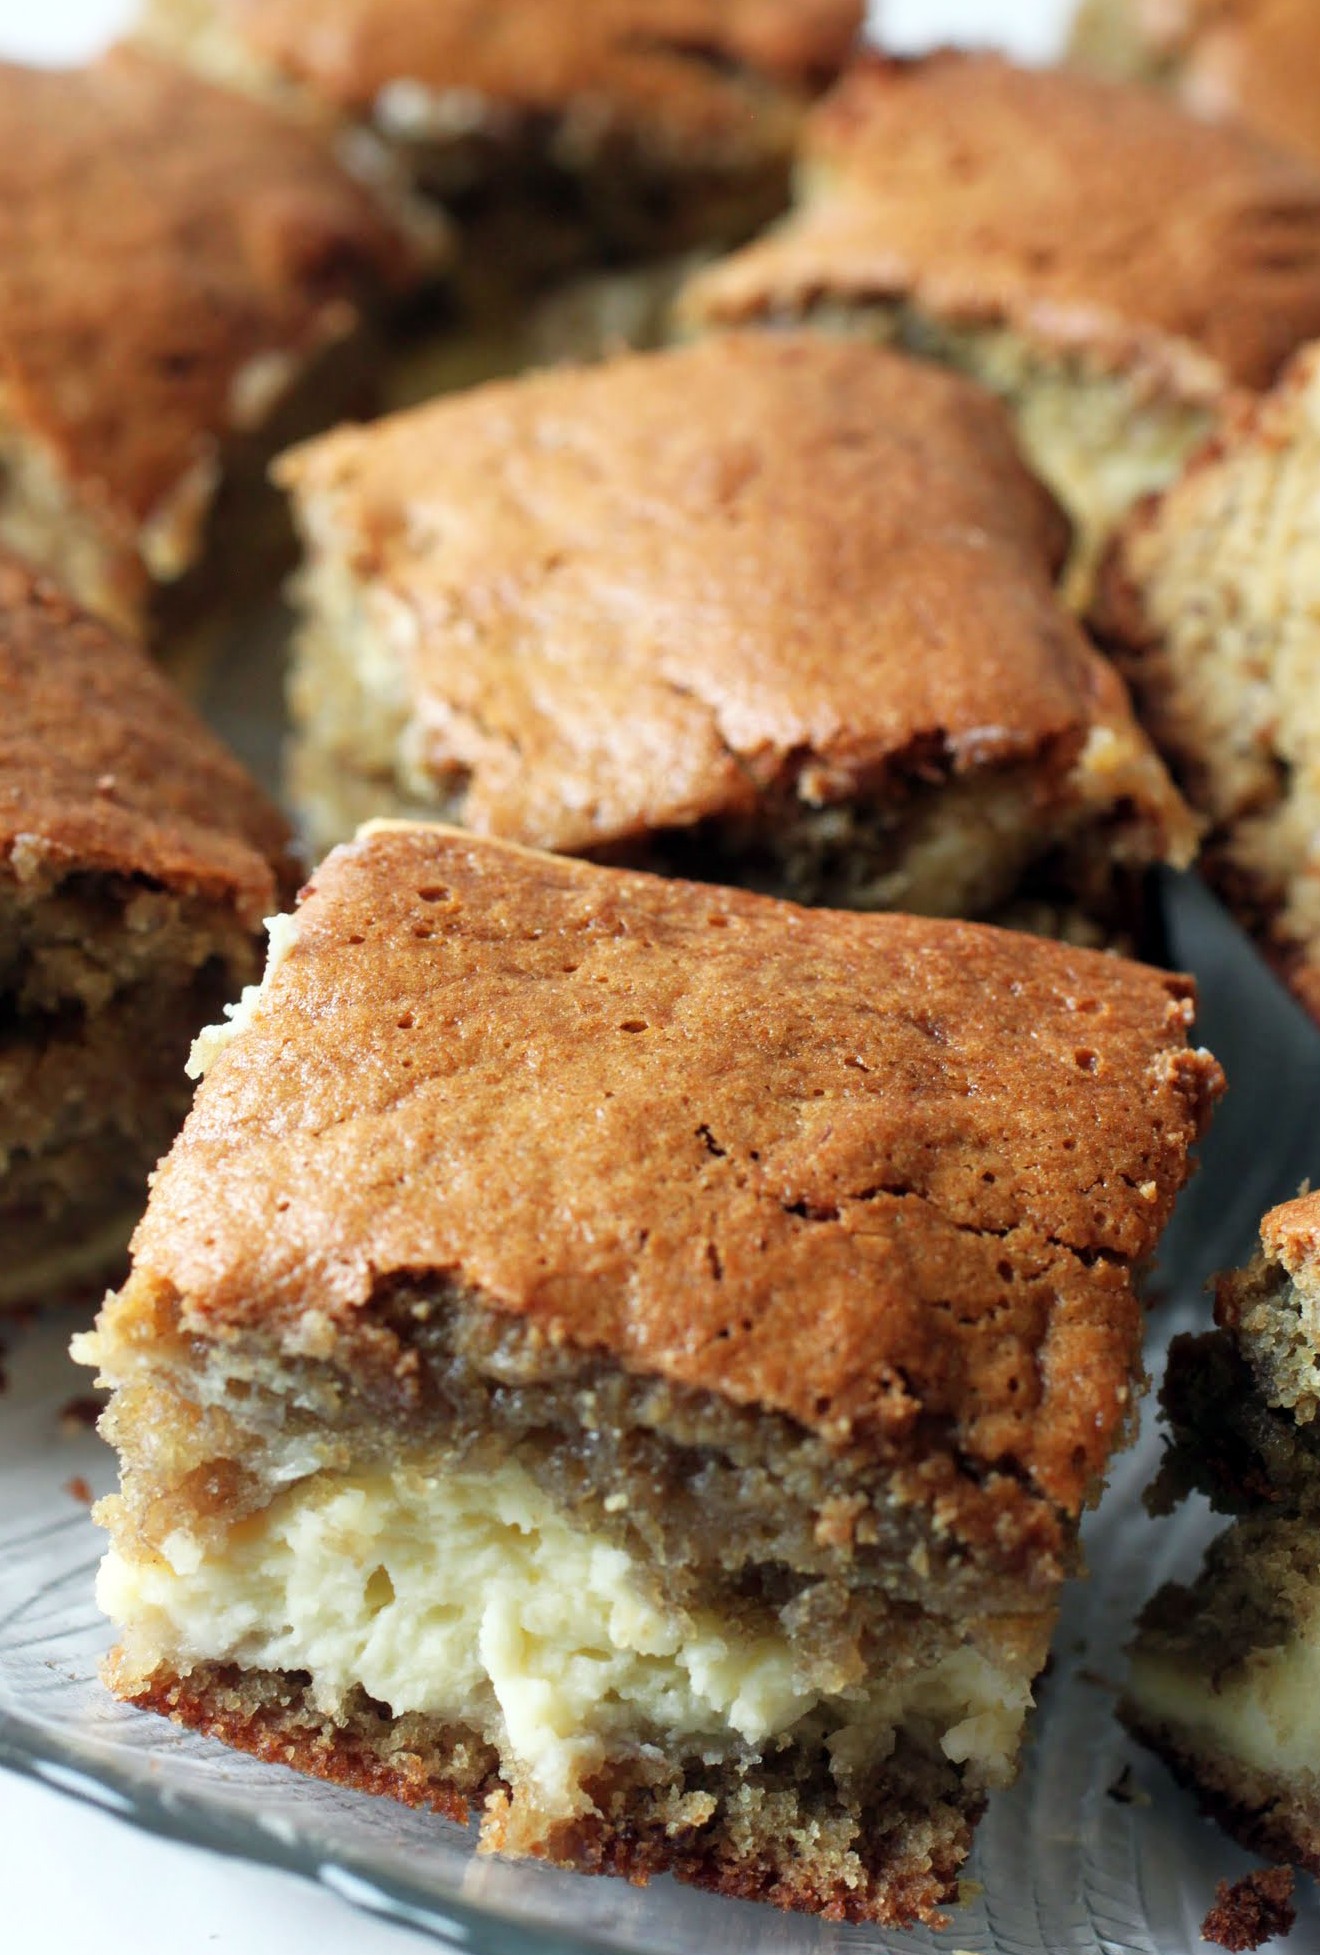
But let’s not forget you all! JAB is one of my constants as well, and I love the rhythm of baking for the blog. Nothing is quite so relaxing as mixing things together. This week, I decided that the tired bananas on my counter needed a little more than just the usual treatment, so I got sneaky and put a cheesecake filling into the center. Hello, beautiful!
I’m pretty proud of the fact that when bananas turn brown in my house, my son points them out and says, “Time to bake!” That’s right. He knows! I’m proud. Everyone also knows to ask if I’ve taken pictures of dessert yet before they dig in. Life in the home of a food blogger, people. It’s a party every day.
When you bake this much, you fall into the habit of having really good stuff around. Homemade stuff, the good stuff. So as a result, the packaged stuff becomes the treat. It’s a very bizarre reversal of the norm, where I’ll see a package of machine-made chocolate chip cookies and get really excited. I guess novelty has charm, huh? There’s something about that processed taste!
A lot of it is nostalgia, too. When I was growing up, my source of almost all dessert food was Entenmann’s or those really cheap grocery store brand cookies. To this day, no donut tastes better than an Entenmann’s rich chocolate frosted donut with a glass of milk. It’s like my childhood comes rushing back at me with each bite.
Food is a time machine, people. I think there’s no more reliable way to travel to childhood than to eat those foods you ate way back when. Nothing is quite as evocative or powerful. Maybe it’s because taste is such an integral part of our sensory spectrum, along with the sense of smell.
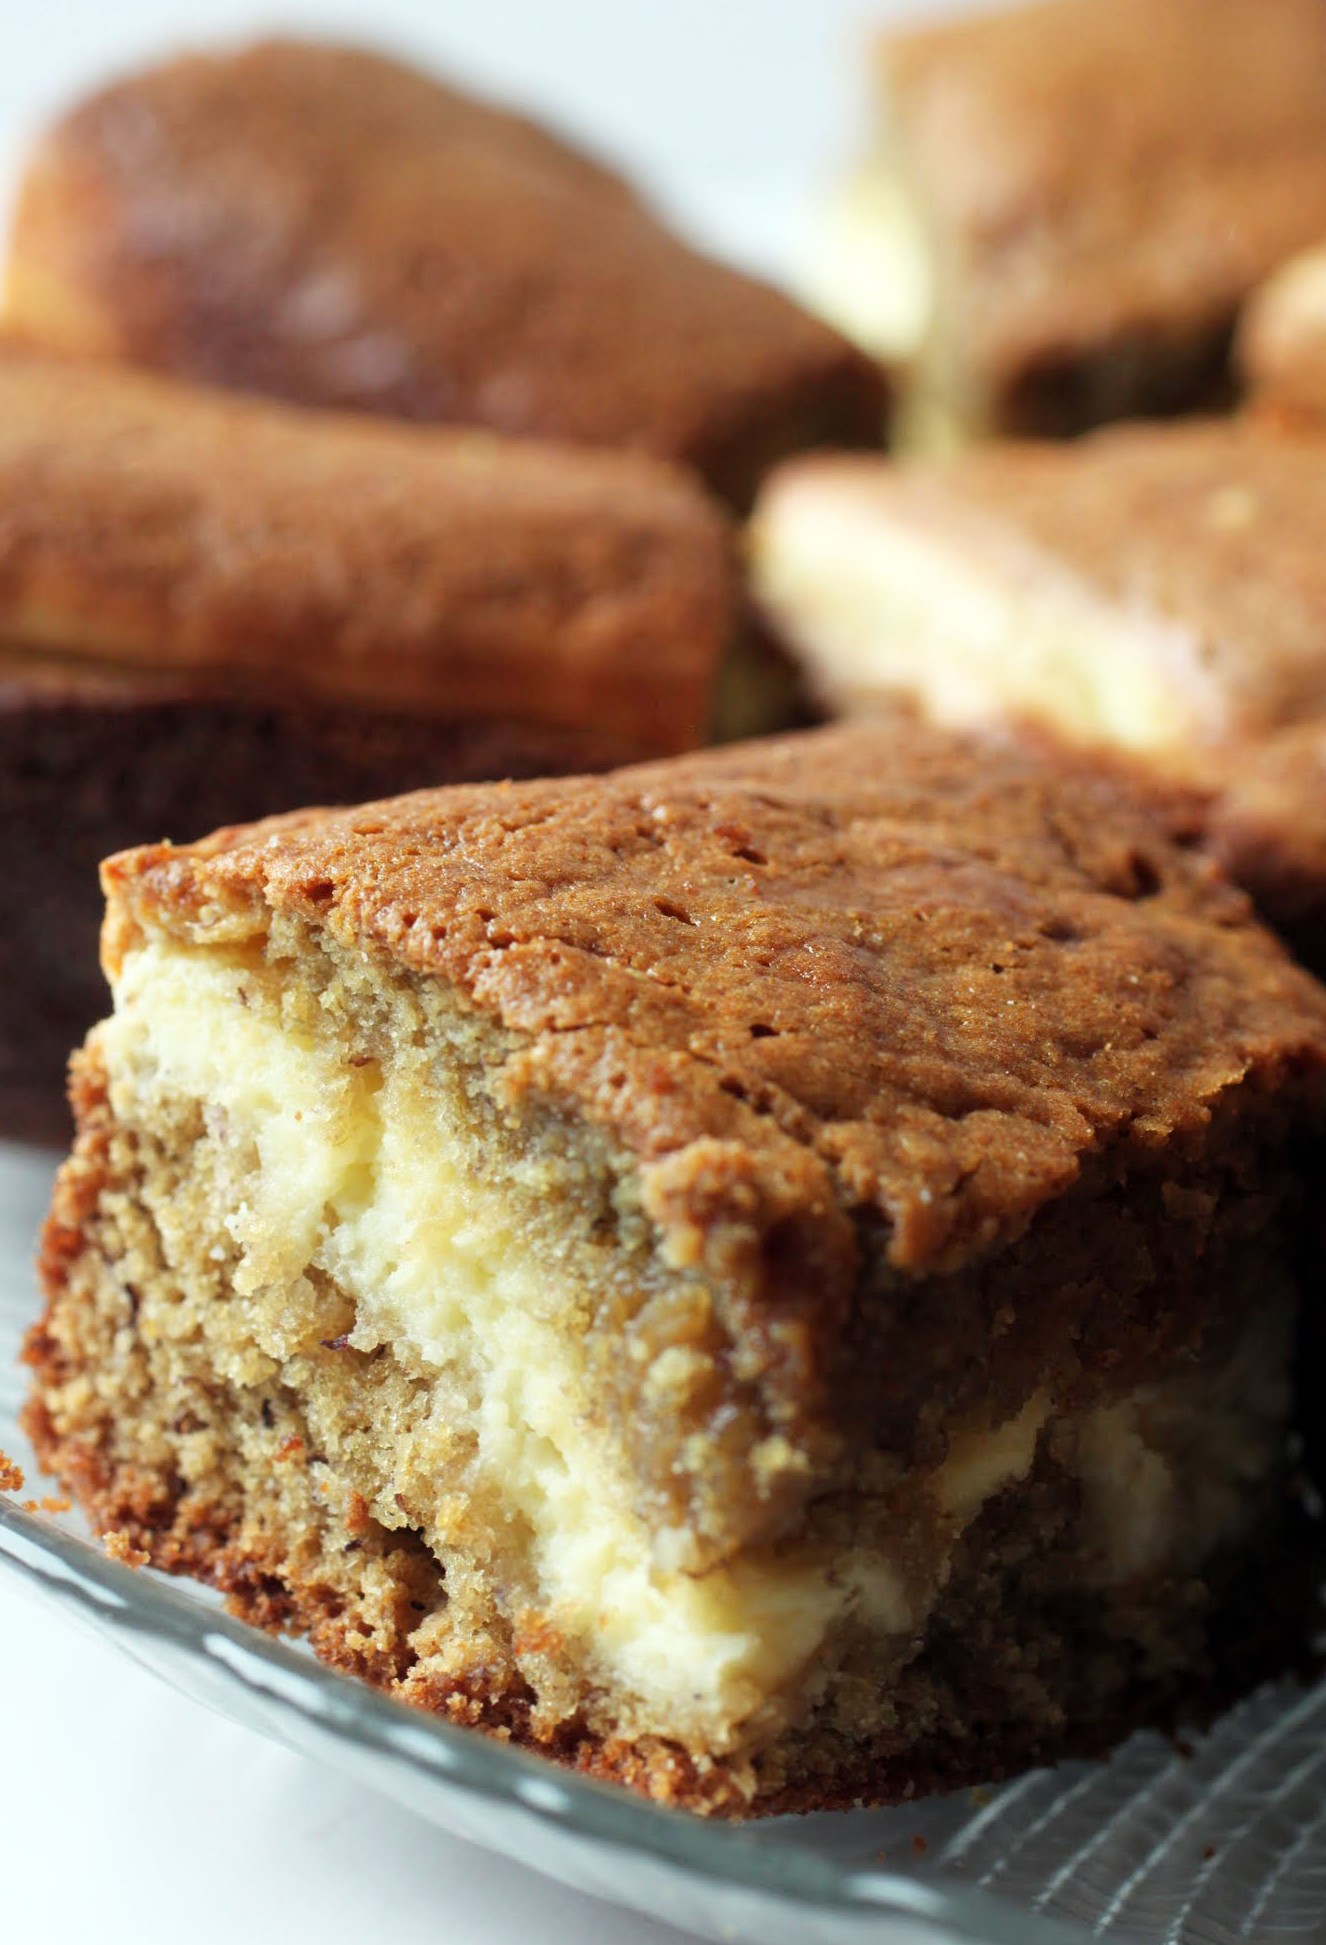
My love of banana in cake or quick bread also goes back to childhood. Now and then, my mom would take those brown bananas on the counter and make a banana bread. I never understood how a fruit that I felt pretty indifferent about (and now don’t eat as an adult unless it’s baked into something) could be the base of such a delicious dessert. That, in a nutshell, is the wonder of baking, and why I never cease to be fascinated at what a little bit of oven and lovin’ can do.
This snack cake is gluten-free, moist, and filled with a very simple cheesecake filling. It’s just cream cheese, sugar and egg. That’s it! The cake is also simplicity itself, all coming together in one bowl. Like childhood, it’s not that complicated. Oh, wait. Childhood is very complicated. I remember!
No matter how old we are, we can always go through adjustments. It’s important to have those constants in our lives that ground us and make us feel connected to something that represents a greater scheme. Along the path, it doesn’t hurt to have a lovely cake with a hidden layer of cheesecake to make life even more fun!
Ingredients
Instructions
- Preheat the oven to 350. Line an 8-inch square pan with foil and coat with cooking spray. Set aside.
- In a large bowl, combine the oil and brown sugar, mixing until smooth and all the brown sugar lumps are gone. Add the eggs, yogurt, mashed bananas, and vanilla. Mix well.
- In a small bowl, combine the oat flour, baking soda, salt and cinnamon. Add the dry ingredients to the wet ingredients. Mix until well combined. Set the bowl aside.
- In a smaller bowl, combine the cream cheese, egg and sugar, mixing well until smooth. A fully softened cream cheese is ideal (I leave mine on the counter for an hour) to prevent a lumpy batter.
- Pour half of the banana cake batter into the prepared pan, spreading it out gently to the edges. Pour the cheesecake batter on top, again being sure to gently nudge the filling toward the edges of the pan. Finally, pour the remaining banana cake batter on top, trying to cover as much of the cheesecake filling as possible.
- Bake 30-35 minutes until the a toothpick inserted into the center of the cake comes out clean.
- Cool completely. Cut into squares. Store covered.
]]>
The end of the school year is always a little sad. We say goodbye to students we really liked, clean out our classrooms (only to set them up again two months later), take some time to reflect on what we want to do differently next year, and head out in to the sunlight.
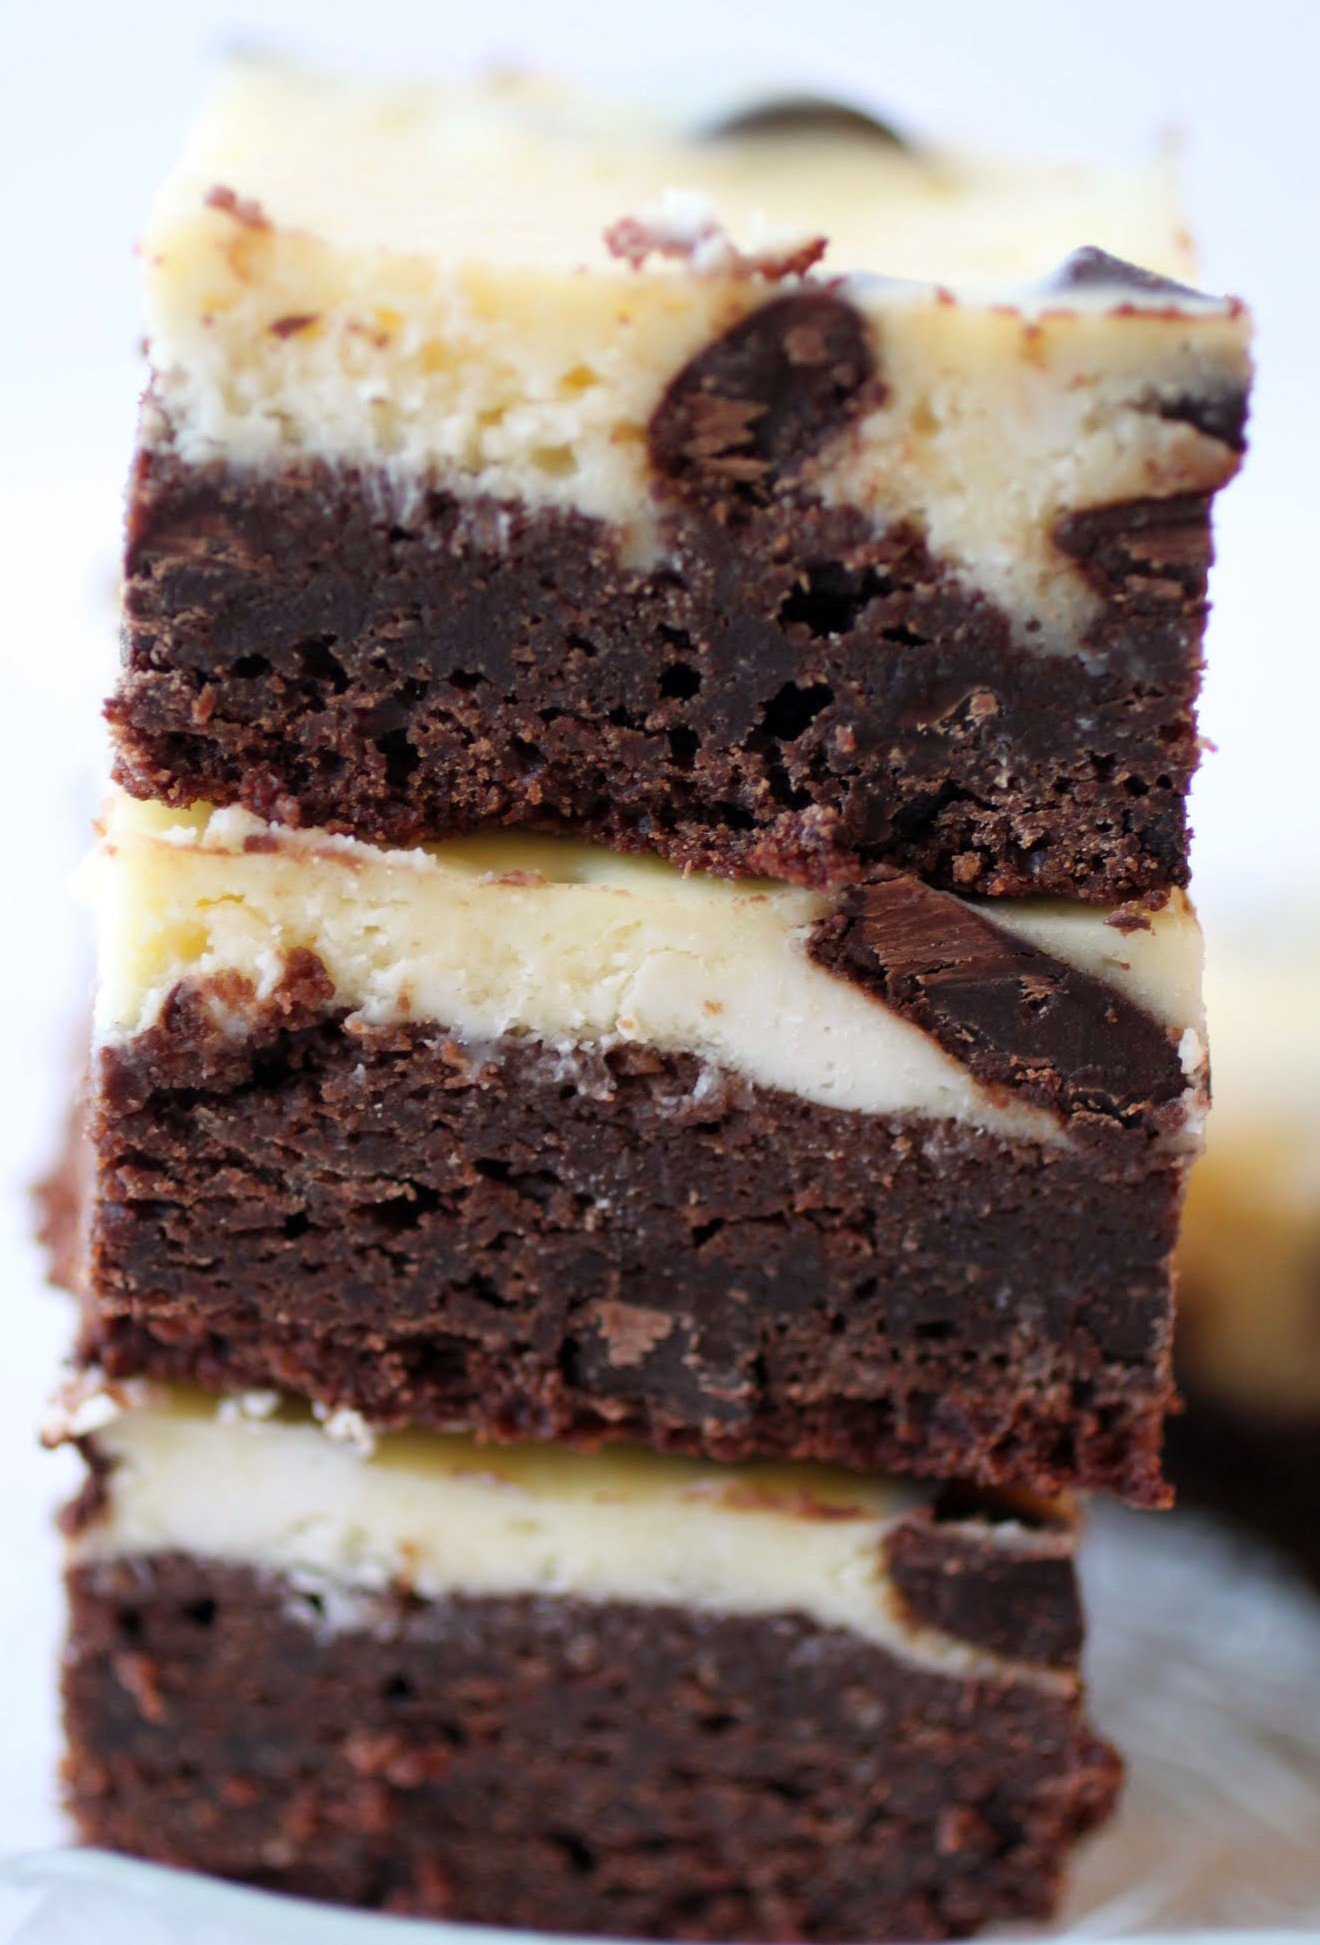
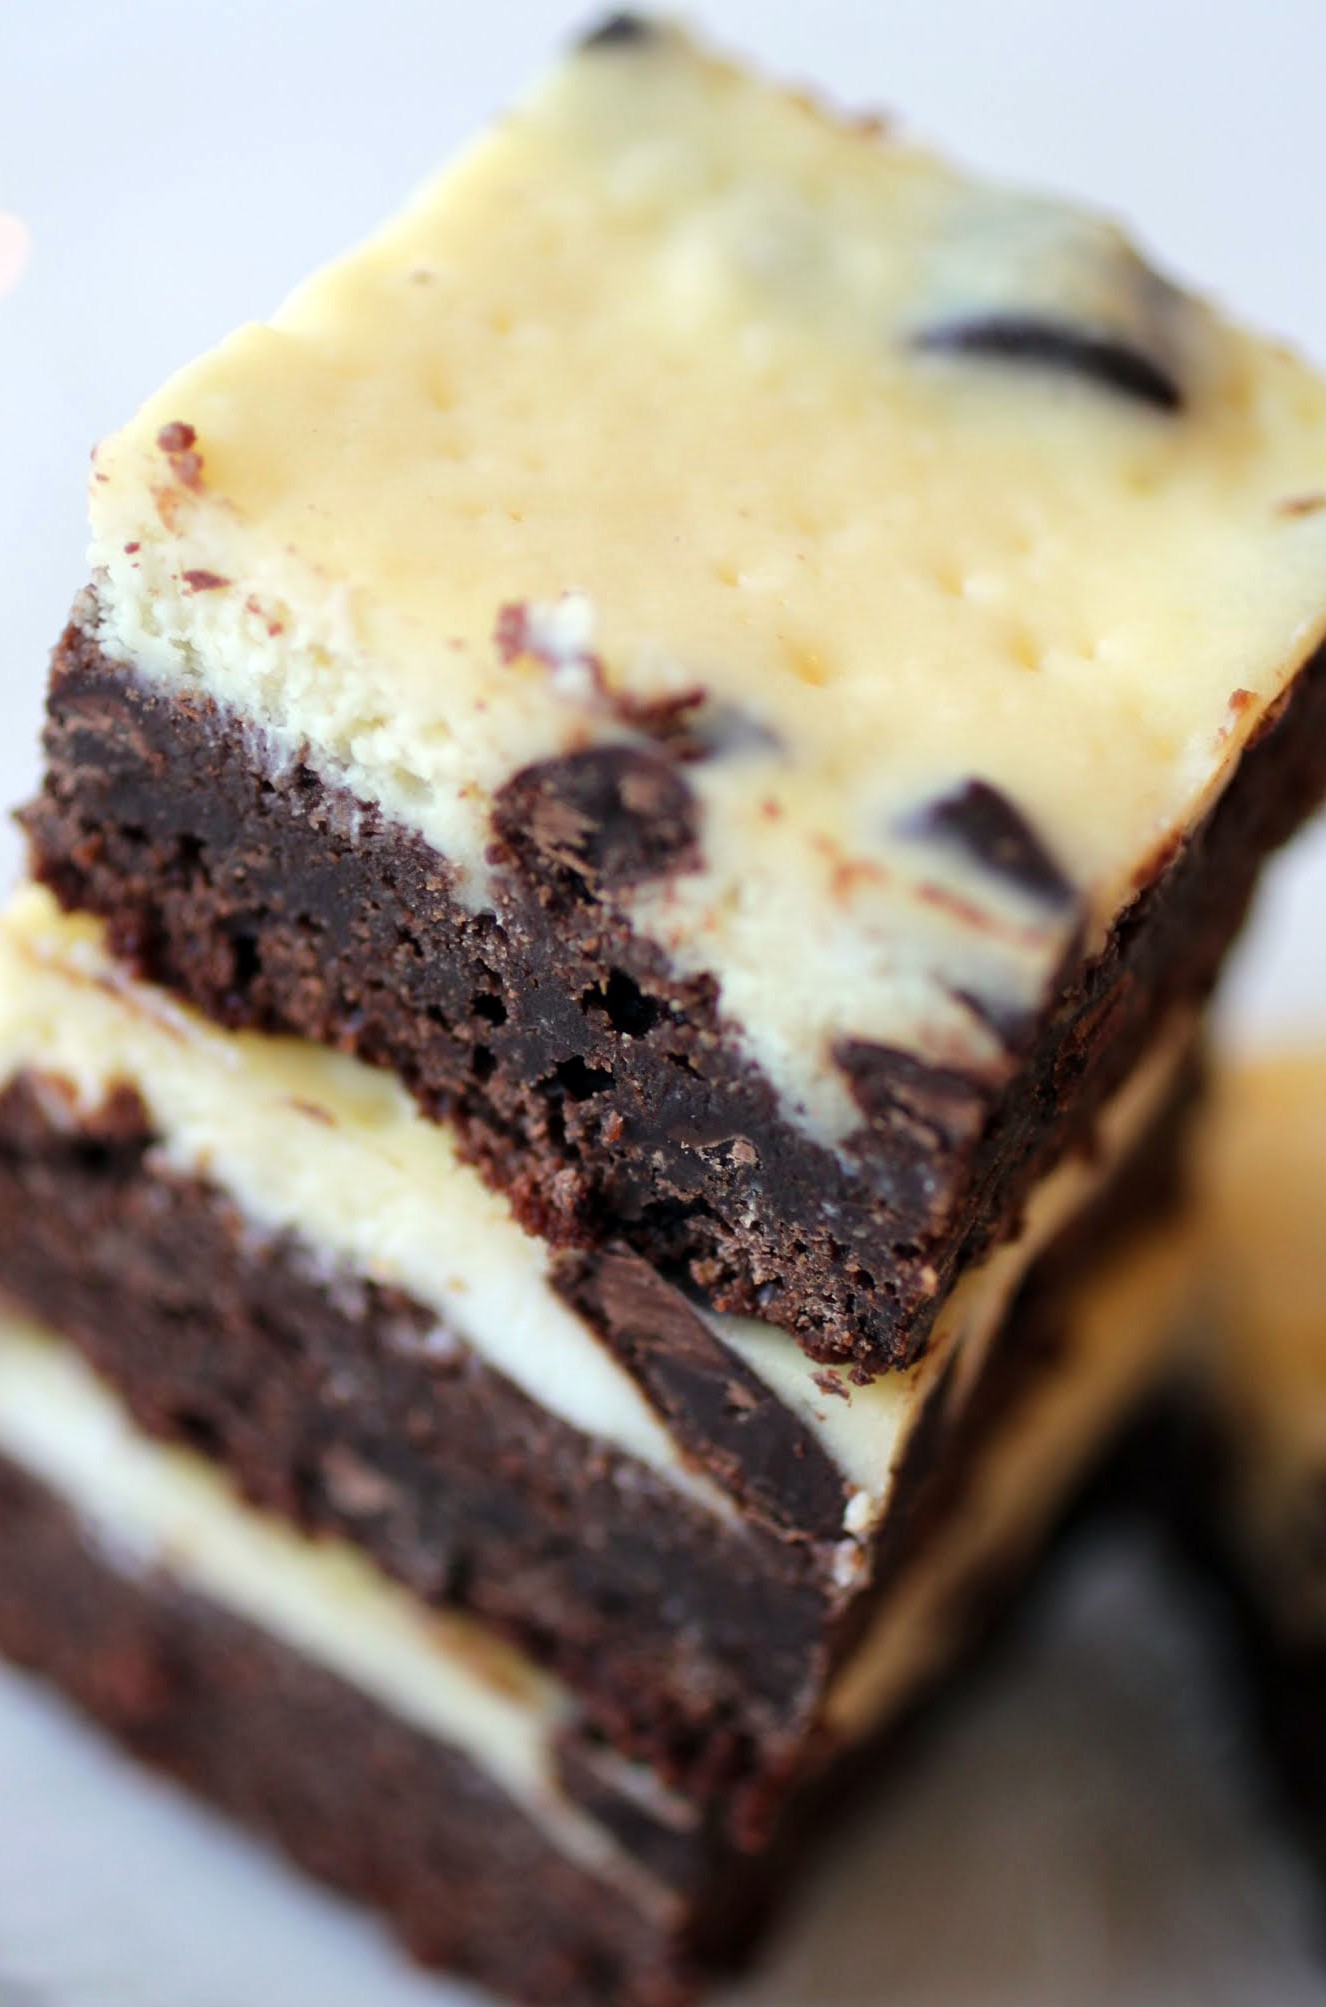
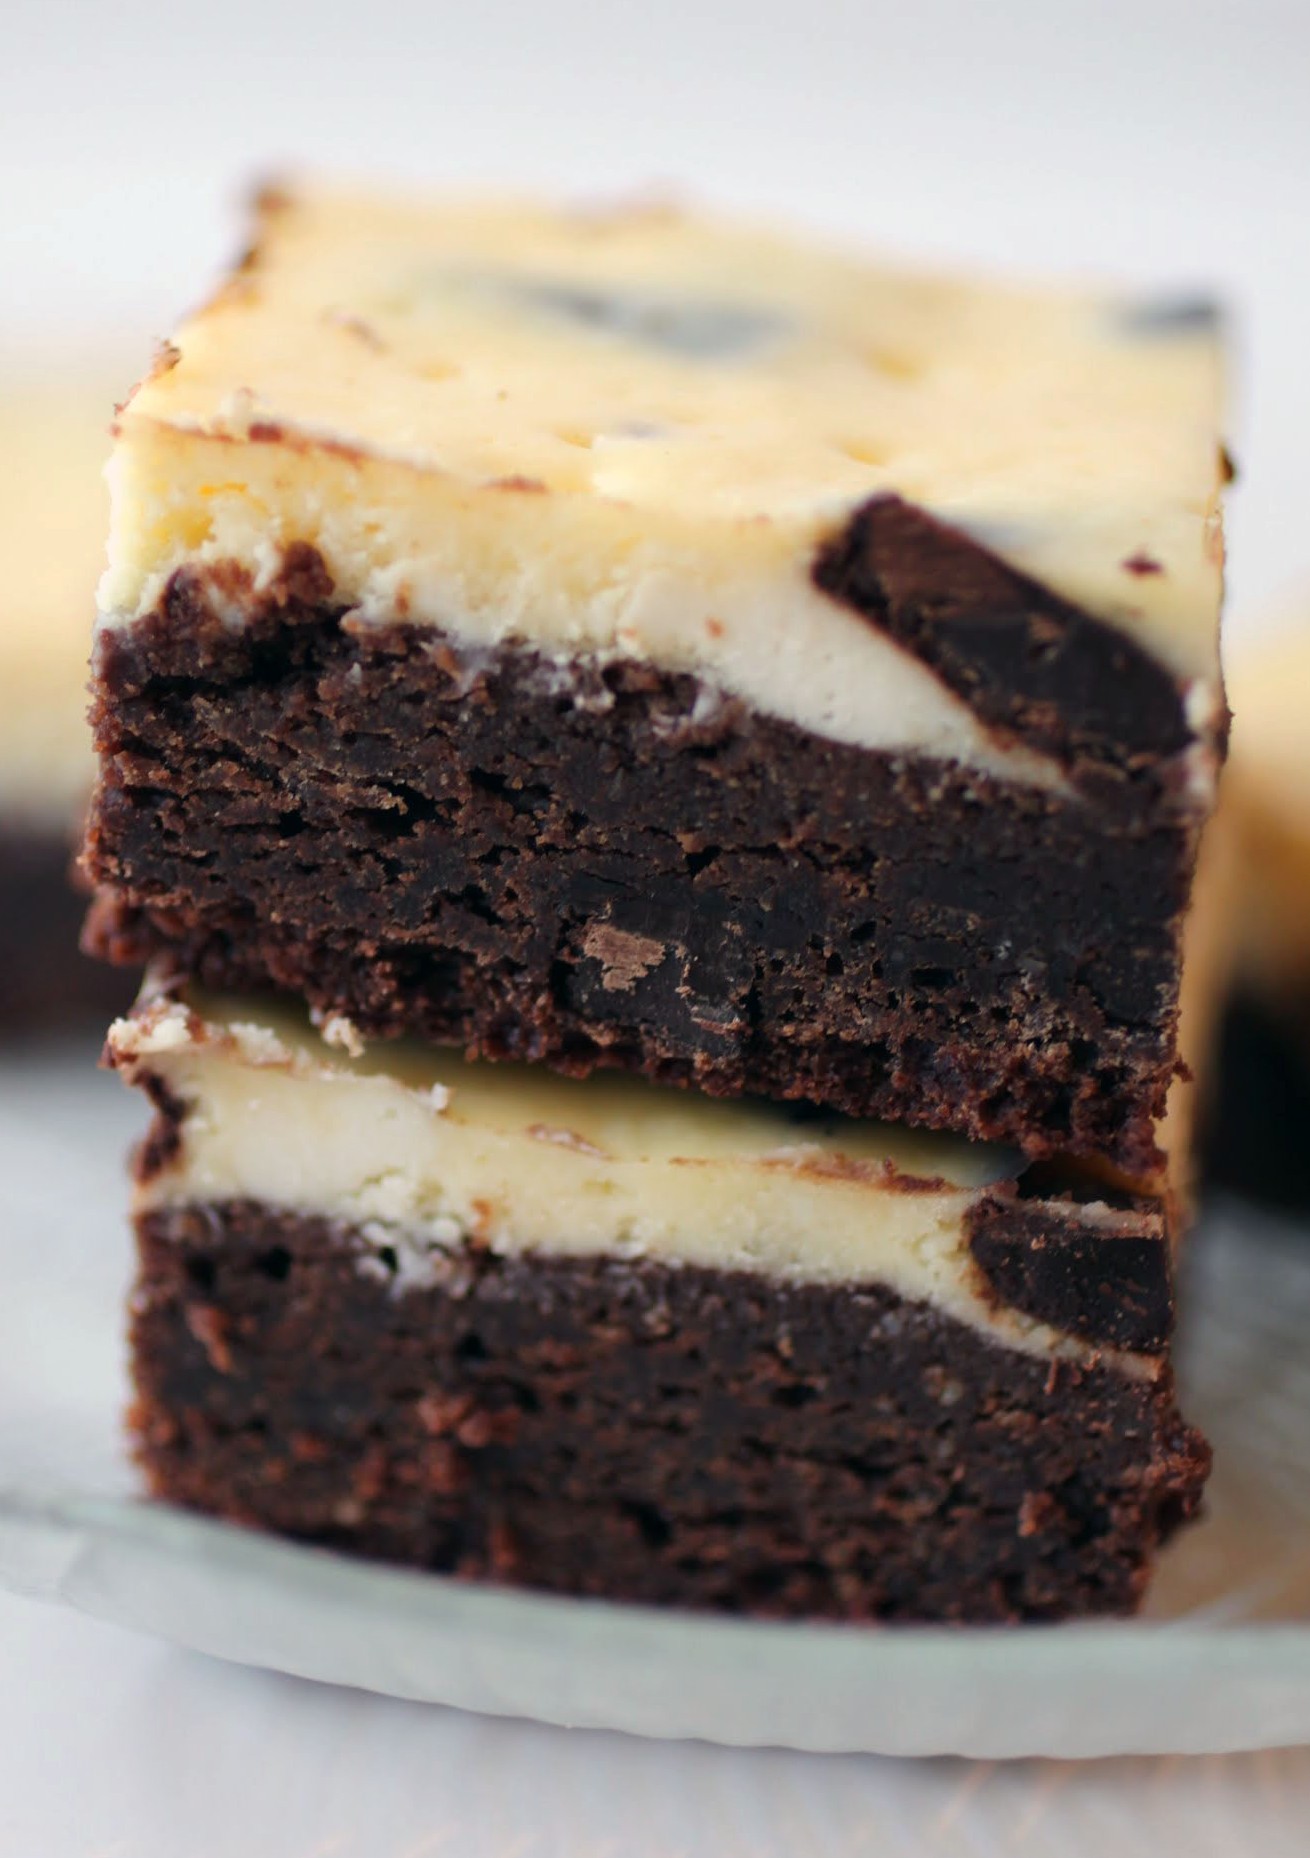
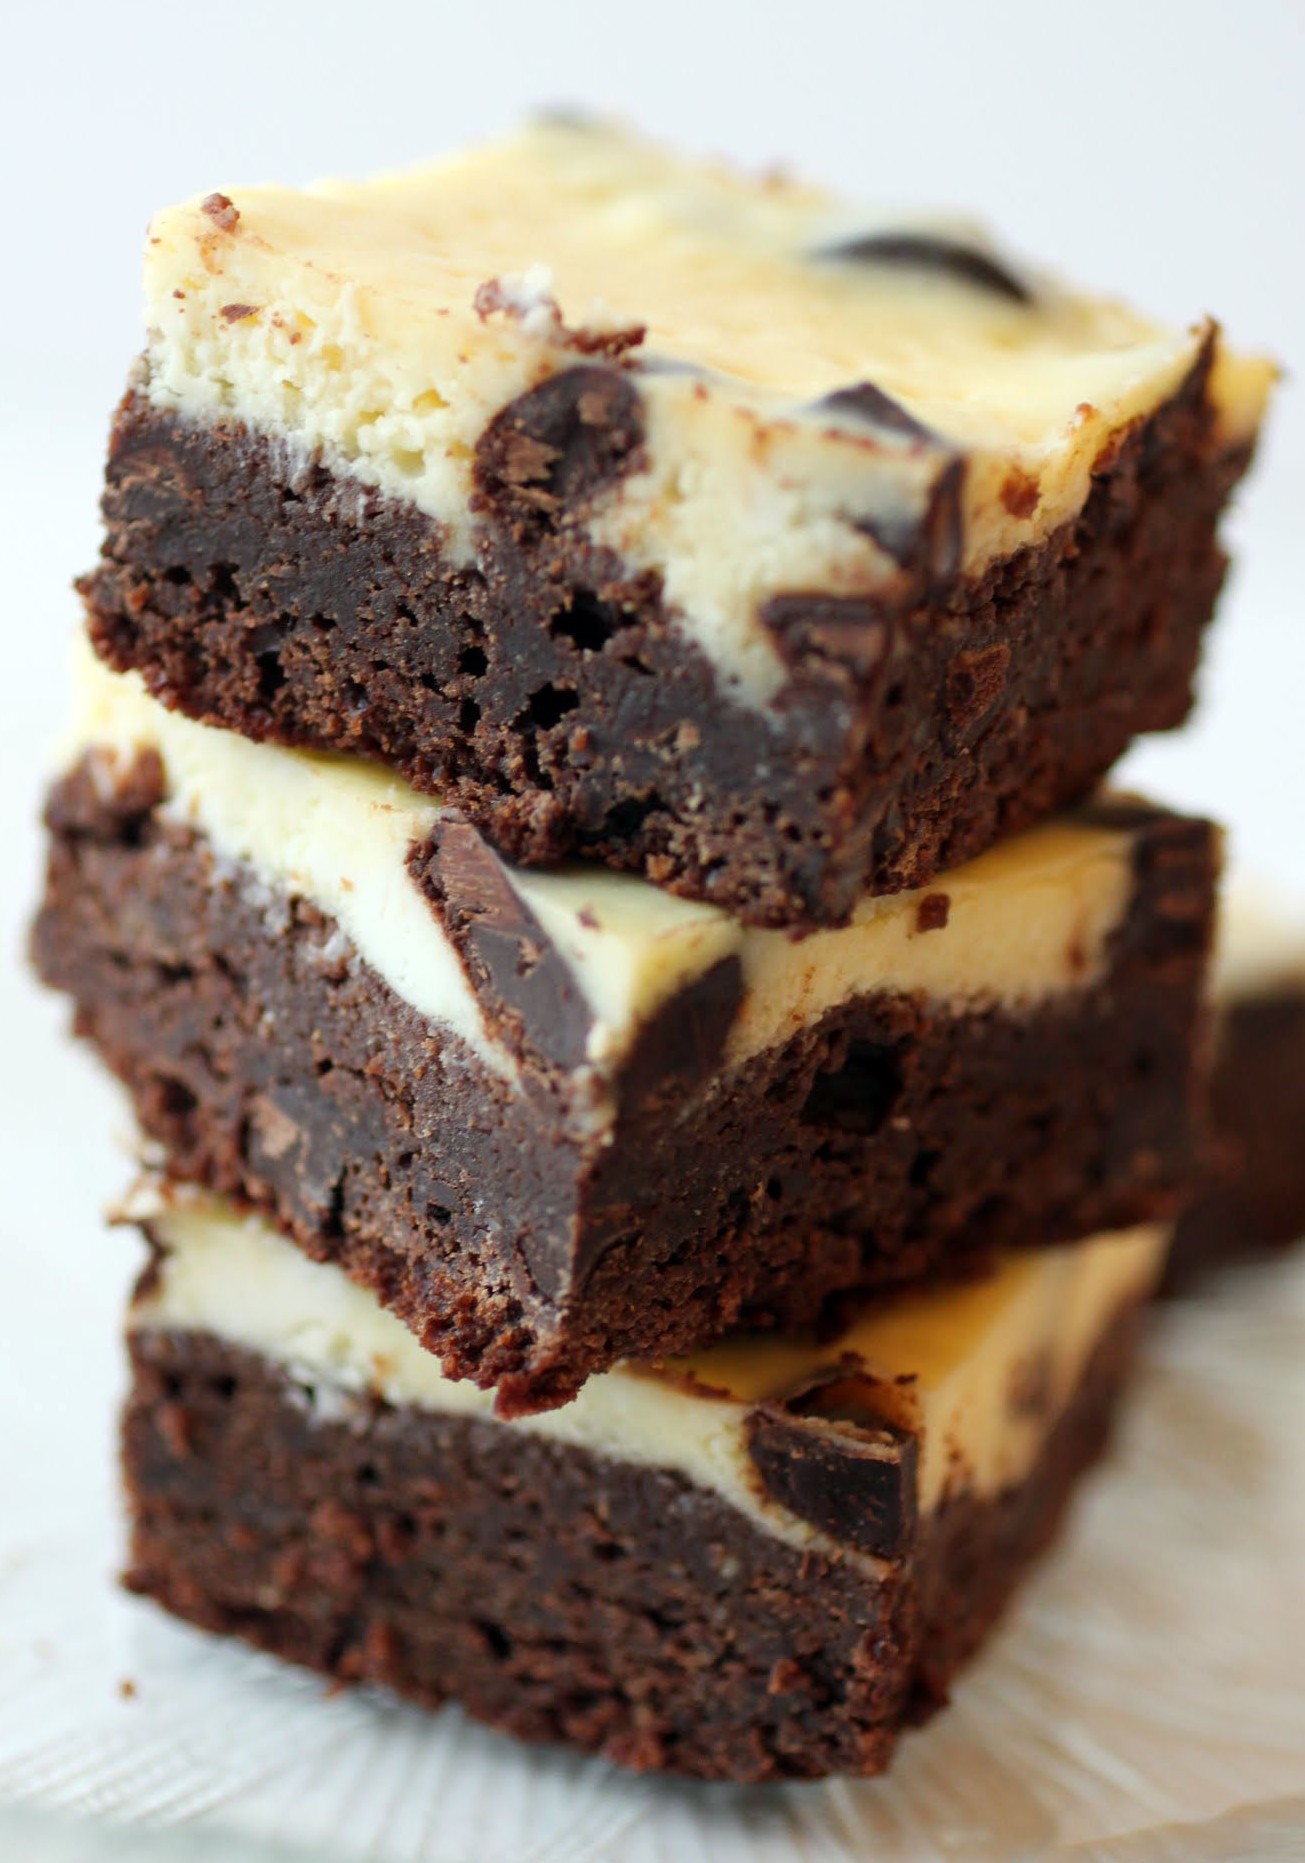
I get much more reflective if cheesecake is somehow involved, and these brownies are the ticket. Filled with chocolate chunks, these gloriously thick cheesecake brownie bars are the stuff dreams are made of.
Every summer, I take on lots of projects for my growth. The list is pretty long this summer, so I’m just trying to figure out how to get through it. I’ve got two months of cake decorating class, a week of meetings at work, a book on starting a business to get through and annotate, a novel one of my students wrote that I promised to edit, two short vacations, and…yeah. That’s just the beginning.
The summertime is when I try to organize the house. My son’s room needs to be decorated, my daughter’s room needs to be shoveled out and organized, and I need to find a contractor. We’re redoing our dining room, and I want to get going on making the prettier house happen.
Did I mention the childcare? I’m also doing childcare this summer. Wish me luck.
The natural tendency of the human being is to get bored easily. We think we want time off, but more than a day or two with nothing to do will really start to get old. I think retirement is tricky for that reason. Sure, you worked for 30-plus years in a job, but what then? The brain needs to be engaged somehow.
That’s why I’m a huge believer in keeping a lot of irons in the fire, even though people tell me that I overload my schedule in a way that’s nothing short of crazy. We’re only around once, and I want to get a lot done. Oh, and somewhere in there, I’d like to go kayaking and stand-up paddle boarding again, and I’d like to try some beach body workouts. Those are fun summer activities. So much to do, so little time!
While I contemplate logistics, these chocolate chunk cheesecake brownies can keep me company. They’re perfect for pensive moments. The textures alone are amazing. I keep them chilled, so the fudgy brownie, creamy cheesecake and crunchy chocolate chunks are beautifully contrasted.
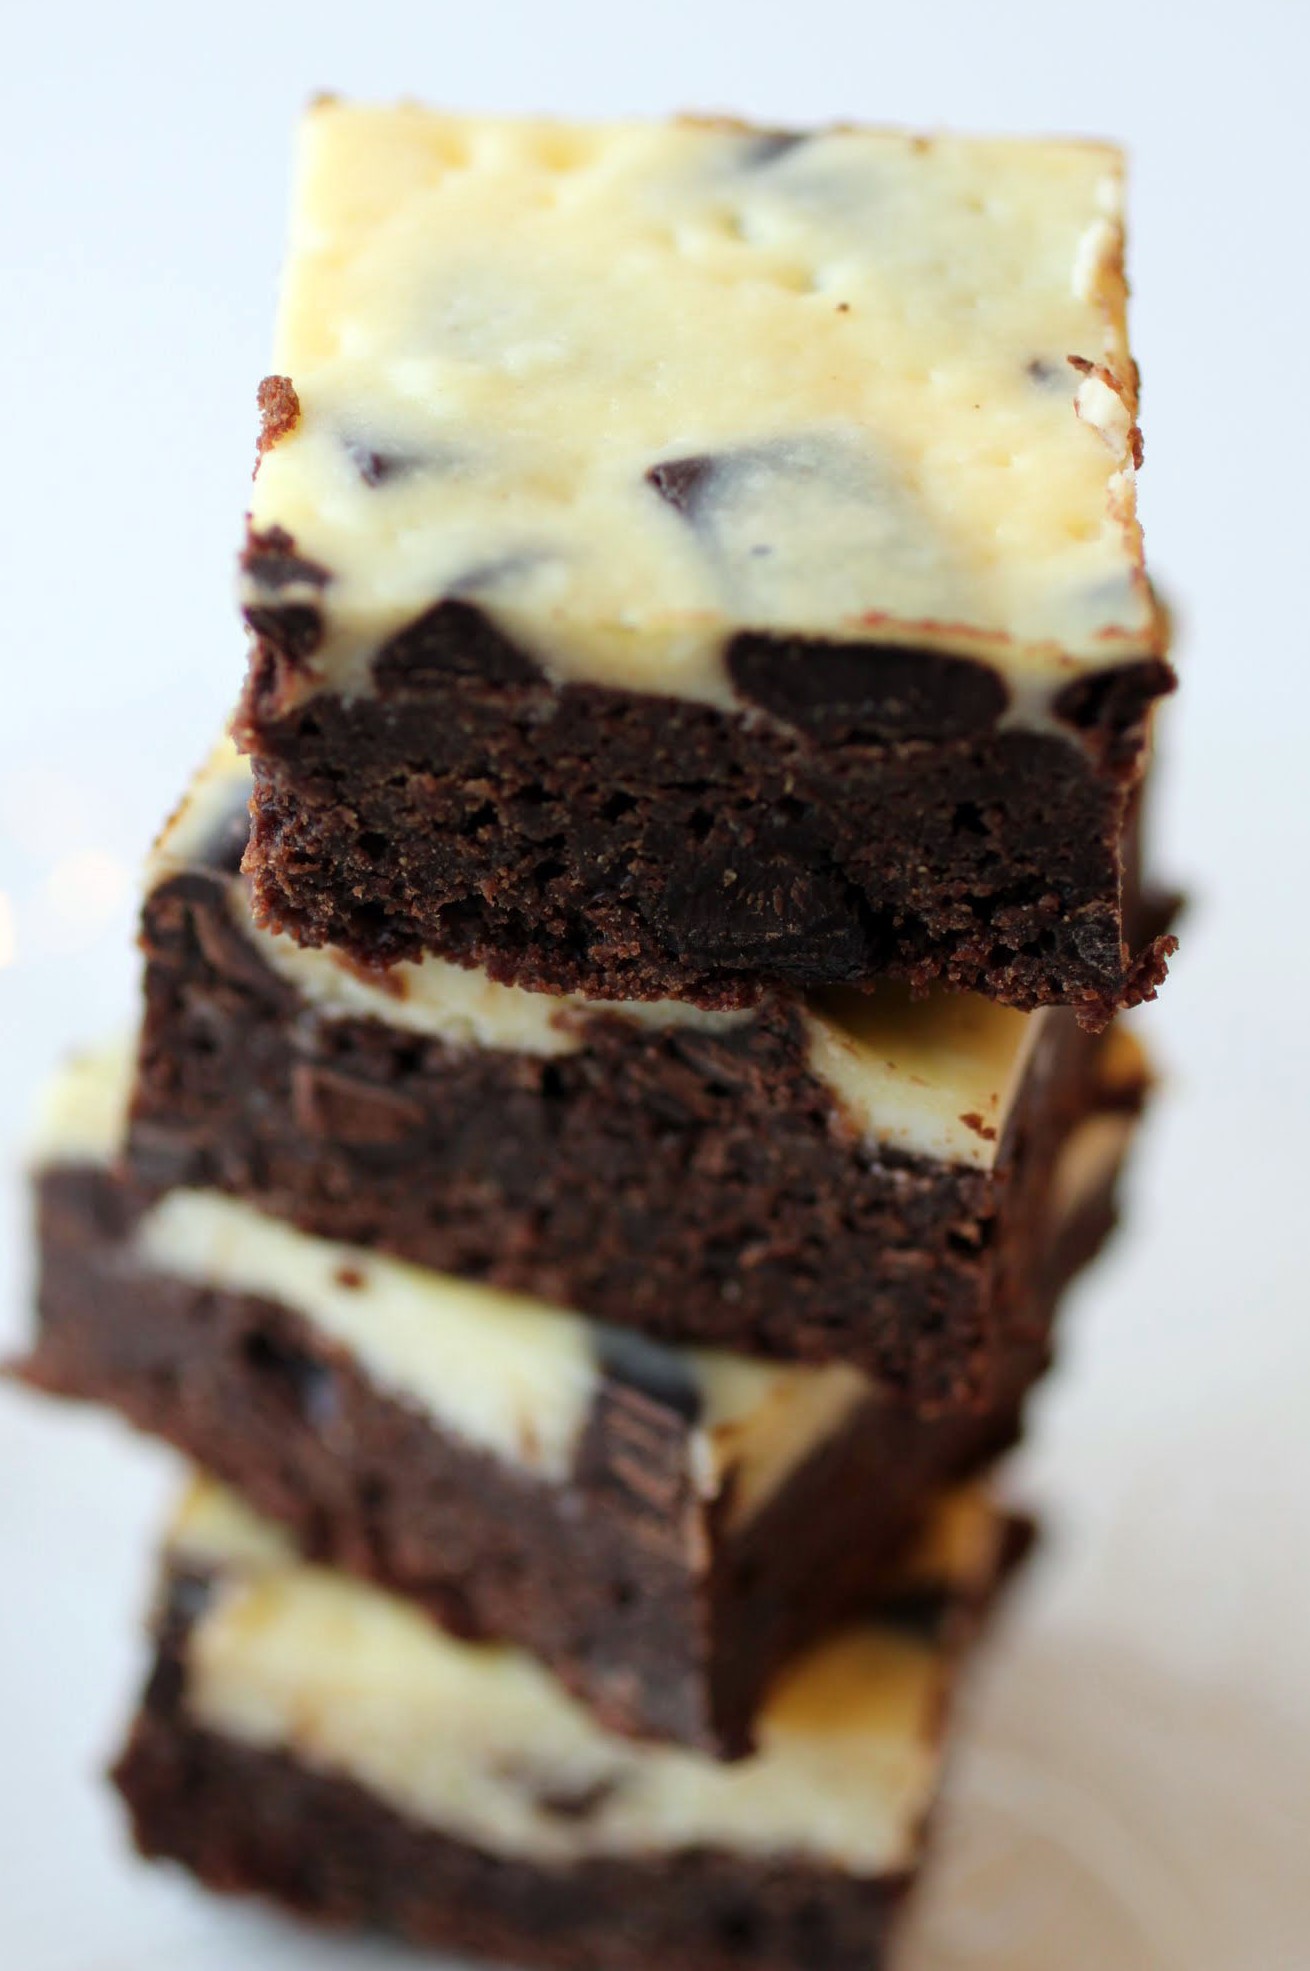
Like any bar, these are not complicated to make. Each layer requires one bowl, and that’s it. So consider these a time-saving indulgence!
I’m raring to get going this summer on all my projects, and rest assured that JAB is one of them. The desserts will keep flowing your way, starting with these!
Ingredients
Instructions
- Preheat the oven to 350. Line an 8 X 8 pan with foil and spray it with cooking spray. Set aside.
- In a medium-sized bowl, mix the cocoa into the melted butter until it dissolves. Add the sugar and stir again. When the sugar is incorporated, mix in the vanilla and eggs. Add the salt and flour, mixing until just combined. Fold in the chocolate chunks.
- Spread the batter in the prepared pan. Bake for 15 minutes until partially done.
- While the base is baking, make the cheesecake layer. In a medium bowl, mix the softened cream cheese with the sugar until smooth. Add the egg and vanilla and stir again until completely incorporated. Mix in the chocolate chunks.
- Remove the partially baked brownies from the oven. Pour the cheesecake batter over the brownie layer. Spread the batter out evenly.
- Bake for 20-25 minutes until golden at the edges and set. Cool completely.
- Refrigerate overnight and cut into squares. Store in an airtight container.
]]>
It’s definitely time for cupcakes. After all, spring has sprung. What better time to get our pastel frosting action on?
Well, I think spring has sprung. The D.C. area has a habit of swinging back and forth like a crazed toddler on a playground with temps, but I’m hoping we’ll stabilize soon. Until we do, I plan to hide in the house with cupcakes.
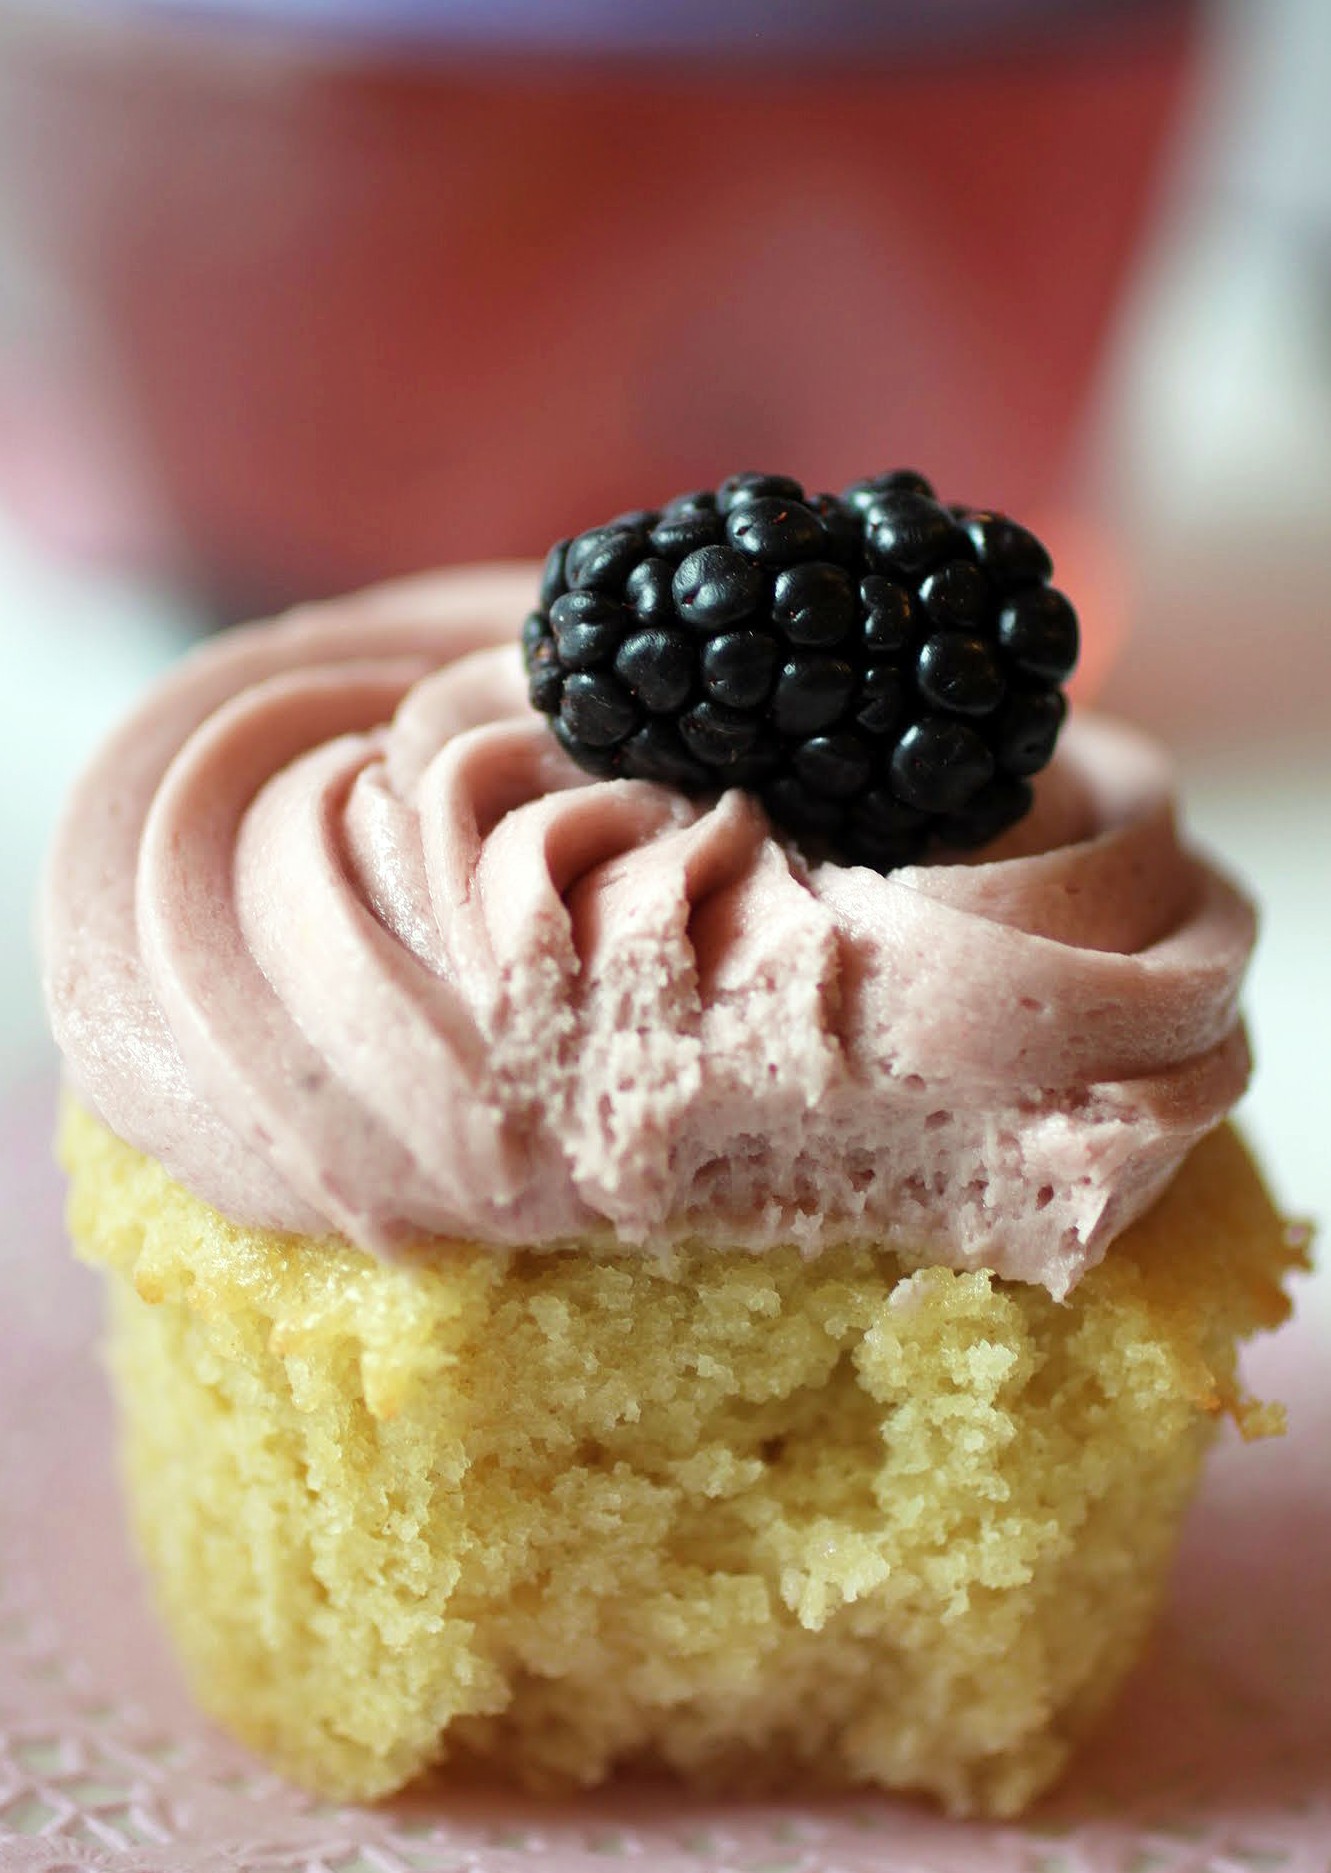
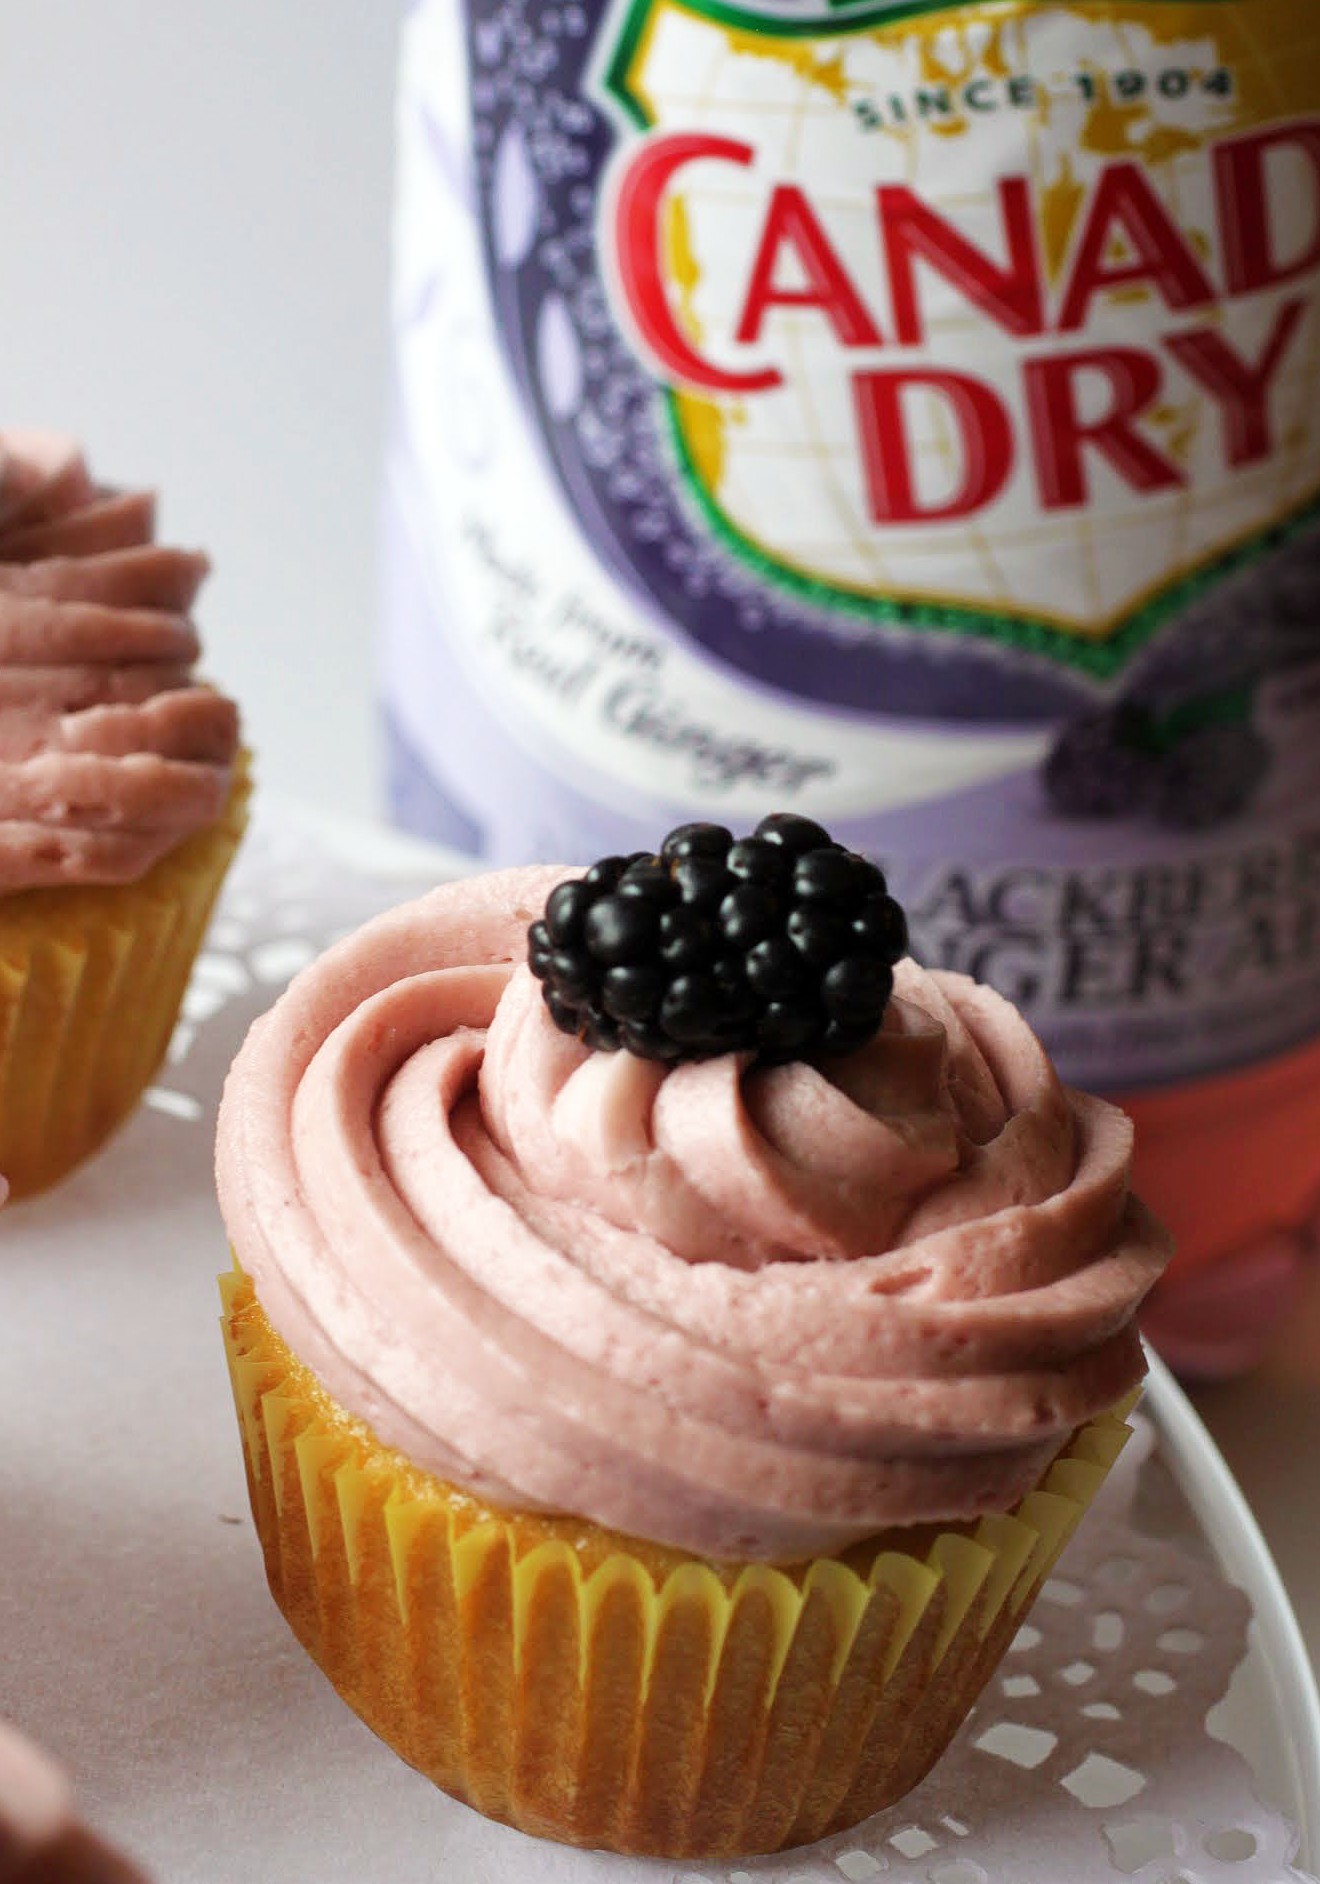
These are, according to a picky person I work with, the best thing I’ve ever baked. The cupcake batter is made with Canada Dry® Blackberry Ginger Ale and topped with a blackberry frosting. They’re pretty darn special.
All year long, I wait for fruit to finally become available. It seems patently unfair to me that some parts of the world have amazing fruit on a yearlong basis while we have to endure the winter.
But then I think about my grandmother. When she was a girl in Russia, they barely had any fresh fruit, ever. One day someone gave her an apple, which was a rare treat. Her siblings (she had five of them) ate their apples right away, but she saved hers for later. And saved it. And saved it.
You can probably guess what happened. The apple rotted, and my poor grandmother never got her treat. When I think about that story and then consider how absolutely spoiled I am (I mean, I can’t go a day without sugar), I realize I have nothing to complain about.
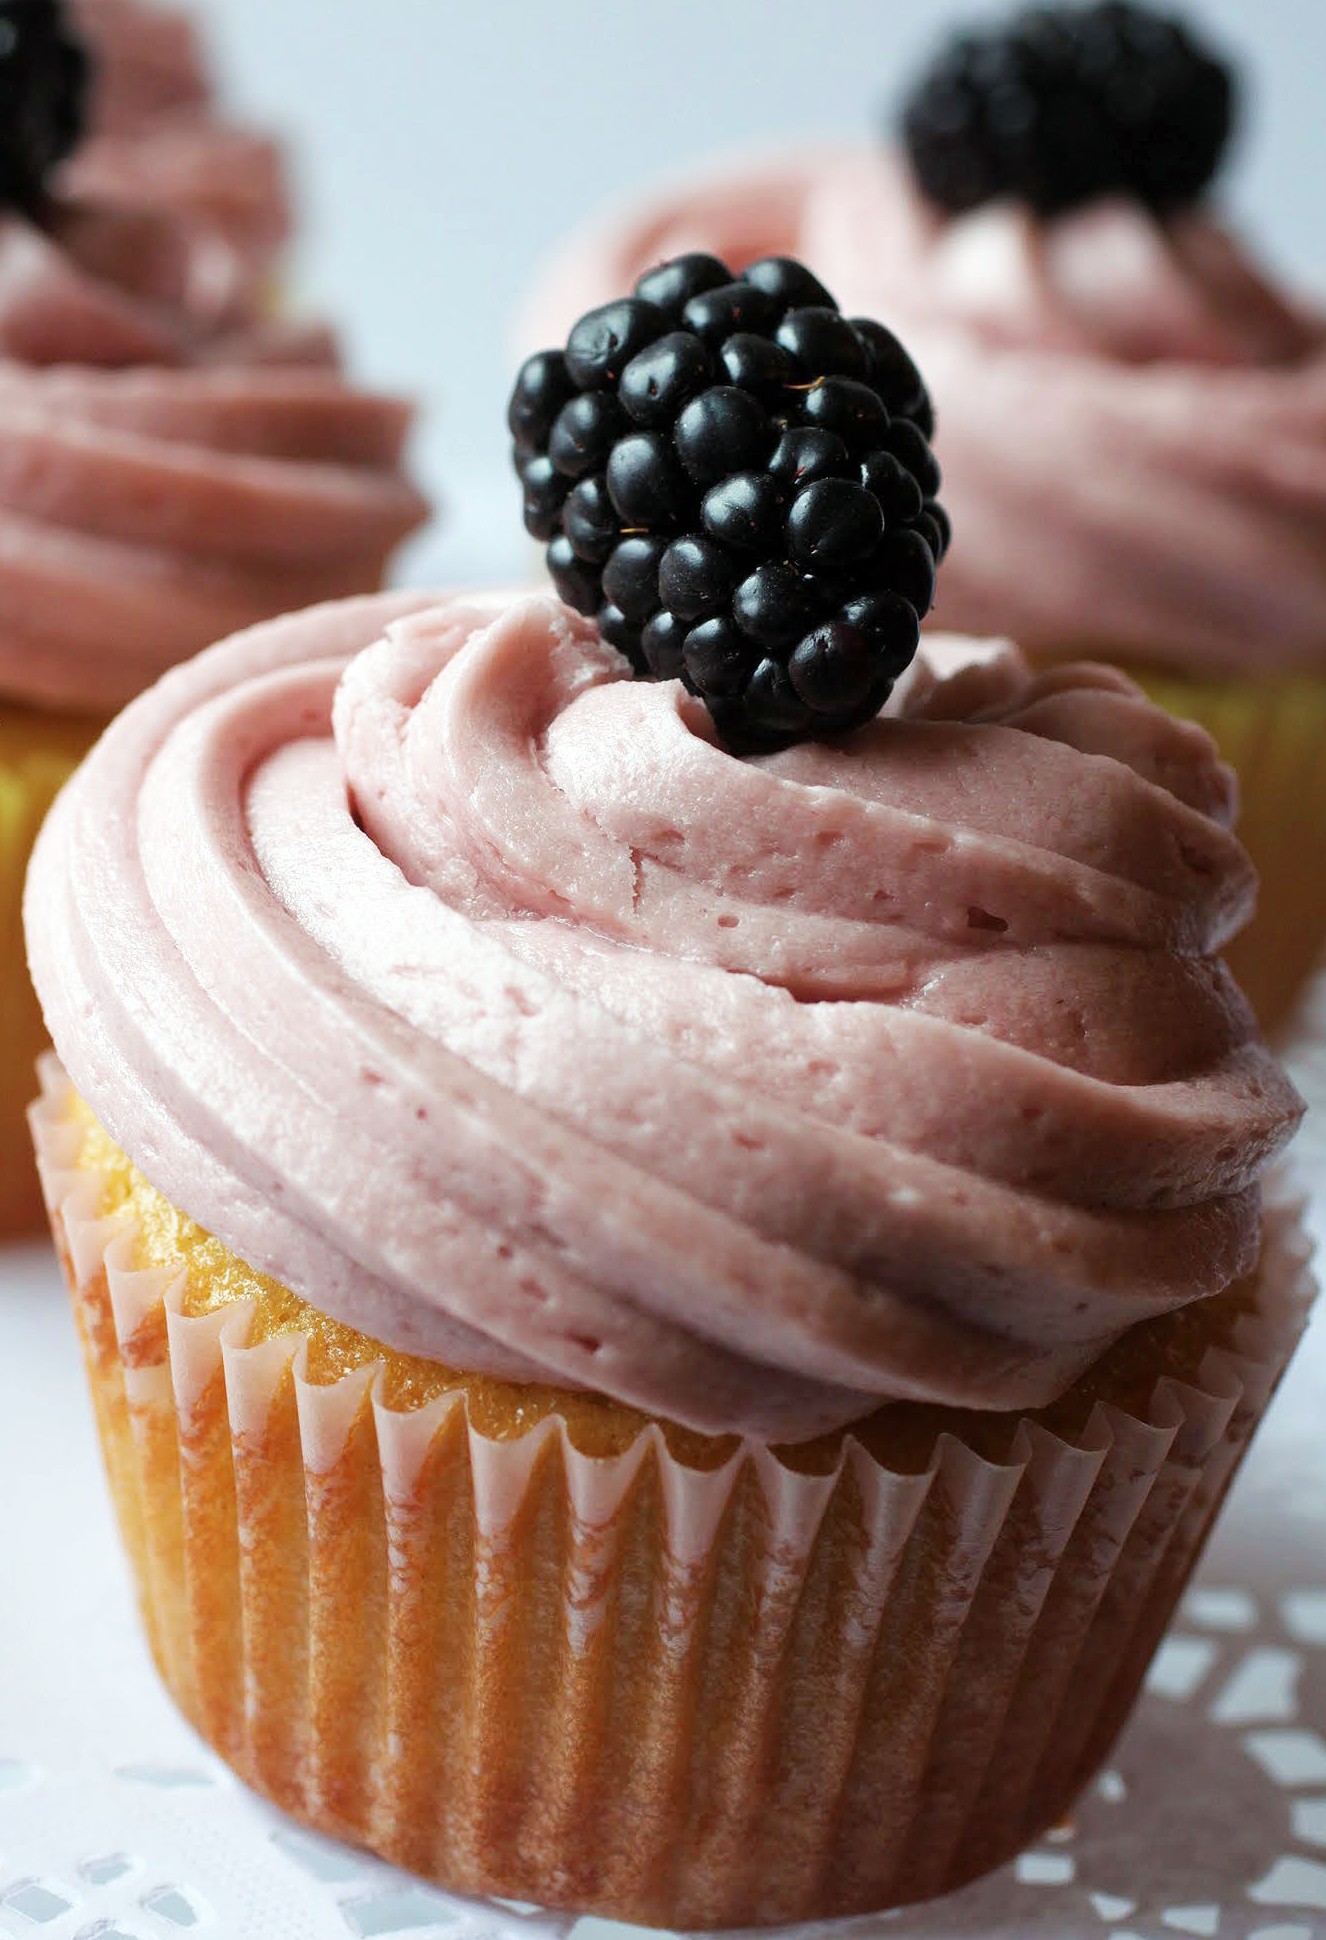
There’s no doubt that the spring brings forth increased desire for refreshing treats, and these cupcakes are the epitome of that. The Canada Dry® Blackberry Ginger Ale is made with real ginger, and I also have some ground ginger in the cupcake batter. The goal is to create a subtle undertone of ginger to complement the stronger blackberry flavor, and it worked out great.
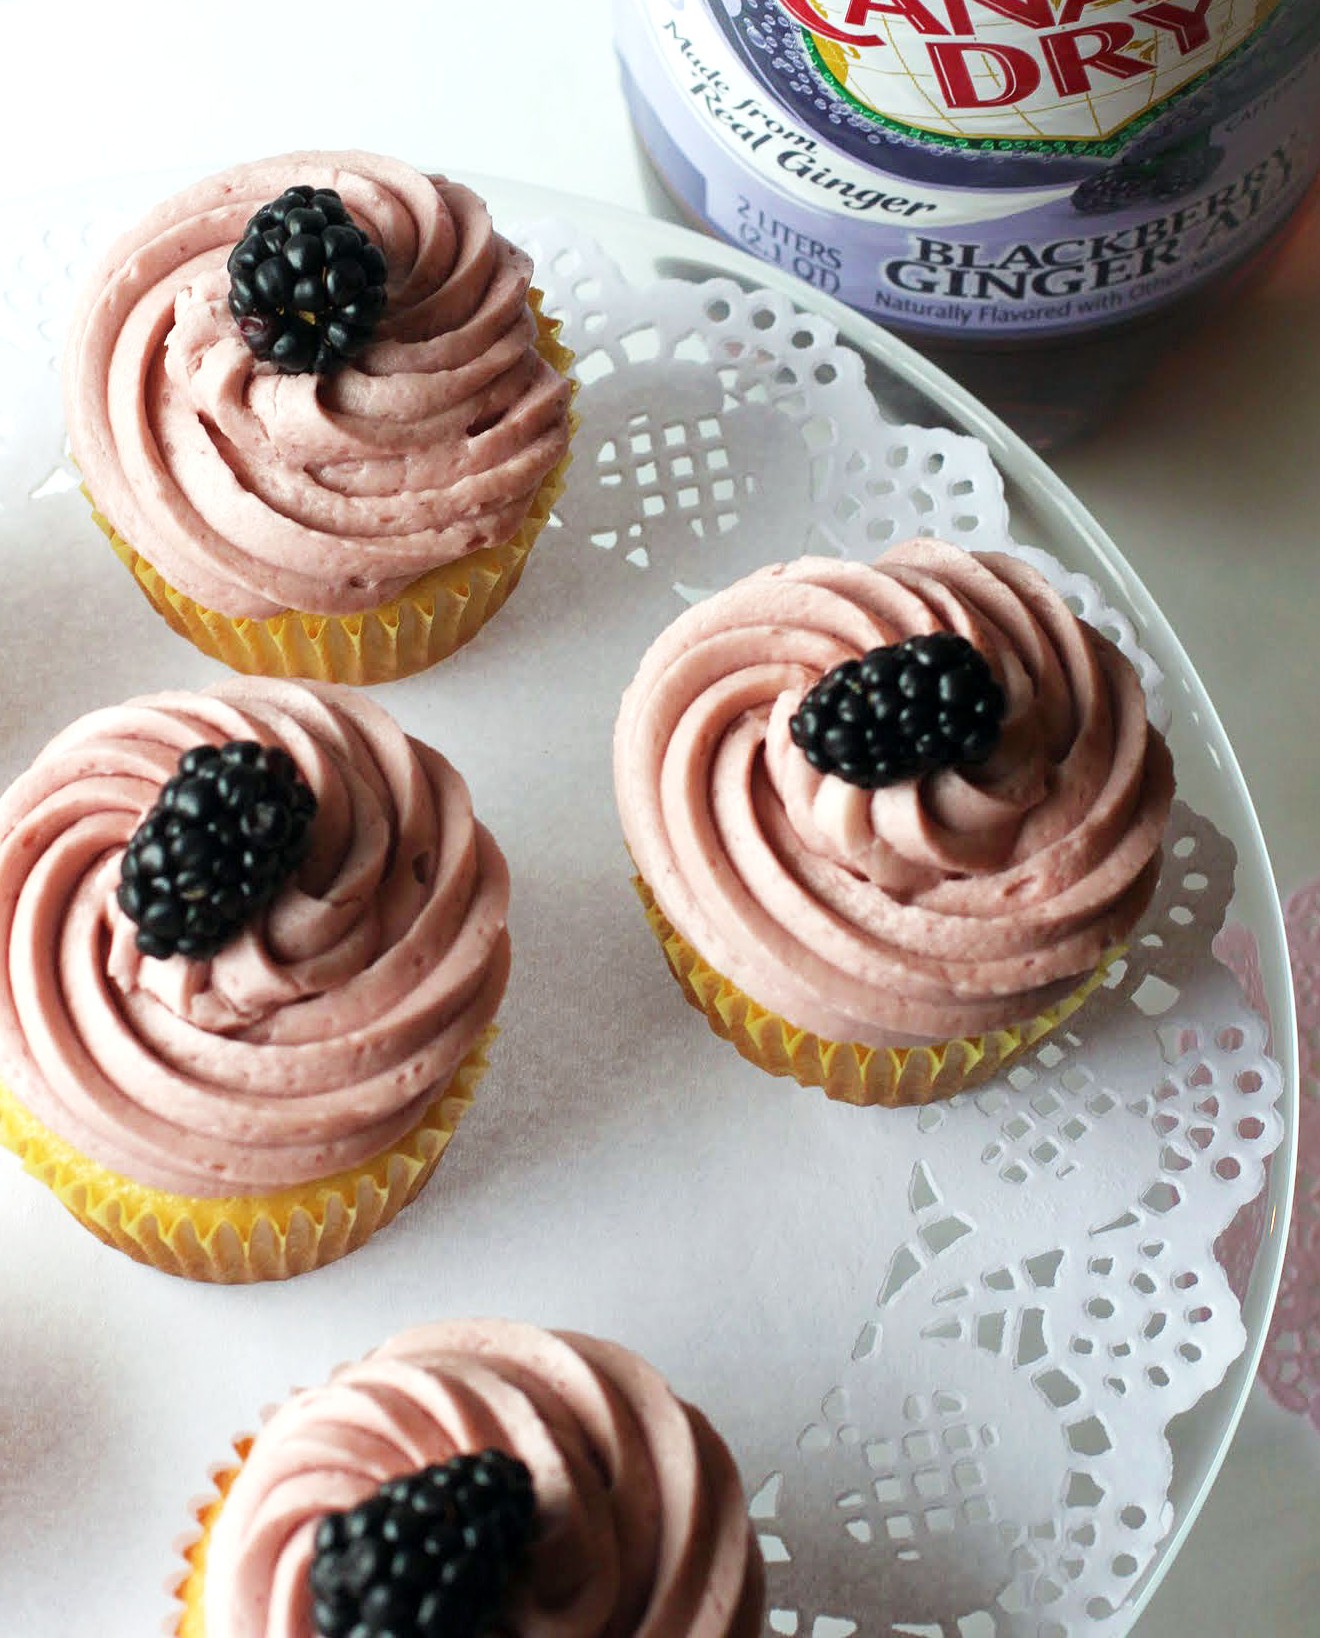
As the official birthday coordinator in my office, it’s my job to bring in treats for everyone’s special day. When these cupcakes came into the office, nobody could resist eating them. There’s just something so festive about a blackberry ginger cupcake in the spring!
I also brought in some of the Canada Dry® Blackberry Ginger Ale 2-liters so that everyone could taste the soda, and all that bubbly made everyone even happier. But since the soda is only available seasonally through mid-May, they’ll have to get it quickly!
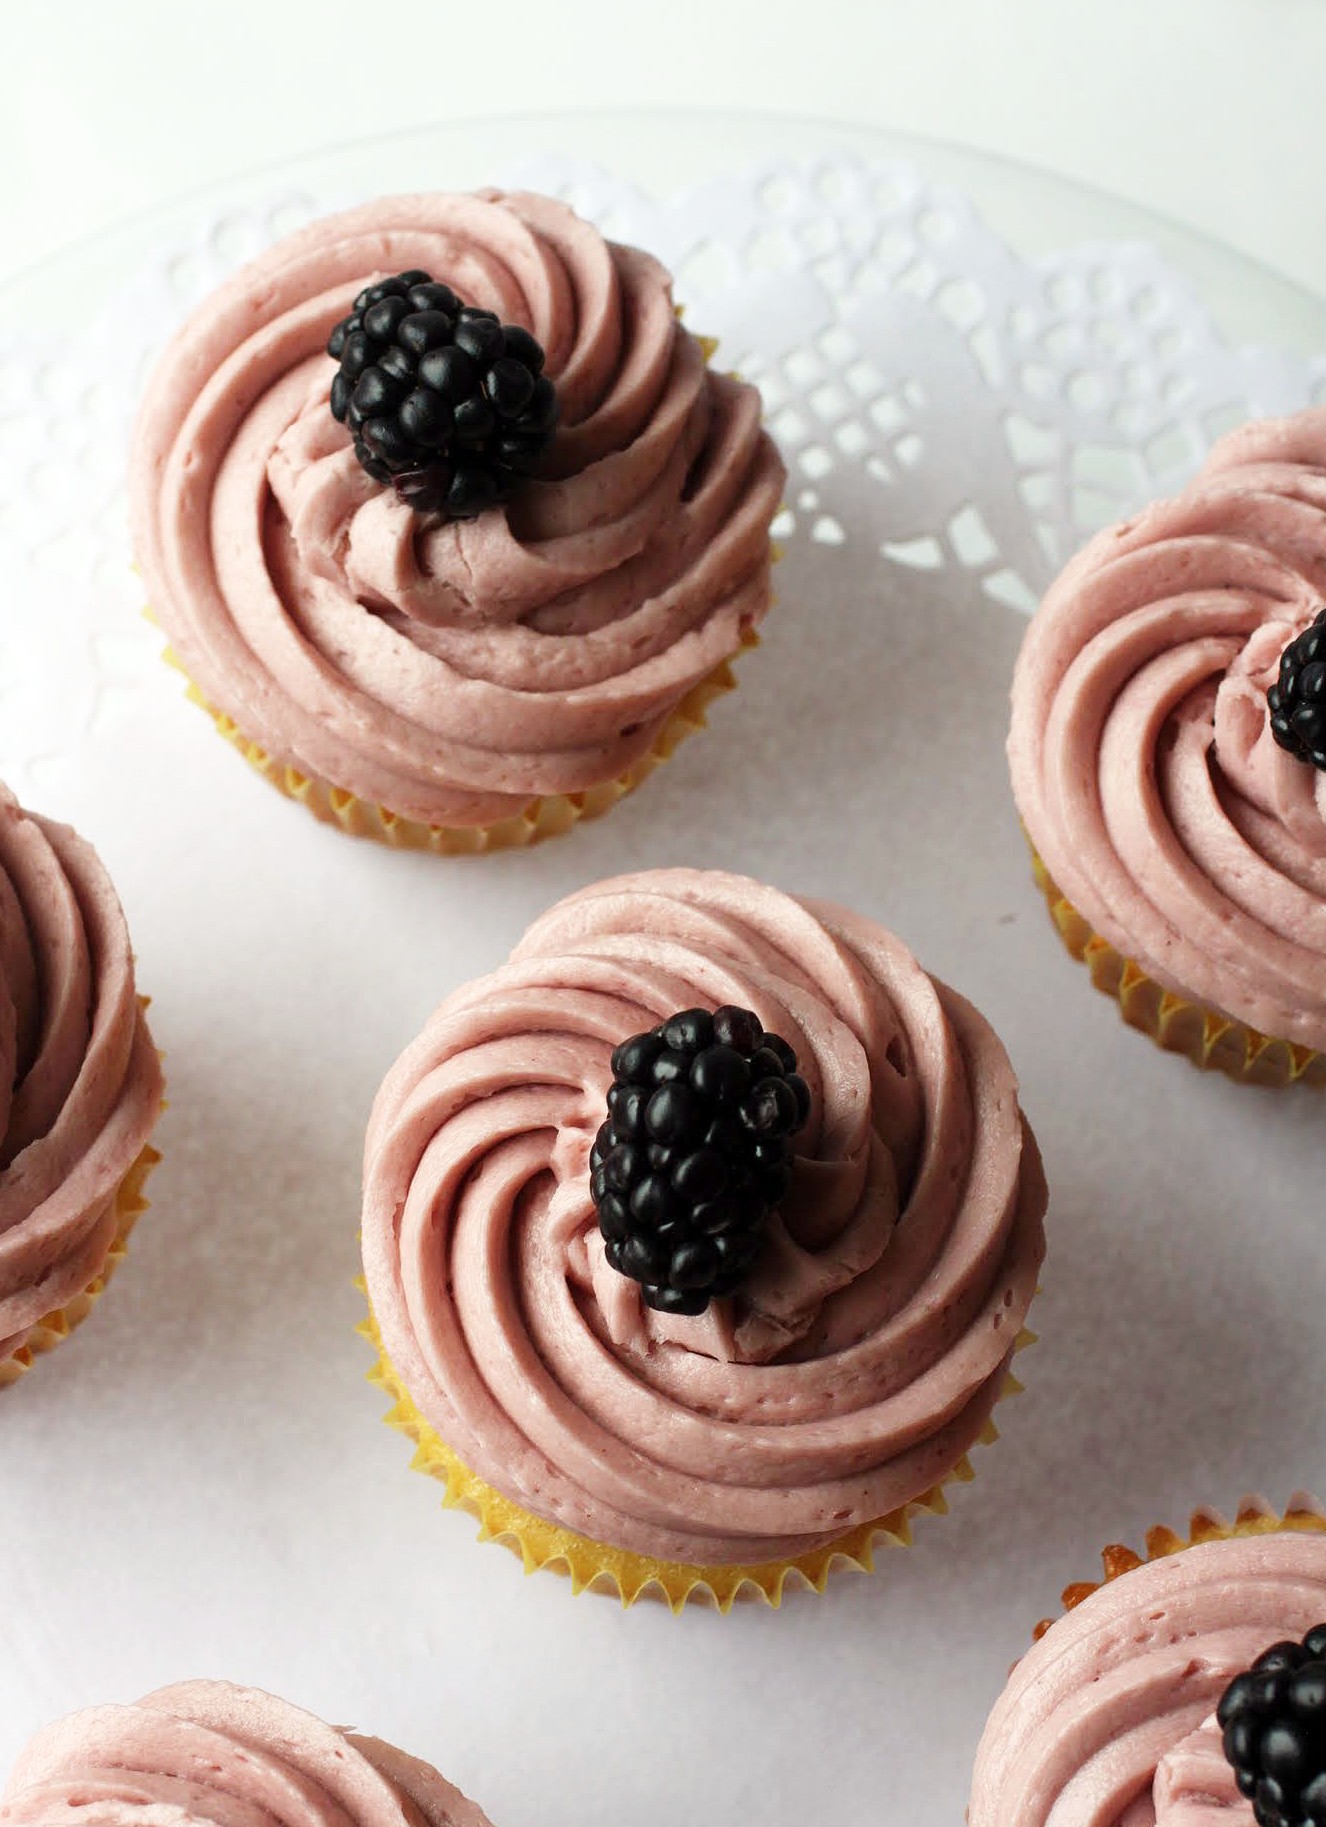
These can be made with pretty much the ingredients you already have, plus the Canada Dry® Blackberry Ginger Ale. For the frosting, make sure the jam you buy is seedless. You don’t want seedy frosting!
Remember to pick up a bottle of Canada Dry® Blackberry Ginger Ale for some fun spring cupcake action this season. Your cupcakes will be the life of the party, guaranteed!
Ingredients
Instructions
- Preheat the oven to 350. Line a muffin pan with cupcake liners and spray them lightly with cooking spray. Set aside.
- In the bowl of a stand mixer, cream the butter and sugar until light and fluffy. Add the eggs one at a time, mixing after each addition. Add the vanilla and mix again.
- In a small bowl, combine the flour, baking soda, baking powder, salt and ground ginger. Set aside.
- In another small bowl, combine the sour cream and the Canada Dry® Blackberry Ginger Ale. Mix until incorporated.
- Alternating mixtures, add the dry mixture and the sour cream mixture to the stand mixer. Beat until all ingredients are smooth.
- Using an ice cream scoop for portion evenness, portion the cupcake batter into the prepared liners. Fill each liner about 3/4 of the way up.
- Bake the cupcakes for 20-22 minutes. Cool completely.
- When the cupcakes are cool, make the frosting. Cream the butter and vanilla until smooth. Add the powdered sugar one cup at a time until a smooth frosting forms. You want it to be stiff enough to pipe with, especially since you're adding jam. Finally, mix in the blackberry jam.
- Using a large star tip, pipe the frosting onto the cooled cupcakes. Place a blackberry in the center of each cupcake.
- Allow the frosting to set. Store covered.
]]>
Every time I bake a cheesecake on the blog, people seem to really enjoy it. If you think about it, that makes sense. Very few people in life don’t want cheesecake.
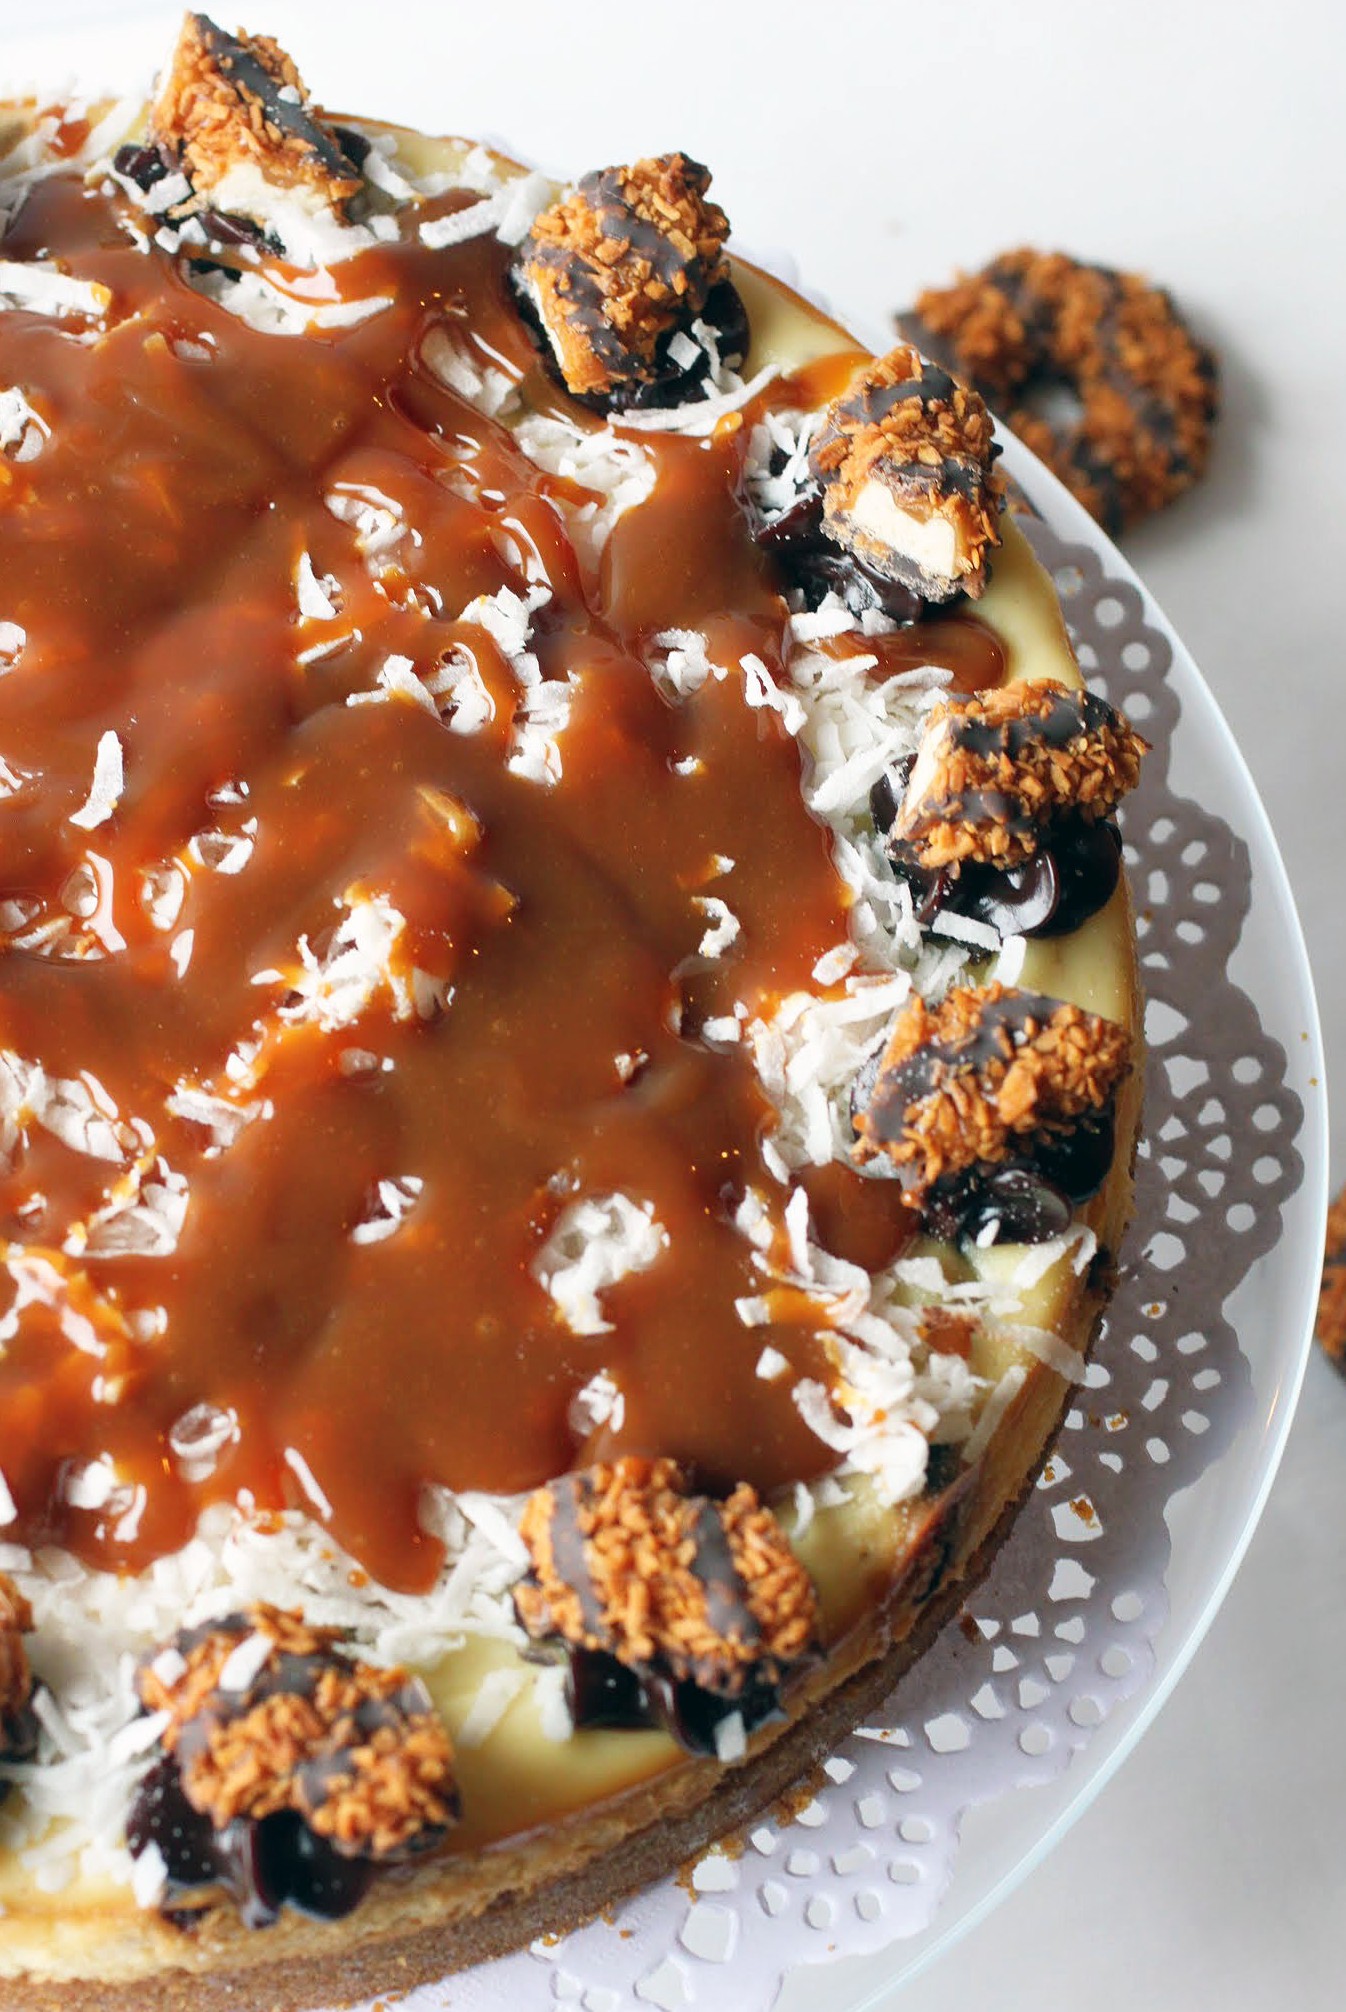
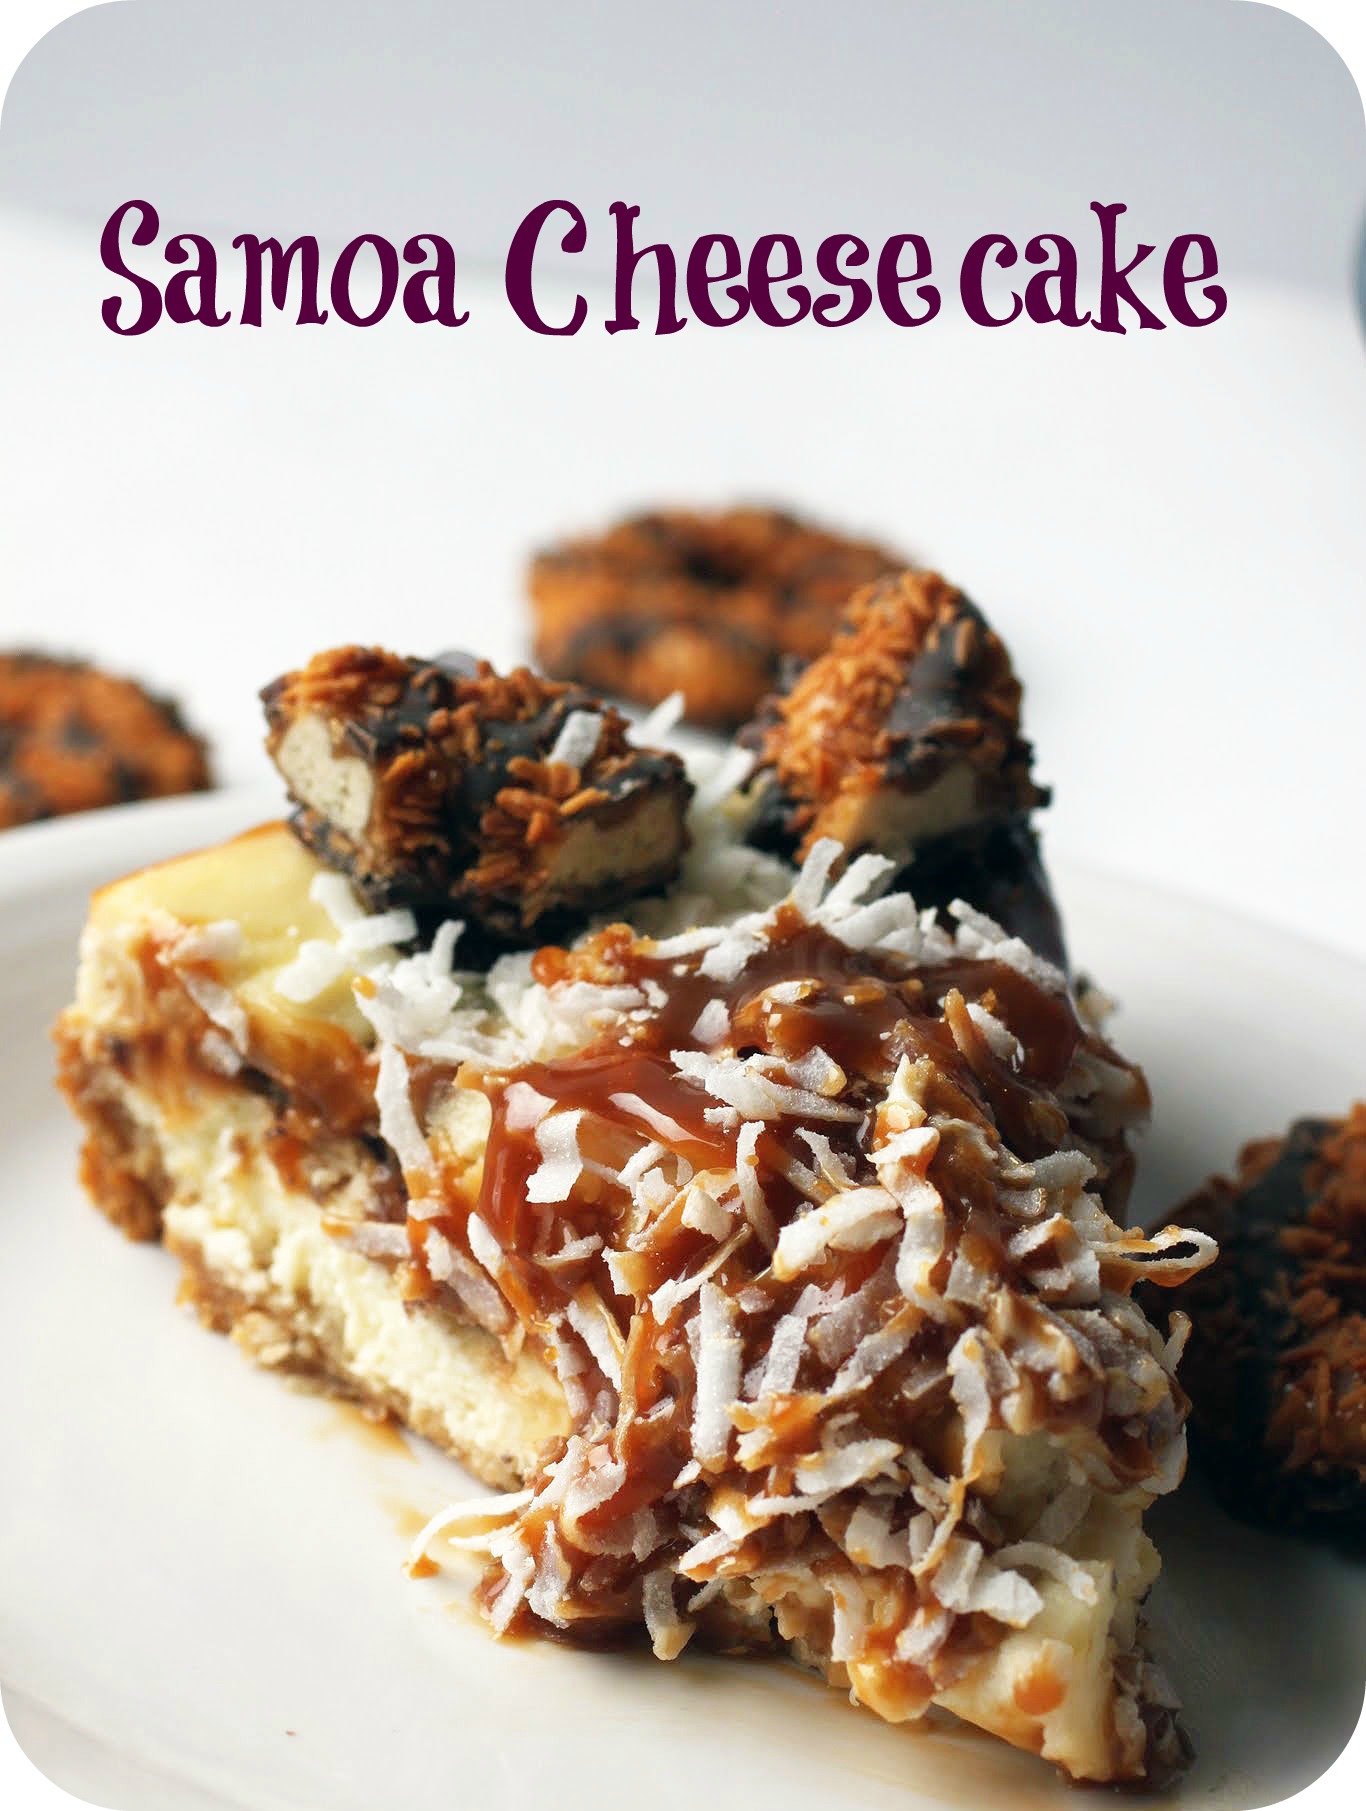
Especially when it’s filled with Samoas. There is Girl Scout cookie goodness through and through, from the cheesecake to the topping! I’ve gone rogue on this thing.
Last week, I had the flu. Or at least, that’s what it felt like. I’m still not sure because I will go to great lengths before I ever let anyone give me a flu test again.
Have you ever had a flu test? They take this implement and shove it very far up your nose. I have a hard time describing the level of discomfort (translate: pain) that is involved with this test. First of all, that region is usually sensitive and congested anyway, and anything being stuck up there is massively unpleasant.
Let me put it this way: I might rather give birth yet again than have a flu test. It’s much more comfortable. And that’s without the epidural.
Maybe that seems hyperbolic, but I swear it’s not. In fact, here’s a list of things I’d rather do than take a flu test ever again:
- Get five flu shots in a row in a 10-minute period
- Fast for a day (no food or water)
- Watch an episode of Keeping Up With the Kardashians (oh torture)
- Ask my daughter to pull my hair even harder than she already does while she’s playing hairdresser
- Eat an entire box of stale Cheez-Its (and I don’t even like fresh ones)
And the list goes on and on!
In fact, the flu test is worse than actually having the flu. So now you know how I feel and we can talk about cheesecake.
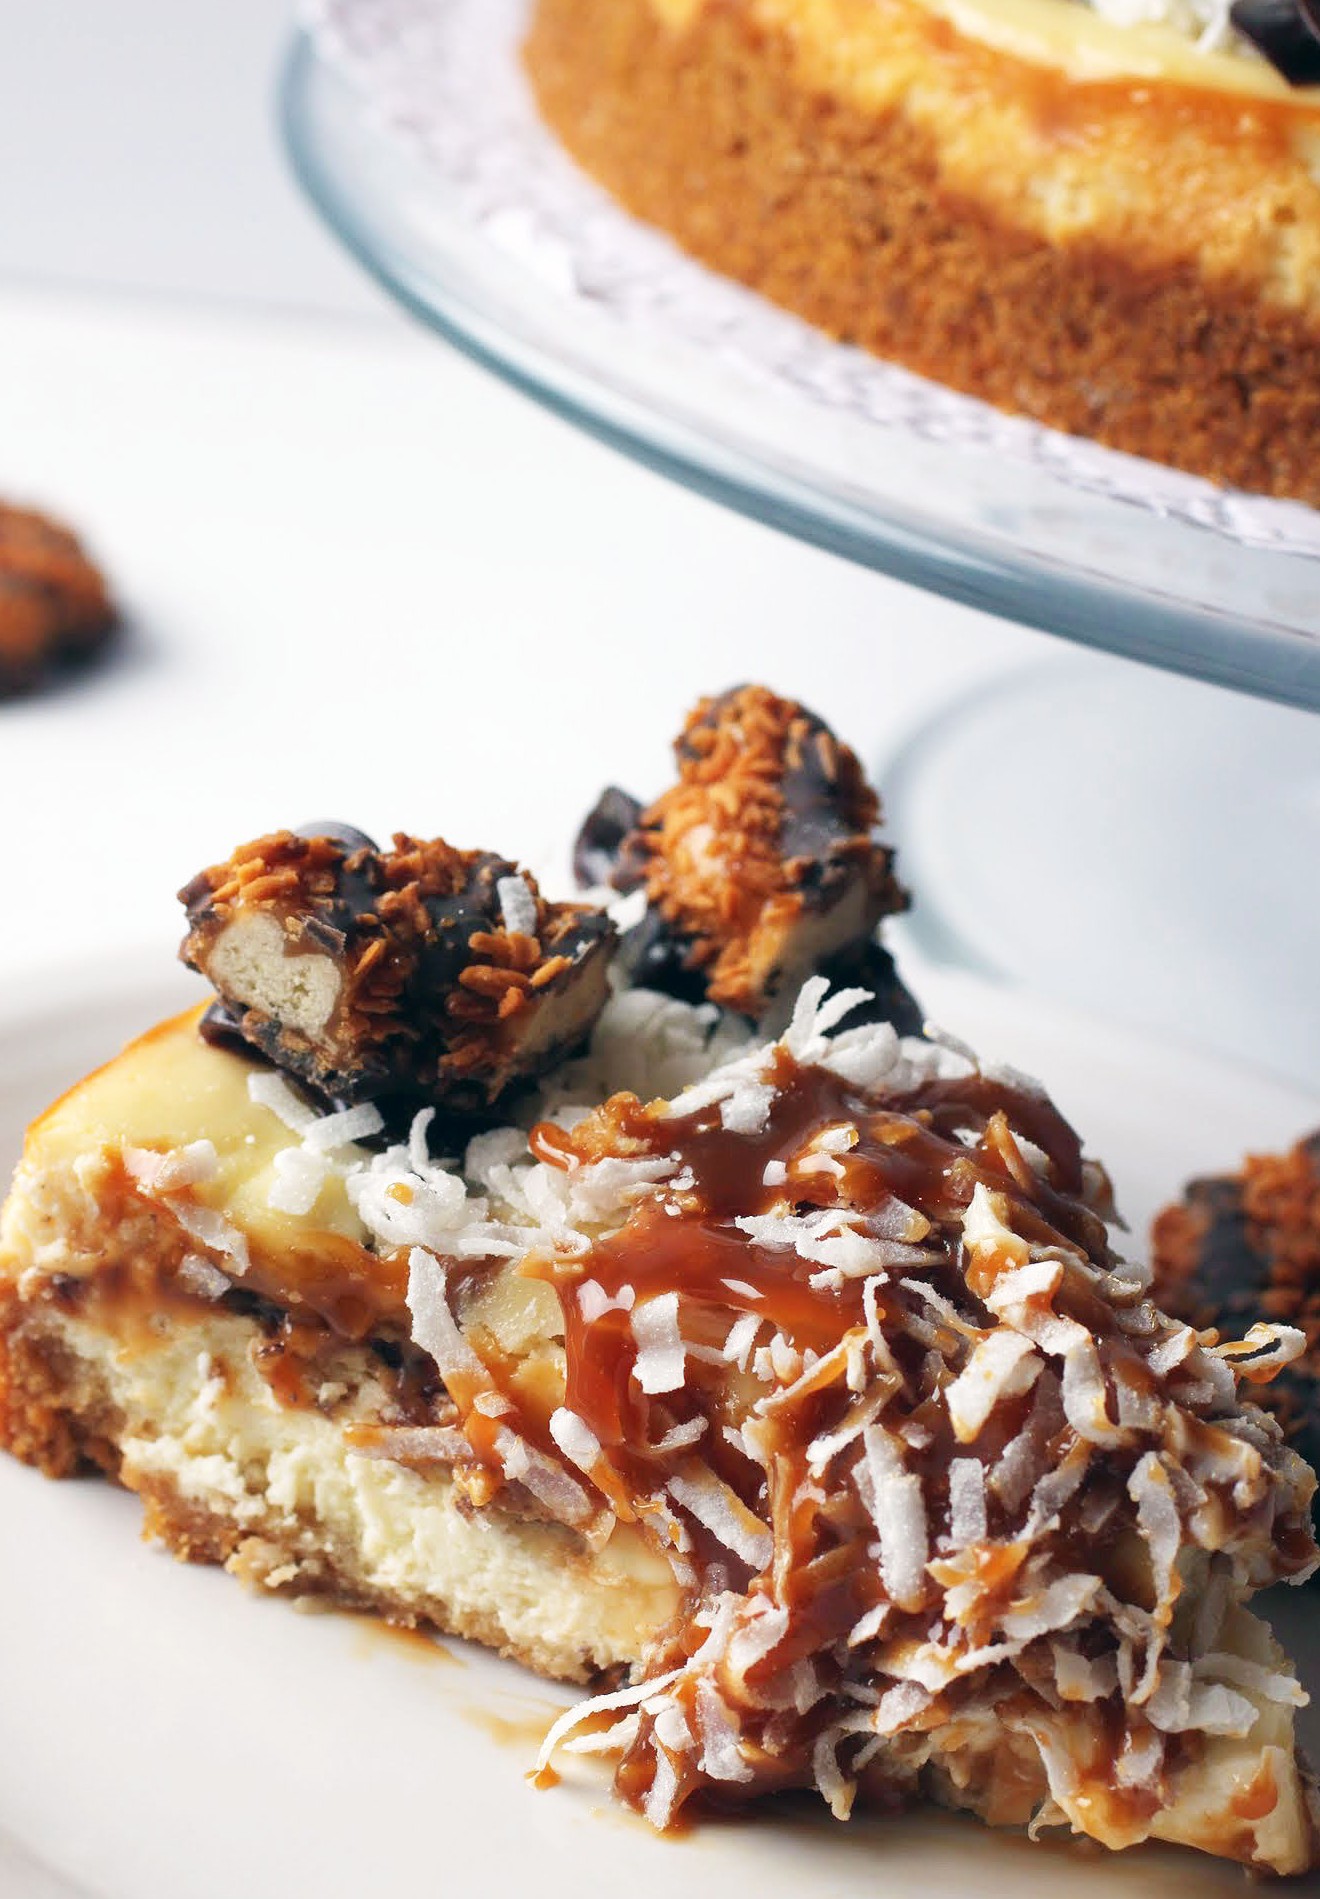
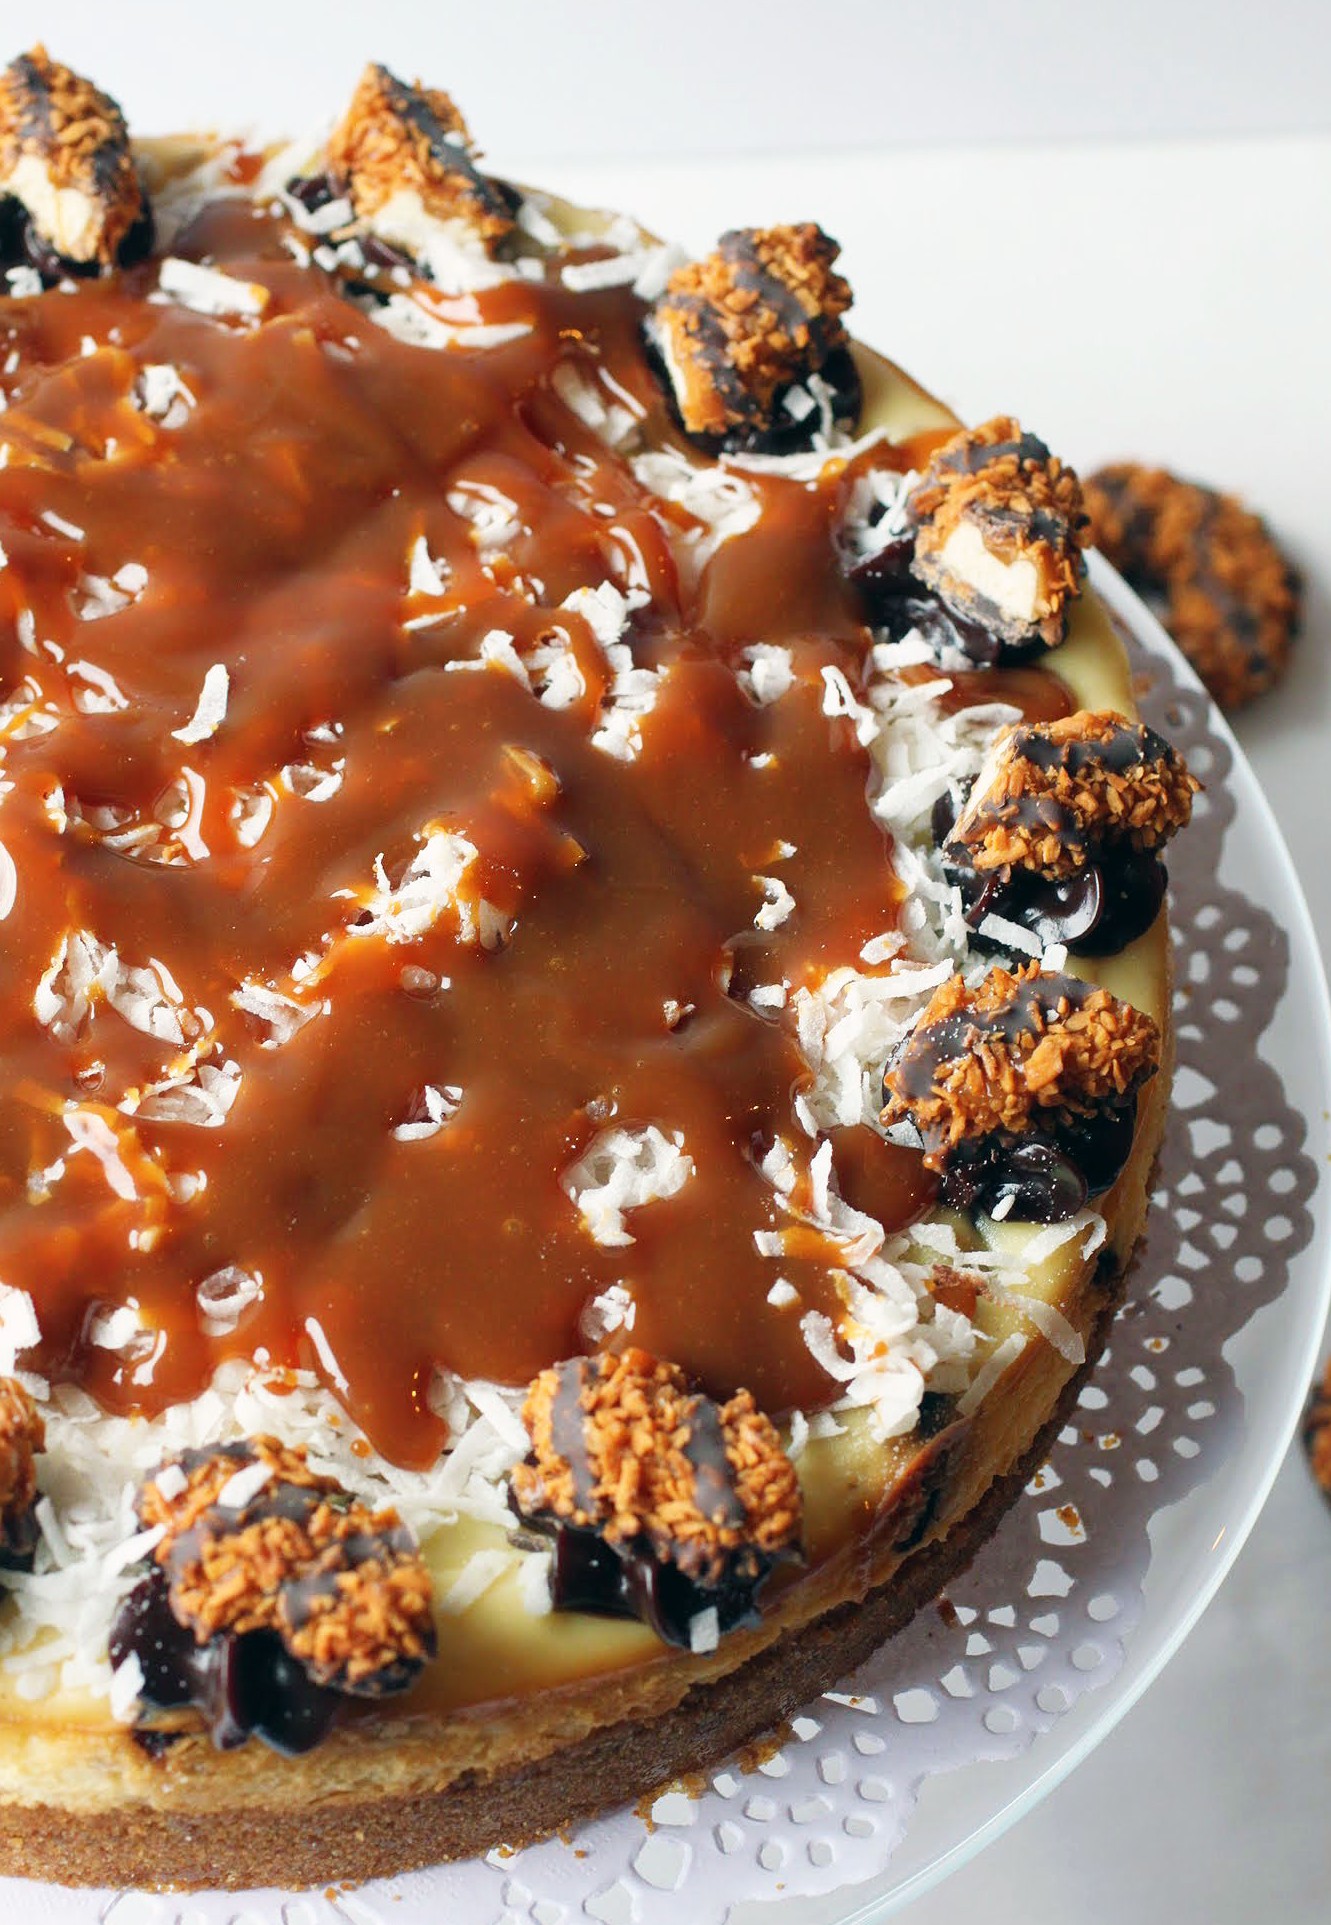
This one is just happiness. It’s creamy, full of Samoa bits, and topped with more Samoas. Oh, and coconut, caramel, and some hot fudge. Yesssssss.
I brought this to work to give to my friend who loves Samoas. She foolishly put the cake out on a communal table and turned around for about five seconds. When she turned back, the cheesecake was gone. Hey, finders keepers!
You’re going to love this, unless you have the flu. Then you can freeze it and eat it later. But for all you well kids out there, cheesecake away. And remember, when the time comes: the flu test is massively sucky, and it won’t take away your flu. But this cheesecake will be waiting for you when you recover!
Ingredients
Instructions
- Preheat the oven to 350. Coat a 9-inch springform pan with cooking spray. Set aside.
- In a medium bowl, combine the graham cracker crumbs, brown sugar and melted butter until the crumbs are moistened. Press the crumb mixture into the prepared pan, pressing firmly into the bottom and slightly up the sides.
- Bake the crust for 15 minutes,
- While the crust is baking, beat the cream cheese and sugar in the bowl of a stand mixer until creamy. Add the yogurt and vanilla and beat again. Finally, add the eggs and beat until just incorporated. Fold in the chopped Samoas.
- Pour the filling into the crust and bake for 50 minutes. Do not open the oven door while baking.
- When the cheesecake is done, turn the oven off and crack the oven door. When the oven has cooled, remove the cheesecake and let it cool completely.
- Refrigerate the cheesecake overnight.
- Make the topping. Using a star tip, pipe hot fudge around the cake in even swirls. Top each swirl with a chopped Samoa. Fill the top of the cake with sweetened coconut and pour the caramel topping onto the coconut.
- Cut into wedges. Store chilled.
Well, my world, anyway. There are certain days (or weeks) when facing the day is just hard. Maybe I have to work a 12-hour day before heading home to my kids, or maybe a student of mine has been going through something rough and I’m absorbing the pain. It’s not always cake!
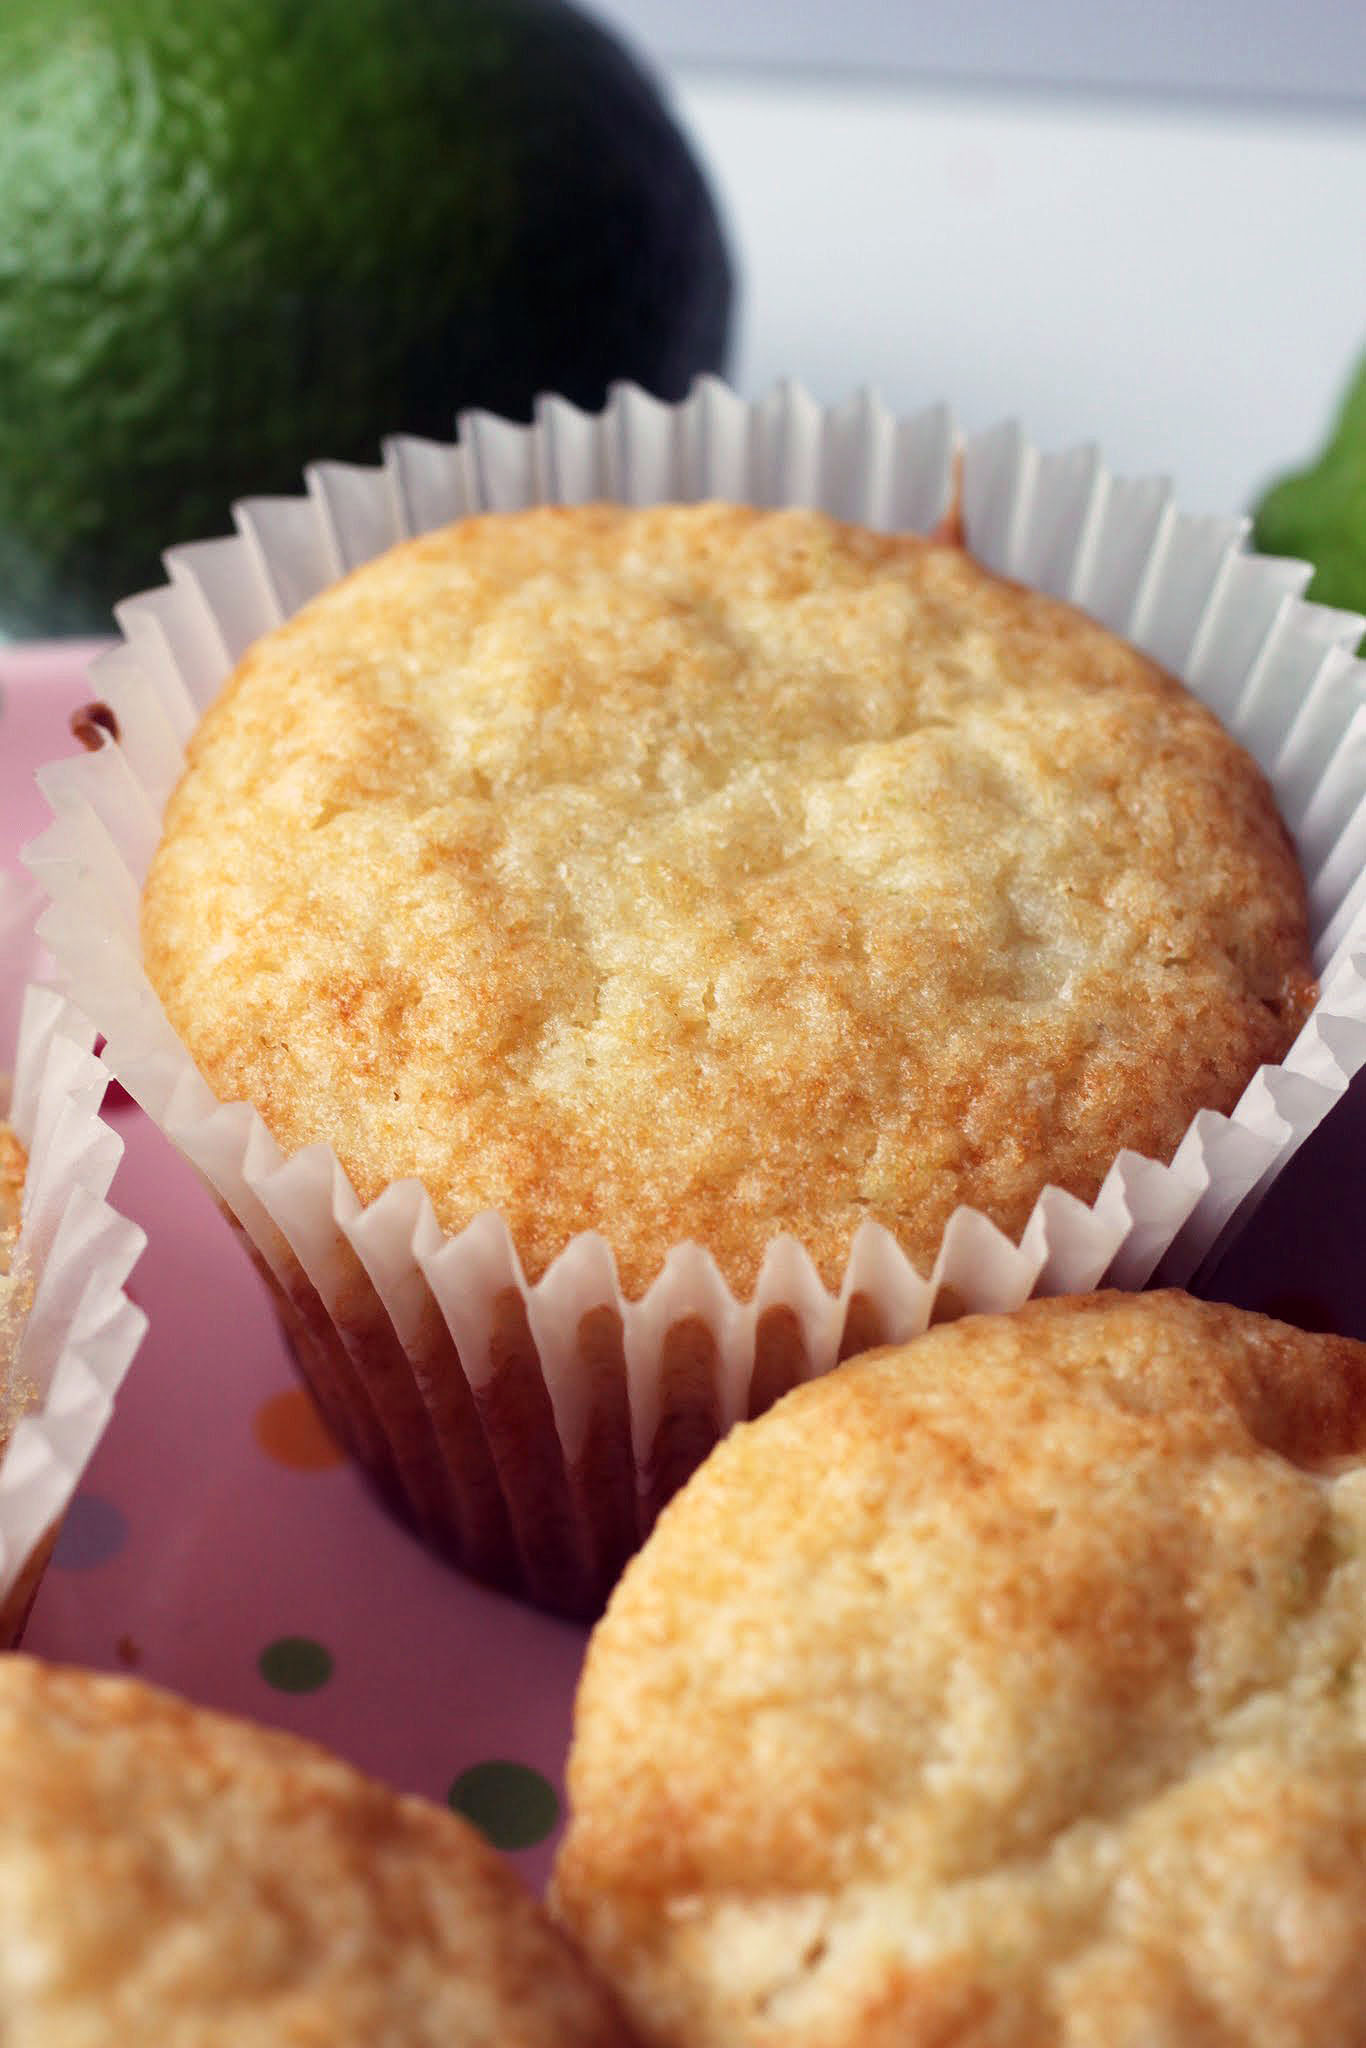
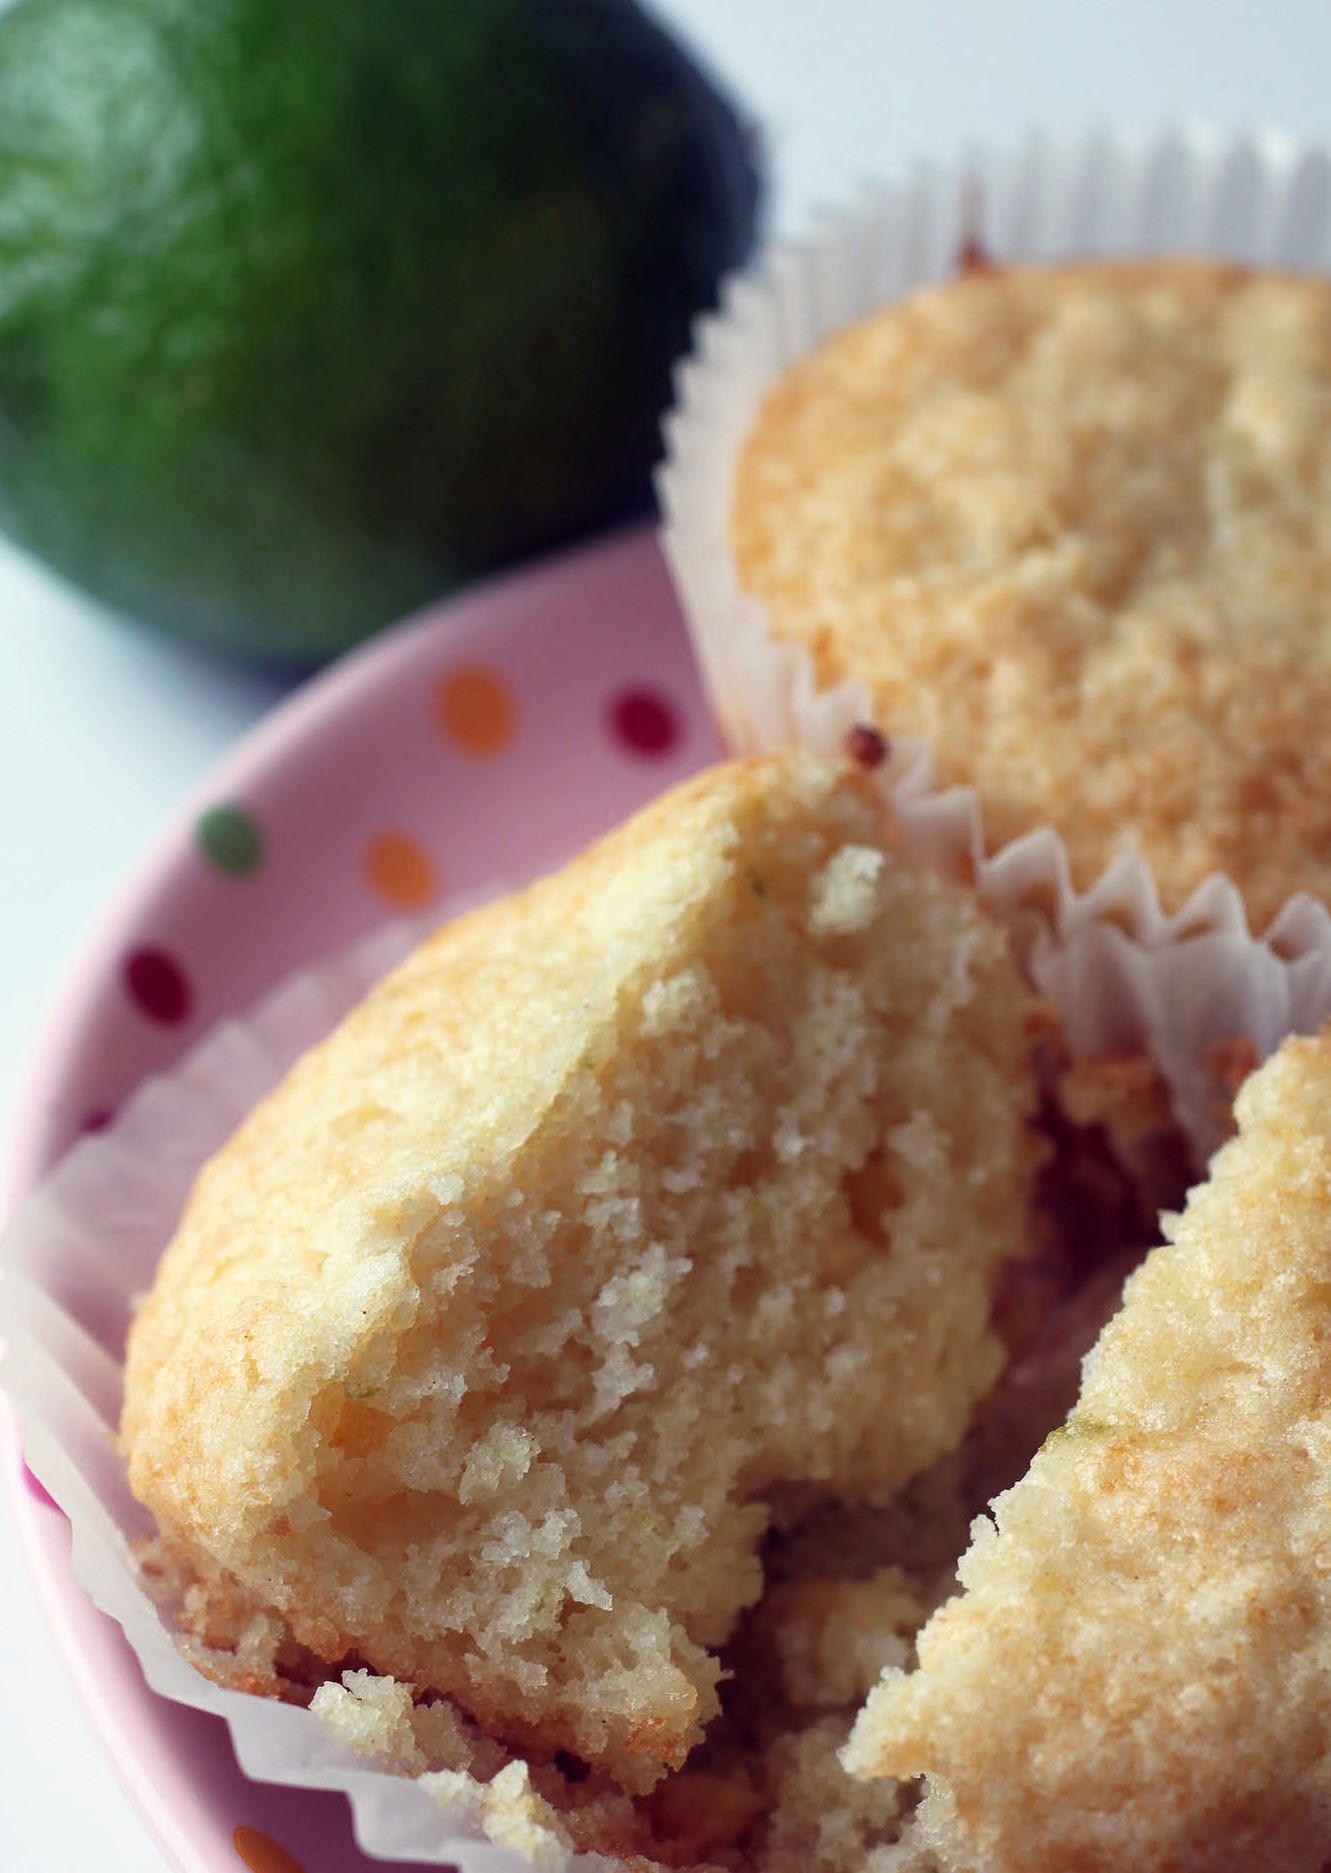
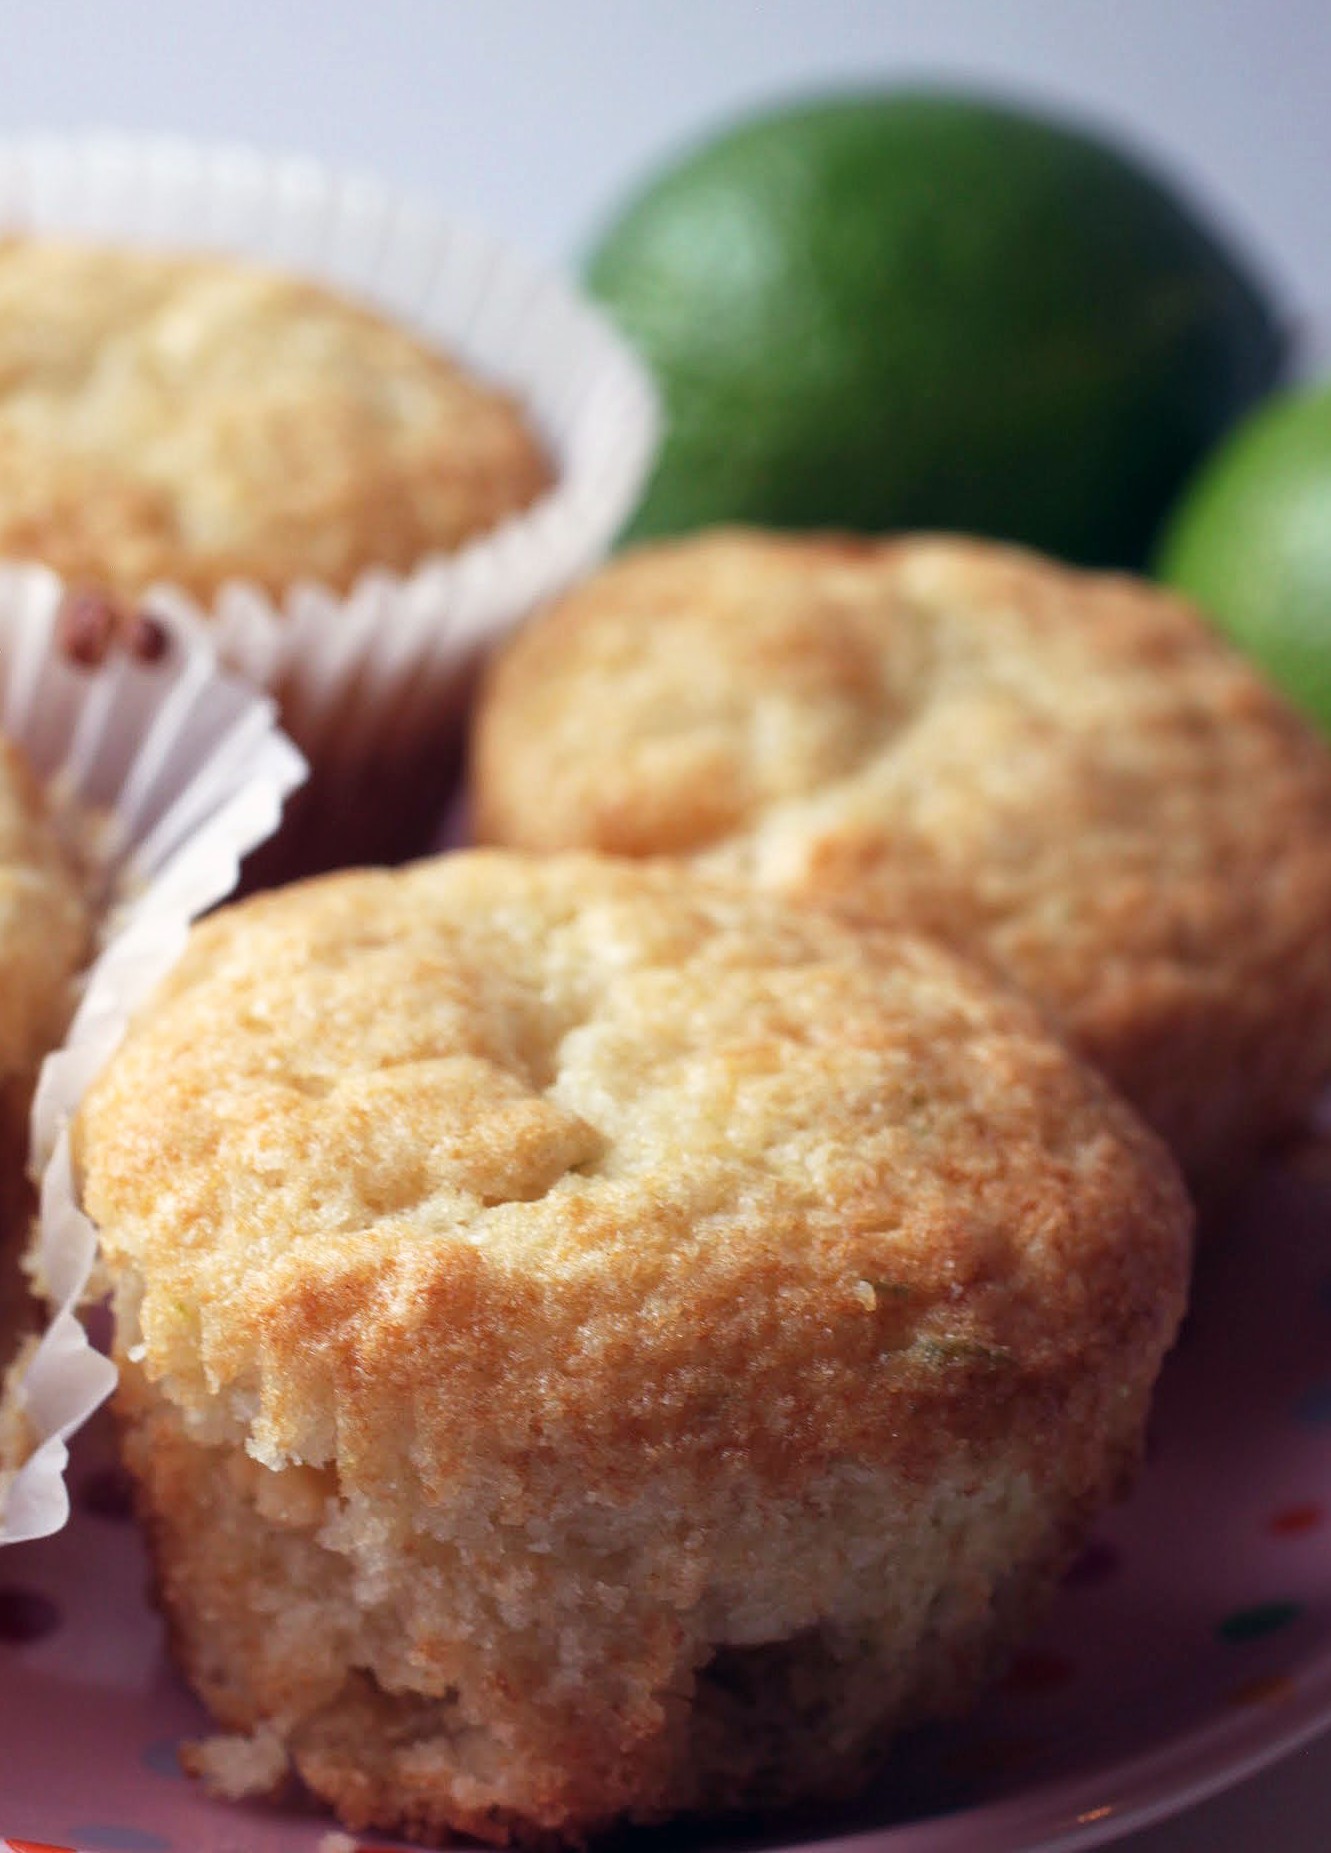
On days like that, I need an easy breakfast to throw together. This muffin base is simple, butter-free (and therefore a health food, of course), and easily customized. I chose lime zest (a.k.a. summer in a whiff) and white chocolate chips, but you can use any old mix-ins. It’s all about making your mornings as happy as possible!
I know it’s pretty common for people to whine about winter, so I try not to do it a lot. But being honest here, this time of year is an endless struggle for me. You see, I have an autoimmune disorder that restricts the blood vessels all over my body. In warm weather, my blood flows freely and I feel energetic, vibrant and positive.
But when winter hits, I range from a partial lack of feeling in my arms and legs (and even other parts of me on bad days) to a continuous ache in those areas. It’s totally manageable, but there is a tangible difference between the person I am in warm weather and the person I am right now. I’m just waiting for the seasons to shift so that things can get better.
And I don’t even mean to complain (though it reads that way, I know), because I’m really lucky. At least my problem is seasonable and it’s workable. A lot of people suffer with chronic pain and exhaustion and there’s not anything they can do to make it better.
While I like to think of the Sylvia Plath quotation that there’s not a whole lot that a good book and a good bath doesn’t fix, we all know what happened to her. So I think it’s really important to focus on self-pampering when possible. That could be wrapping yourself up in a cozy heated blanket at work with a mug of tea, or taking a bubble bath at night, or taking a 20-minute power nap, or having muffins for breakfast. Or why not do it all?
Well, time often gets in the way, but that’s why I love these muffins. They take no time at all to make (the video will show you!) since it’s a simple matter of mixing dry ingredients with wet ones, and then you’re done. Check it out!
This time of year, I start baking with citrus more, especially lime. Lime to me is summer. When I zest a lime and the aroma reaches my nose, I feel sunny days and sand and margaritas. These muffins reached me at the heart of my winter blah feelings and really helped alleviate some of the grayness everywhere.
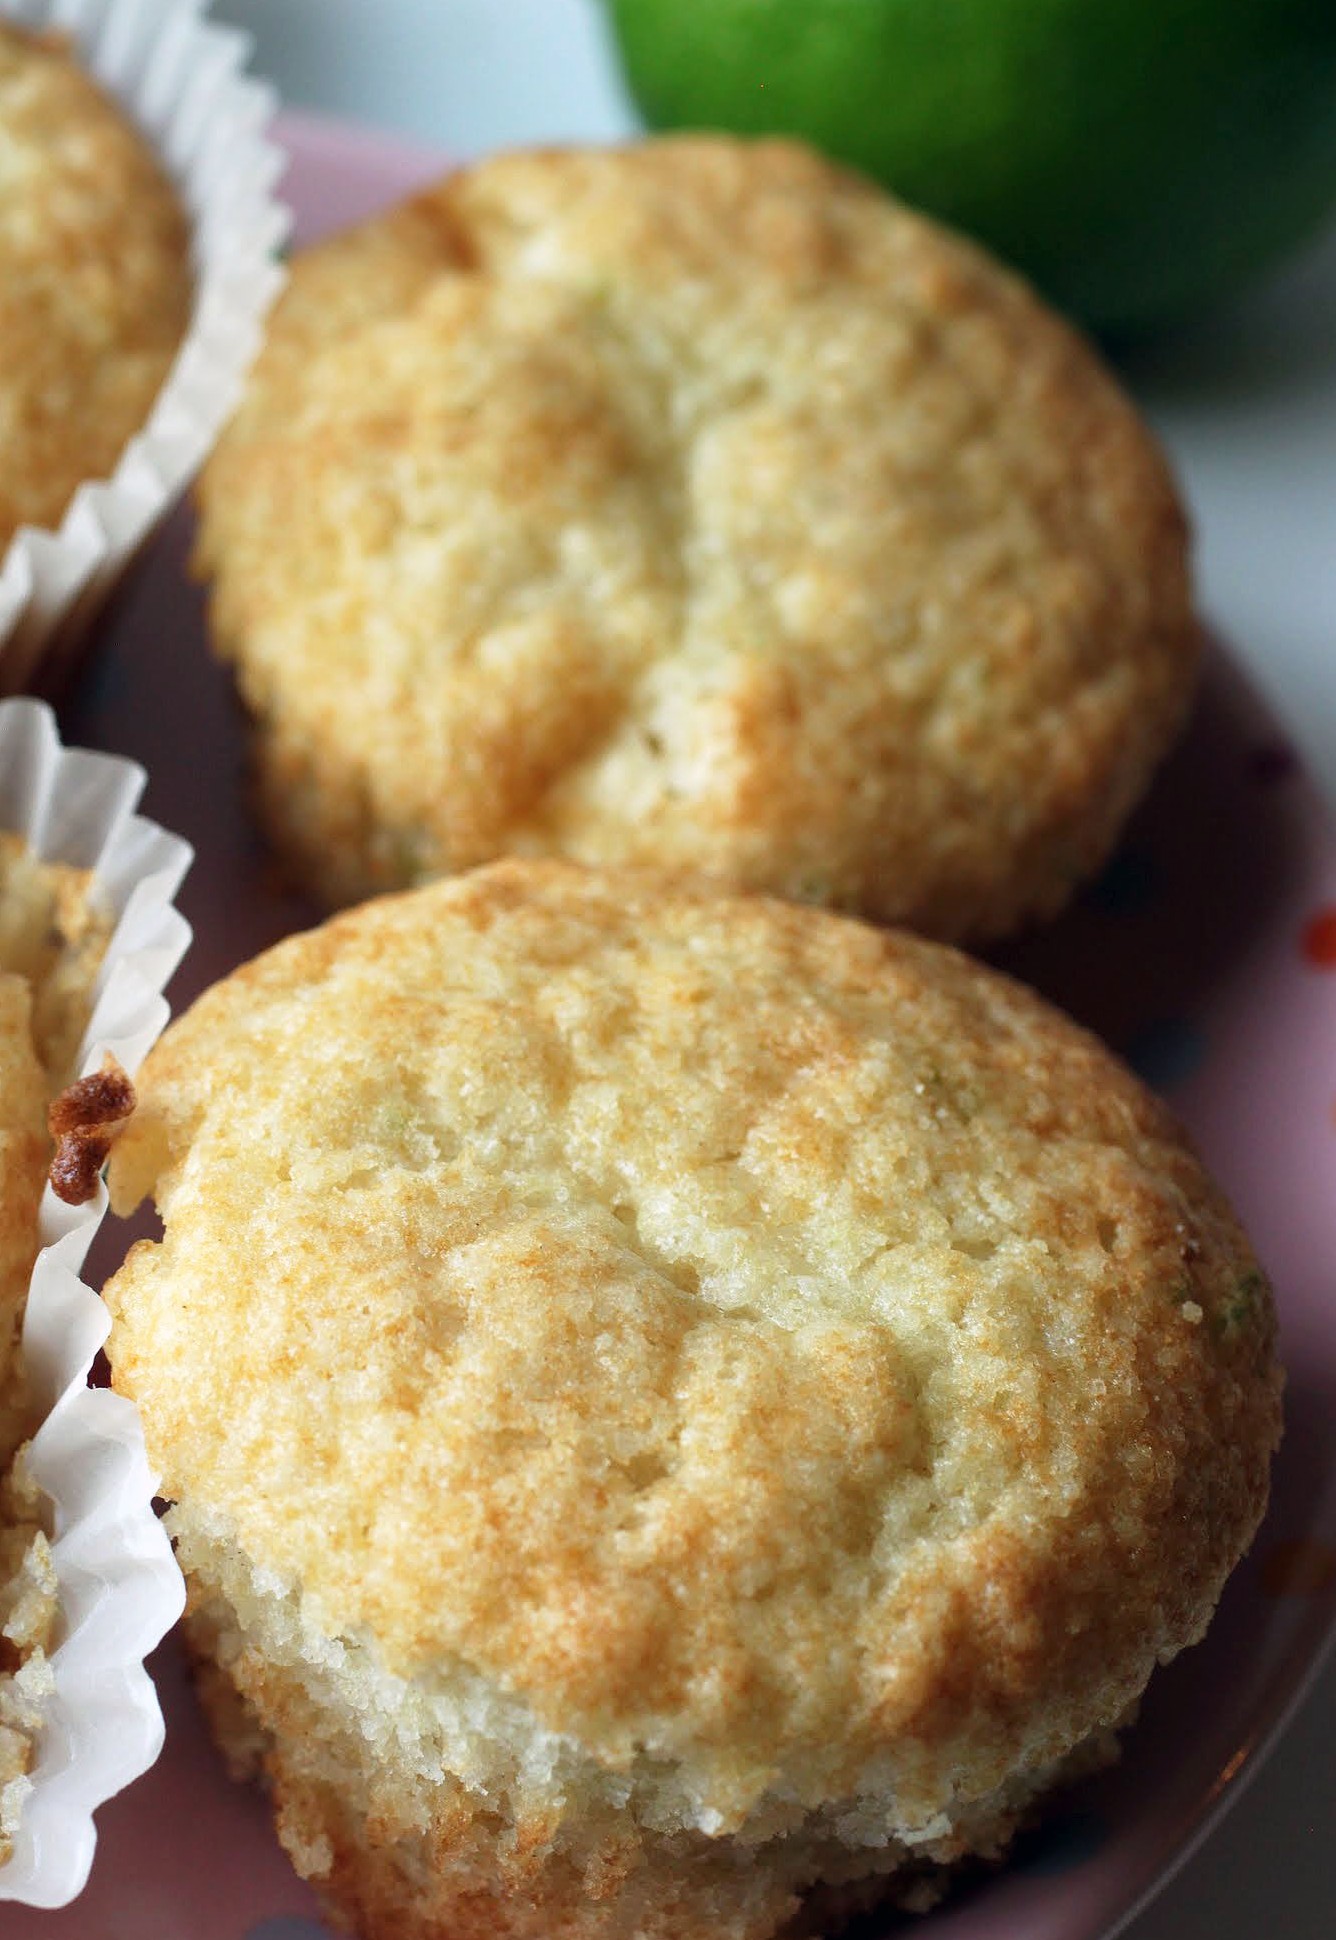
And white chocolate with lime is the best. If you haven’t gone for that tangy-sweet combo, try it now!
It’s totally okay to hate on a season for whatever reason, but just be sure to self-pamper. After all, there’s no guarantee than anyone else will do it for you. Make some muffins, grab some tea and have a moment!
Ingredients
Instructions
- Preheat the oven to 400. Line a 12-yield muffin pan with cupcake liners. Set aside.
- In a bowl, combine the flour, baking powder and salt. Set aside.
- In a medium bowl, combine the next three wet ingredients. Add the sugar and mix well. The add the dry ingredients and stir until all is combined. The batter will be lumpy.
- Add your desired mix-ins (I used the lime zest and white chocolate chips). Using an ice cream scoop, fill each muffin liner about two-thirds of the way full.
- Bake the muffins for 20-25 minutes until golden. Cool and enjoy!
Personally, I’m not a coffee drinker. I’m fairly wired as it is, so I don’t need any chemical help getting going every day. And I was on a decaf kick for a while because it tastes nice, but it also stains your teeth. I guess some people don’t fall prey to that, but I do, which also explains why I gave up green tea. Hot beverages are not my friend.
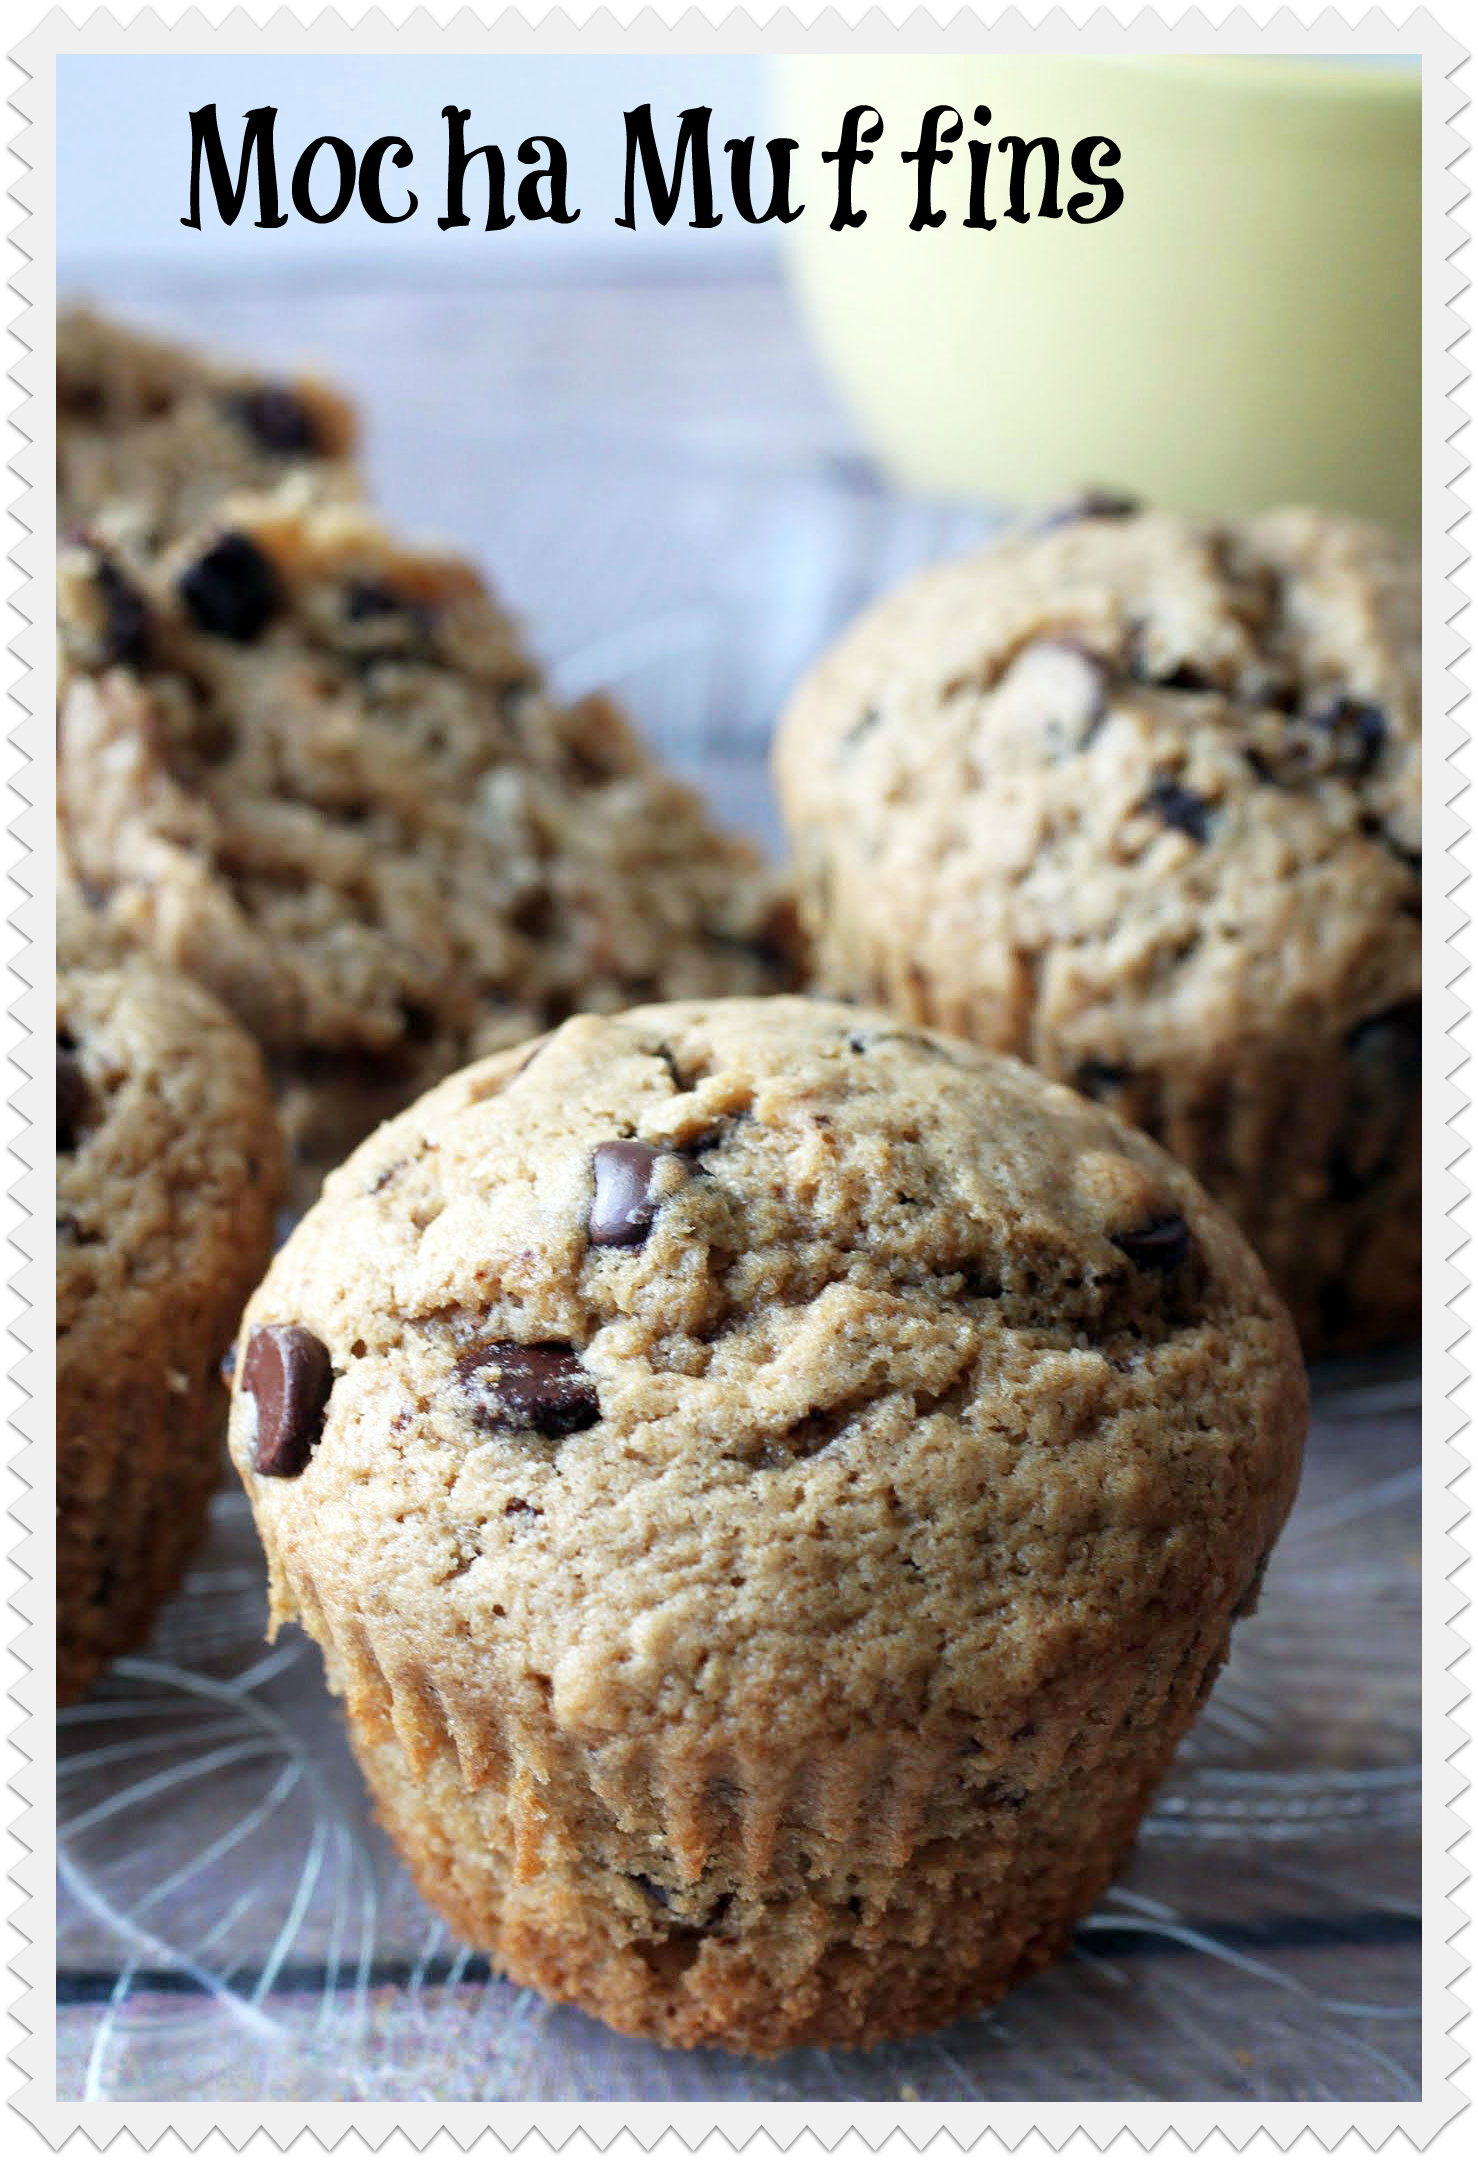
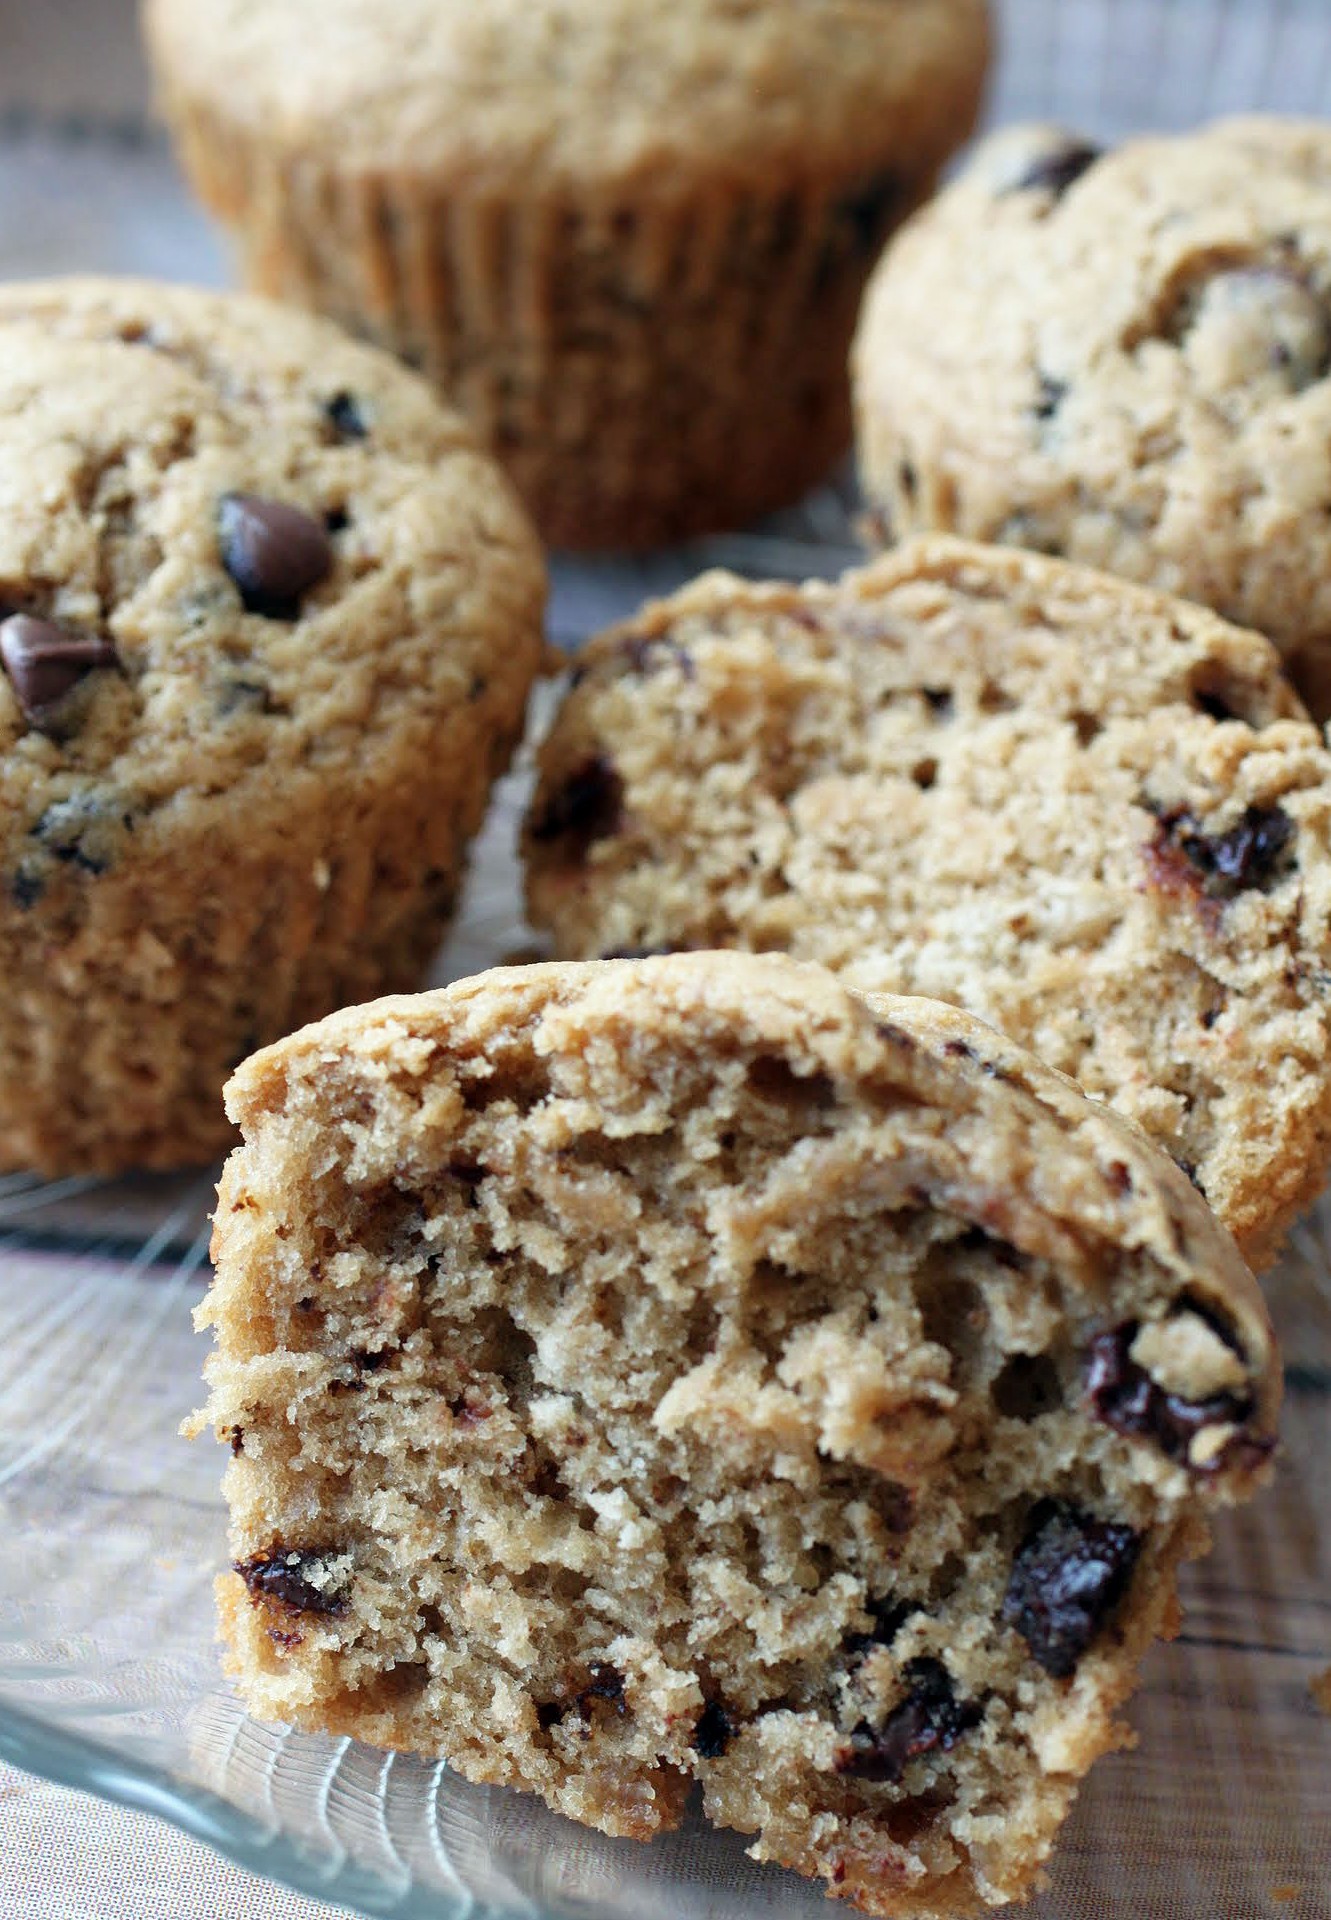
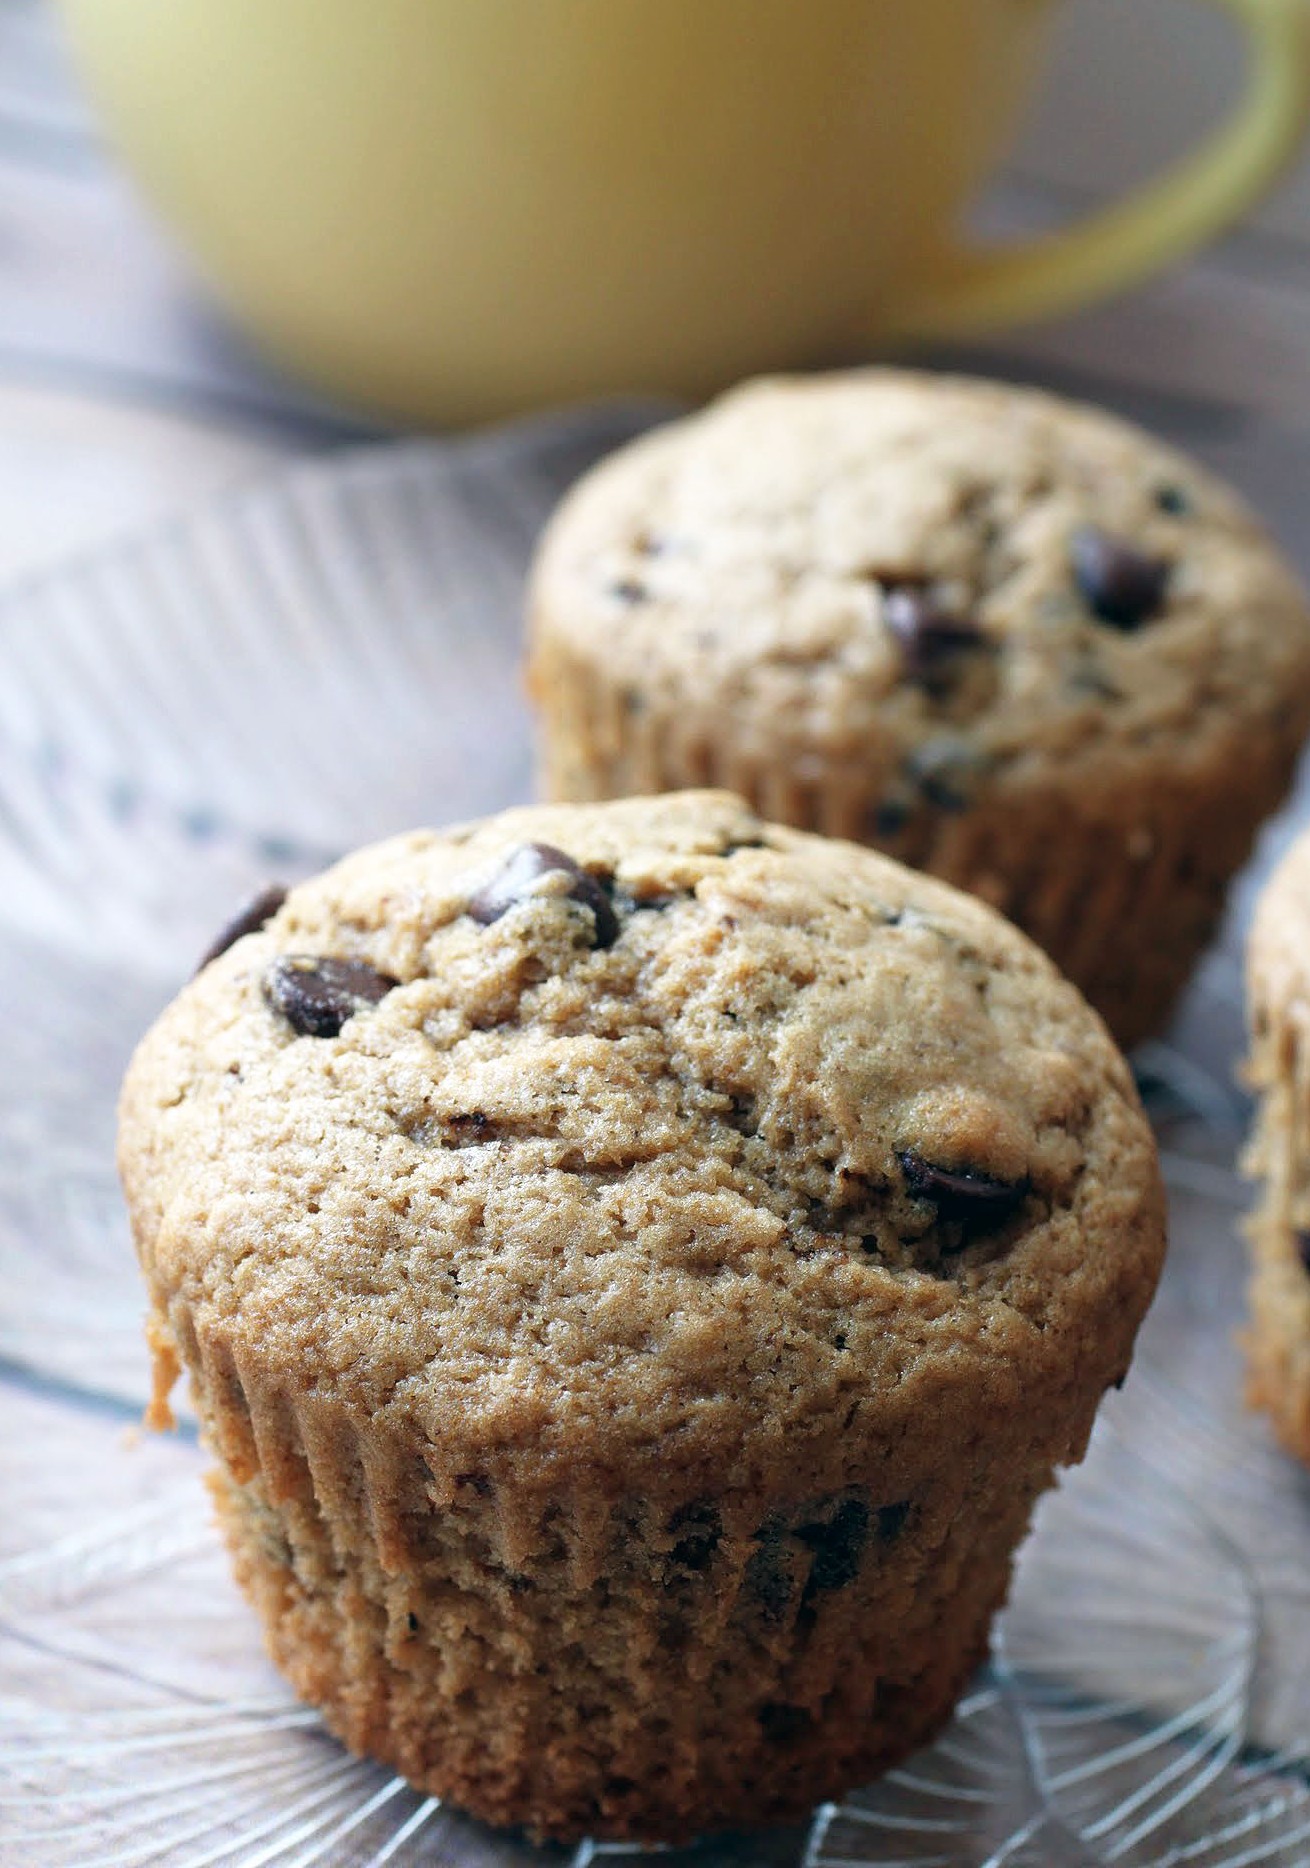
As a result, I like to get my caffeine kick through dessert, and what better way than with the best muffin I’ve had in quite a while? These pack a nice coffee punch while not being overly sweet, making for a gentle start to the day. We all need that on a tired Monday morning!
In the meantime, I’m doing okay because I did not stay up late. I’ve mentioned before that my body turns off at nine, and I’m not ashamed of that. It’s also wired to wake up in the 4s, and I’m very upset about that. I should have been a farmer.
The thing is, once anyone wakes me up, that’s it. I’m up. My brain starts racing and I just can’t sleep any more. Kenny, on the other hand, sleeps through pretty much everything and if he does wake up, he’s snoozing again within seconds. It’s very tempting to throw things at him in the wee hours of the night out of sheer frustration at his sleep skills.
Over the past week, I have been awakened by the following: a child with a nosebleed, a child needing her nose to be blown, someone slamming the toilet seat shut at maximum volume at two A.M., Kenny accidentally turning the light on in the middle of the night, little feet running down the hall at top speed back and forth (I don’t want to know), and a nonstop looping nightmare that I’m drawing My Little Ponies nonstop for my daughters. Which actually did happen in real life, but the nightmare is worse.
While this level of sleep deprivation runs nowhere close to what we experienced when the children were babies, I have to wonder if I’ll ever sleep well again. When they get older I’ll just wonder where they are, who they’re with and what they’re doing. I can see myself doing a lot of waiting up. And by the time they’re responsible adults, I’ll have forgotten how to sleep properly at all.
But then, I can always throw things at Kenny while he sleeps if it makes me angry. He’ll never know. And I can make breakfast muffins with lots of coffee in them to get me going.
A few weeks ago during our big snowstorm, I decided to bake my way through Dorie Greenspan, and these muffins were part of that. As happens a lot with any recipe I make, I added chocolate chips. My mother pointed out that no coffee dessert recipe is nearly as good without chocolate, and I agree with her wholeheartedly.
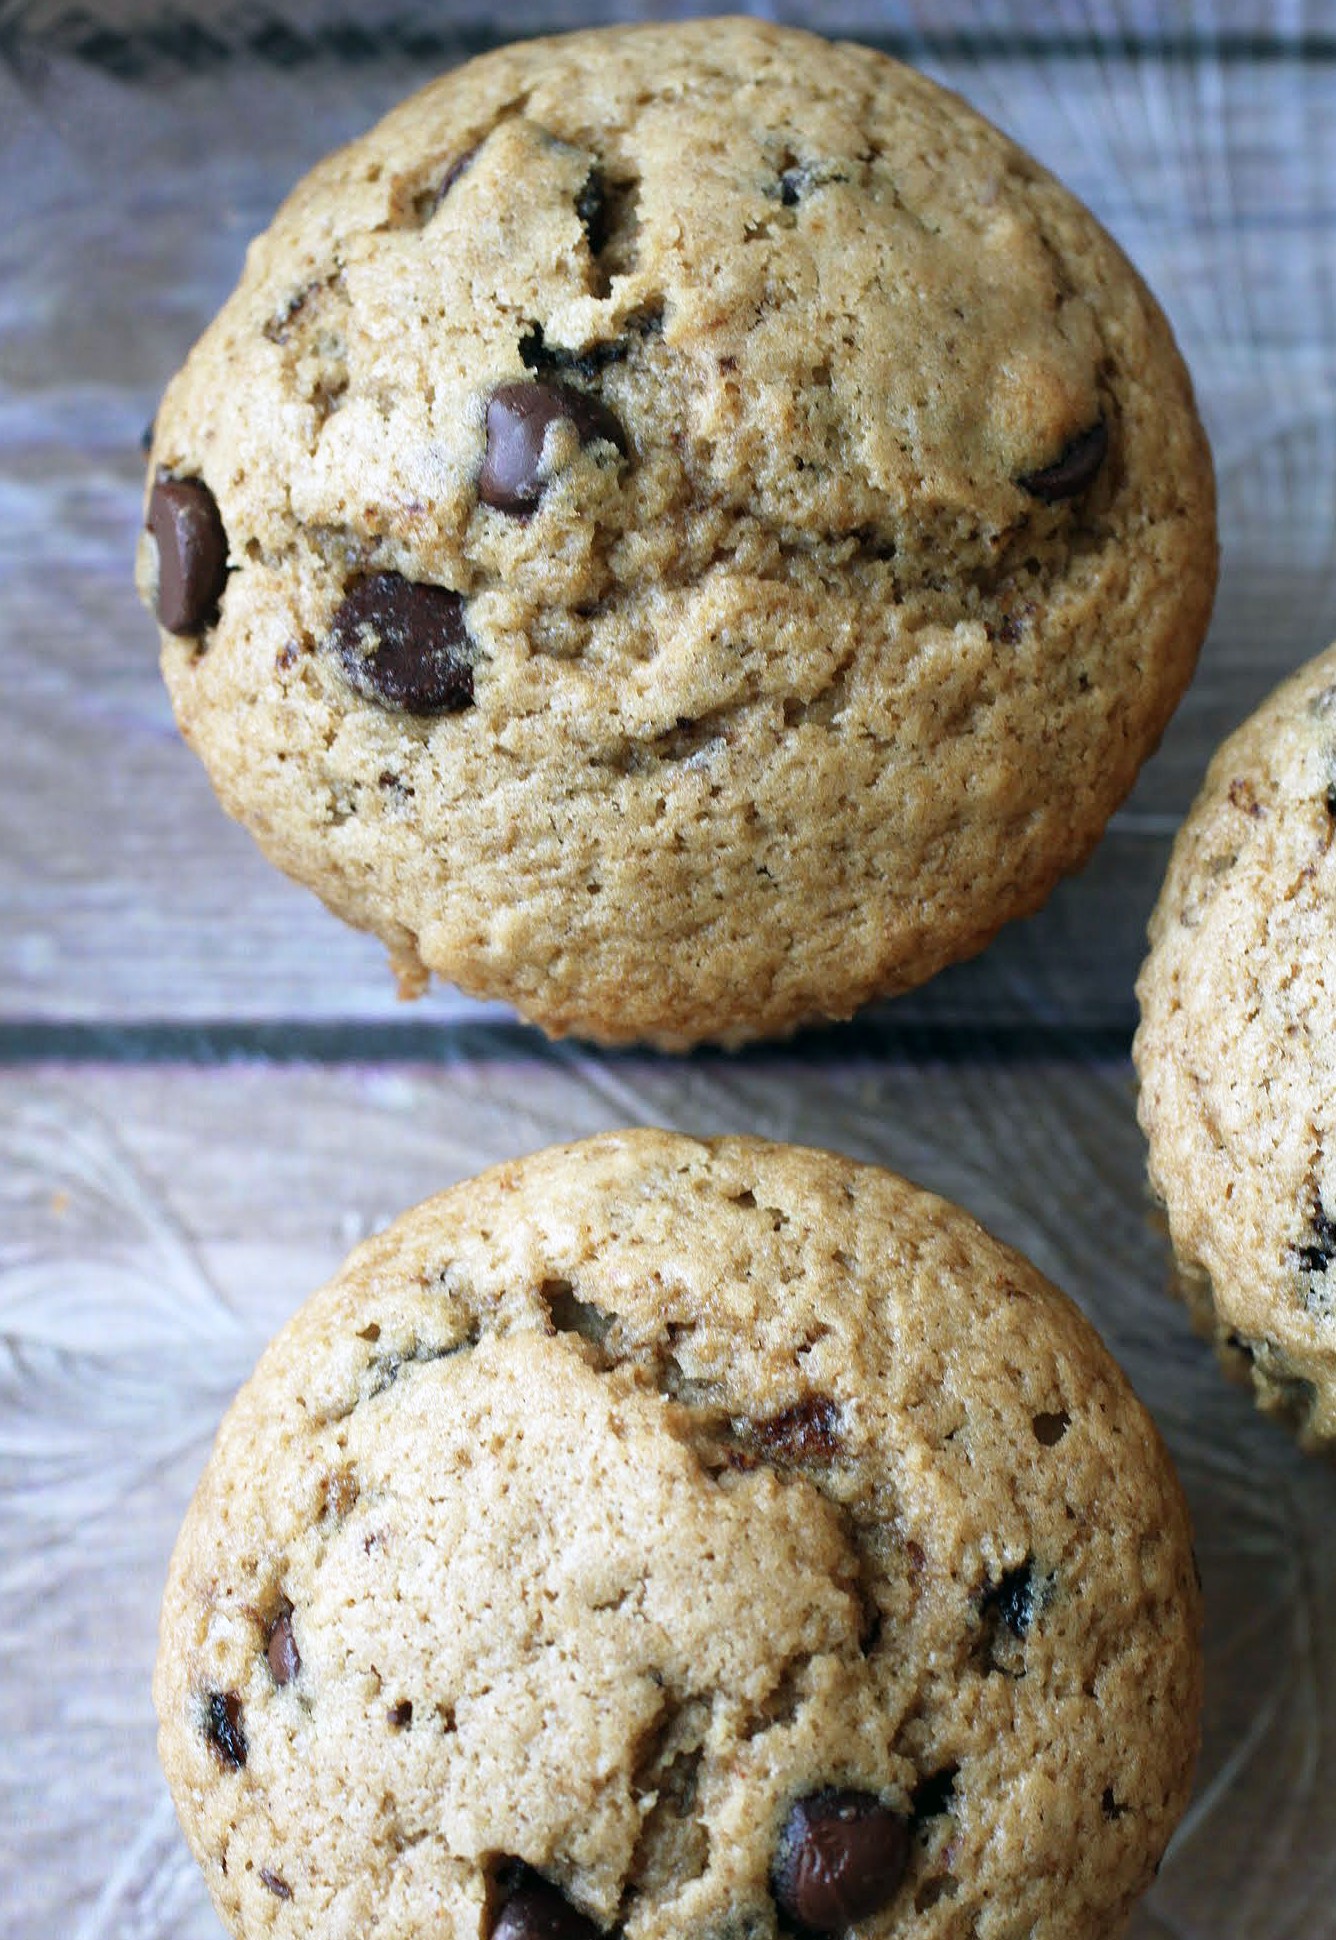
These are pretty easy, and they make for good motivation after a night of little sleep to get up and at ’em. We’re all tired, but let’s see what we can do to make today happen!
Ingredients
Instructions
- Preheat the oven to 400. Line a 12-cup muffin tin with cupcake liners. Set aside.
- In one bowl, combine the flour, sugar, espresso powder, baking powder, cinnamon, salt, and brown sugar. Set aside.
- In a smaller bowl, mix together the coffee, melted butter, egg, and vanilla. Be sure to have fully cooled the coffee and butter, or your egg will cook. Gently stir in the chocolate chips.
- Using an ice cream scoop, portion the muffin batter equally among the 12 prepared cupcake liners.
- Bake for 20-25 minutes until a toothpick inserted into the center comes out clean. Cool and serve!
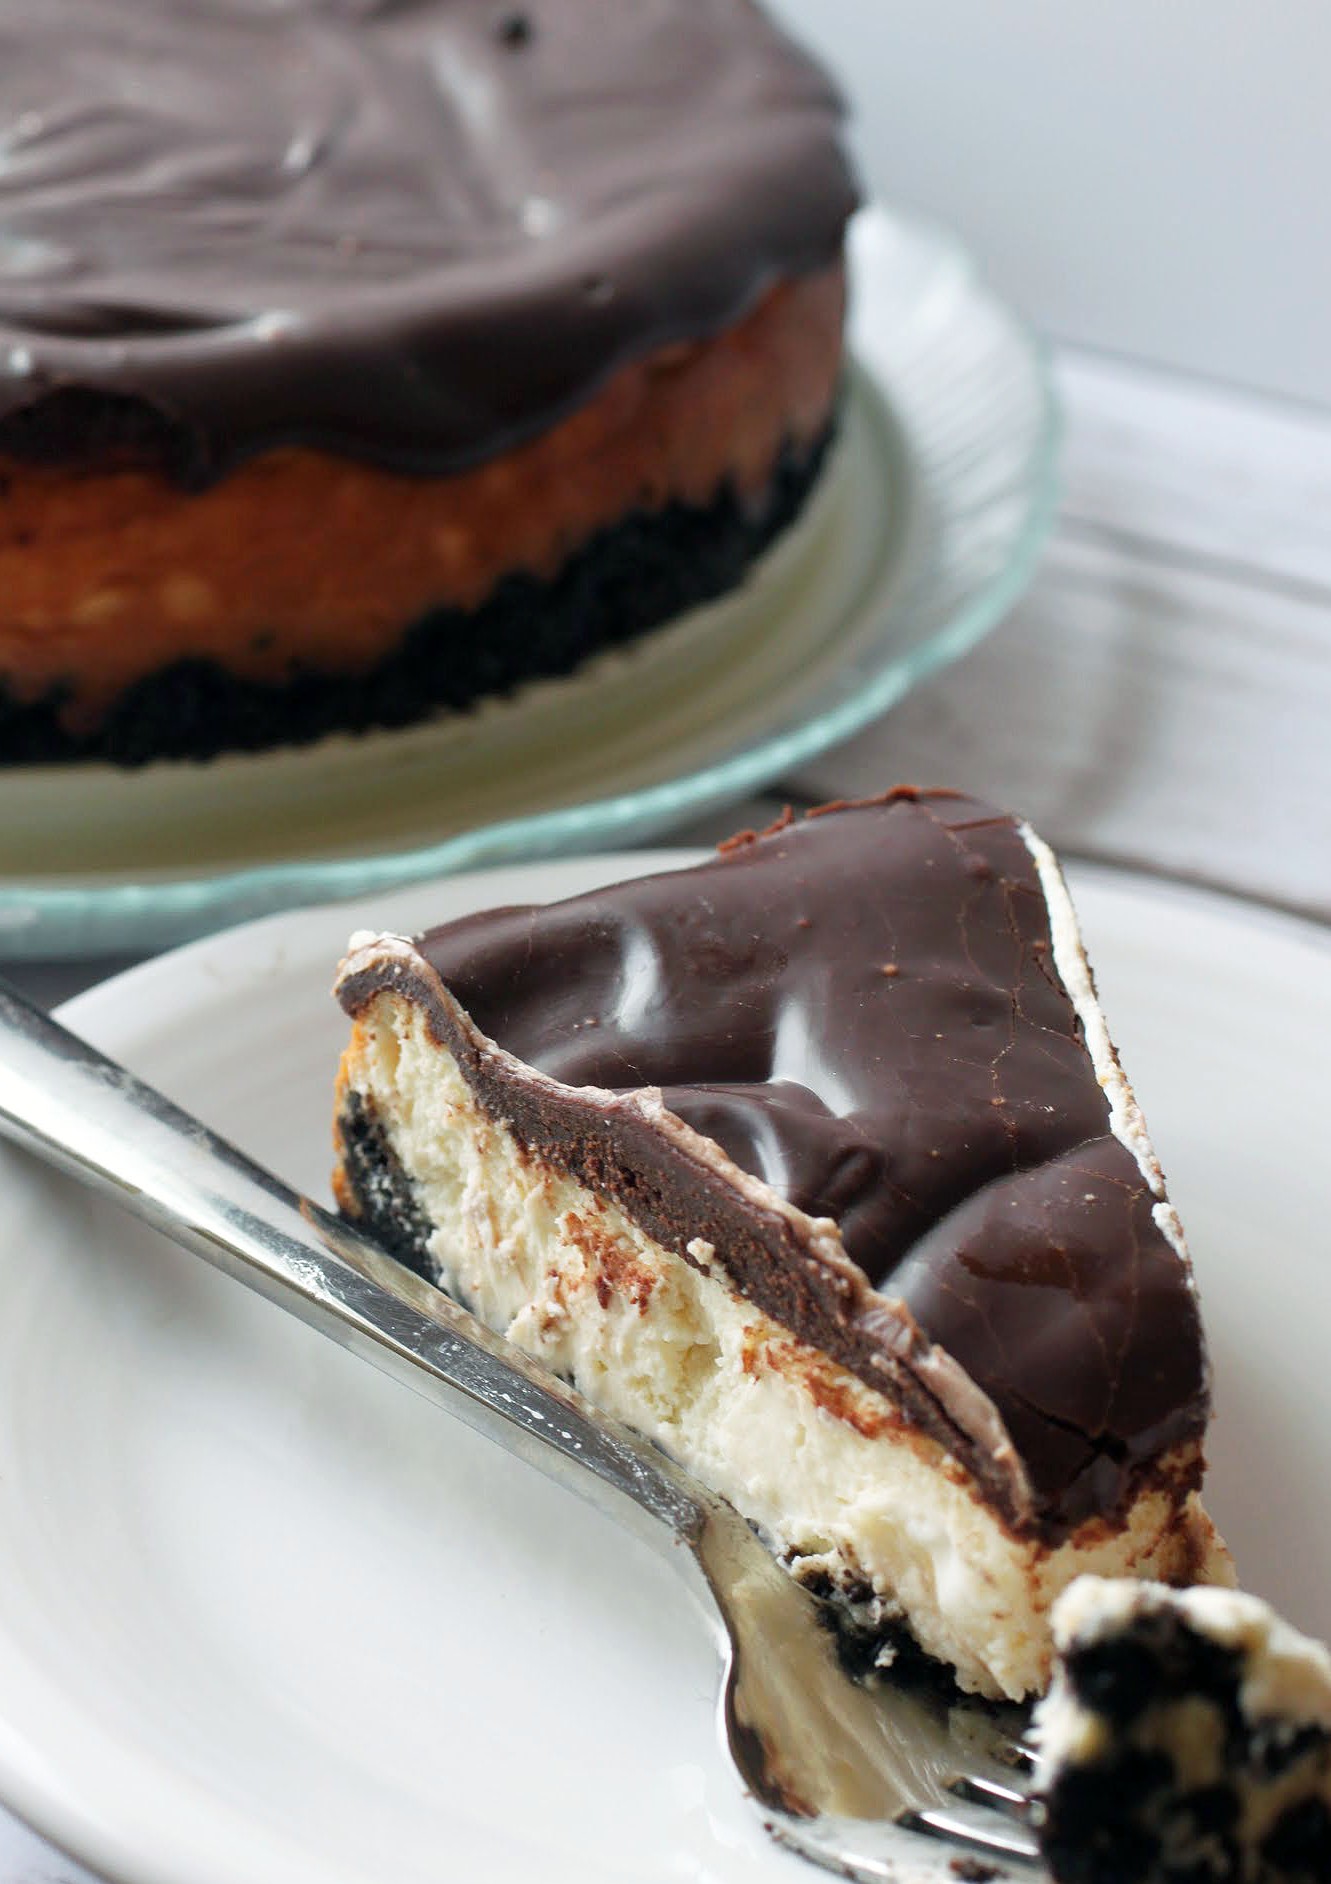
Neither, apparently, does closed captioning. I’m one of those weird people who likes to read my TV, so I always have the closed captioning turned on. In the movie Chocolat (one of my all-time favorites, by the way), one of the characters tells another to prepare the ganache. Instead of that word, closed captioning came up with “knish,” which is a pastry similar to an empanada. And as I type this, the word “ganache” keeps getting underlined in red, while the “knish” remains untouched by spell check. Go figure.
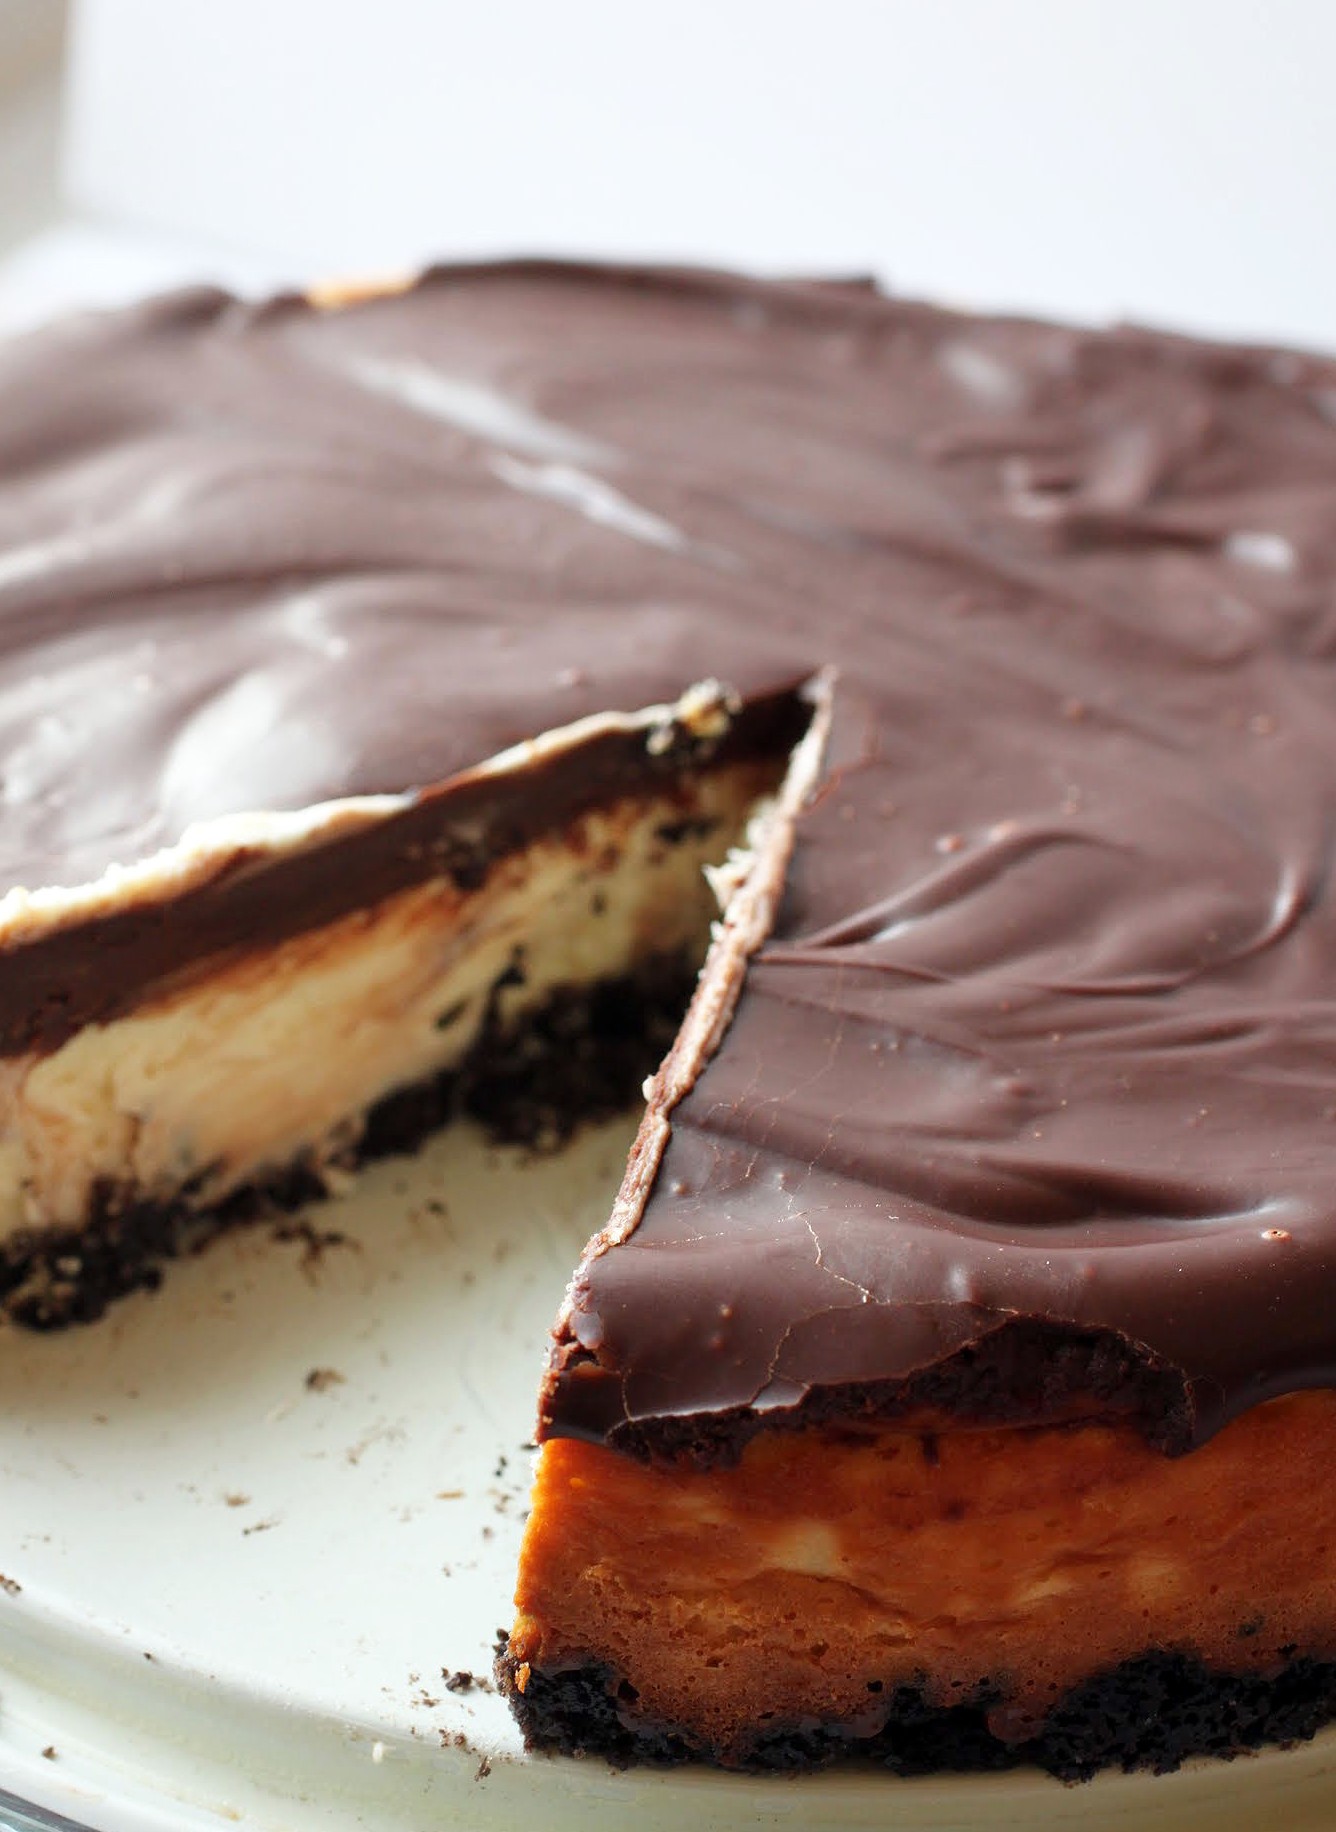
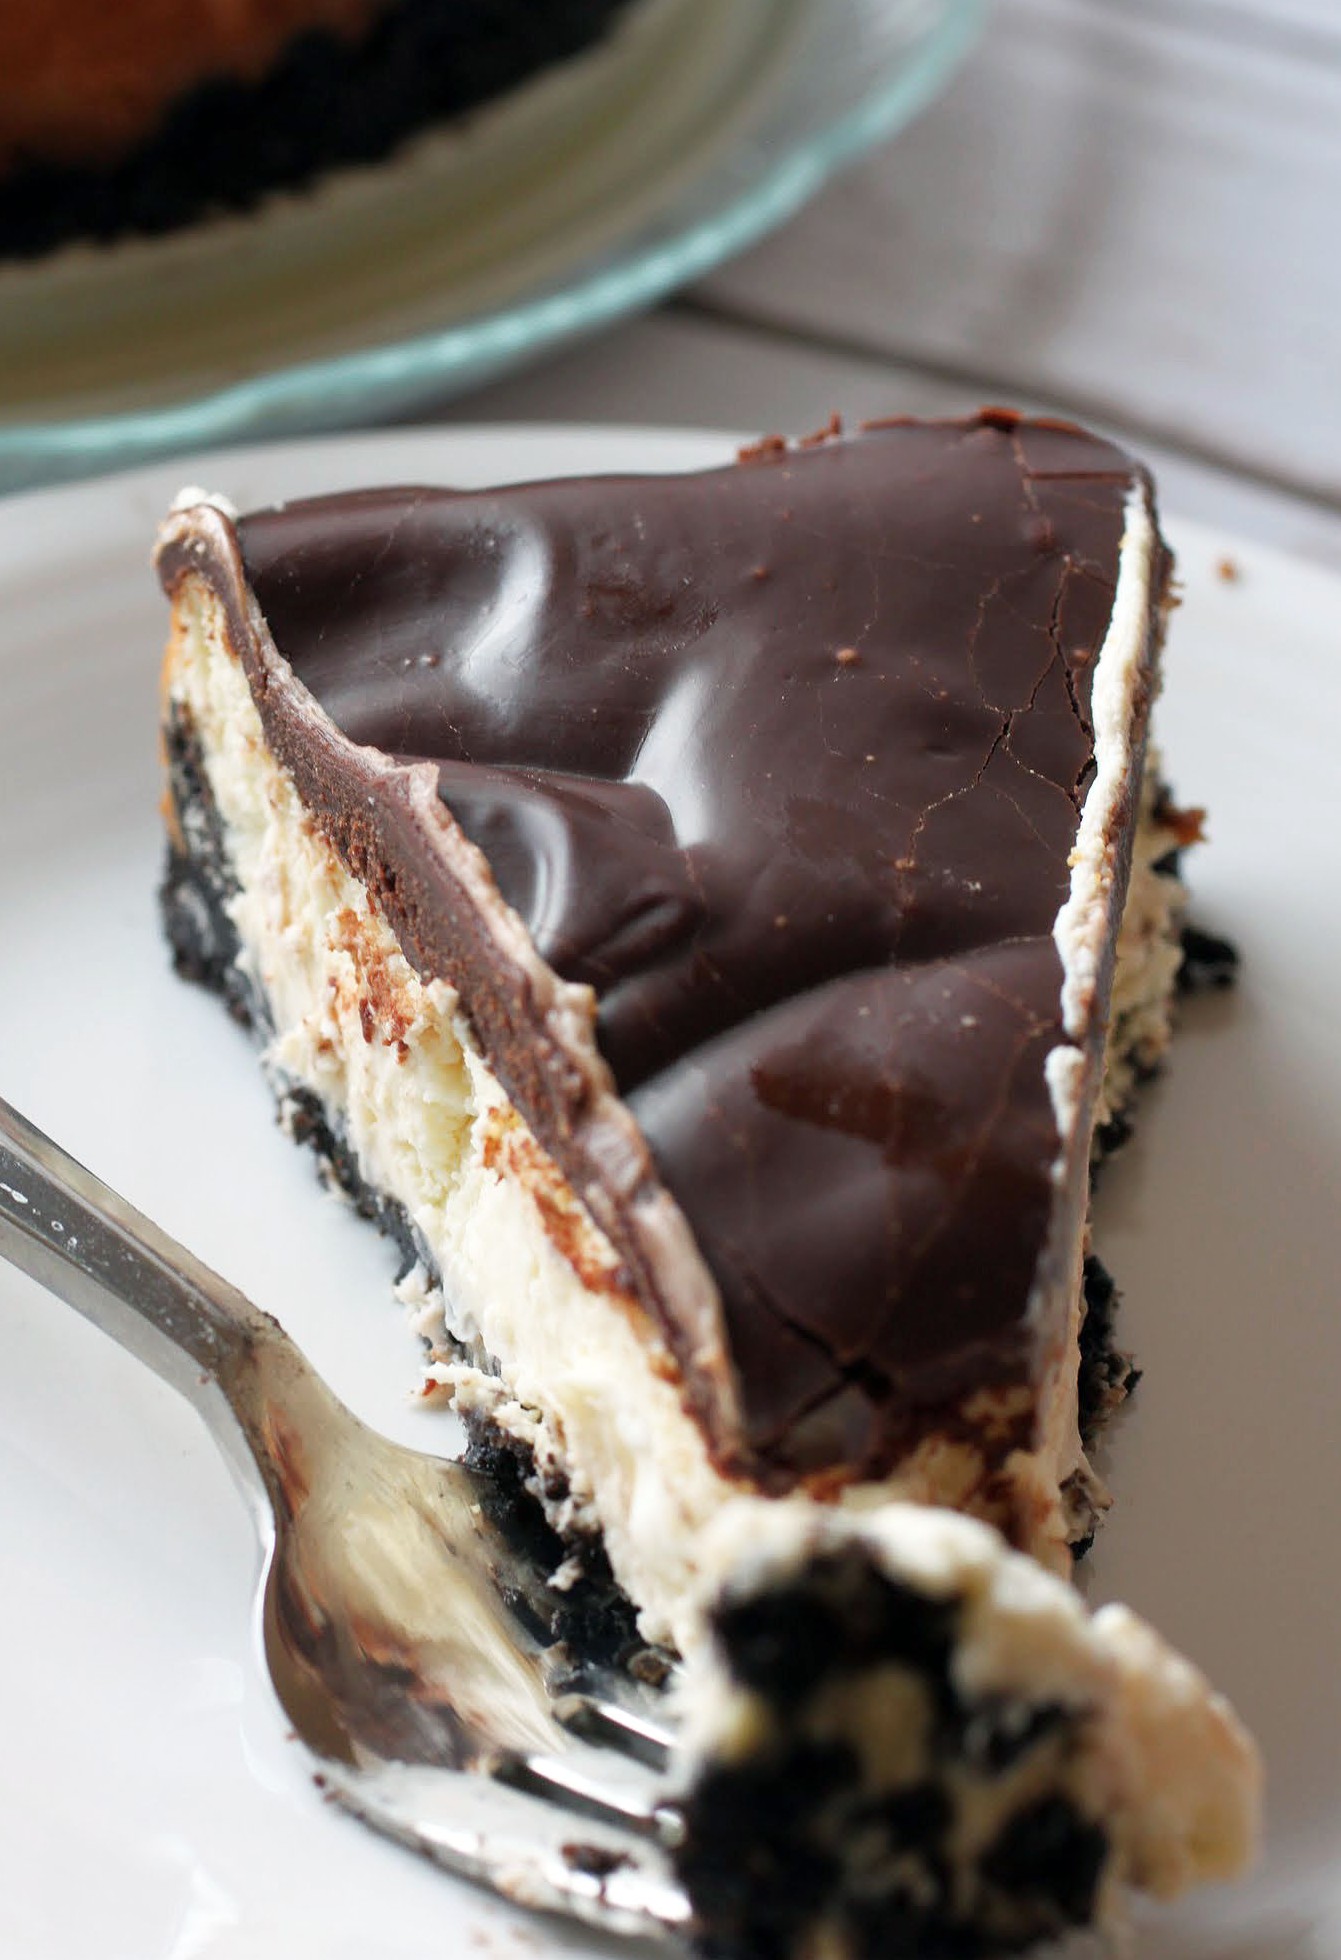
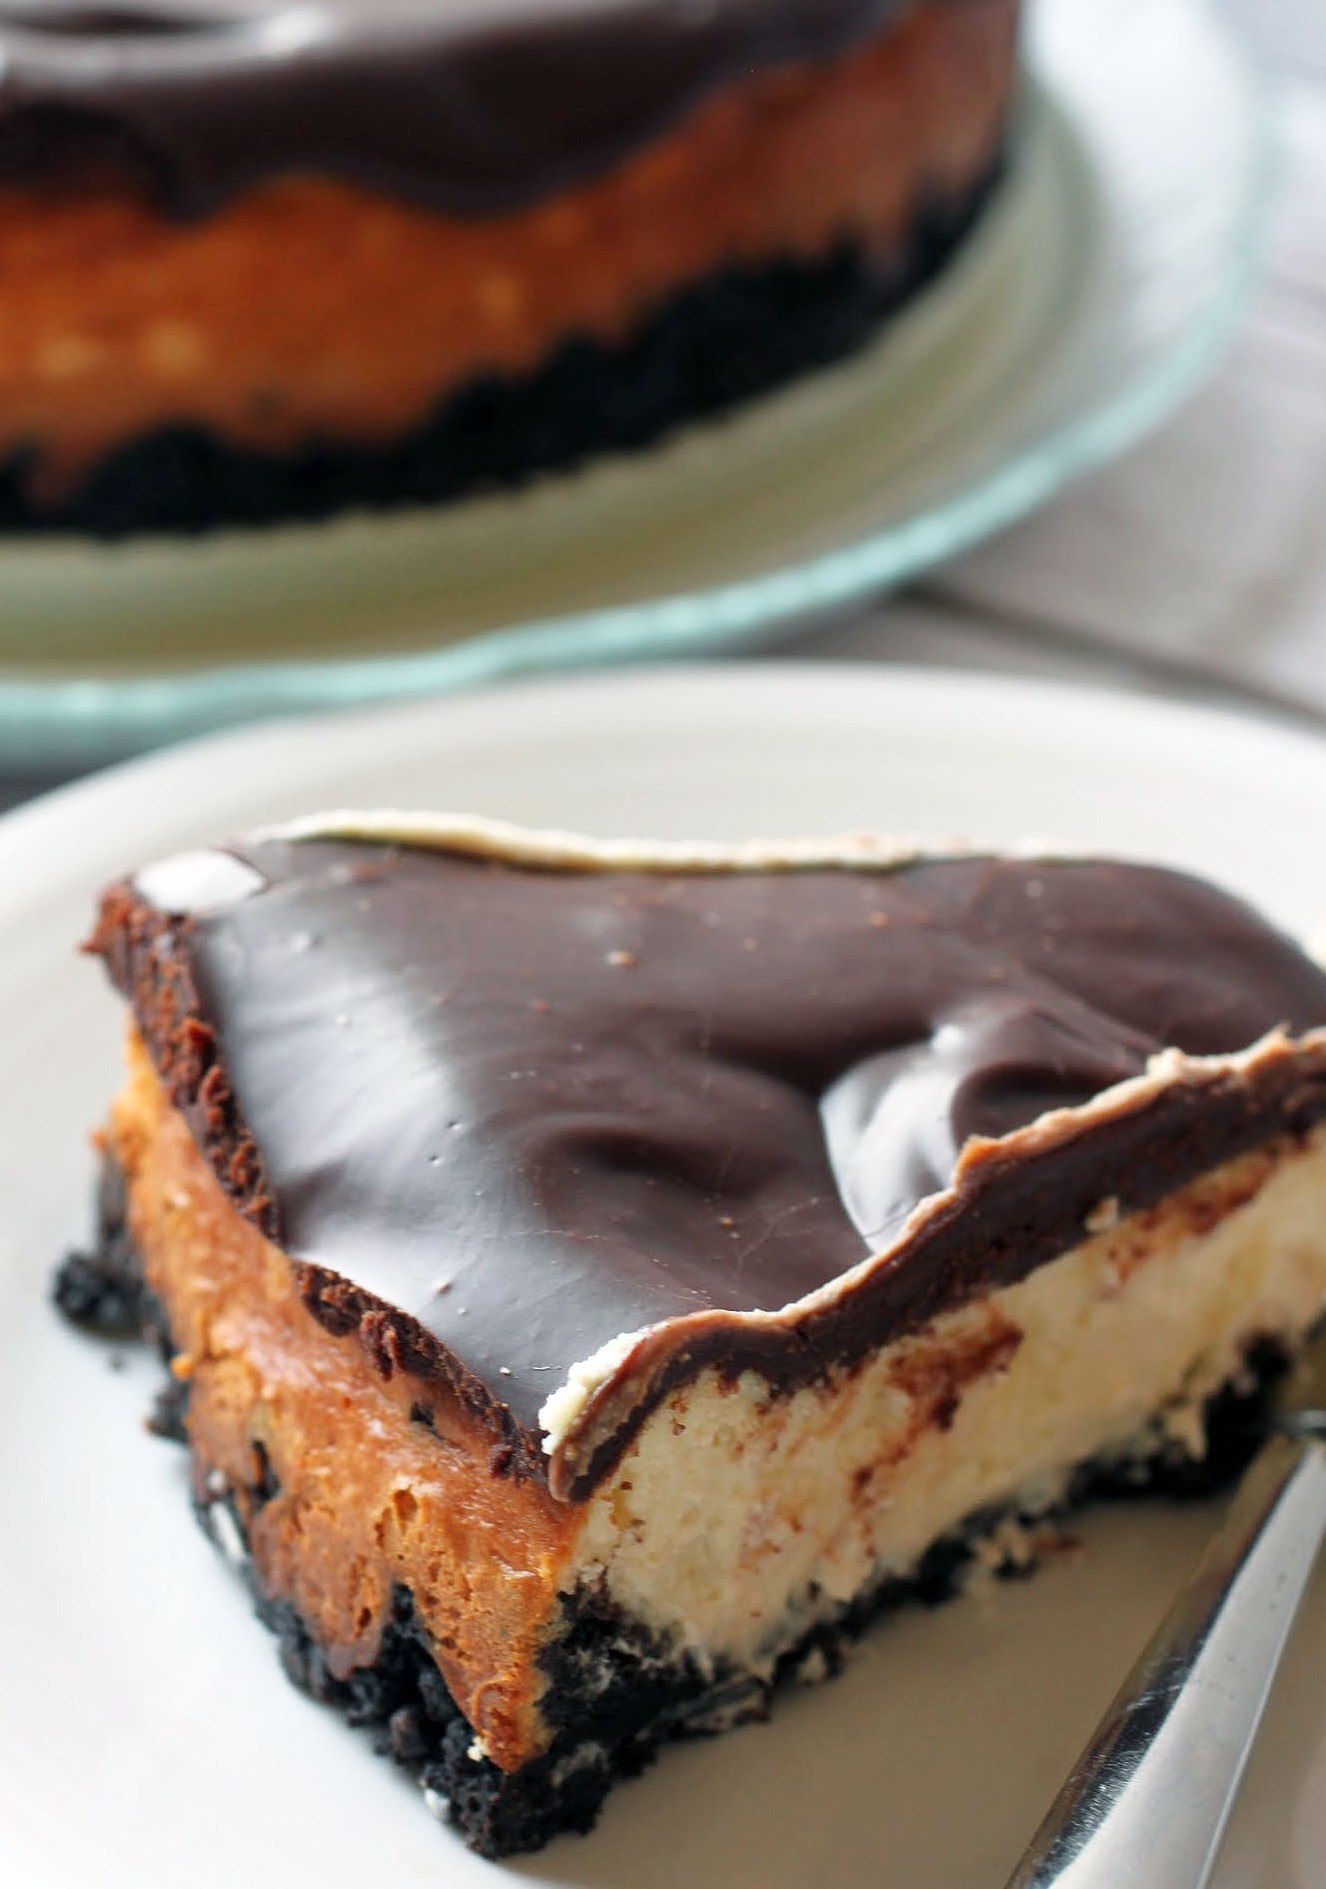
At least spell check knows what cheesecake is, and boy, is this ever a good one. It’s got an Oreo crust and a thick layer of ganache on top, and it’s perfect for Valentine’s Day. Or just, you know, for a Monday. You decide!
I’ve been thinking a lot about mothers this weekend. A few days ago, my favorite advice column (Ask Caroyln, she rocks!) ran a letter from a woman whose mother died when she was young, and she wanted to know how anyone goes about dealing with the fact that a mother will never be there to answer some of life’s basic questions about, well, anything.
Carolyn basically said that there is no dealing with it: you just have to soldier on and do your best and live with the loss. That answer really made me wonder about what my life would be like if I hadn’t been able to run some serious questions by my own mother, whom I talk to nearly every day. We live near one another, and she knows almost as much about my life as I do. What if I didn’t have that?
A few years ago, I was in my office talking to a colleague who was complaining about her mother. All of a sudden, another teacher walked by and said, “My mother has been dead for 15 years. I would give anything to have one more conversation with her.”
At the time, I was too startled to do much but watch my colleague apologize and awkwardly get up and go about her day. I thought about it a lot afterward, though, and I remember thinking a few things. I didn’t think that embarrassing someone who was doing what most people do was necessary, but I also felt for the woman who would give anything to be able to complain about her own mother with such a cavalier attitude.
I have no conclusions here, but I do stop from time to time and think about how good it is that I can call my mother when I want to to tell her things, and how life would feel without that. While we should all ideally spend every moment of our interactions with loved ones being grateful, it’s not a realistic expectation. Still, as long as we remember how lucky we are, that’s the most important thing.
As long as we’re busy being grateful, can we take a moment for cheesecake? Great. Thanks!
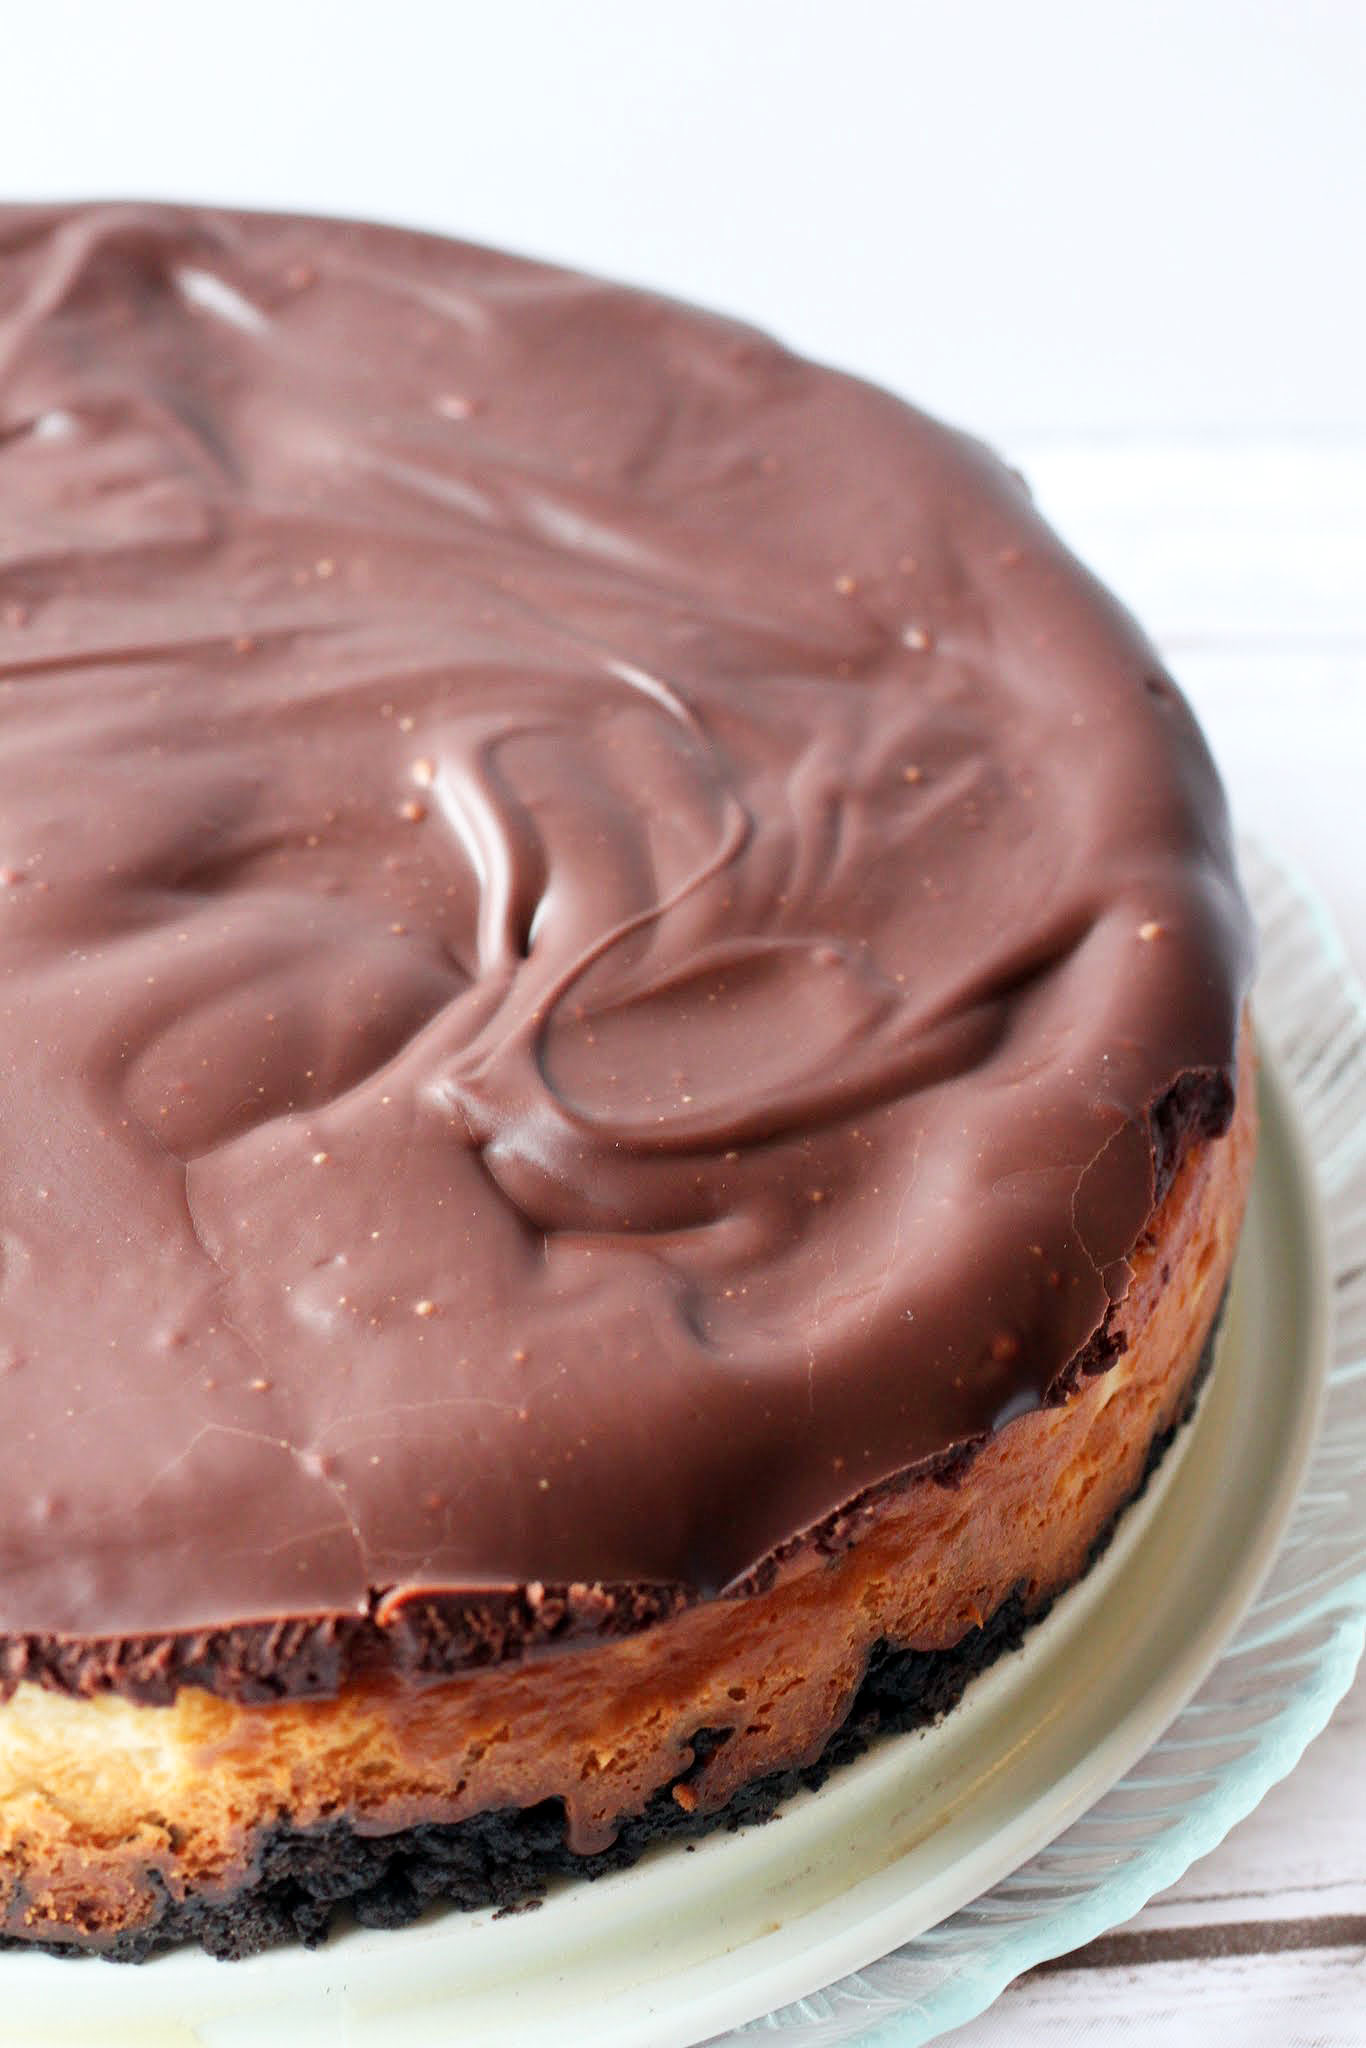
This one is already in my all-time favorites category. It’s that irresistible layer of ganache on top coupled with the Oreo crust. There’s nothing on this cheesecake that I have a hope of resisting.
While people like to think that cheesecake baking is tough, it’s actually pretty simple. Even this one. The ganache comes together very quickly, too, and has the added benefit of covering any potential cracks on the cheesecake’s surface.
Let’s spend time being grateful, when we remember it. Everything is fleeting, from that slice of cheesecake on your plate to the people who surround us with love. Savor everything!
Ingredients
Instructions
- Preheat the oven to 350. Coat a 9-inch springform pan with cooking spray. Set aside.
- In a medium bowl, combine the crushed Oreos and melted butter until the crumbs are moistened. Press the crumb mixture into the prepared pan, pressing firmly into the bottom and slightly up the sides.
- Bake the crust for 15 minutes,
- While the crust is baking, beat the cream cheese and sugar in the bowl of a stand mixer until creamy. Add the yogurt and vanilla and beat again. Finally, add the eggs and beat until just incorporated.
- Pour the filling into the crust and bake for 50 minutes. Do not open the oven door while baking.
- When the cheesecake is done, turn the oven off and crack the oven door. When the oven has cooled, remove the cheesecake and let it cool completely.
- Once the cheesecake is cooled, make the ganache. Heat the heavy cream and chocolate chips in the microwave for one minute. Stir until smooth.
- Pour the ganache over the cake. Do not remove the sides of the springform pan.
- Chill the cheesecake overnight.
- Cut into wedges. Store chilled.
Who am I kidding? I’m ready all year long! Nothing is more fun than the hearts and flowers and chocolate. Especially the chocolate. And the treats! I really can’t get enough. Too bad Kenny hates Valentine’s Day. More on that some other time.
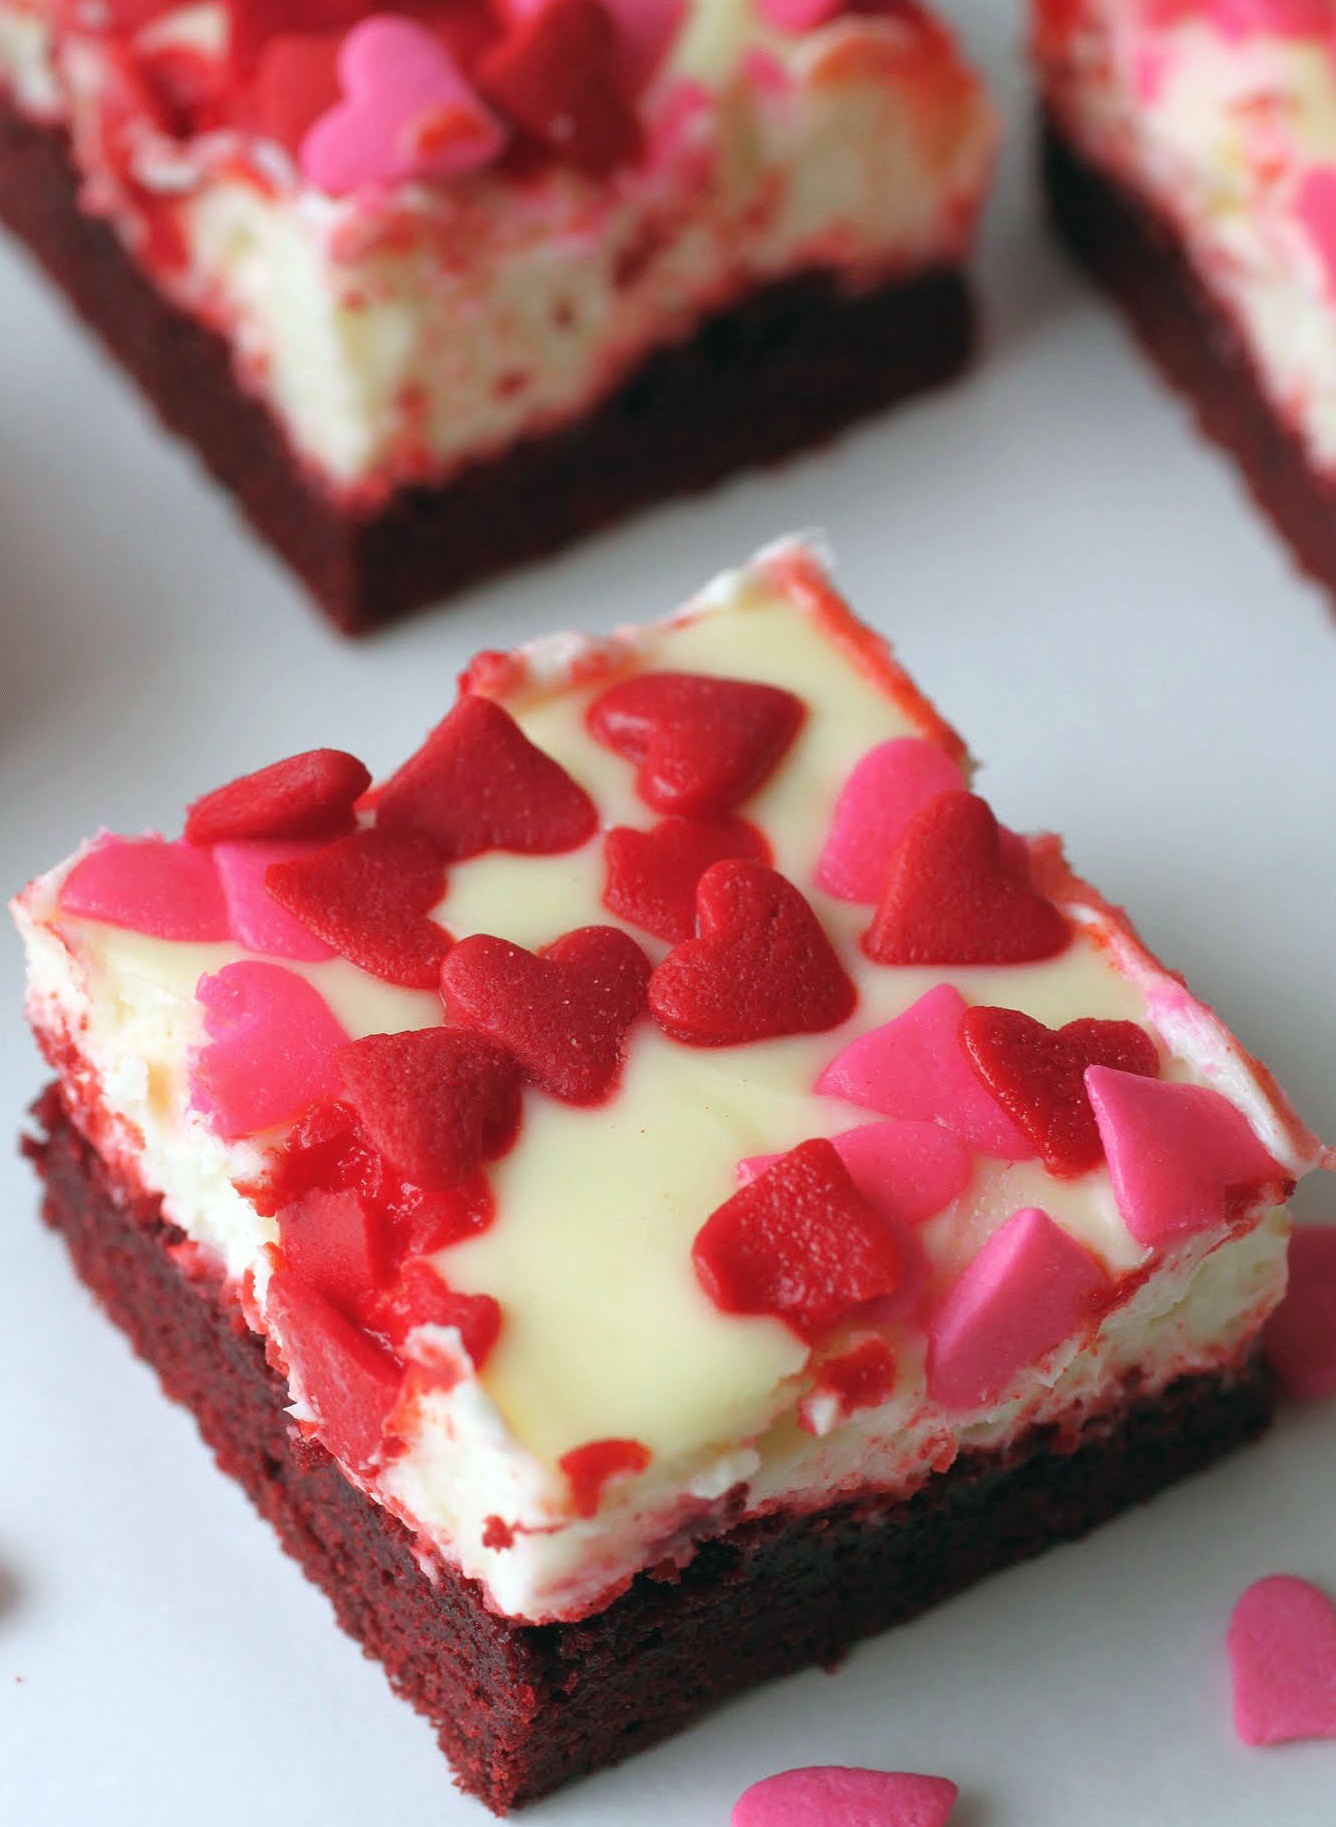
These red velvet cheesecake bars should get your holiday going. The bottom is a super-easy cake mix cookie bar, and the top a simple layer of cheesecake. And let’s not forget the heart sprinkle bling.

I’m going to be very honest here: I’m not a red velvet person. To me, if you’re using cocoa powder, put a lot in the mix, not just a trace. And the whole red food dye thing really throws me. But I can see that it all sure is pretty!
Besides, whenever I bake something I’m not crazy about myself, I just bring it into work and people devour it there. All my red velvet fanatics were pretty happy about these bars, so I’m gonna assume they were the essence of red velvet happiness. And I did enjoy the cheesecake top.
It’s important for me to experiment with flavors that aren’t my favorite, or otherwise I’m not much of a baker. It’s just so hard to taste test flavors that I naturally dislike. It’s a lot like teaching a book in my English class that I’m not so crazy about. On an intellectual level, I can recognize the worth of a book or a dessert I dislike, but personally, just…no.
It’s like snow. I think I used to like it, and I appreciate it aesthetically from a whole “wow is Mother Nature powerful” point of view. But boy, do I hate it. Last night the D.C. area got a measly inch, but because our local governments were totally focused on the two feet of snow headed this way Friday night, they ignored the one inch and didn’t treat the roads.

Result? Chaos. It took people 9 hours to get home from relatively short distances. It’s not the first time this kind of SNAFU has occurred, either. I got to stay up all night waiting for Kenny to get home. So yeah, snow is nice, or something. I just don’t like it. Give me a beach every day!
And give me a classic brownie with the beach. But today, red velvet will win!

These are an easy way to give someone a cute Valentine’s surprise. The bottom layer mixes up in literally seconds, and the top is a simple cheesecake. No bells and whistles, unless you count the sprinkles. How could you not love those?
When all is said and done, you have a bar worth remembering. And if it’s not your cup of tea, you can still appreciate how pretty red velvet is. Or snow. Doesn’t mean we have to marry them!
Ingredients
Instructions
- Preheat the oven to 350. Line an 8-inch square pan with foil, leaving enough to hang over the sides. Coat with cooking spray. Set aside.
- Combine all of the red velvet cookie base ingredients in a medium bowl until a stiff dough forms. Press the dough into the prepared pan and bake for 15 minutes.
- While the dough is baking, make the cheesecake. In a medium bowl, mix the softened cream cheese with the sugar until smooth. Add the egg and vanilla and stir again until completely incorporated.
- Gently spread the cheesecake batter over the partially cooked bars. The cookie dough underneath will cave in a little with the weight. Just do your best to get the batter evenly distributed.
- Bake the bars for an additional 20-25 minutes until golden at the edges and set. Cool completely.
- Refrigerate overnight and cut into squares.
]]>