The idea of making a pie crust used to terrify me. I knew that it involved a food processor, which I owned, but couldn’t put together. Seriously. The directions were so confusing. But then, I found a way around it for an easy crust you can make in a bowl. More details on that later.
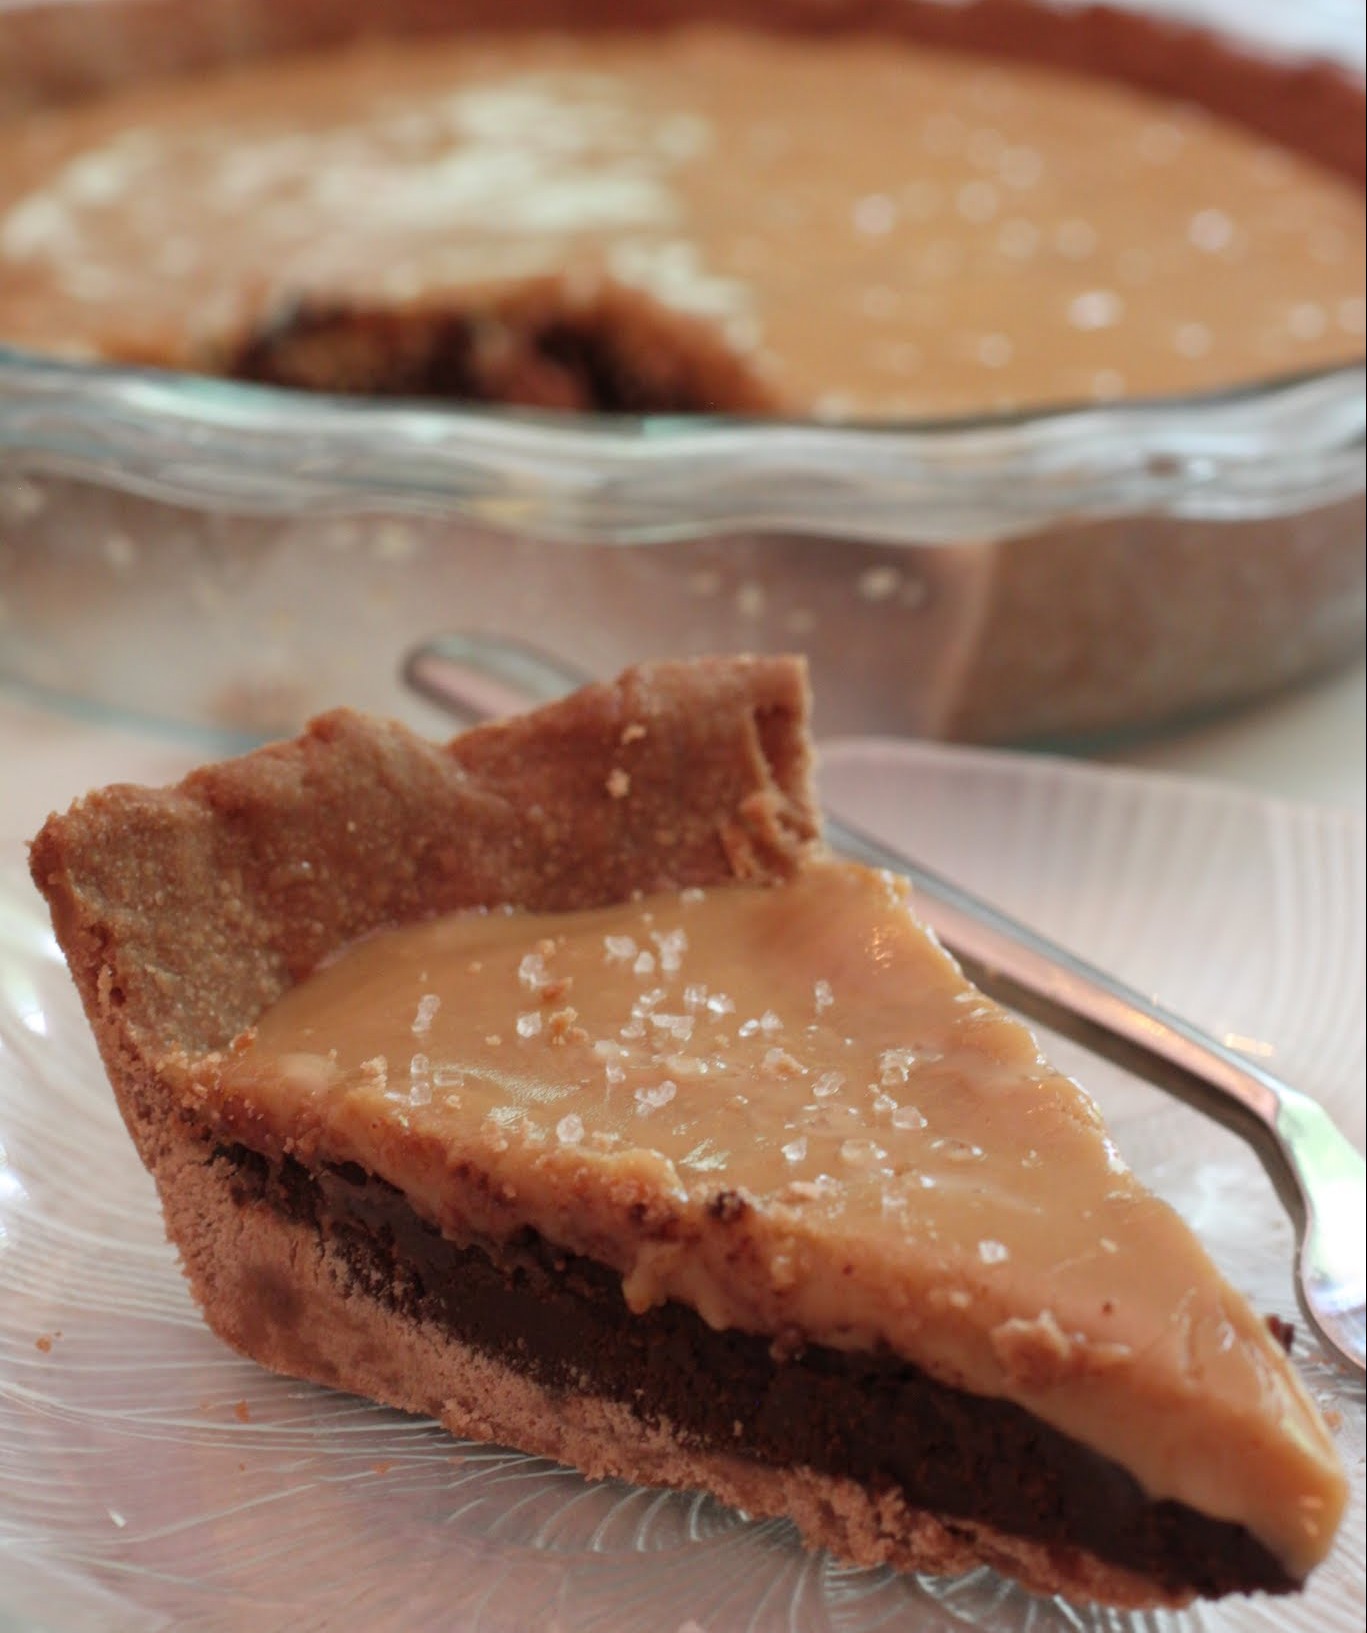
By the way, I know how to use my food processor now. But whatever. What makes this pie so amazing is peanut butter caramel. Salted peanut butter caramel. Yes, that exists. And it’s easy to make!
What was life like before people knew about salted caramel? Or sushi? Or cake pops that you put in the freezer and eat when they’re super cold?
I really, really have a thing for the freezer. Some people put baked goods into the freezer as a deterrent. Not me. I put baked goods in the freezer, wait a couple of hours, and then start gnawing away. Frozen cheesecake is the best. Frozen brownies are even fudgier than those at room temp. Now that it’s getting hot out, everything I bake (except cookies or giveaway treats) goes straight into the freezer. I strongly encourage you to give it a shot!

If you’ve decided that I’m crazy at this point, I’m okay with that. Liking things a certain way is my right, and if you care to judge, go right ahead. I won’t say anything to you if you’re wearing flats, though I might judge you privately. How do people wear flats? I would like to, in theory. They just make my calves look huge. And my legs look shorter. And maybe I just have a high arch, because heels are more comfy cozy.
If there’s one thing we can agree on, I hope, it’s that pie crust should be easy to make. The recipe below uses melted butter instead of cubed cold butter, which is more standard. This crust can be made in a bowl in less than five minutes, and if you aren’t into the chocolate flavor, just omit the cocoa. I hope this cures you of your pie crust fears forever. Amen.
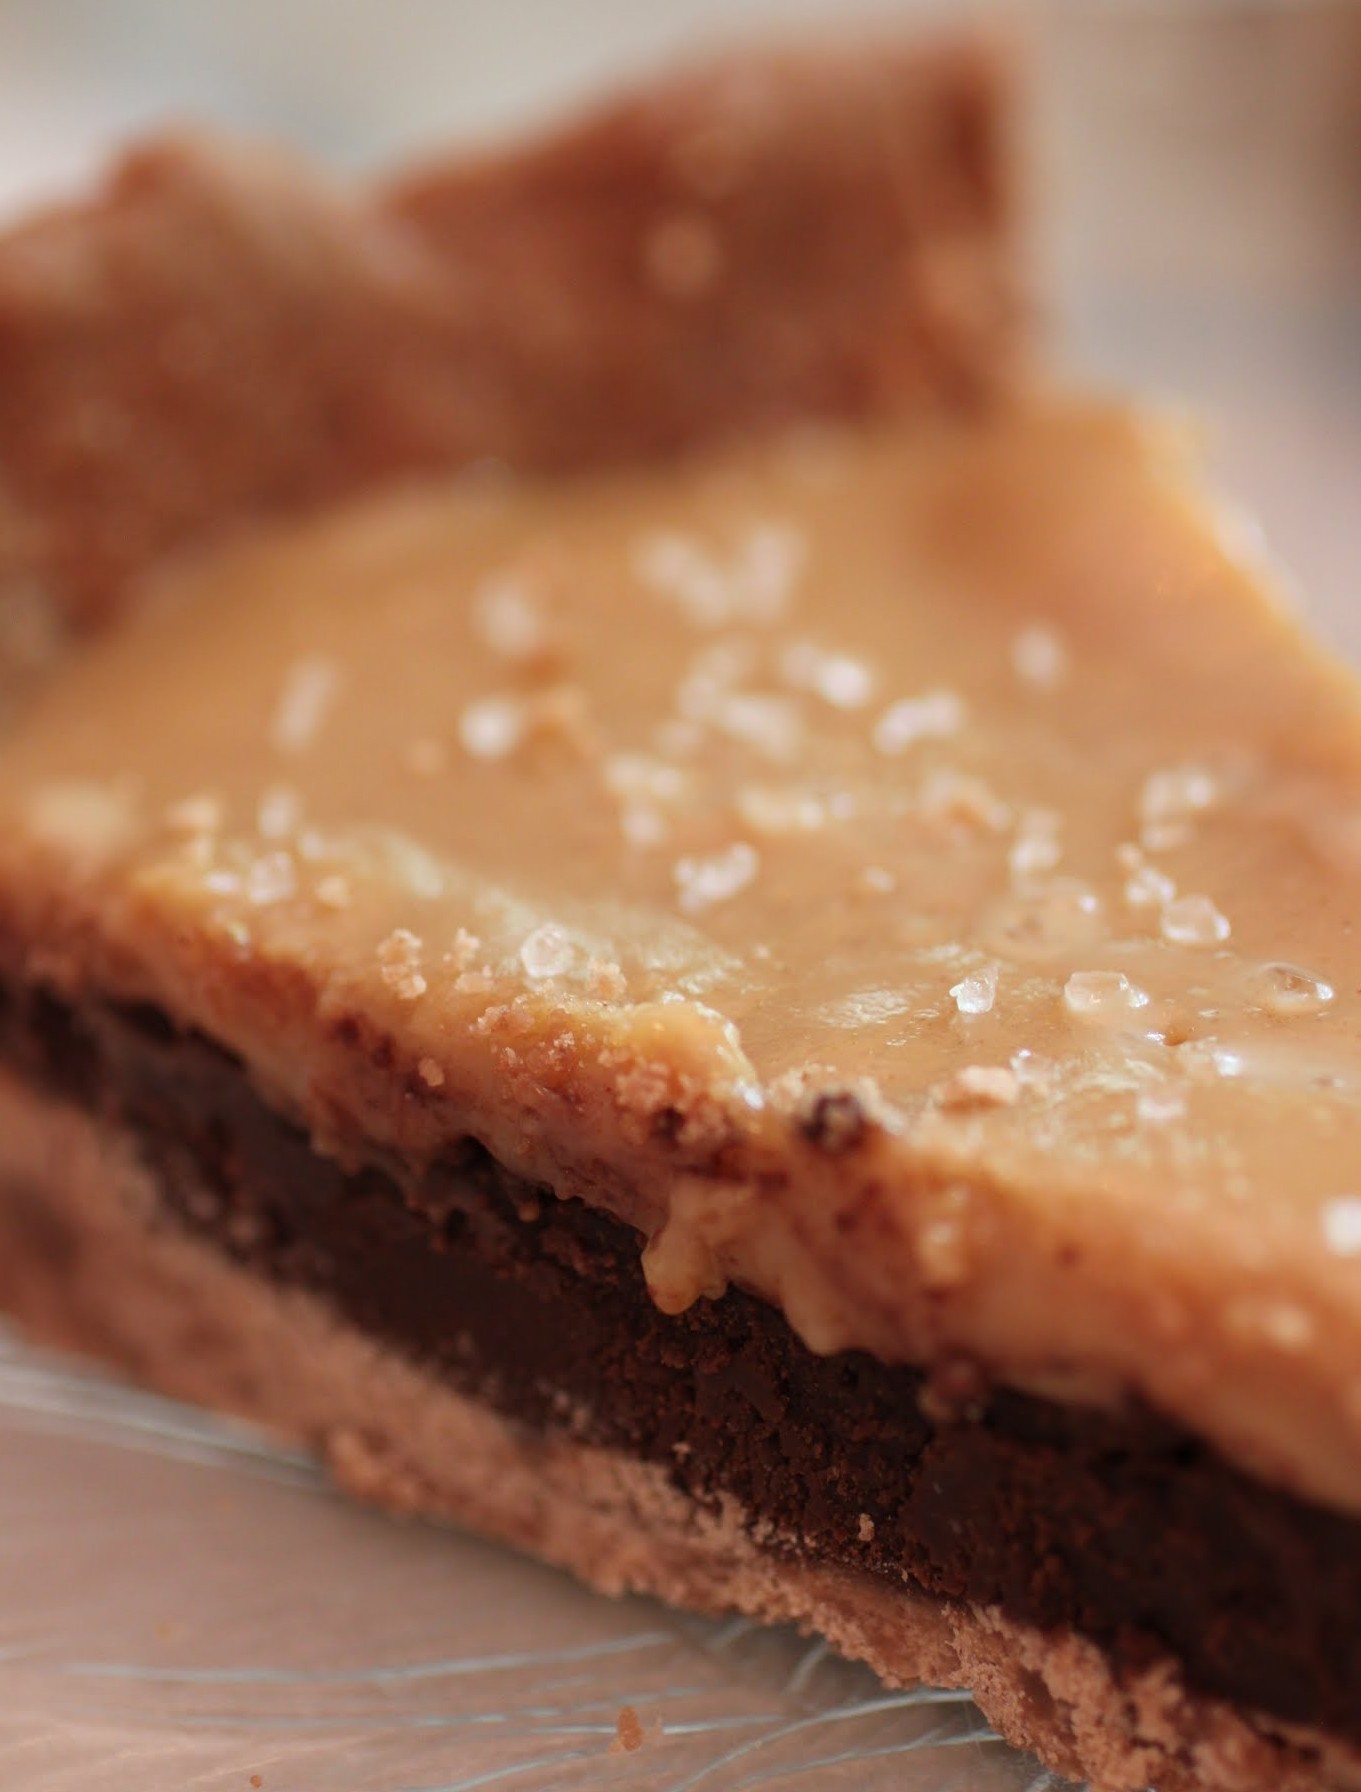
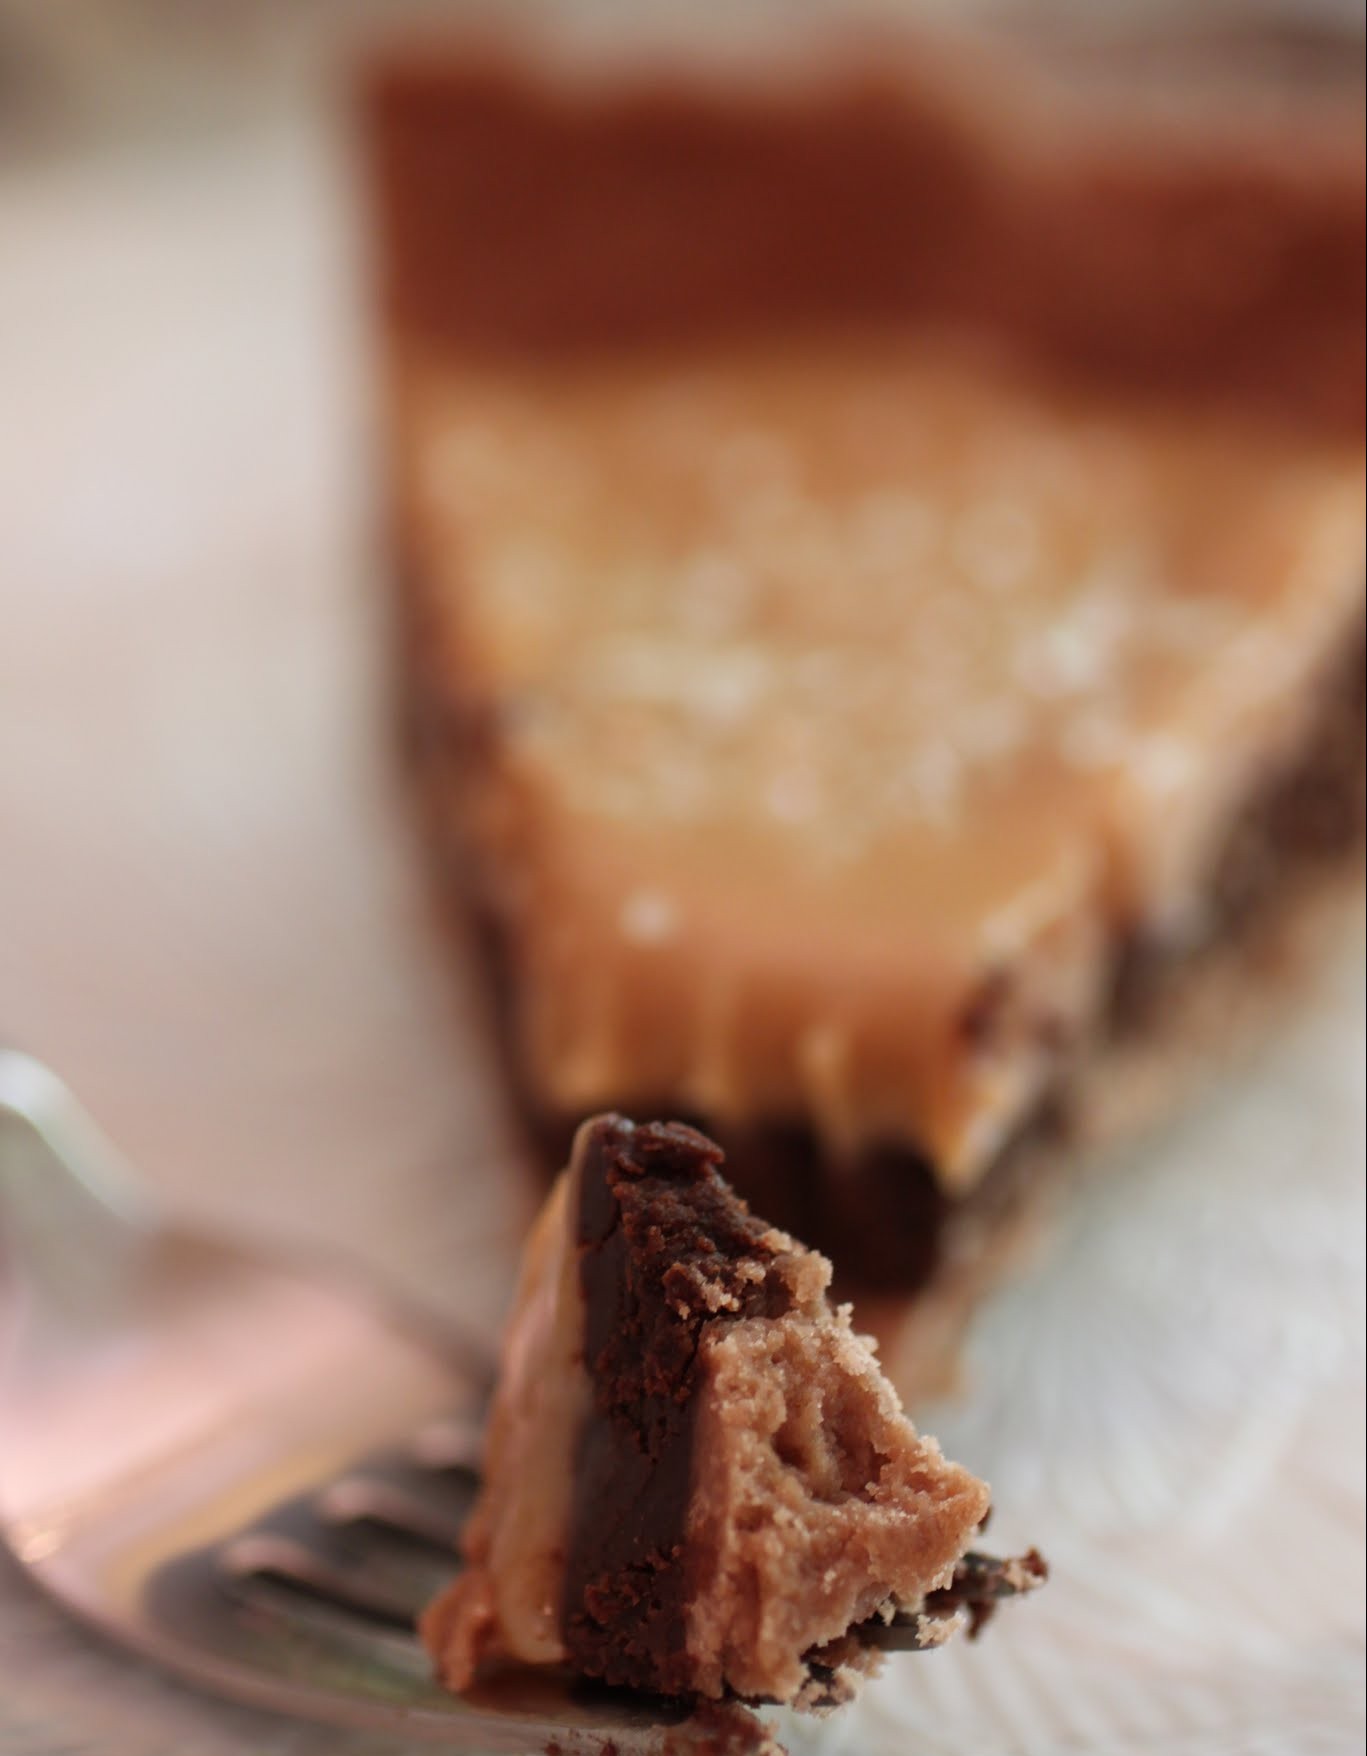
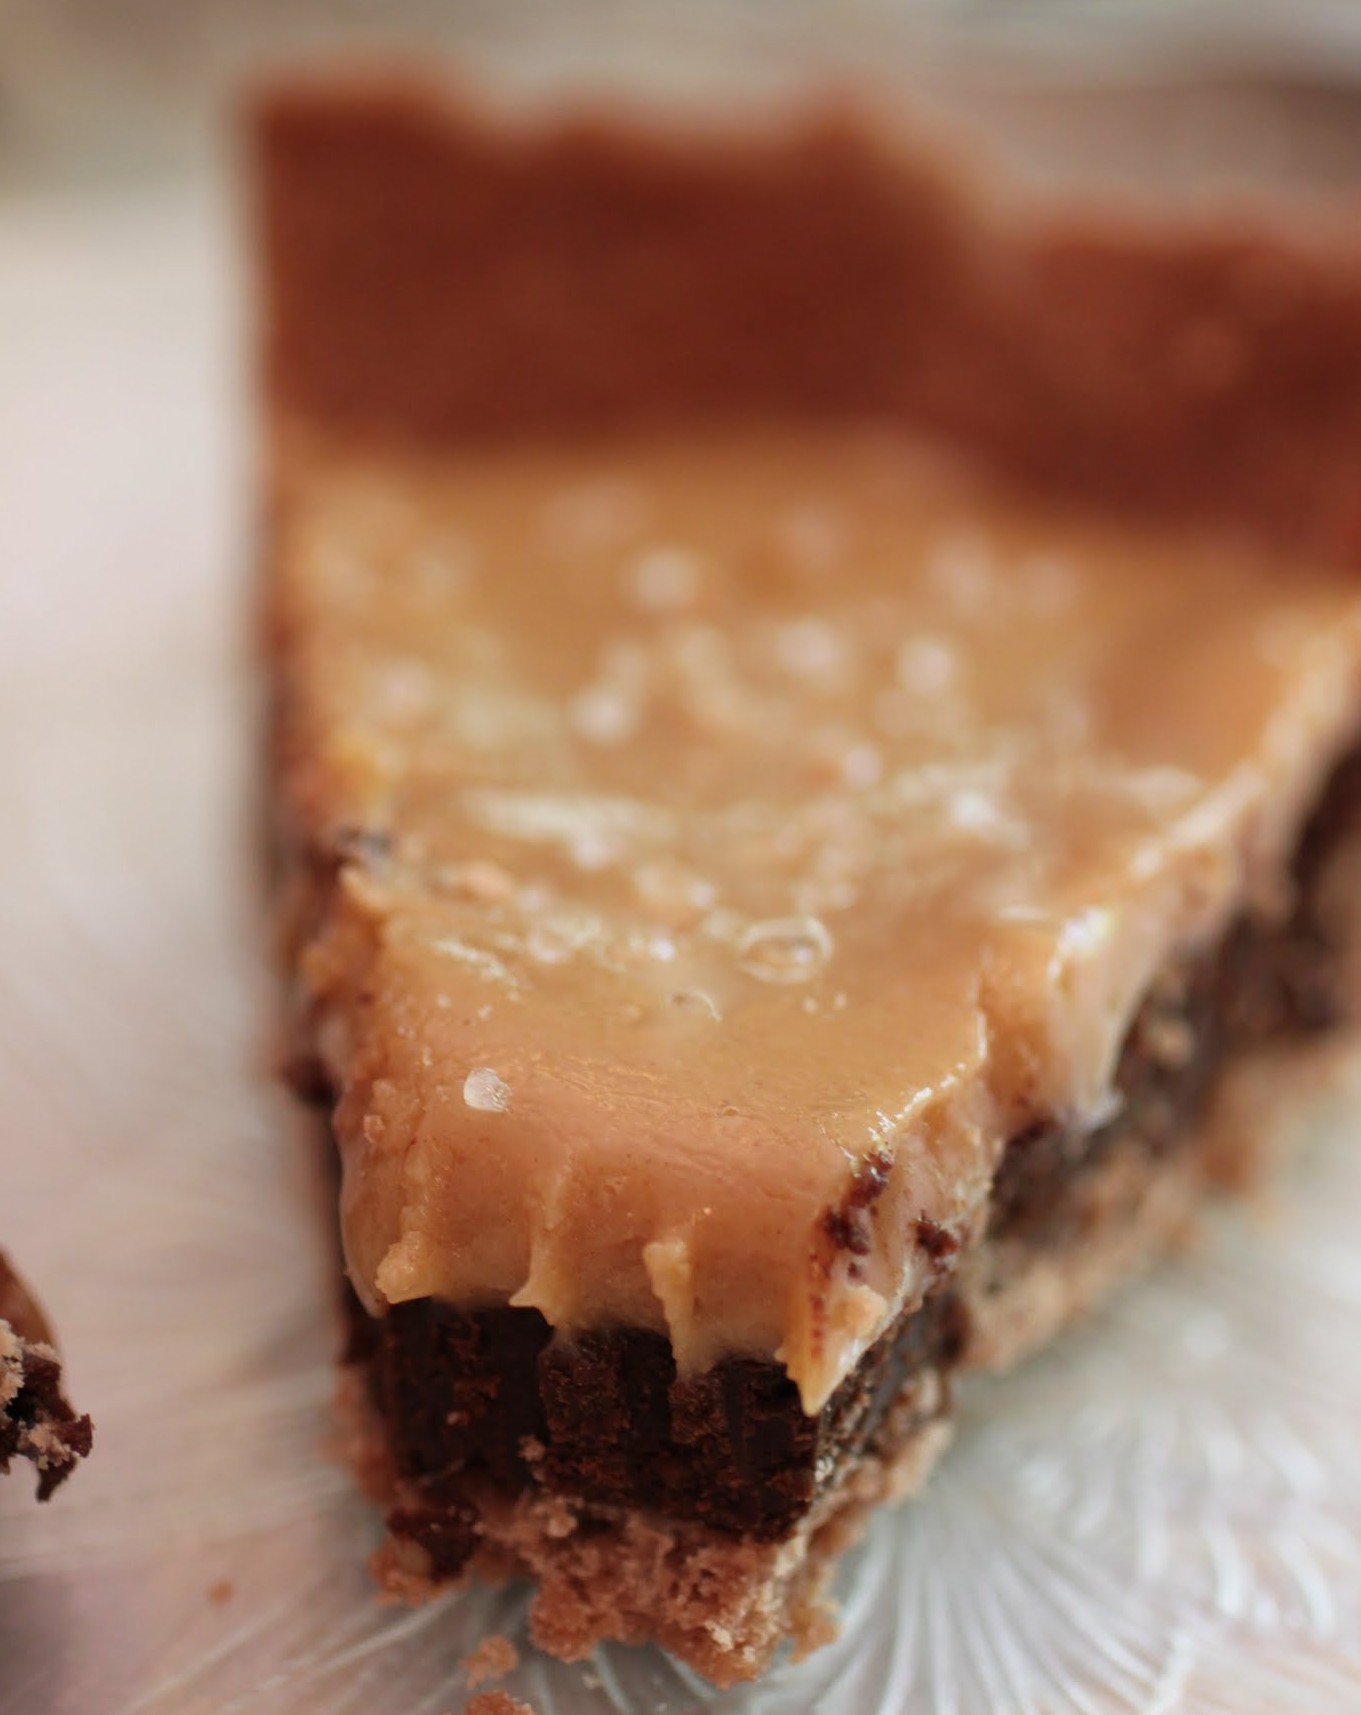
Now, I had to make this pie crust chocolate to accommodate the happiness that comes next. The first layer of filling is a very simple, thick ganache. It looks almost like a brownie, doesn’t it? But nope, it’s ganache, made purposely on the heavier side to give the pie more heft.
Layered on top is my favorite part: salted peanut butter caramel. This stuff is so simple to make that it’s almost not a recipe. Ready? You take one cup of peanut butter and melt it with a can of SCM (that’s sweetened condensed milk for you laypeople out there) until it’s smooth. Donesies! And then I sprinkle coarse sea salt on top.
All of this comes together, gets chilled in the fridge, and you’re done. And for all this effort (i.e., almost none at all), you get some seriously impressive pie. Might I say, brilliant pie. And if you want to eat it all right away, great. But if not, freeze it! I’m telling you, people. Wave of the future!
Ingredients
Instructions
- Preheat the oven to 350. Coat a 10-inch pie pan with cooking spray. Set aside.
- In a medium bowl, combine the melted butter with the sugar, salt and vanilla until blended. Stir in the cocoa. Add the flour gradually and mix until a dough forms. If the dough is too soft, let it sit for a few minutes.
- Press the dough into the prepared pie pan, working it evenly along the bottom and up the sides. Bake for 15-20 minutes until firm and slightly puffy.
- While the dough is baking, make the ganache. In a microwave-safe bowl, melt the chocolate chips and heavy cream for one minute and 30 seconds. Stir until smooth.
- Pour the ganache into the baked pie shell, spreading it out evenly. Place in the refrigerator to set.
- While the ganache is setting, make the peanut butter caramel. In a medium saucepan over low heat, melt the peanut butter with the sweetened condensed milk until smooth and well blended.
- Pour the peanut butter caramel over the ganache and chill the entire pie until firm.
- Right before serving, sprinkle coarse sea salt over the top. Cut into wedges and serve!
]]>
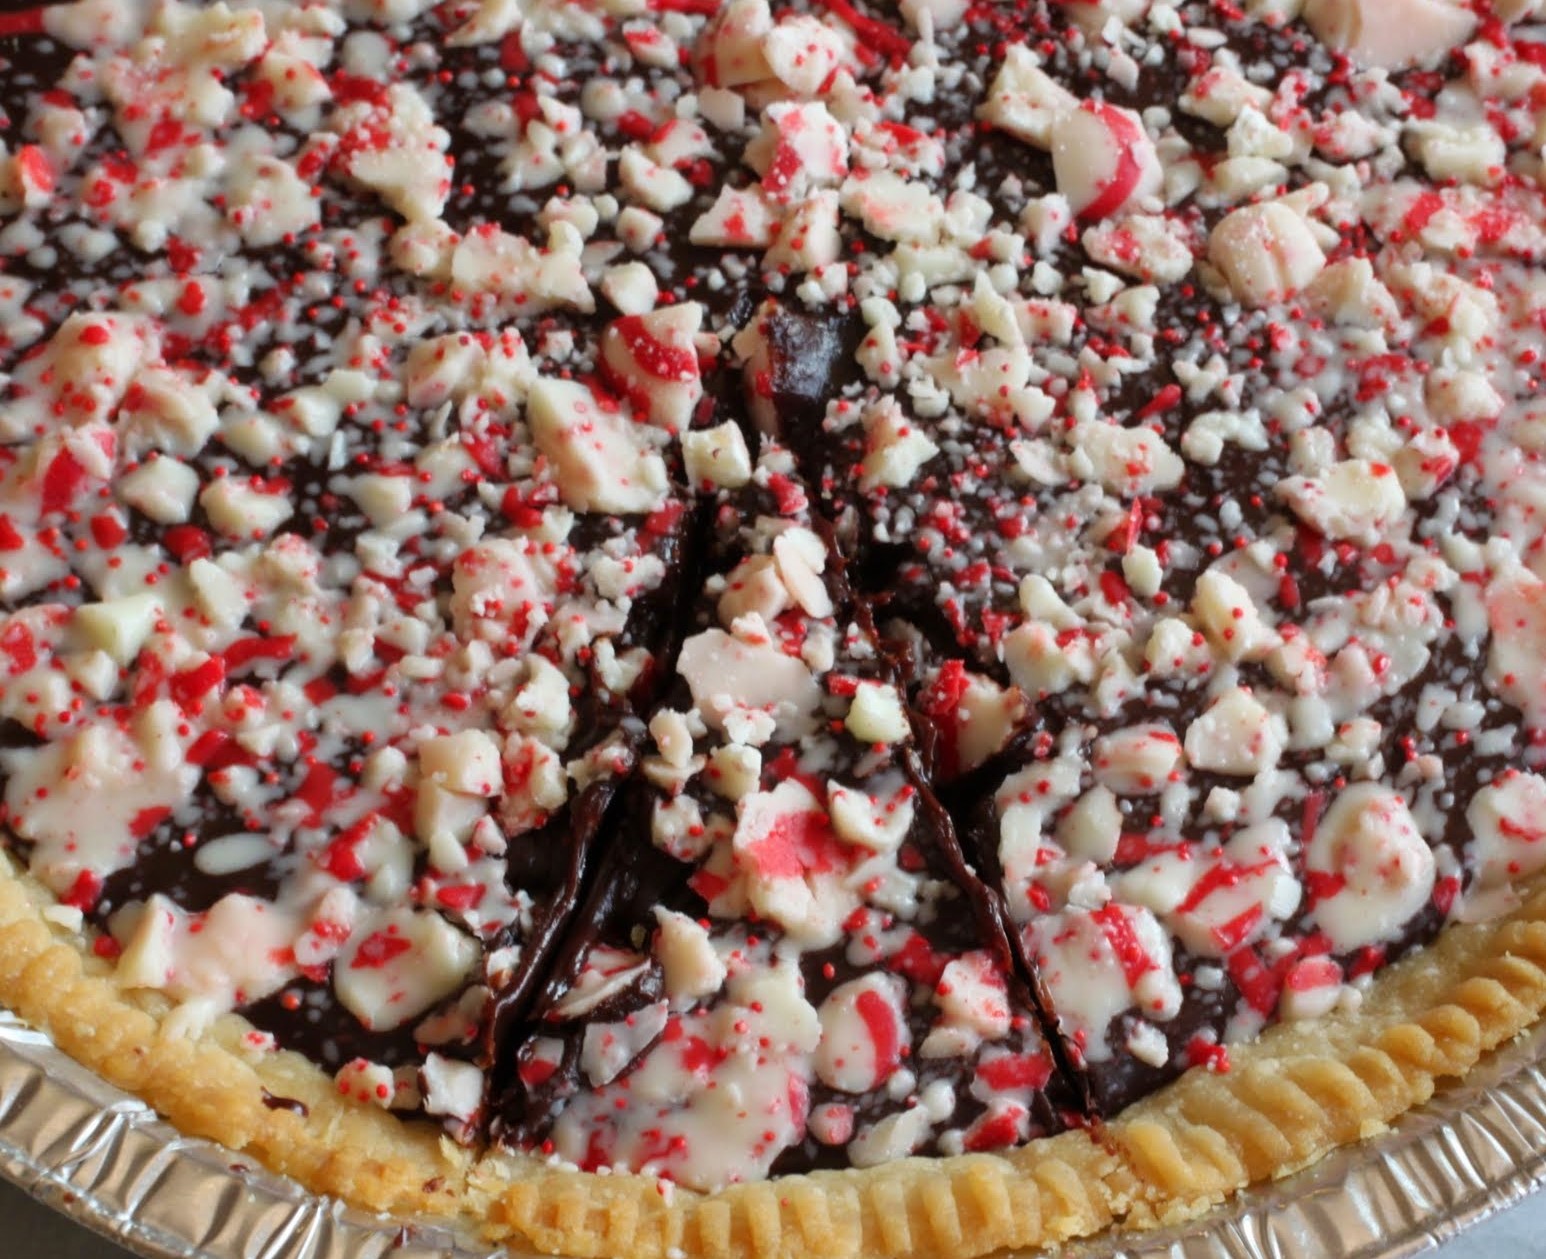
Sorry, but it’s still officially Pie Week here on Just About Baked. I see no reason to stop making pies. Why should I? As long as I’ve got breath in me, I will bake pies!
Don’t worry, this one is easy. And delicious. And holiday-esque. And gluten-free. And mint, which is highly rare on this blog. In case you missed it earlier, I’m not so fond of mint.

But heck, the things I do for my readers. You all seem to like mint, so with a shake of my head, I present you with this lovely ganache pie, rich and chocolatey and garnished with lots of crushed candy cane Hershey kisses. You are very welcome!
You see, since having kids, I’ve learned to put other people before me in every area, even dessert. My kids don’t always love the desserts I make, so I will compromise my better instincts and give them the packaged crap they prefer to homemade cookies. Why not?
It’s with that spirit that I give you this pie. Honestly, I had a few bites to test it, and considering that it’s mint, I was happy with it. That means I didn’t want to stop eating it. So for you people who really like mint, I can only imagine what this will do to you.
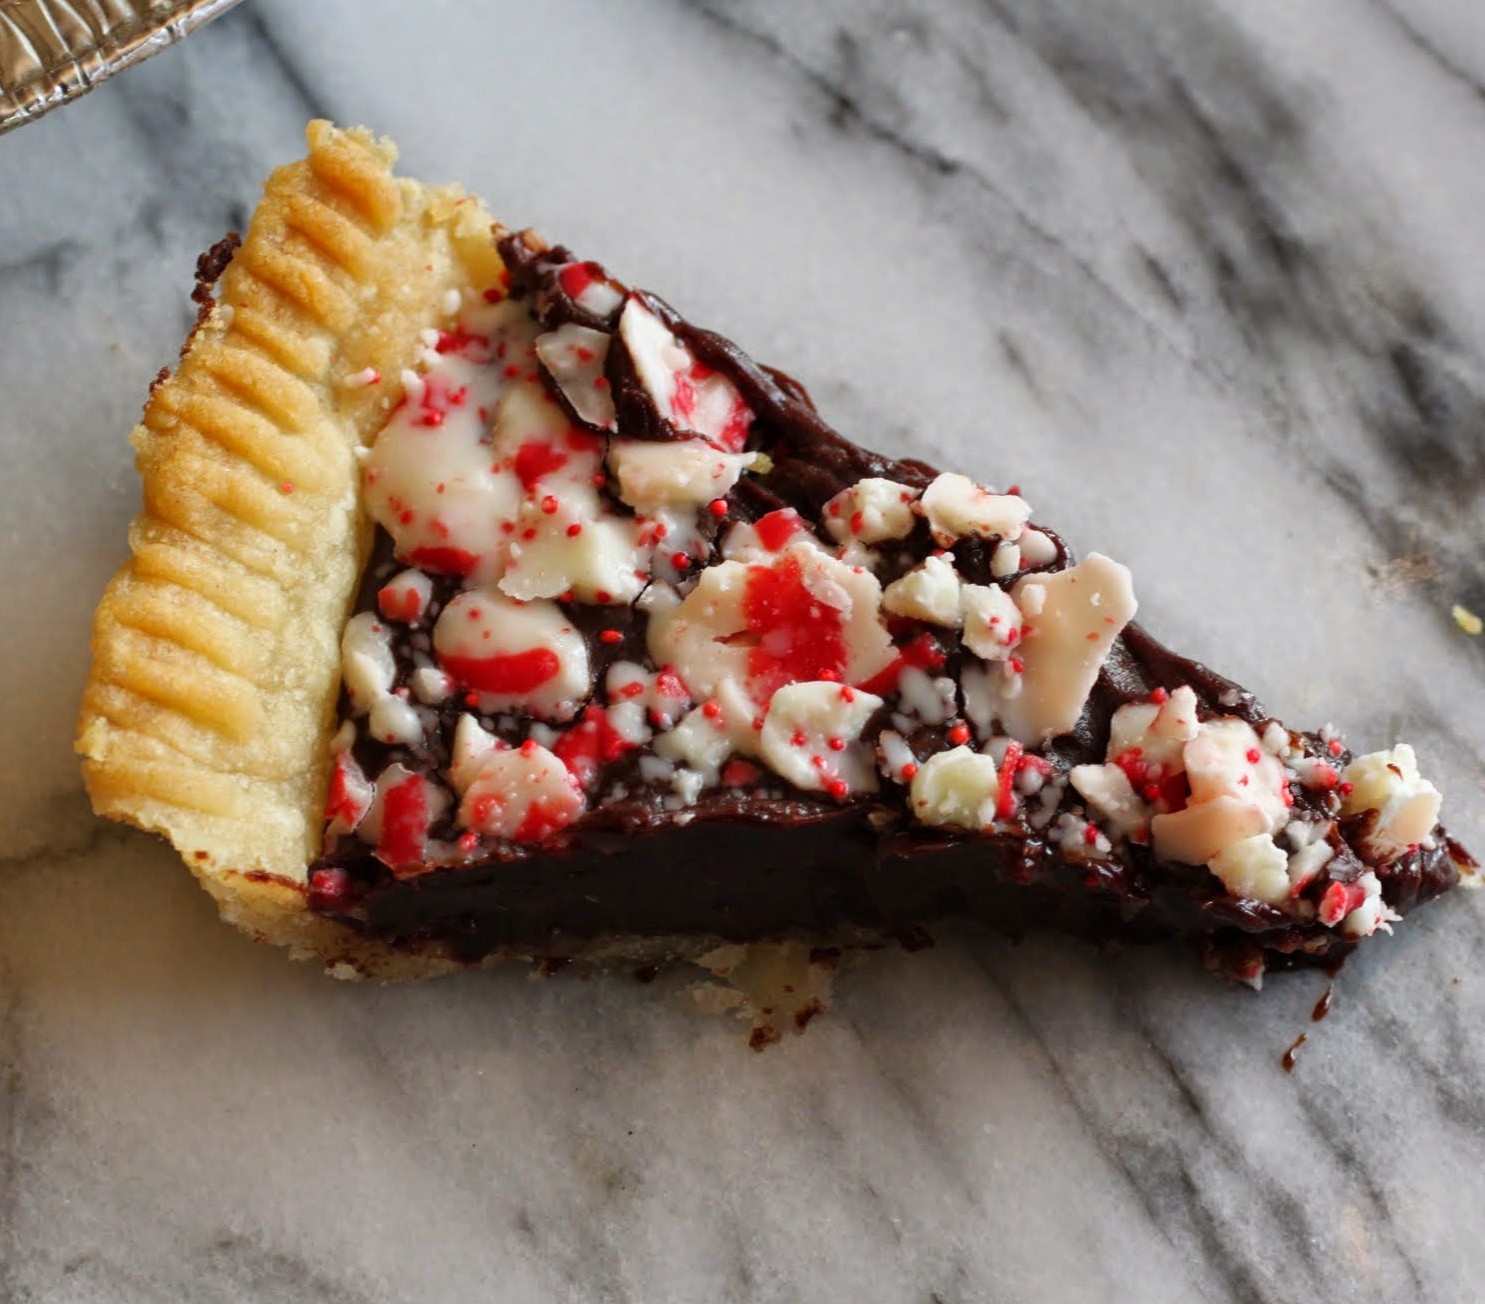
I used the gluten-free Pillsbury pie crust, which rolls out just as nicely as any pie crust I’ve ever used. It also tastes wonderfully flaky. The ganache balances it out perfectly, and the mint adds that welcome cool blast.
Speaking of, this pie needs to stay refrigerated, so just be aware. And also be aware that I will probably not make anything mint again until Girl Scout cookie season. This is my gift to you. Happy Holidays!
Ingredients
Instructions
- Preheat the oven to 350. Coat a 9-inch pie pan with cooking spray.
- Roll the pastry dough into a large circle after kneading according to package directions. Press the dough into the pie pan and use the tines of a fork to make a pattern along the edge.
- Prick the bottom of the crust with the fork. Bake the crust for about 20 minutes until golden.
- Make the ganache. In a microwave-safe bowl, heat the chocolate chips and heavy cream for 1 minute. Stir until smooth.
- Pour the ganache into the cooked pie crust. Sprinkle the chopped candy cane kisses on top.
- Chill for 3 hours to overnight. Slice into wedges and serve.
1) The Indianapolis Colts will rise again.
2) Taking time for yourself is not an act of selfishness, but of necessity.
3) Cakey brownies are a crime against humanity.
4) A lot of brides need to stop wearing strapless gowns. Other silhouettes rock!
5) Trying to sleep in my class is an act of disrespect.
6) Hope springs eternal as long as you’re getting enough sleep.
Oh, and here’s another for you: graham cracker crust needs to be tricked out!
What do I mean by that? I’m so glad you asked!
I used to be one of those poor souls who bought ready-made graham cracker crusts at the grocery store. I was laboring under a terrible misconception that pie crust in general can be tricky, and so therefore graham cracker crust must be the same. Um, wrong!
It’s so easy to make graham cracker crust. It takes a couple of minutes to assemble and a few minutes more to bake. And if you make my tricked-out version, which includes white chocolate and brown sugar, you’ll never think about graham cracker crust the same way again. Here’s how!
The process begins with your favorite microwave-safe bowl. In the bowl, you place 1/3 cup unsalted butter (or margarine if you’re aiming for a non-dairy crust) and 1/2 cup white chocolate chips.
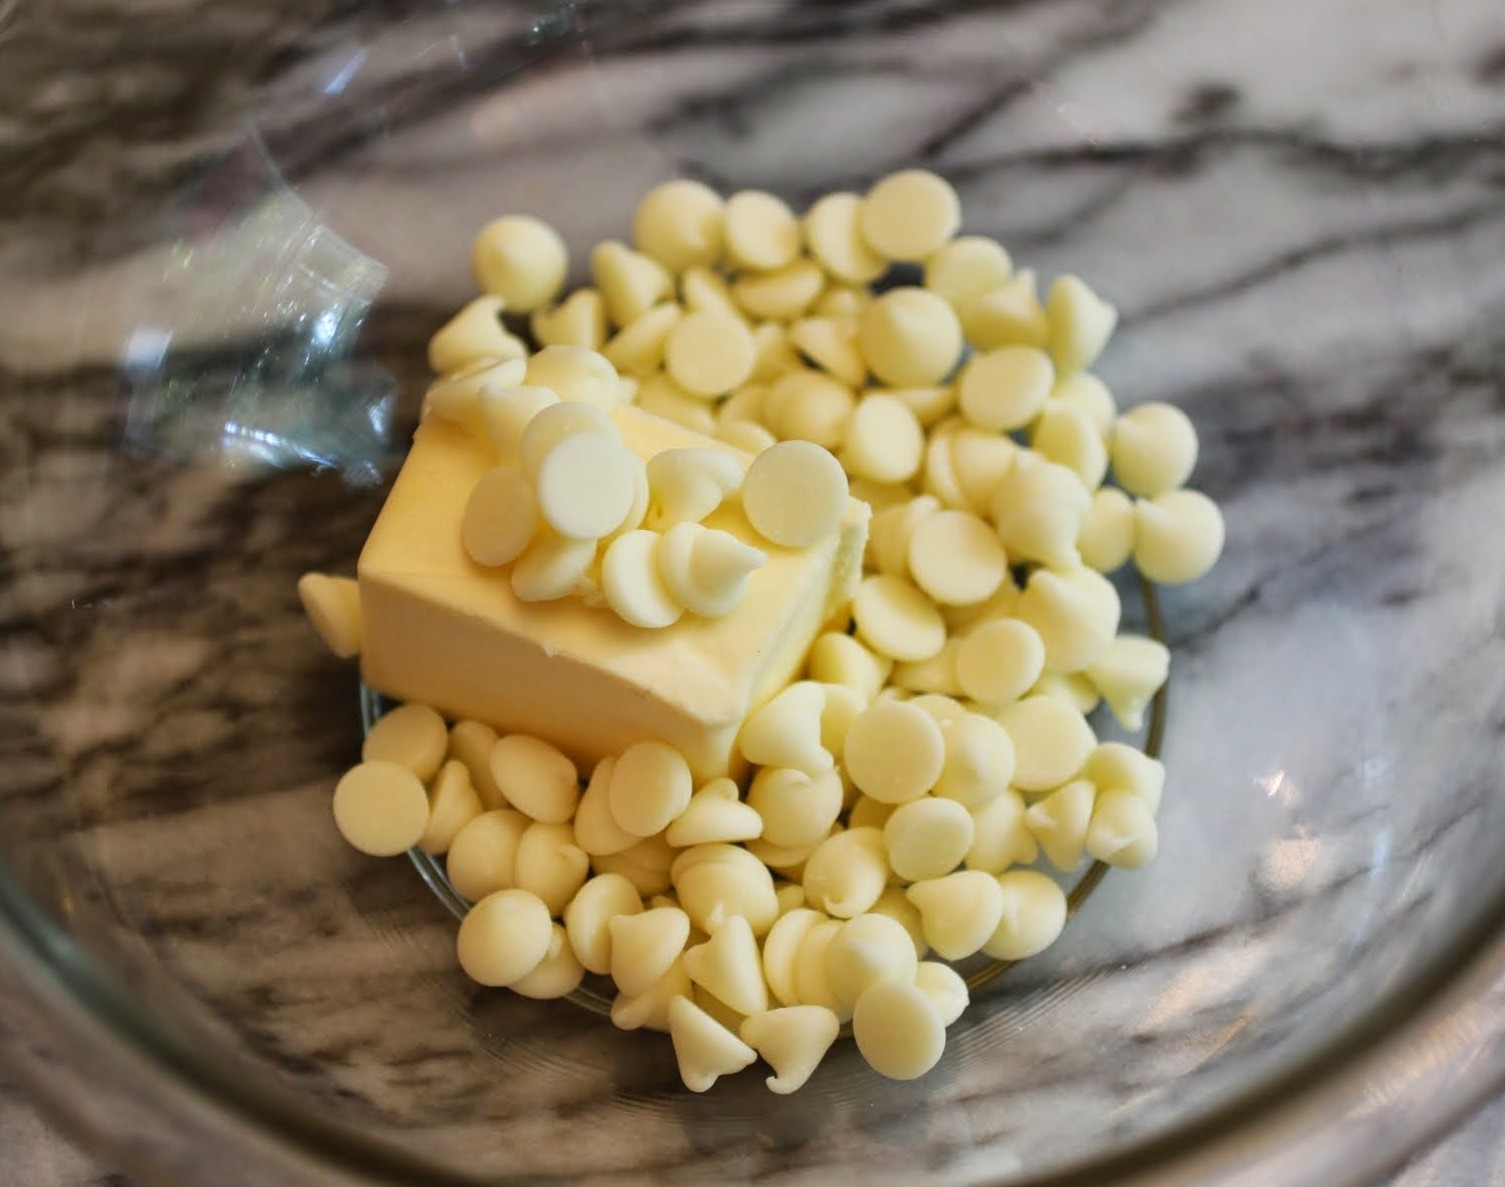
Here’s the vital part: do not overheat the white chocolate. If you do, it will seize up and become impossible to work with. So microwave in 30-second intervals, stirring after each interval until the mixture is smooth. I typically do that twice, so one minute total.
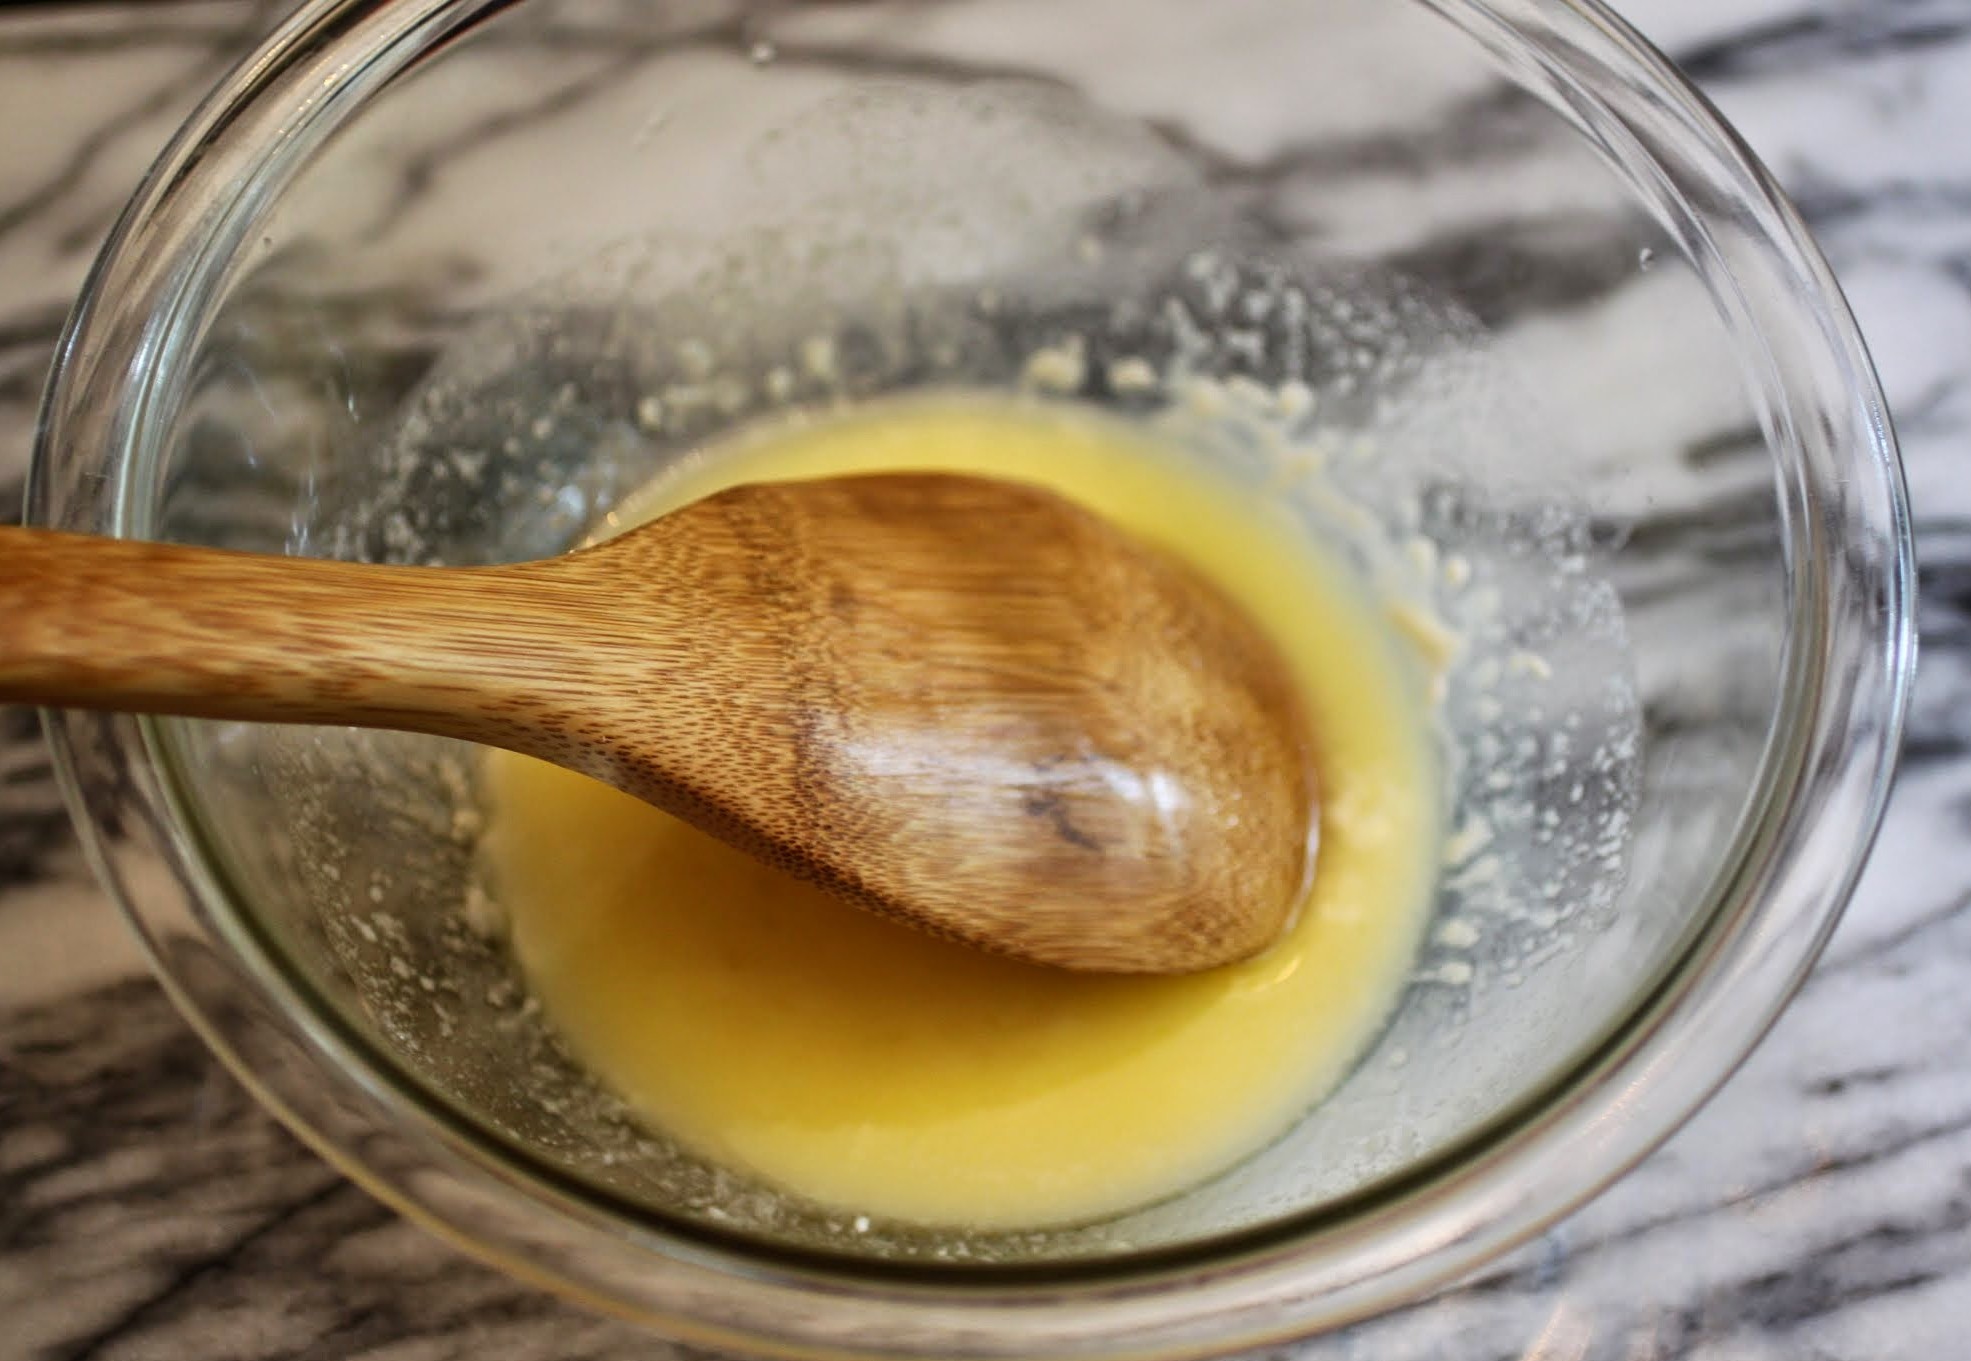
Once the butter and chocolate are mixed, you add 1/3 cup firmly packed light brown sugar and 1 cup graham cracker crumbs. The brown sugar gives your crust a moister base, and when it bakes up the crust will taste caramelized, kind of like the best graham cracker in the history of the world.
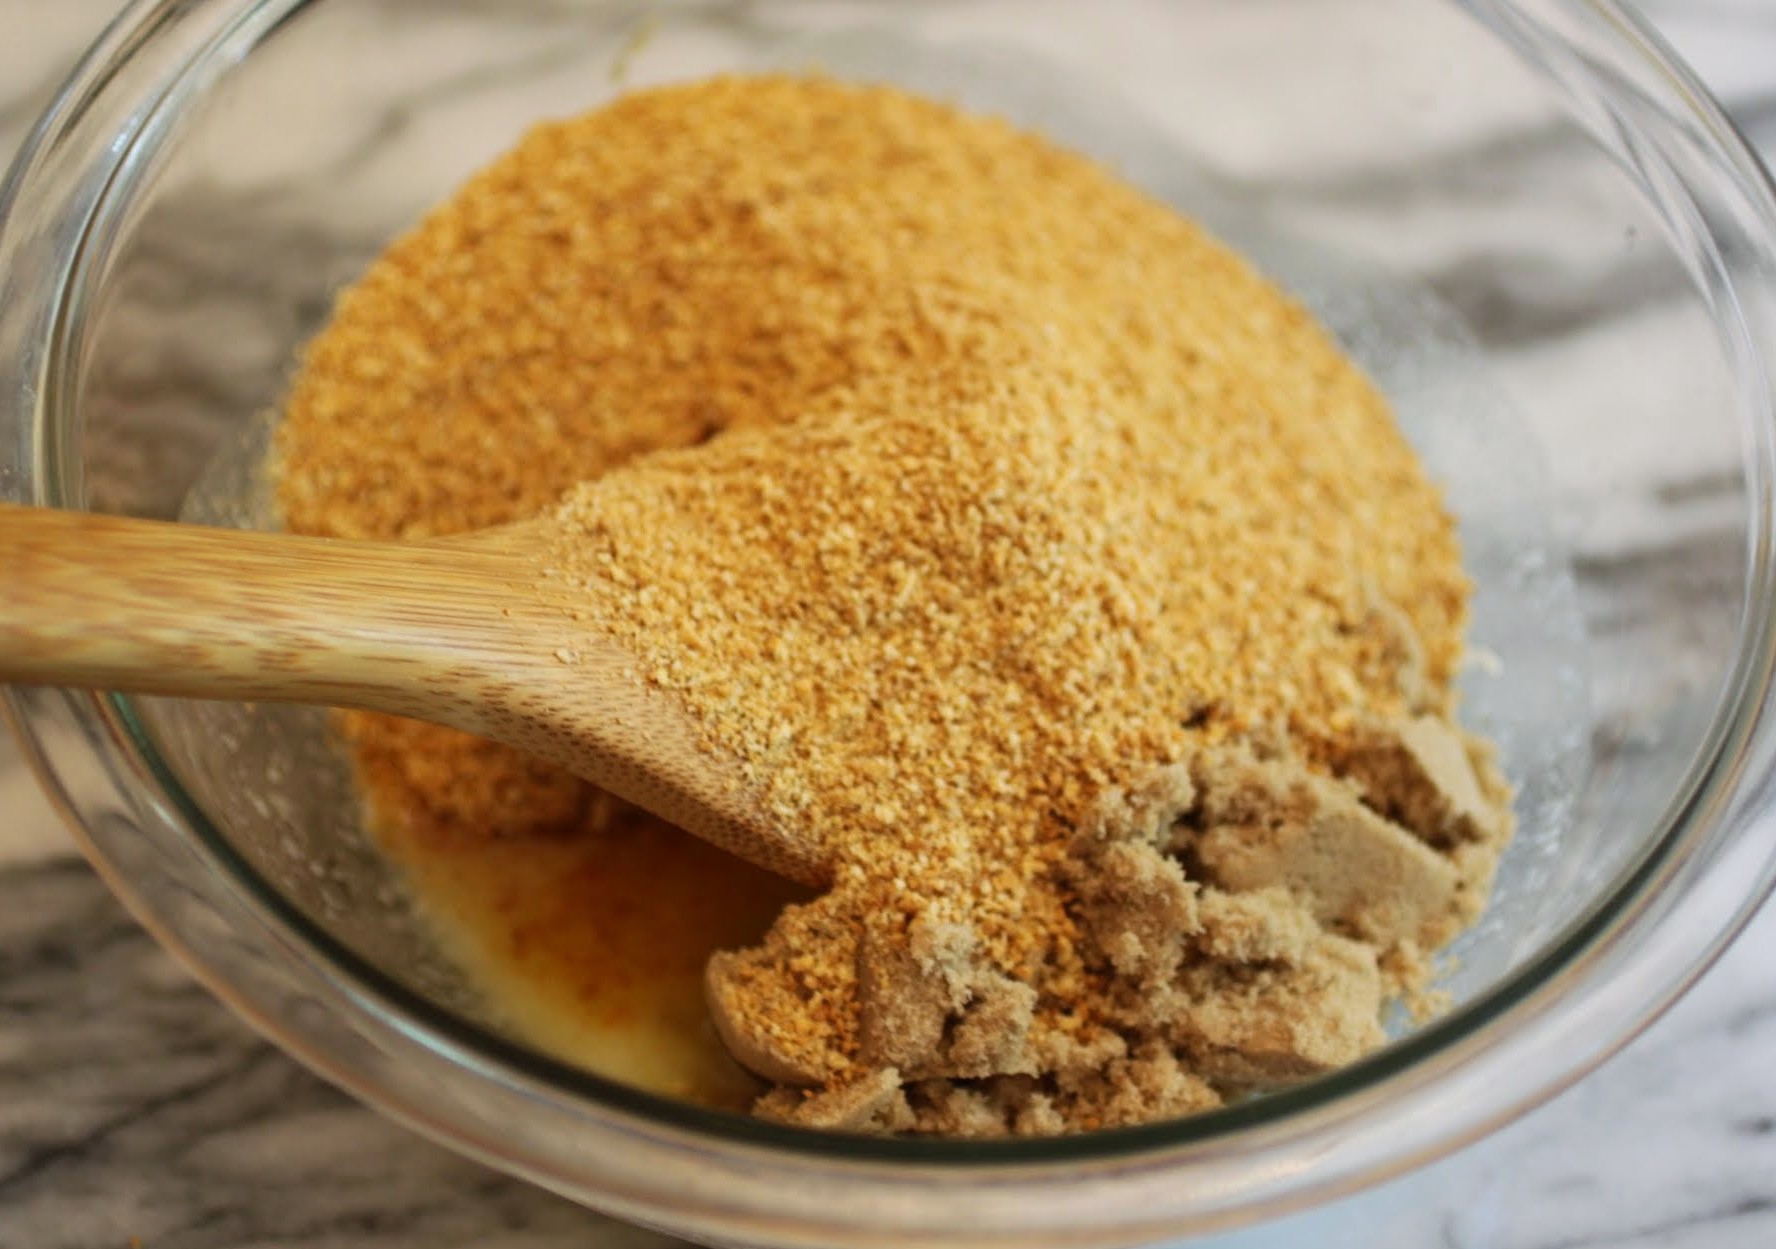
You mix the brown sugar and crumbs in until all the crumbs are moist. That’s essential, because if any crumbs are dry, the crust will crumble like mad. You want it to stand firm!
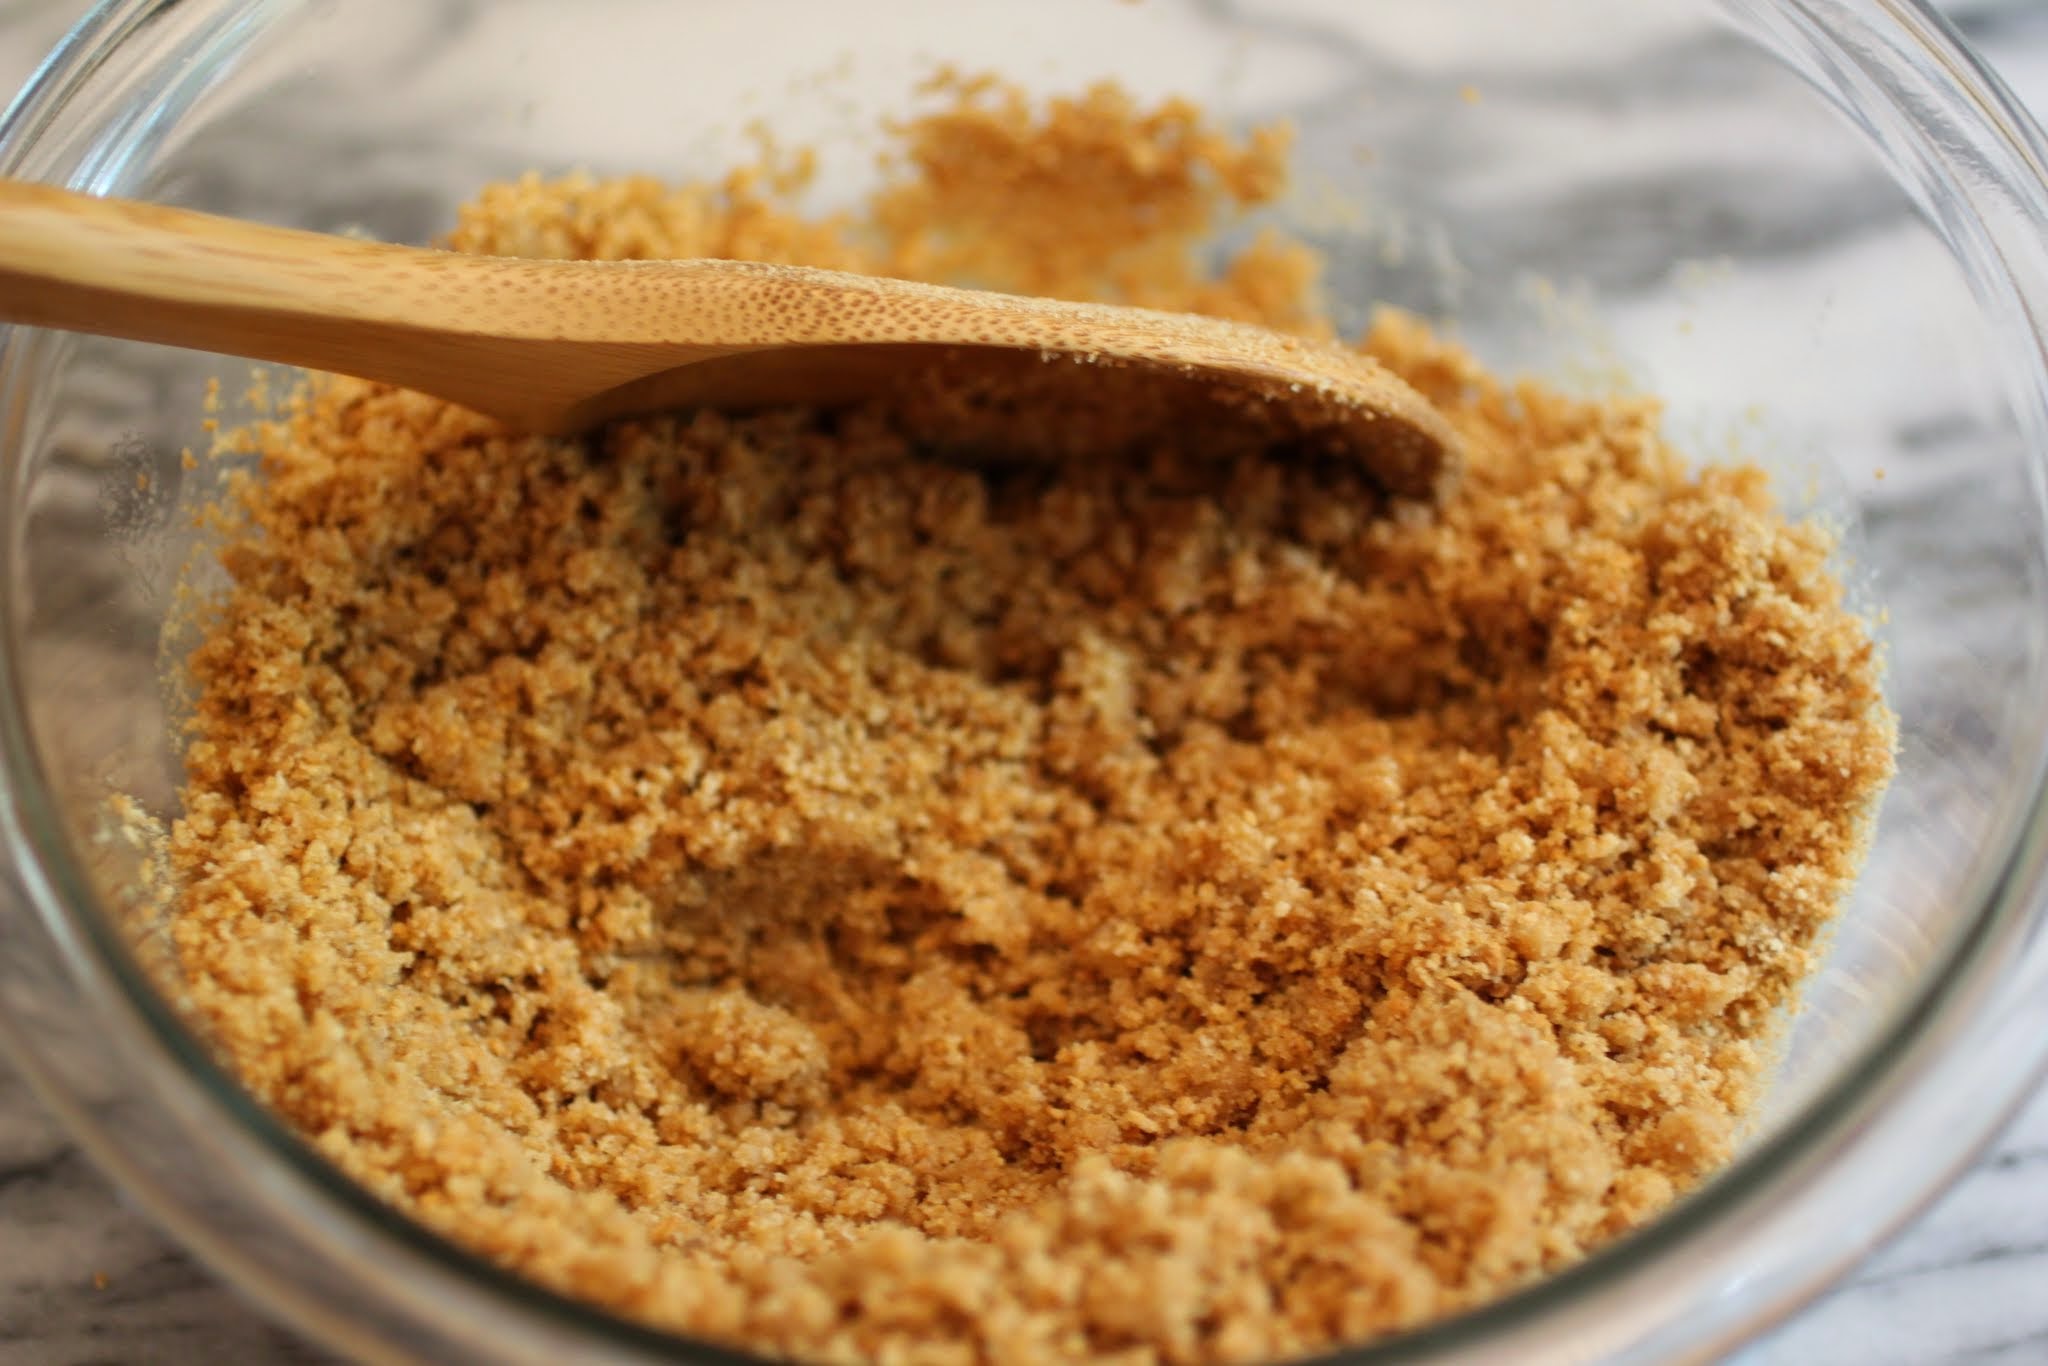
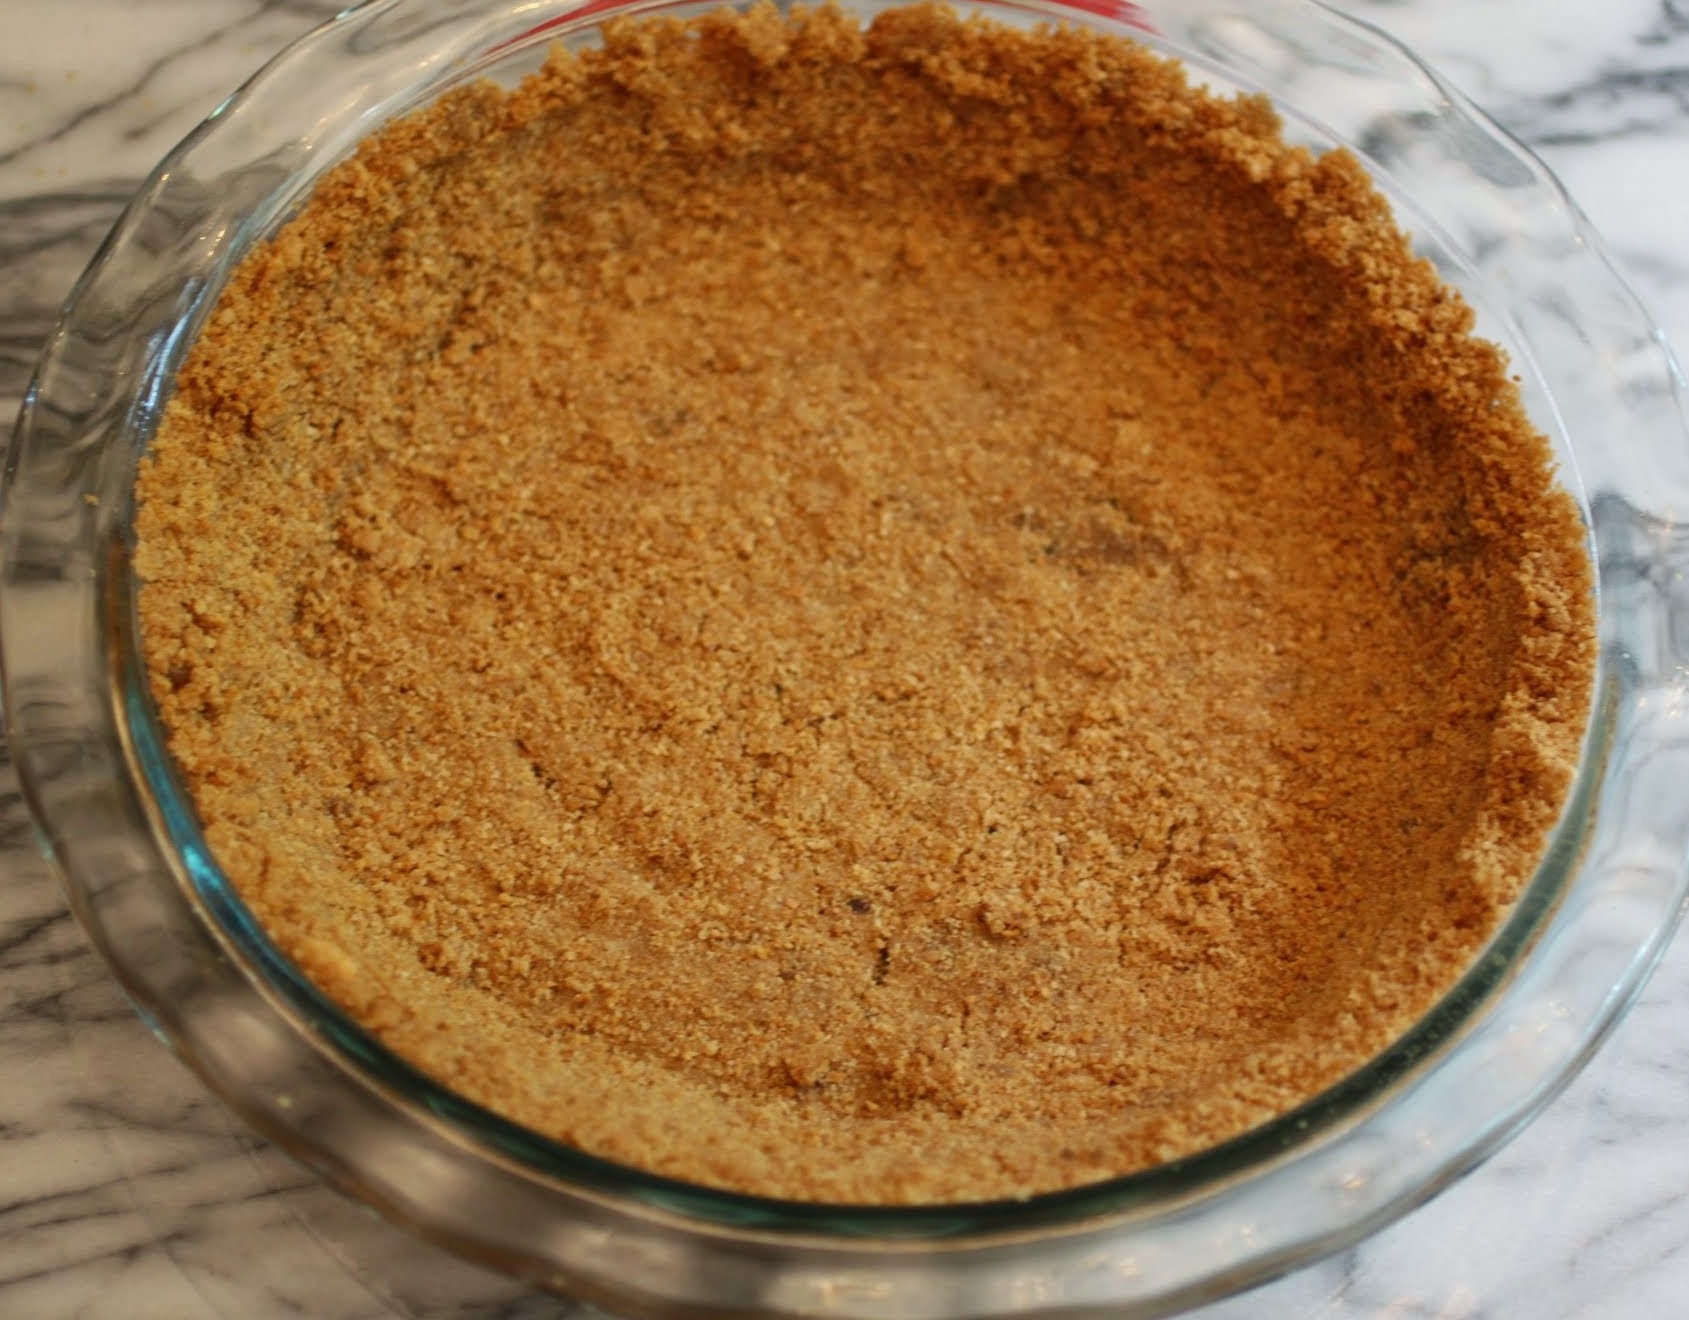
Press the mixture into a pie plate. I like to use a really big 10-inch monster, but not everyone likes that. Your goal is to press the crumbs evenly along the bottom and up the sides. Once that’s finished, you can bake it. Alternatively, this crust could form the base of a cheesecake in a springform pan.
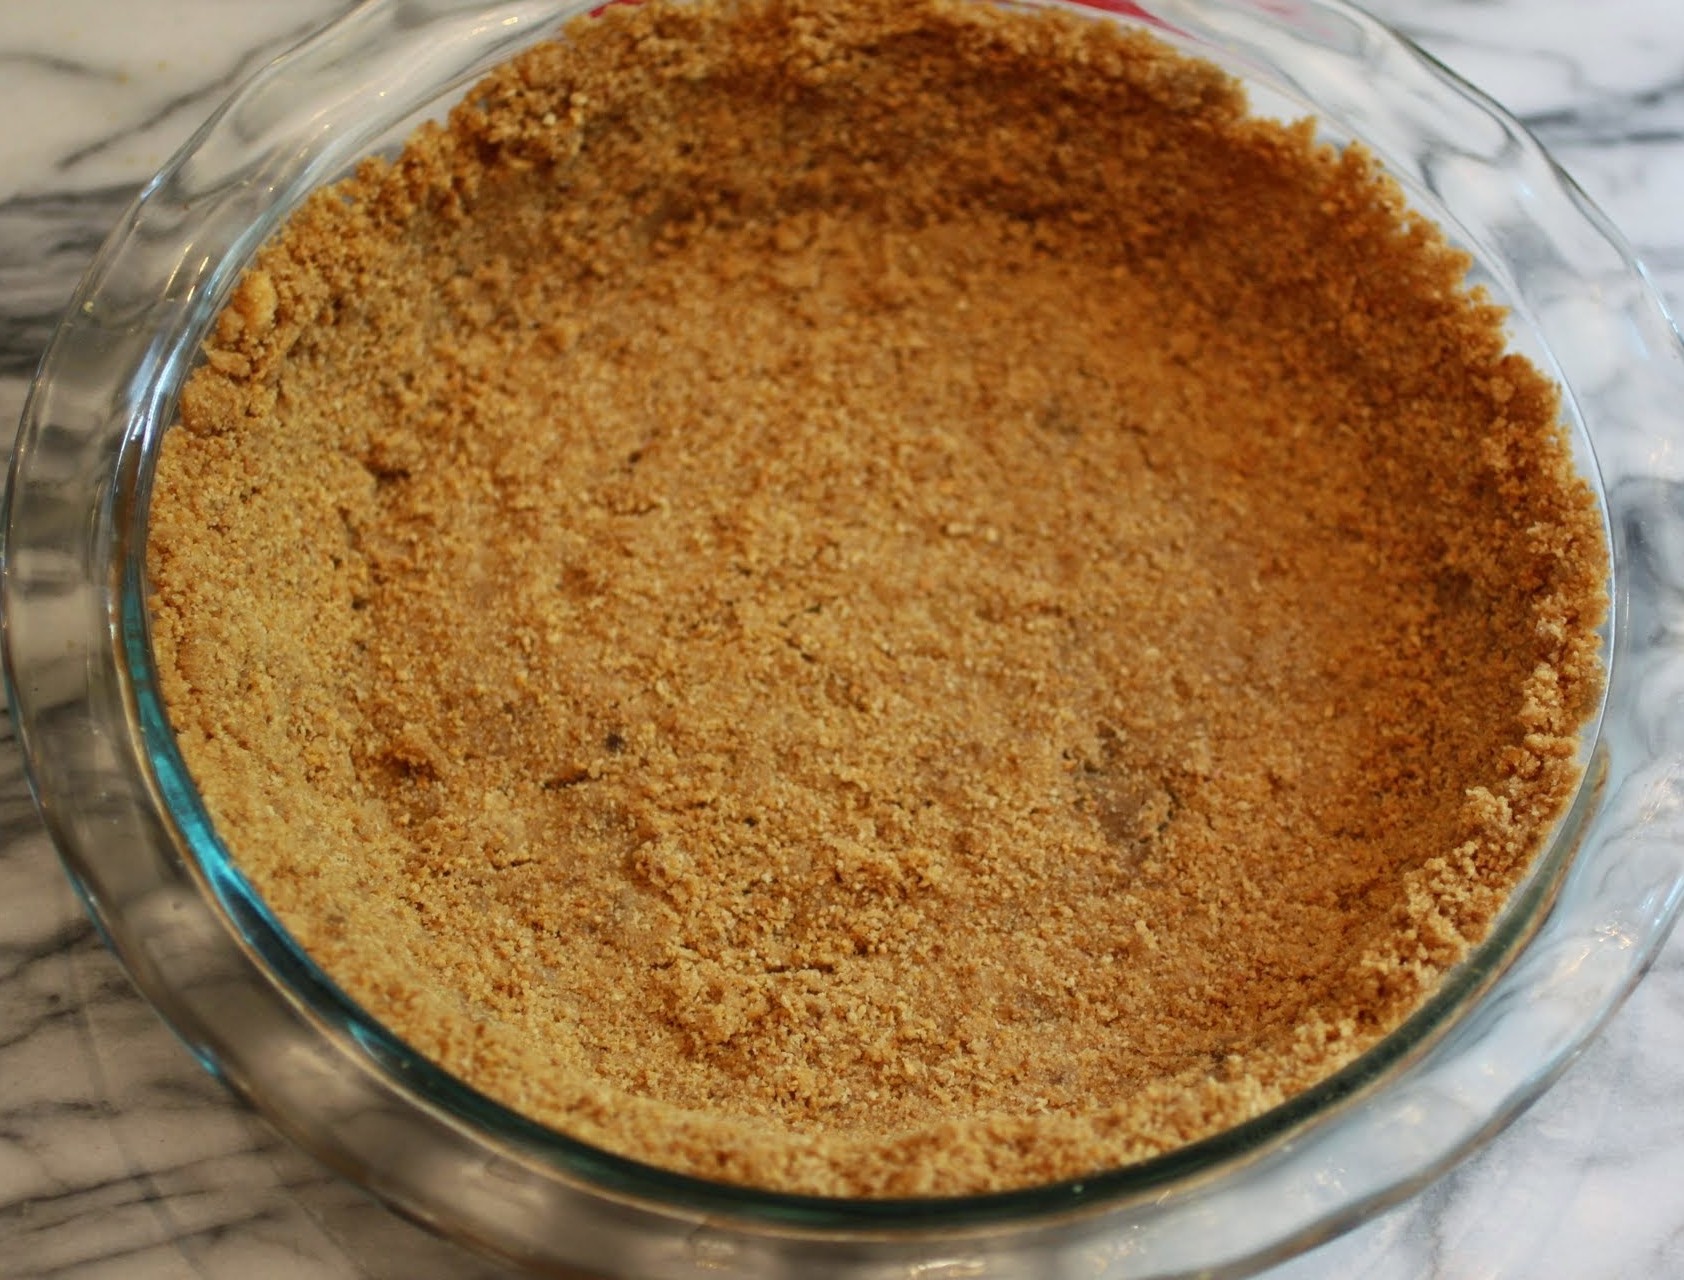
Preheat the oven to 350 and then bake the crust for 10 minutes. You want it to set without going too far unless you’re using a no-bake recipe, since the crust will get a second oven treatment as soon as you add whatever filling you’re using. If you’re not baking it again, let it sit in the oven for another 5-10 minutes. When you remove the crust from the oven, you should test it lightly to make sure that crumbs are not coming off.
And then you’re ready to fill the crust! I’ll share my filling with you in my next post, but some of the more popular choices are citrus-based pie fillings, like key lime or lemon (click on the links to see my recipes!), or even a cheesecake filling works great, like in this cheesepake (no, not a typo) I made.
Don’t fear making homemade crust any more. It’s so much better than the store kind, and your taste buds will thank you!
]]>