My son doesn’t like chocolate. Or so he claims. At first, I was grief-stricken when I heard this news. Was he mine?!
Then I realized that he does like chocolate but he doesn’t want to admit to it, for some weird little kid reason. For example, he loves Reese’s peanut butter cups. I can’t bring the telltale orange and yellow packaging anywhere near the house without him begging to have some, puppy eyes and all. But if the chocolate gets too rich, suddenly it’s not his thing anymore.
Which is all totally fine, except that the boy asked for a peanut butter cup cake for his birthday this year. And he wanted it done with yellow cake, not chocolate. As much as my instincts tore me away from this challenge kicking and screaming, I had to obey. I mean, he’s my kid and it’s his birthday. What am I supposed to do?
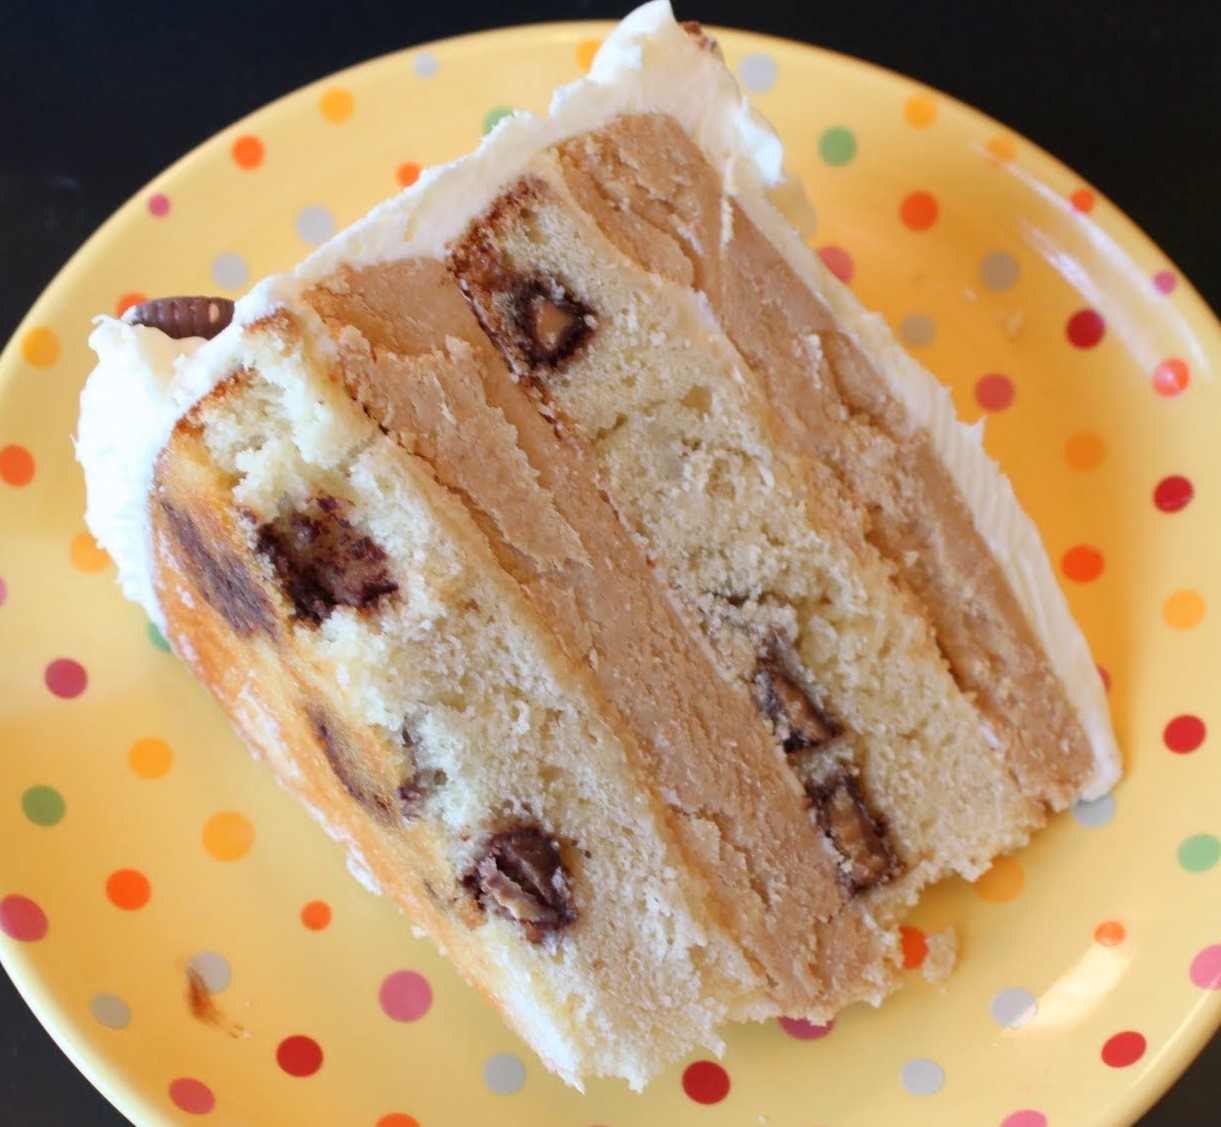
The cake is made up of two separate elements. One is the peanut butter layer that I got from Sprinkle Bakes in this amazing recipe. One of my students made me this cake once, and it was so decadent and unbelievable that I never forgot its amazingness.
For the other layer, I used a yellow cake base and filled it with tiny peanut butter cups from Trader Joe’s. I would have used my usual Reese’s, but these are smaller and lighter and I didn’t want to put anything too heavy into what is already a very rich cake.

My son’s birthday happened to fall last week when I was crazy busy getting grades done for the end of the fourth quarter. So like any good mom, I cheated and used white frosting that I bought from my favorite local bakery. I can make great frosting, but every now and then I take some shortcuts. We all need a break from time to time, and it’s not like my son would care. He just wanted vanilla frosting. That said, you can always make your favorite frosting for this cake and feel very virtuous when you’re done.
Though I could have been crazy and gone with five layers total, I chose to have a thicker cake this time and to have a peanut butter layer on top. But you can always spread the batter out among three pans instead of two and sandwich each peanut butter layer with cake. It’s your call!
Whatever you decide, the end result will be delicious and decadent. I have to be honest: I’d rather eat chocolate cake (or brownie, as Sprinkle Bakes’ version uses) any day of the week. But to make my chocolate-hating kid happy, this cake was a pretty cool compromise.
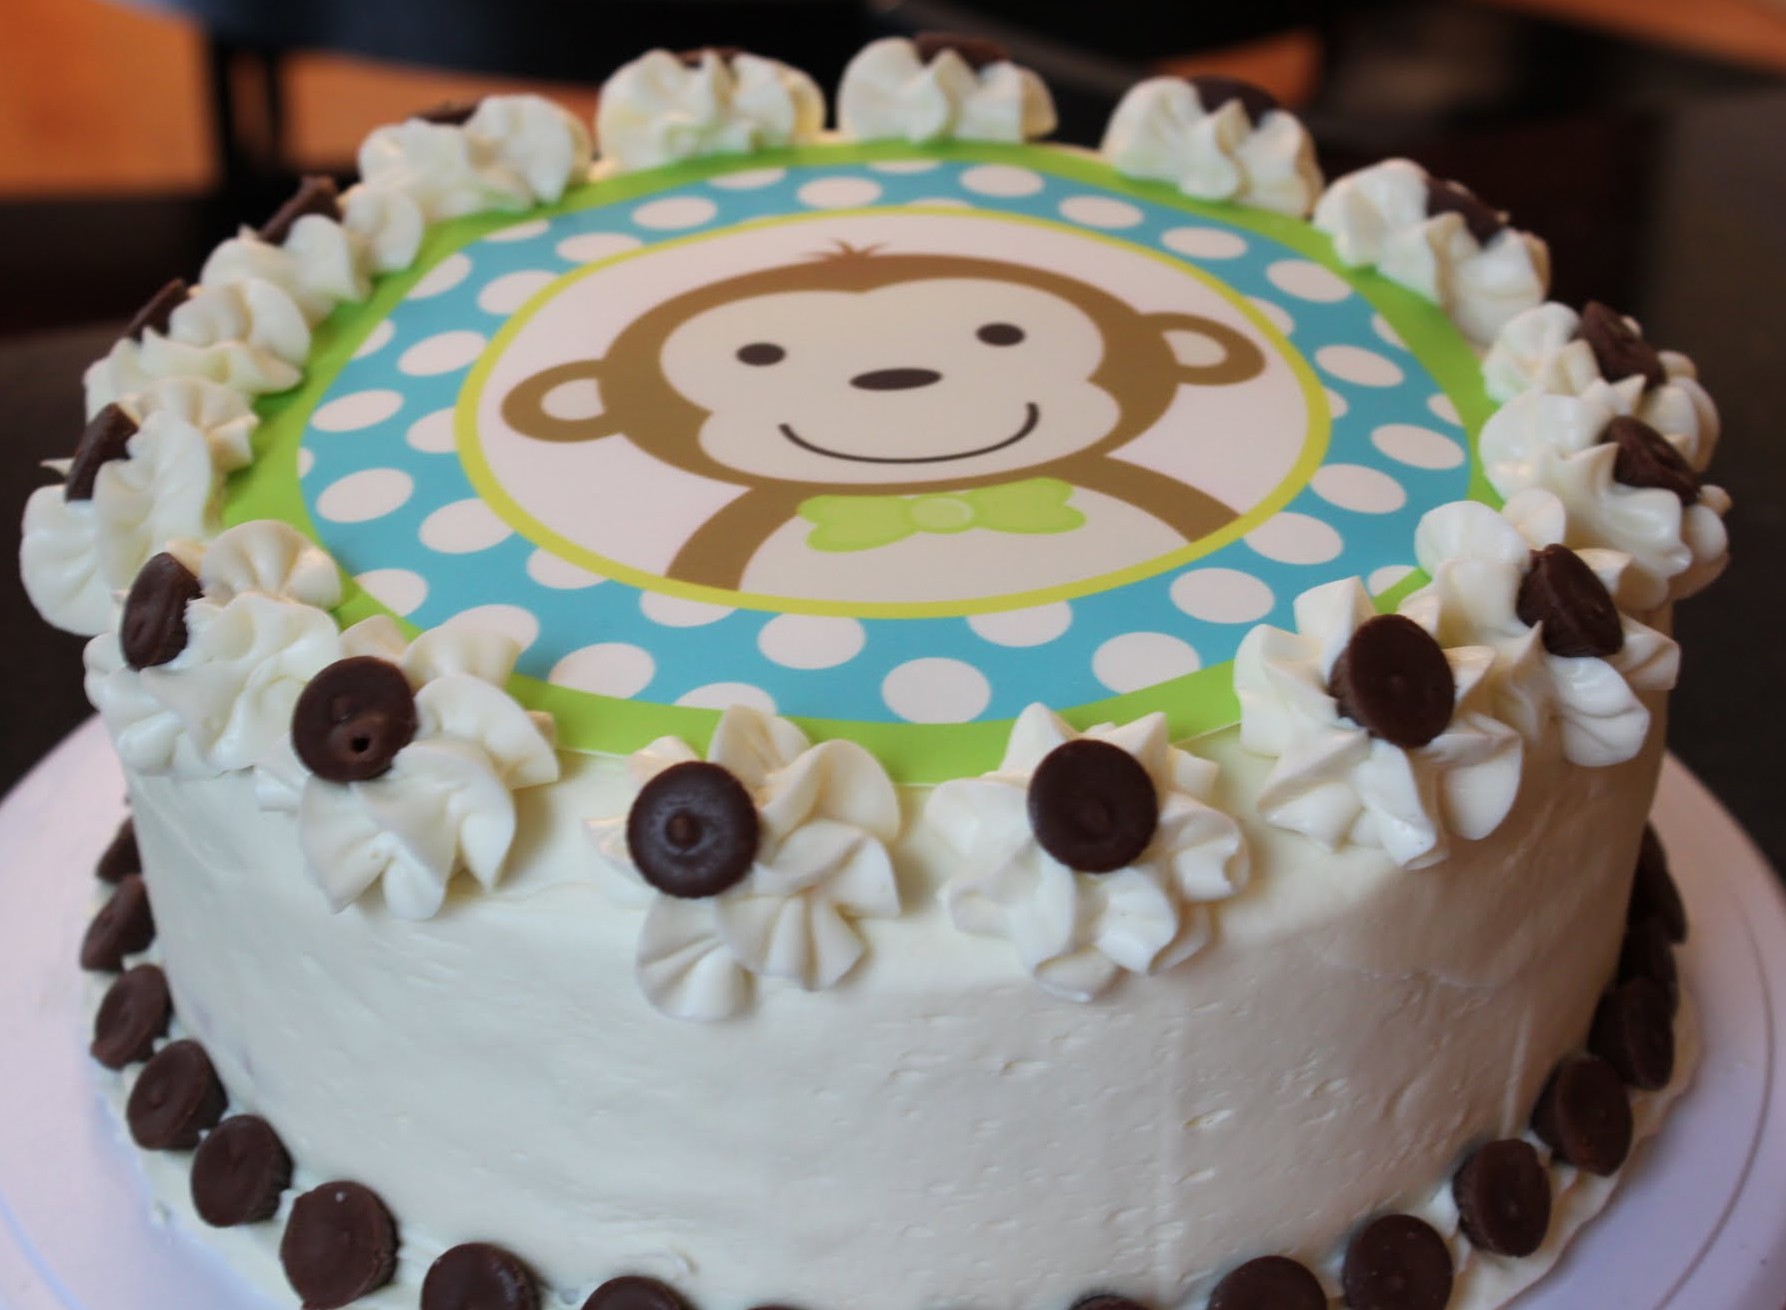
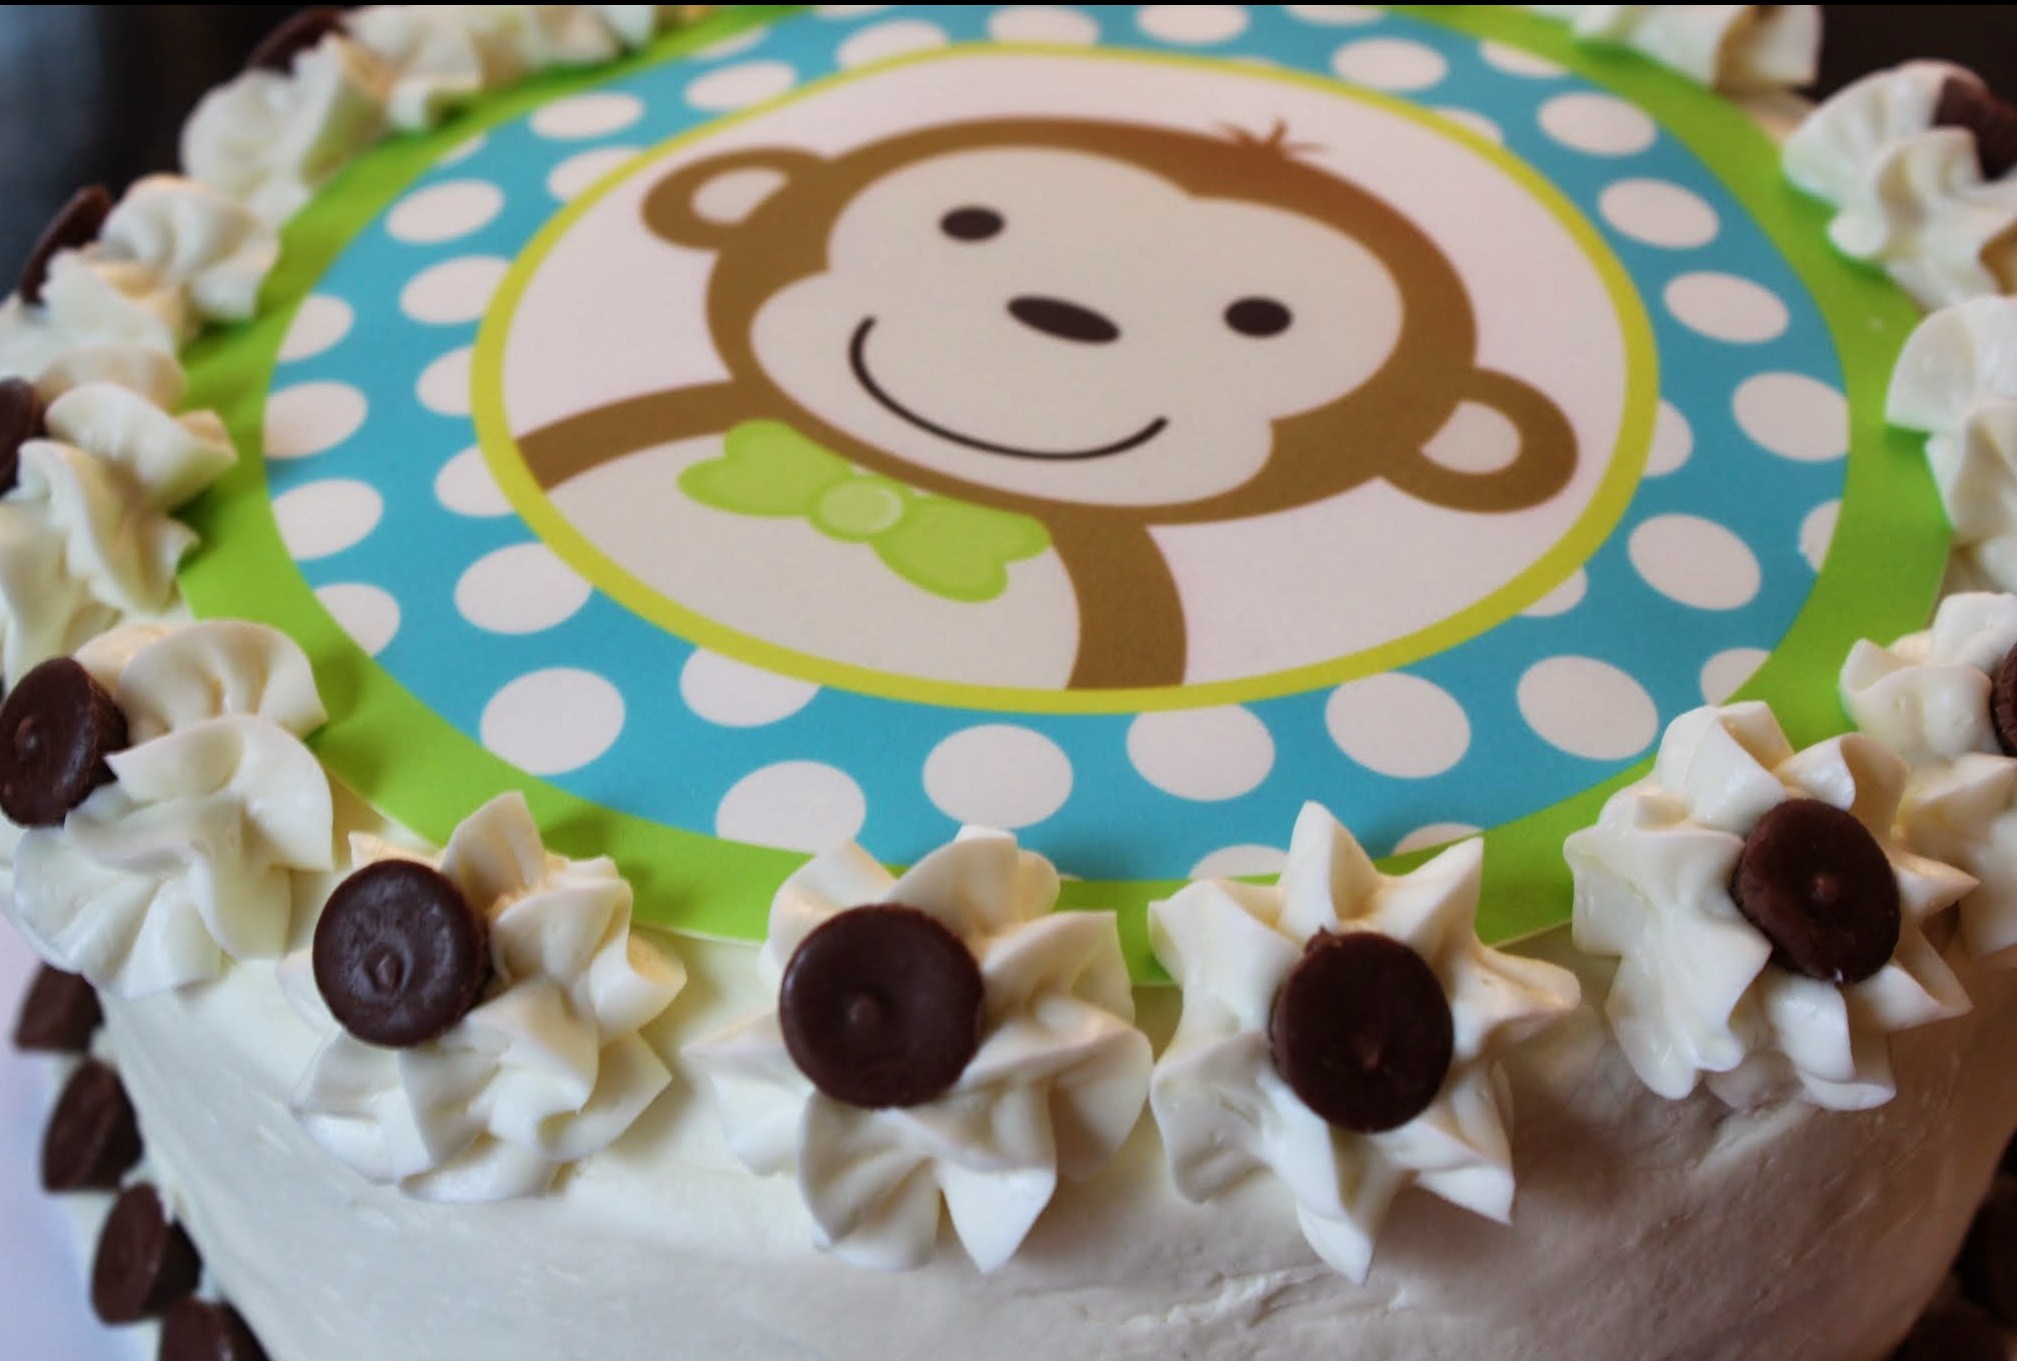
And as for the decorating, he wanted a monkey. Even though the rest of his theme was Spider-Man. Again, I cannot begin to understand. But in the interest of saving time, I got this great decoration on Amazon (a.k.a. my best friend) from Sweet N’ Treats and then piped the swirls on top, using the remaining peanut butter cups to decorate the swirls and the bottom of the cake.
So here it is, the birthday cake for the sorta-kinda-but-not-really chocolate hater in your life. Bon appetit!
Yellow Cake Layer:
- 1/2 cup butter, softened to room temperature
- 1 and 1/4 cups sugar
- 1 teaspoon vanilla
- 3 eggs
- 2 and 1/2 cups flour
- 3 teaspoons baking powder
- 1/2 teaspoon salt
- 1 cup milk (I used 2 percent)
- 1 cup mini peanut butter cups (I used Trader Joe’s)
Peanut Butter Layer:
- 2 cups peanut butter
- 6 cups powdered sugar
- 1/2 cup butter, melted
- 1/4 to 1/2 cup heavy cream
Frosting/Decorating:
- 2-3 containers of your favorite white frosting
- 1/2 cup mini peanut butter cups (I used Trader Joe’s)
Instructions:
In the bowl of a stand mixer, beat the peanut butter, powdered sugar, and butter until crumbly. Gradually add the heavy cream, beating after each addition until the peanut butter mixture forms a dough.
Press the peanut butter dough into two parchment-lined and greased 9-inch round cake pans. Turn the rounds out onto a cookie sheet and cover. If you have trouble turning out the layers, lightly run a knife along the edge once to coax the layers out. Place the peanut butter layers in the freezer and leave them there overnight to become solid.
Preheat the oven to 350. Line the bottoms of two 9-inch cake pans with parchment paper and coat with cooking spray.
To make the yellow cake layers, combine the flour, baking powder and salt and set aside. Cream the butter and sugar until the mixture is light and fluffy. Add the vanilla and eggs. Taking turns, add the dry ingredients and milk gradually, beating as you go, until all the ingredients have formed into a smooth batter.
Fold one cup of peanut butter cups into the batter and reserve the rest for the decorating. Pour the batter evenly into the 9-inch cake pans.
Bake for 30 minutes until golden brown. Cool completely.
When the cake is cool and the peanut butter layers are frozen solid, stack the cake, alternating the peanut butter and yellow cake layers. Be sure to spread a layer of frosting between the layers to help them stick together. You may need to level the yellow cake using a serrated knife.
Once the cake is stacked and even, spread frosting on the top. Using the tip of your choice (I used a star tip), pipe swirls onto the top of the cake and then place 1-2 mini peanut butter cups in each swirl. You can also pipe a design on the bottom and line the piping with more peanut butter cups.
Cut into very thin slices. This cake is rich. A little goes a looooong way!


Wowie Zowie!!!
Thanks, Aunt Lorraine! 🙂