So I was browsing through one of my oldie but goodie cookbooks a while back, The Cake Doctor. For those of you who are unfamiliar, the author takes cake mixes and turns them into other treats. It’s a great book and I suggest you buy it immediately, if not sooner.
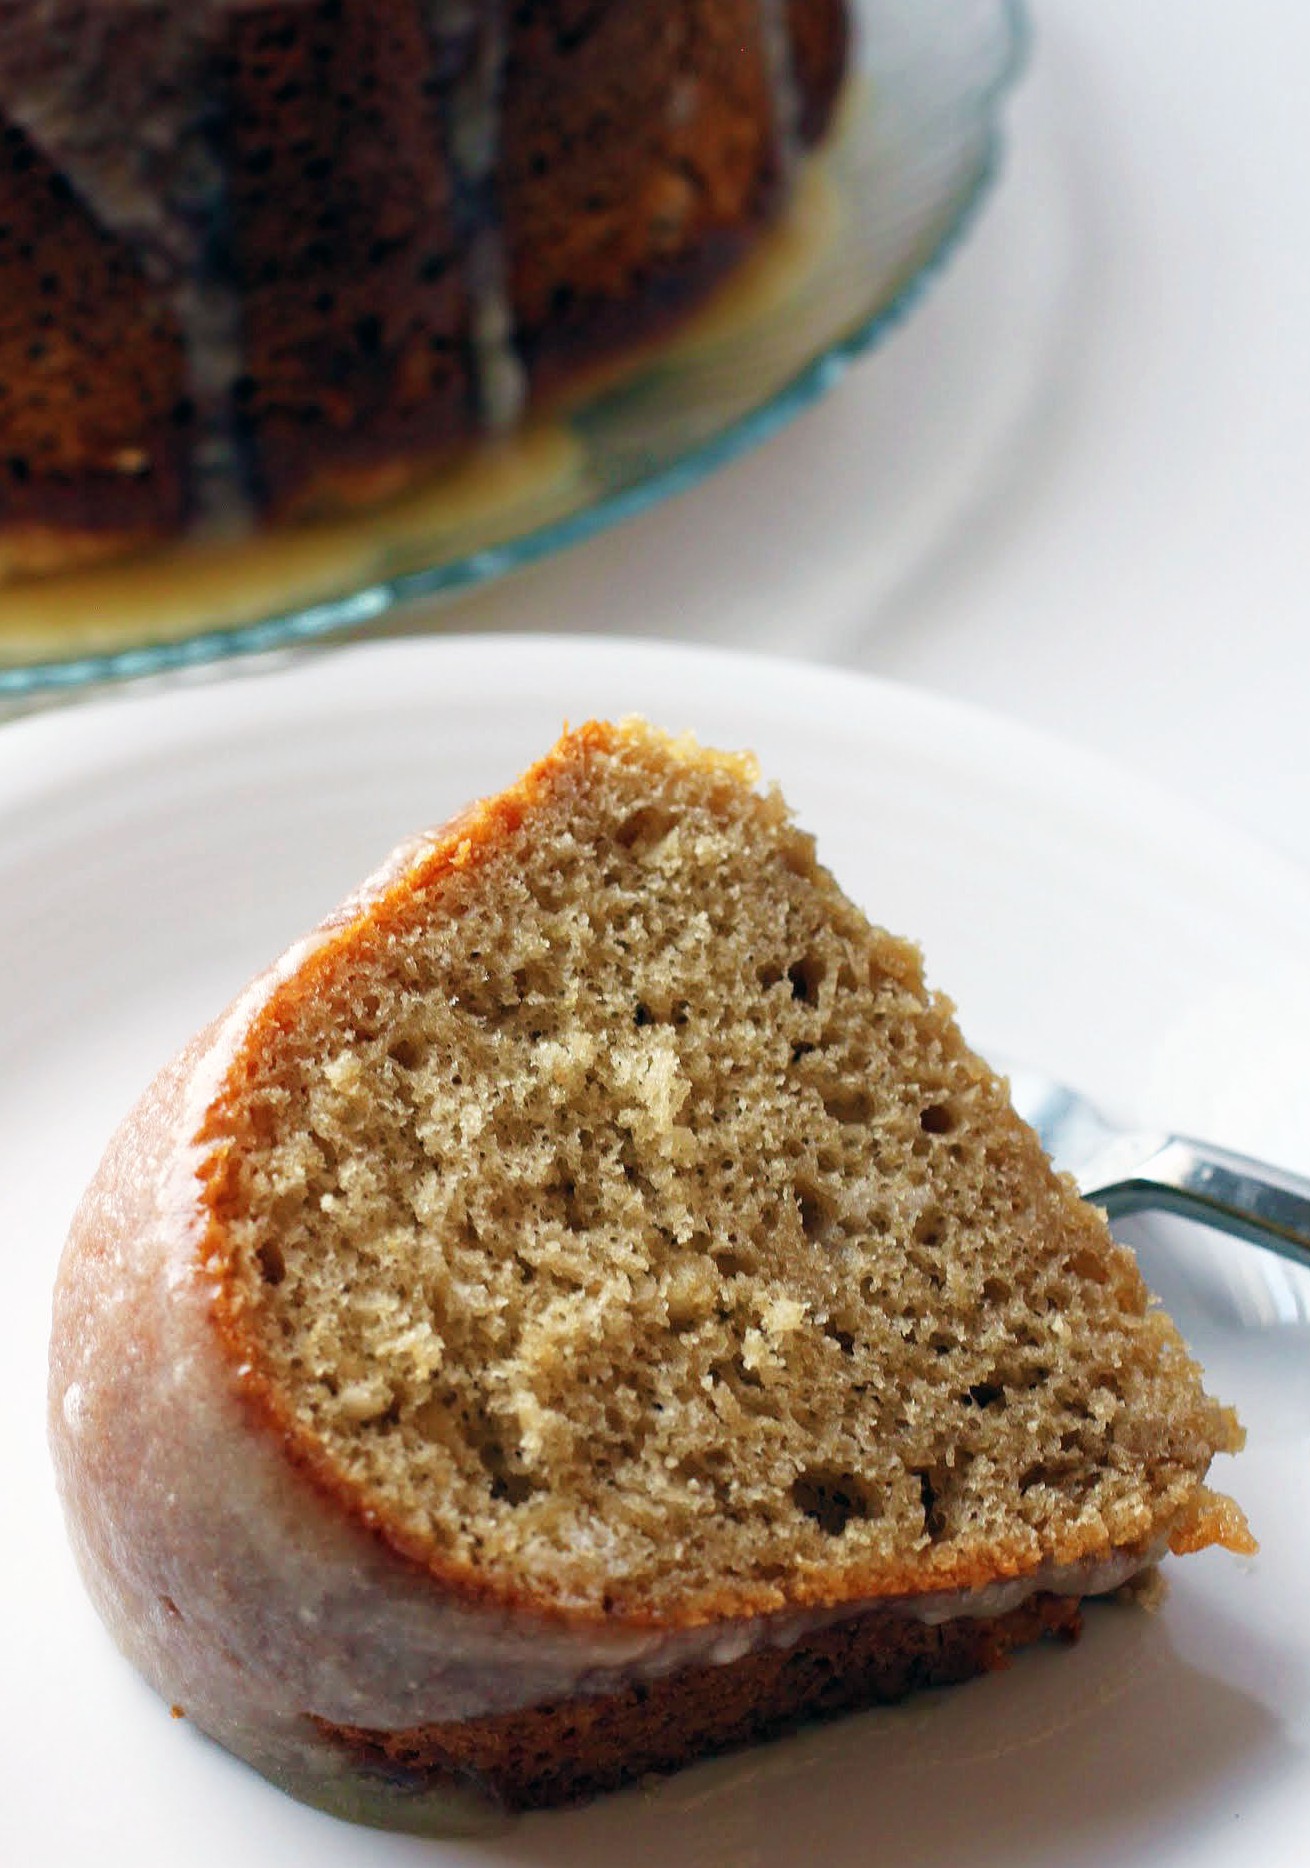
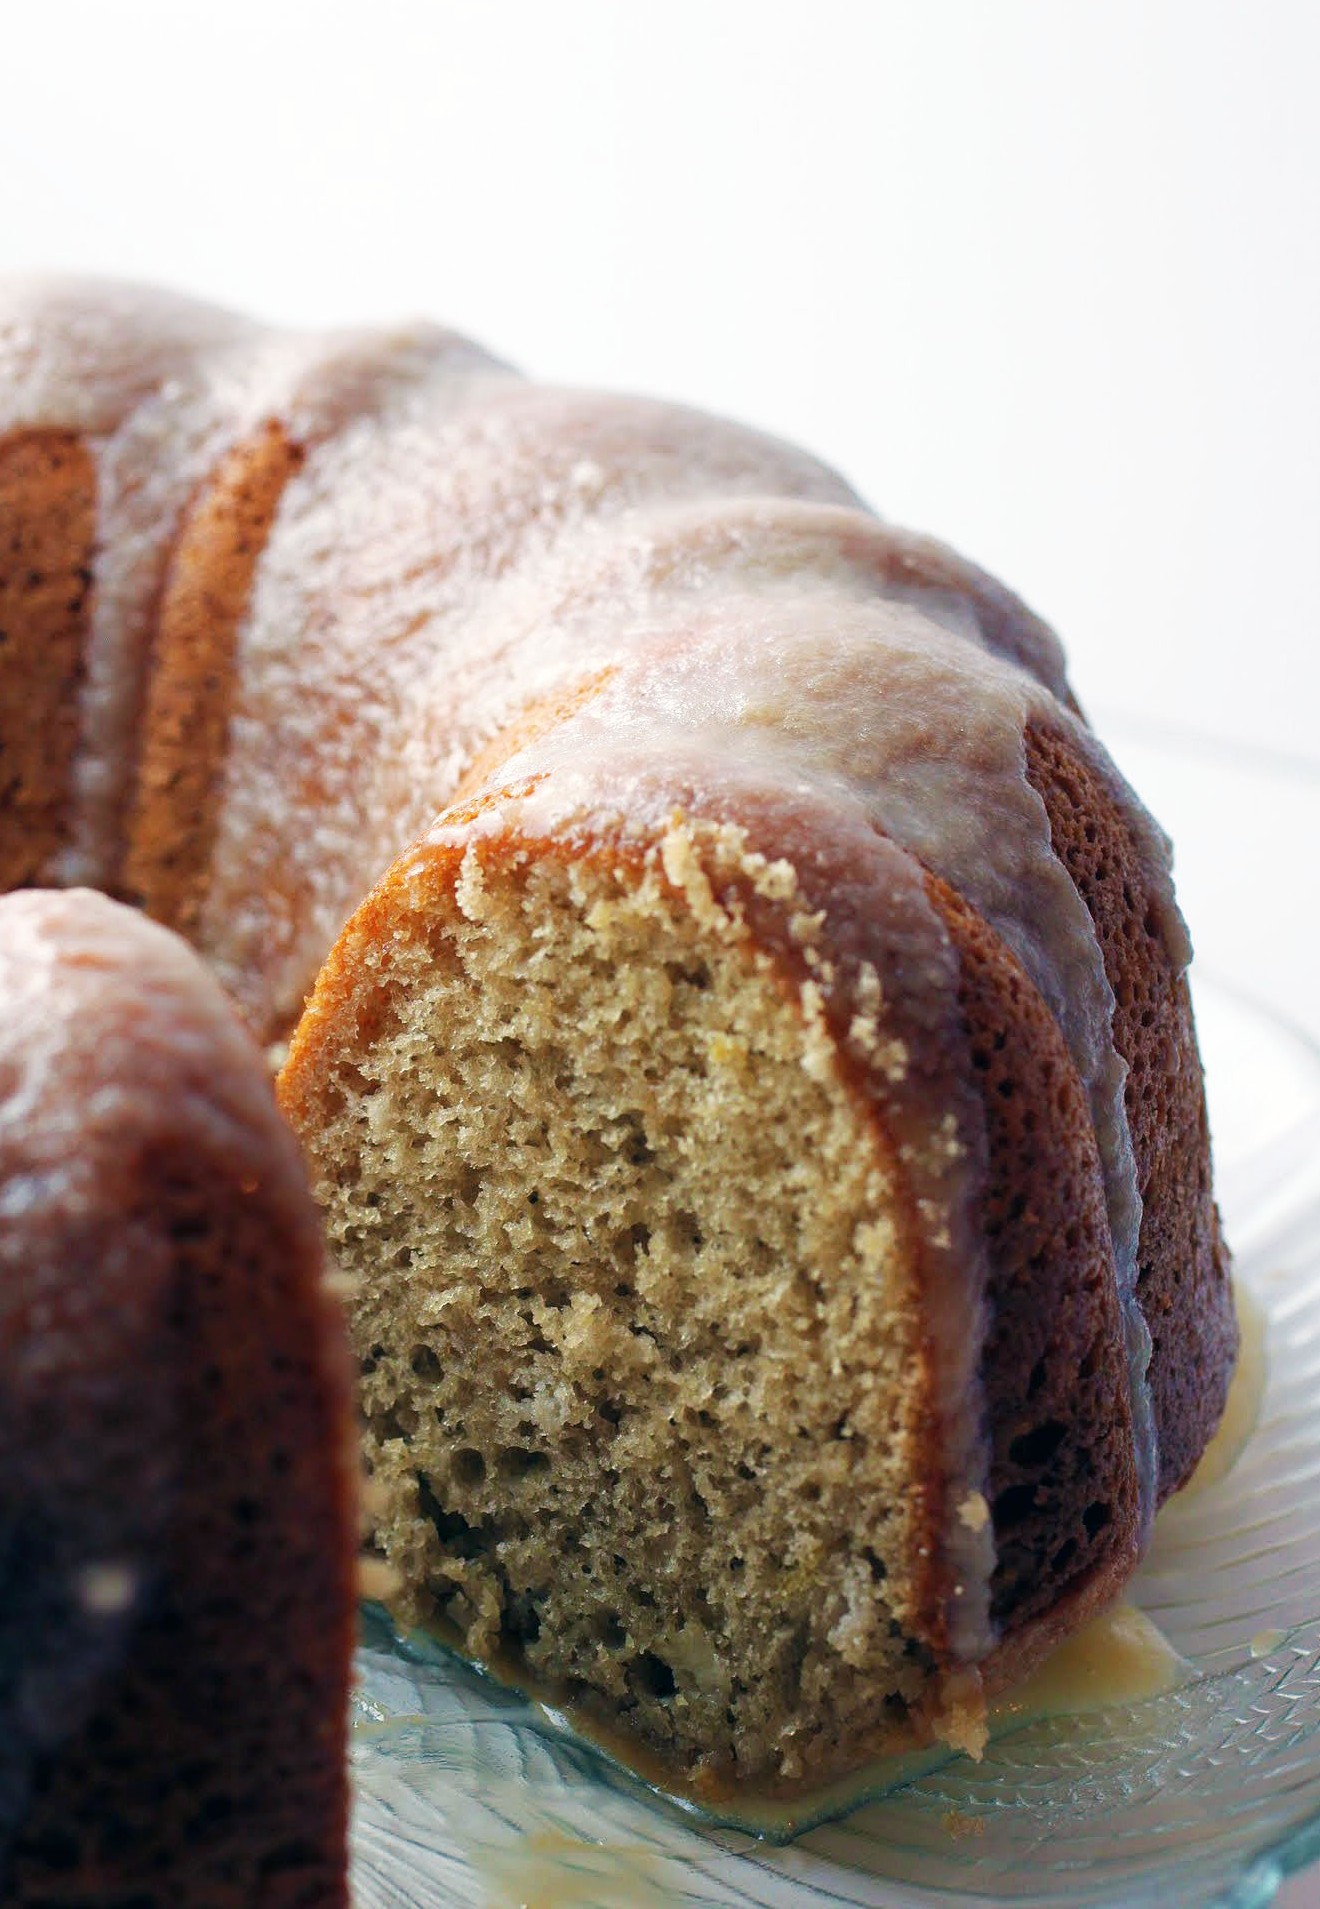
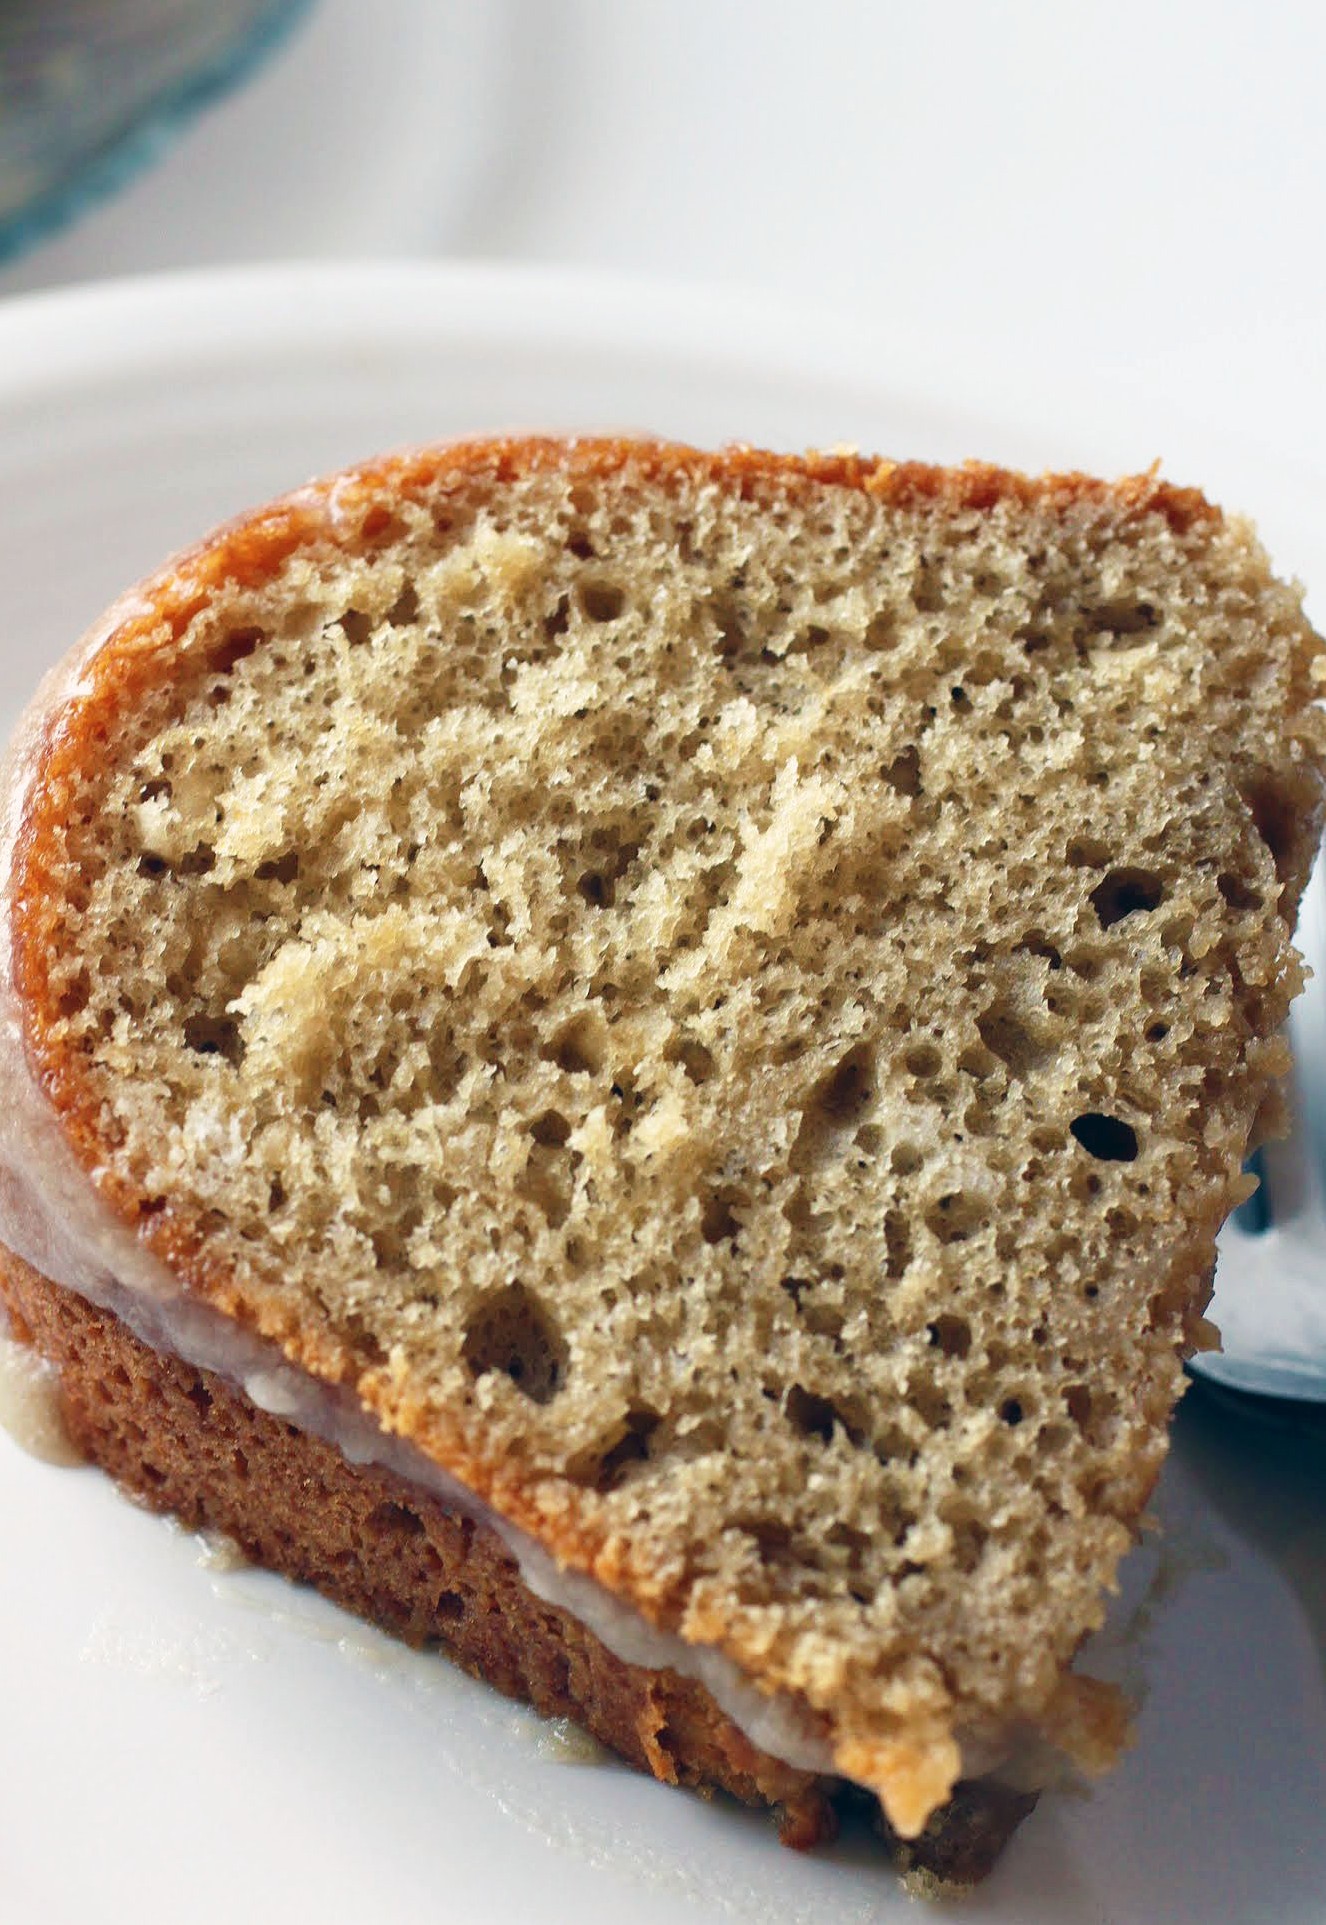
While browsing, I came across this magical recipe. It’s so easy: a box of white cake mix, three eggs, and a pint of ice cream (flavor of your choice) to give the cake its taste. That’s it, folks. I picked coffee ice cream and away we went! Results are right here.
In fact, I almost made a video, but I’m taking a short cinematography break. With Passover looming in less than three weeks, all my energies are going into getting the house ready for the annual onslaught of reminding us that our people were enslaved and now we’re free. But nothing feels free about getting ready for the holiday. That’s probably the point.
If you’re unfamiliar with Passover or the prep involved, just consider it the most demanding holiday you can imagine on steroids. To make Passover happen, the house needs to be spring cleaned from top to bottom. Coat and jacket pockets have to be checked for food wrappers or crumbs, kids’ rooms need to be excavated, and at some point, I wind up behind the fridge chipping away at tiny muck-filled crevices with a toothpick.
It’s not just the cleaning, though. Passover requires special food. Almost no food that we eat all year long except for vegetables (and not all of them, either) is acceptable on Passover. We can’t use typical carb bases (like flour), corn products, most grains, and legumes. The list goes on and on. We also have to expunge all of these unacceptable foods from the house, which means that I spend the weeks leading up to the holiday shopping conservatively so that we don’t wind up wasting food. That includes condiments and the spice rack, people.
And have I mentioned dishes? That’s right. This holiday requires its own dishes, down to pots and pans. We can’t use whatever we typically use because it’s made contact with forbidden foods (I know, it sounds insane). And since people in Judaism typically have different sets of dishes anyway (we separate meat from dairy), you can see where this is going.
Tip of the iceberg, people. I haven’t even gotten into the fact that we host the festive holiday meal (known as the Seder) two nights in a row for both sides of the family, cousins included.
Can someone come scrape my remains off the kitchen floor on or around April 22nd? You’ll find me easily because my three young’uns will be standing in a circle around me, demanding that I get up to fetch them candy.
As I am at my peak of stress right now, I need easy recipes. Recipes with three ingredients that produce delicious cakes that I can take to work and feed people with. Because I work full time, too. In a high school. No stress there.
This cake made me happy, as did the simple brown sugar glaze I poured over it. If I can’t get away from holiday prep at home, I can relax at work among the students I teach. They’re far less demanding of my time, and I’m even allowed to have cake breaks in my mini-cubicle.
Even if you don’t feel the pressure right now, nobody ever objected to making a three-ingredient cake out of melted ice cream. Try it with a flavor you love! The book recommends Cherry Garcia, but you can bet I’m trying it with Peanut Butter Cup next time!
Ingredients
Instructions
- Preheat the oven to 350. Coat a bundt pan with cooking spray and dust with flour. Set aside.
- In a large bowl, combine all three cake ingredients. Stir well until there are no lumps in the batter and the ingredients are well incorporated.
- Pour the batter into the prepared pan. Bake for 40-45 minutes until a toothpick inserted into the center comes out clean.
- Cool for five minutes. Invert the cake onto a large plate or platter. Cool completely.
- When the cake is cool, make the glaze. Over medium heat, melt all the ingredients together in a small saucepan. Let the mixture come to a boil and let it boil for one minute. Remove the pan from the heat.
- Let the glaze thicken, stirring from time to time, for about 10-15 minutes. Spoon it over the cake and let it set.
- Slice the cake and serve. Store covered.
]]>
Who am I kidding? I’m ready all year long! Nothing is more fun than the hearts and flowers and chocolate. Especially the chocolate. And the treats! I really can’t get enough. Too bad Kenny hates Valentine’s Day. More on that some other time.
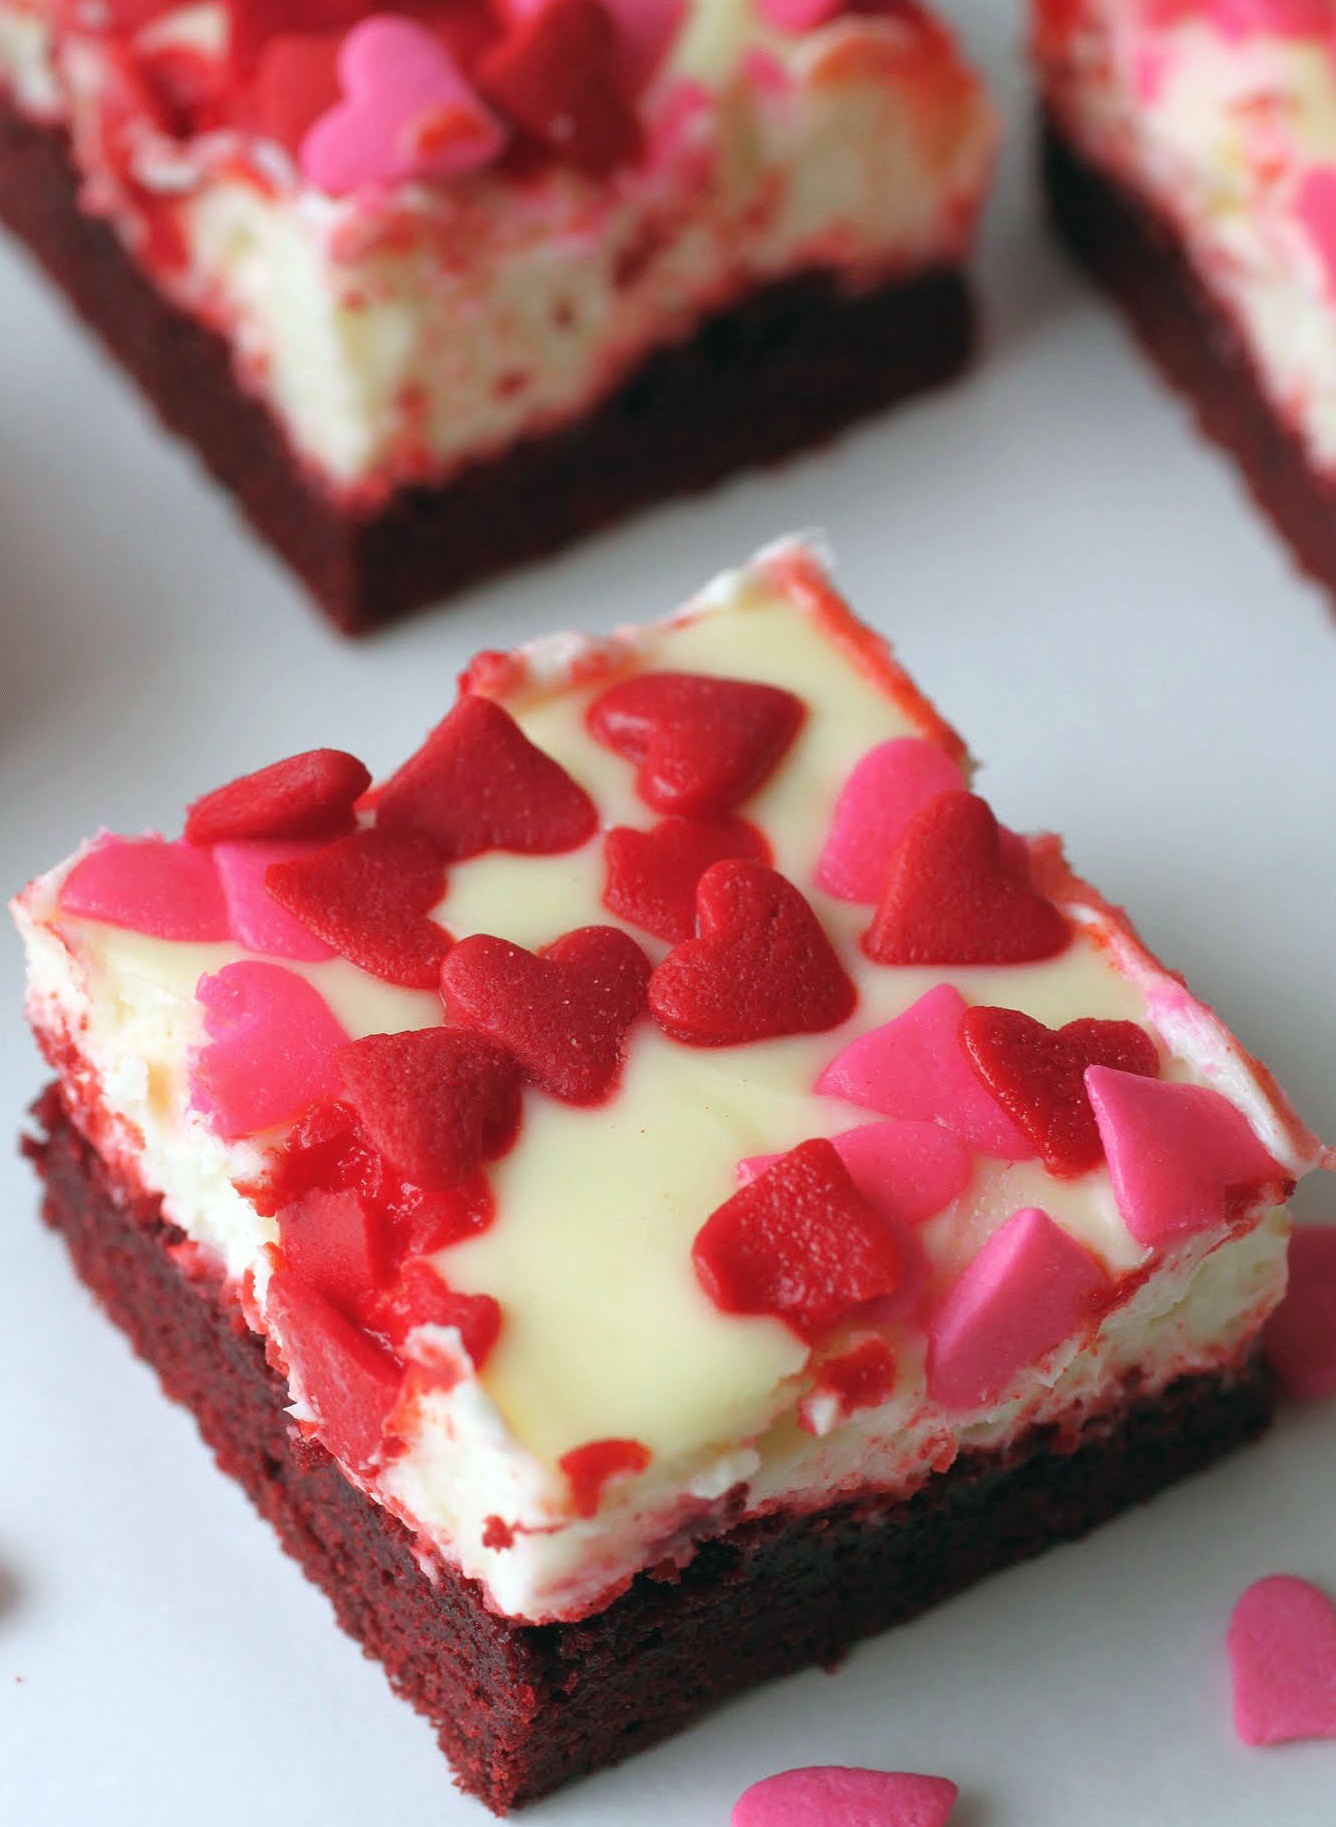
These red velvet cheesecake bars should get your holiday going. The bottom is a super-easy cake mix cookie bar, and the top a simple layer of cheesecake. And let’s not forget the heart sprinkle bling.

I’m going to be very honest here: I’m not a red velvet person. To me, if you’re using cocoa powder, put a lot in the mix, not just a trace. And the whole red food dye thing really throws me. But I can see that it all sure is pretty!
Besides, whenever I bake something I’m not crazy about myself, I just bring it into work and people devour it there. All my red velvet fanatics were pretty happy about these bars, so I’m gonna assume they were the essence of red velvet happiness. And I did enjoy the cheesecake top.
It’s important for me to experiment with flavors that aren’t my favorite, or otherwise I’m not much of a baker. It’s just so hard to taste test flavors that I naturally dislike. It’s a lot like teaching a book in my English class that I’m not so crazy about. On an intellectual level, I can recognize the worth of a book or a dessert I dislike, but personally, just…no.
It’s like snow. I think I used to like it, and I appreciate it aesthetically from a whole “wow is Mother Nature powerful” point of view. But boy, do I hate it. Last night the D.C. area got a measly inch, but because our local governments were totally focused on the two feet of snow headed this way Friday night, they ignored the one inch and didn’t treat the roads.

Result? Chaos. It took people 9 hours to get home from relatively short distances. It’s not the first time this kind of SNAFU has occurred, either. I got to stay up all night waiting for Kenny to get home. So yeah, snow is nice, or something. I just don’t like it. Give me a beach every day!
And give me a classic brownie with the beach. But today, red velvet will win!

These are an easy way to give someone a cute Valentine’s surprise. The bottom layer mixes up in literally seconds, and the top is a simple cheesecake. No bells and whistles, unless you count the sprinkles. How could you not love those?
When all is said and done, you have a bar worth remembering. And if it’s not your cup of tea, you can still appreciate how pretty red velvet is. Or snow. Doesn’t mean we have to marry them!
Ingredients
Instructions
- Preheat the oven to 350. Line an 8-inch square pan with foil, leaving enough to hang over the sides. Coat with cooking spray. Set aside.
- Combine all of the red velvet cookie base ingredients in a medium bowl until a stiff dough forms. Press the dough into the prepared pan and bake for 15 minutes.
- While the dough is baking, make the cheesecake. In a medium bowl, mix the softened cream cheese with the sugar until smooth. Add the egg and vanilla and stir again until completely incorporated.
- Gently spread the cheesecake batter over the partially cooked bars. The cookie dough underneath will cave in a little with the weight. Just do your best to get the batter evenly distributed.
- Bake the bars for an additional 20-25 minutes until golden at the edges and set. Cool completely.
- Refrigerate overnight and cut into squares.
]]>
Do you remember the red pistachios? Do they still exist?
I loved those things. They got red dye all over my hands, but I always thought they tasted better than the regular kind. My grandparents always kept them around for me. And then one day, they disappeared. I haven’t seen a red pistachio since.
Things have a habit of disappearing, unfortunately. There’s a great poem by Elizabeth Bishop called “One Art” where she talks about what she calls “the art of losing.” It’s a great poem, and my English teacher self highly recommends it to you. But I sometimes get creeped out by how much I’ve lost without even realizing it until after the fact.
It’s normal, of course. My childhood houses are gone, the cities I grew up in, all in the past. And while I’d like to think that they’re still out there somewhere, it’s hard to factor in the existence of a house I no longer live in, or a city I haven’t seen in years. But that’s life.
Luckily, pistachios still exist, even if they’re not red. And they come in great flavors. If you’ve never tried a salt and pepper pistachio, you are missing out. And if you’ve never had pistachio cake, that needs to end right now.
This cake recipe was handed to me years ago by a friend, and I just never tried it. To be honest, it didn’t look right at first. Pistachio pudding mix existed? And I could put it in cake?!
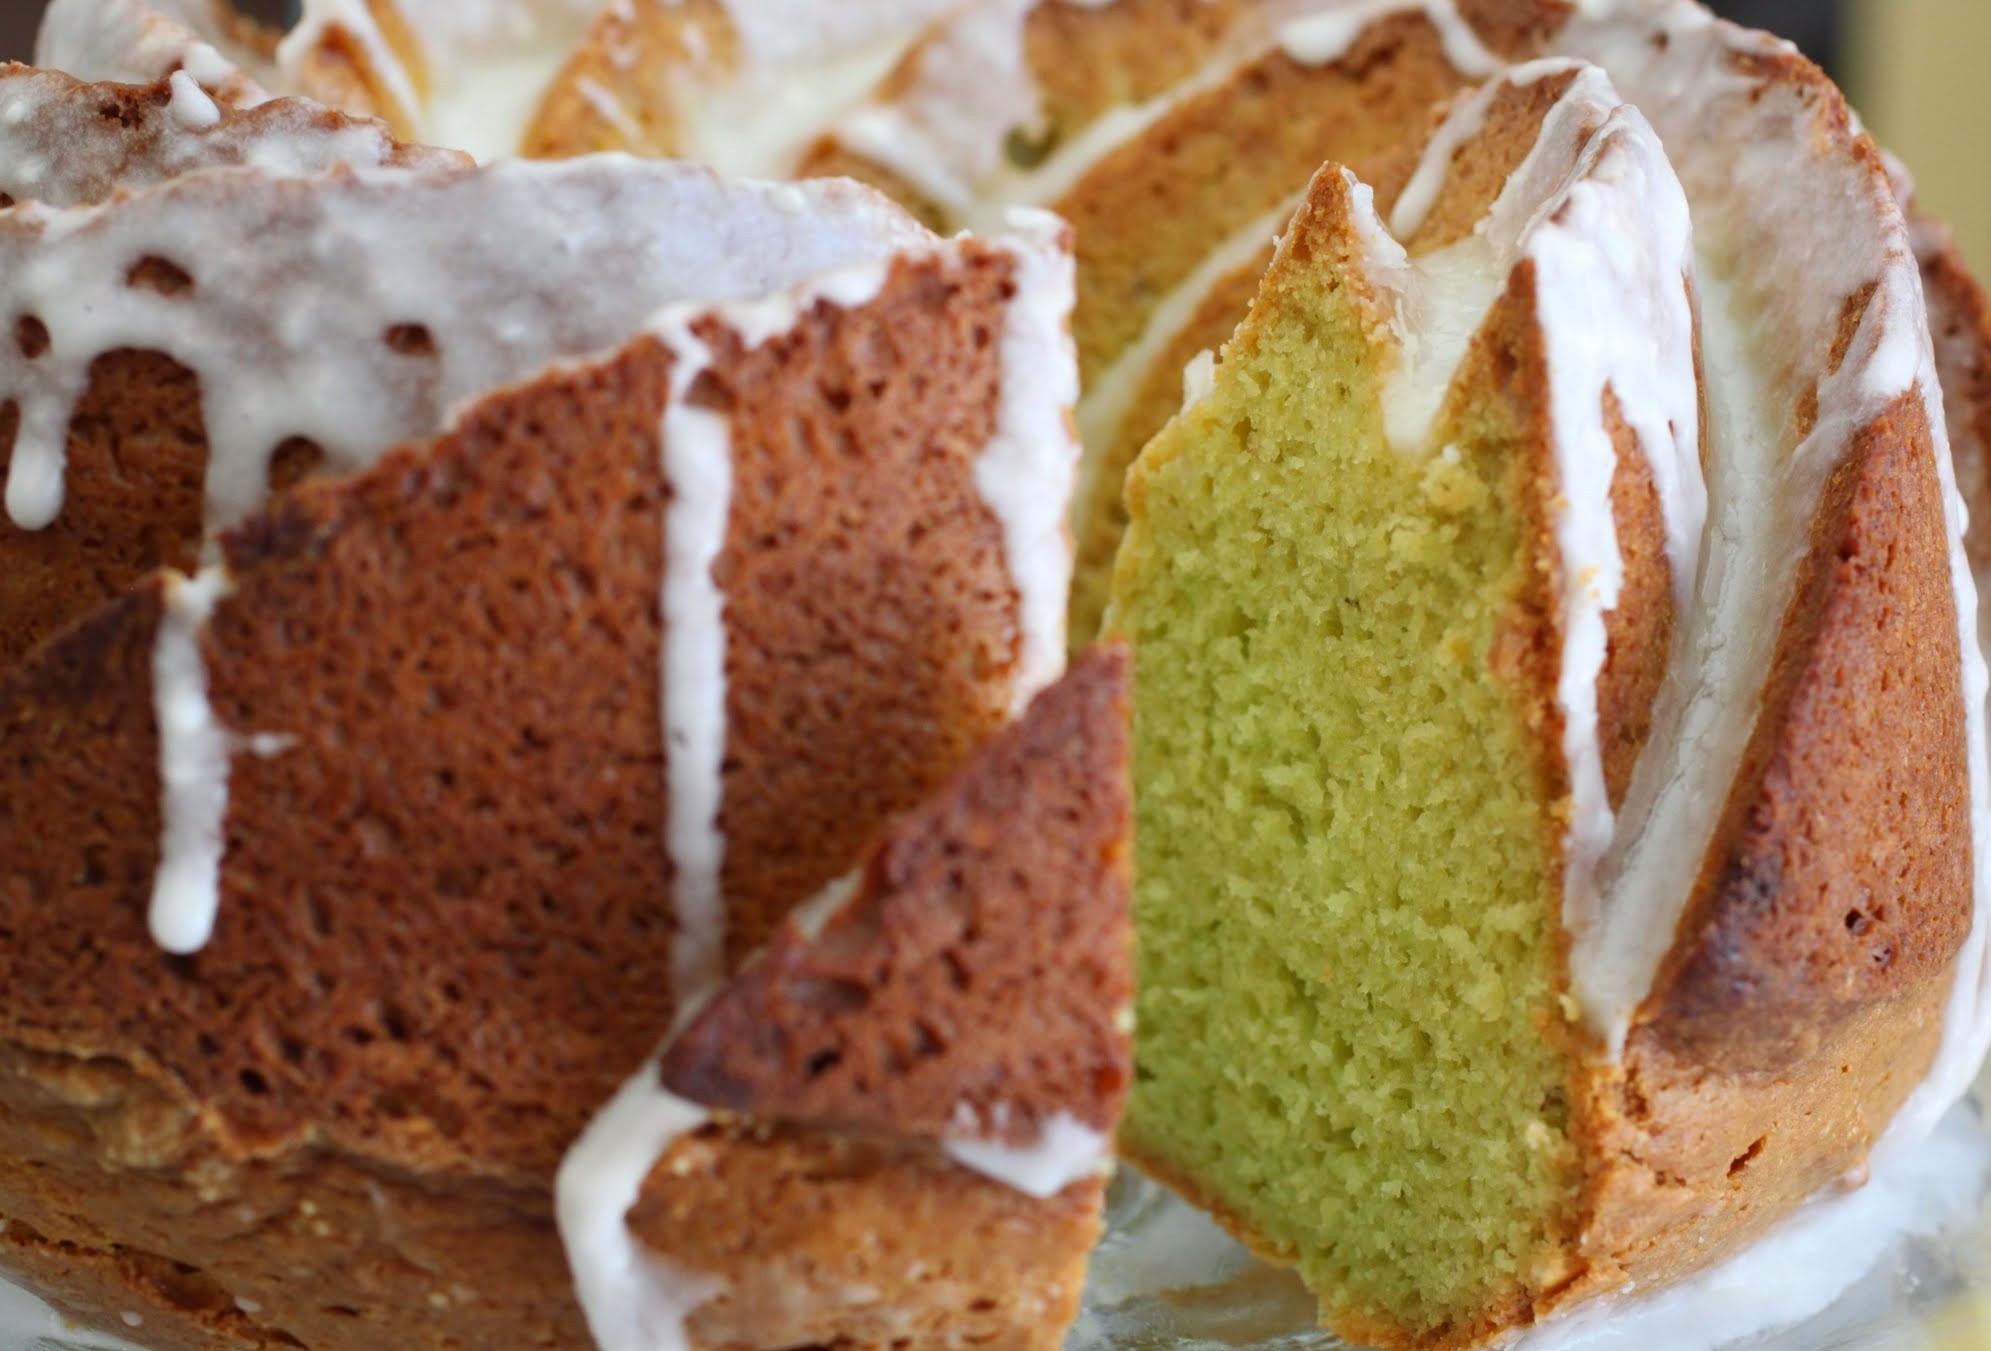
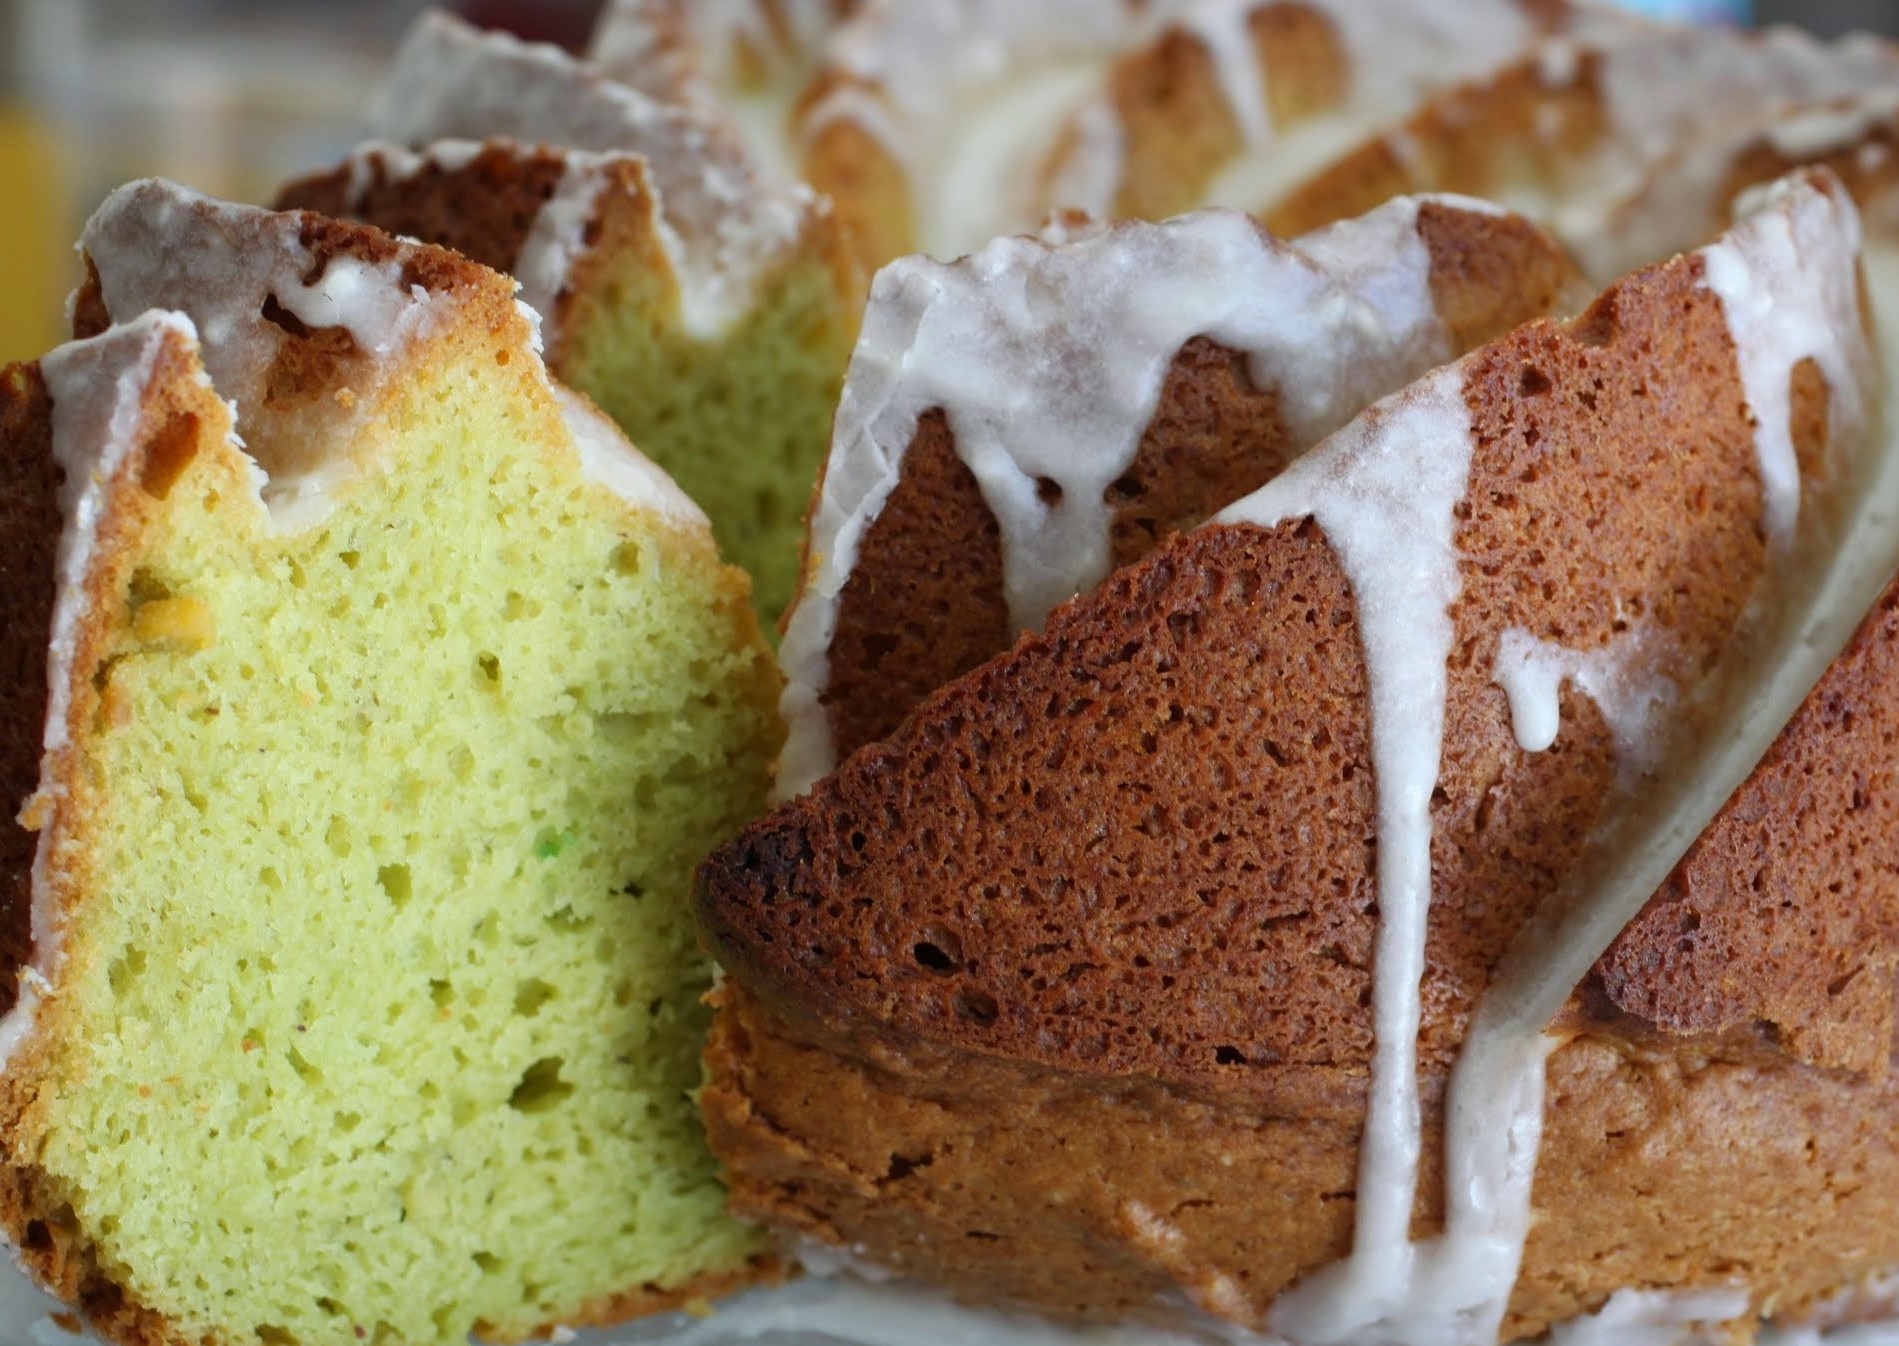
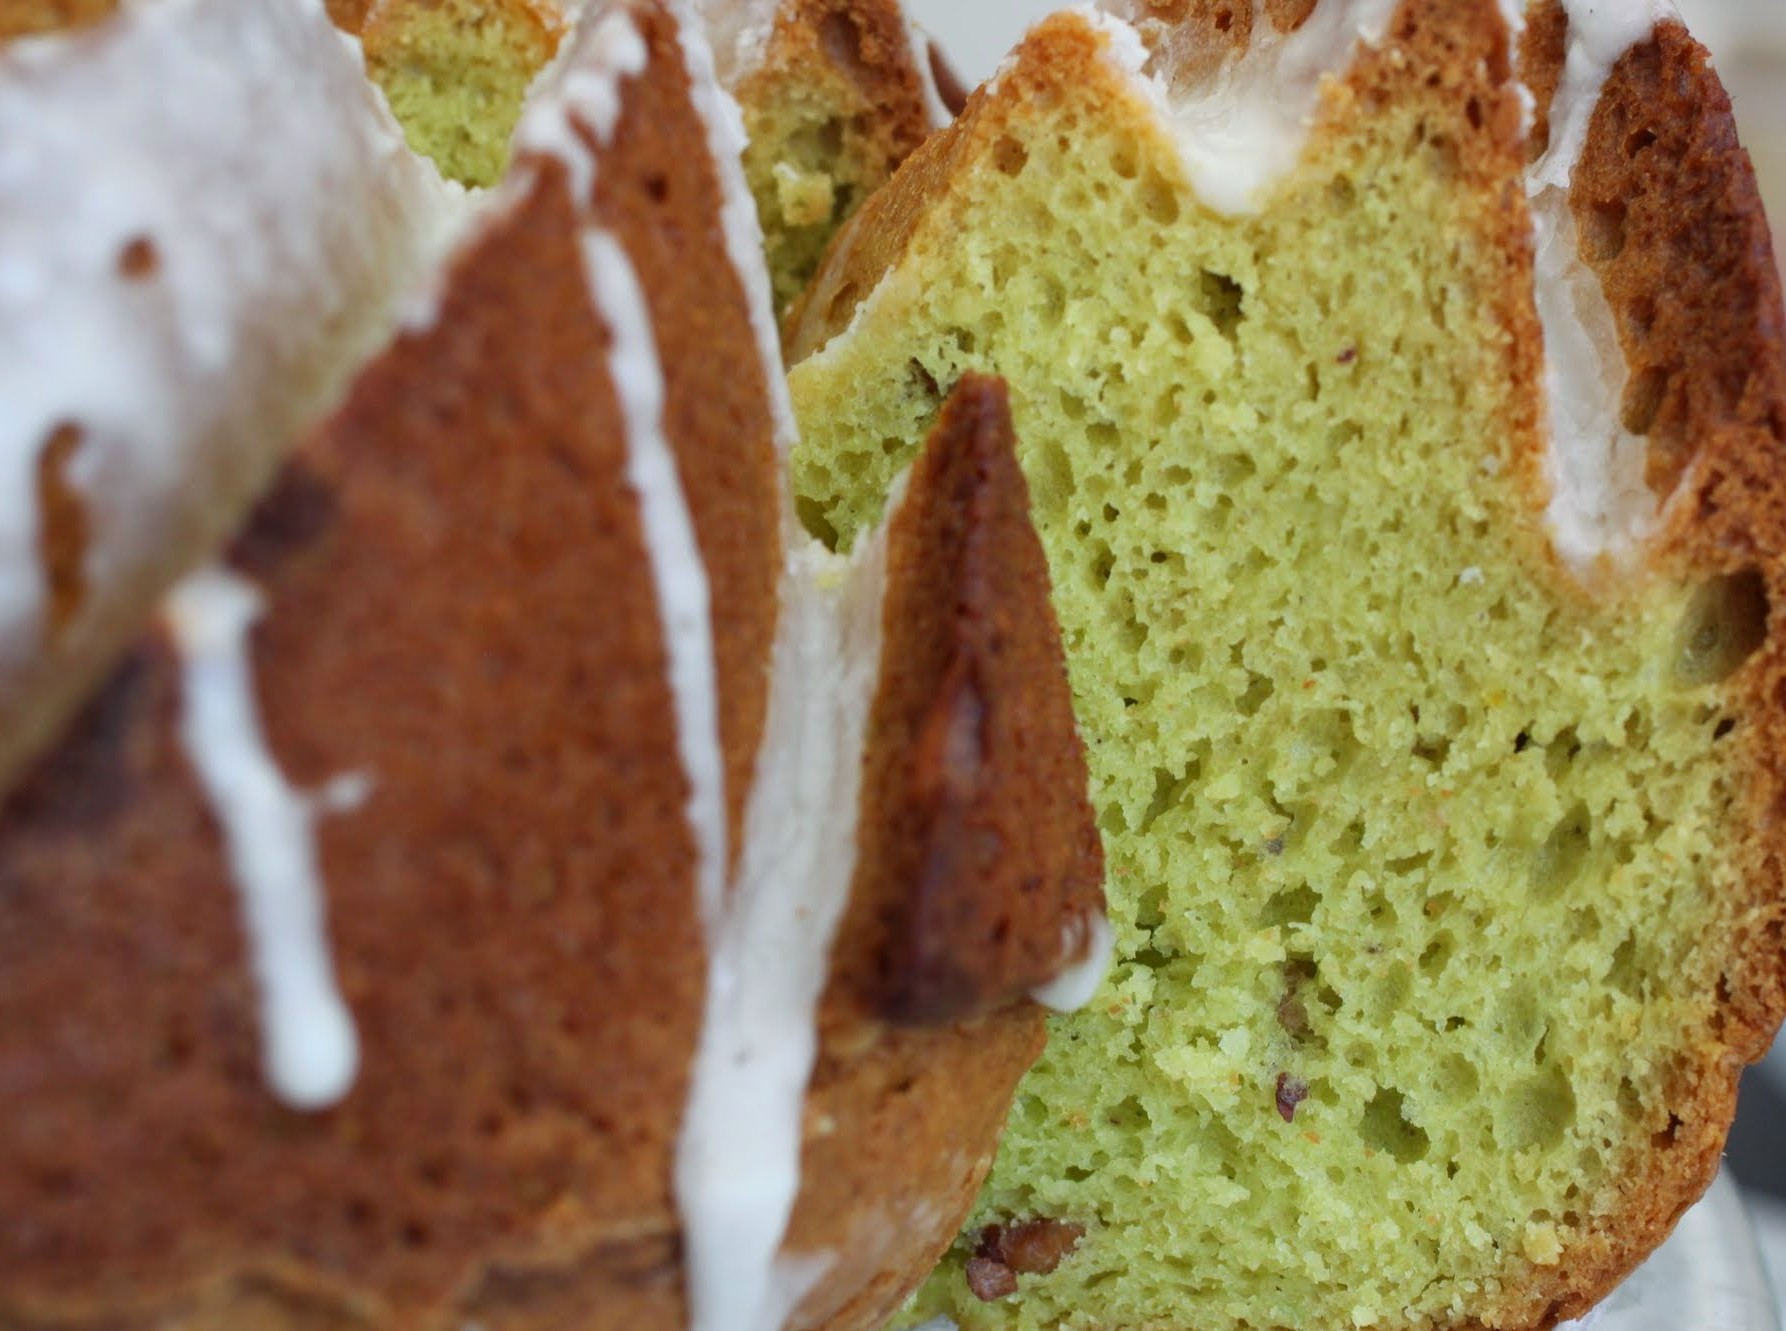
Oh, I was such an innocent. Cake mix rocks, pudding mix rocks, and when you put them together, they create even more delightful results. In this case, you get a perfectly dense, does-not-taste-like-a-mix, beautifully green cake.
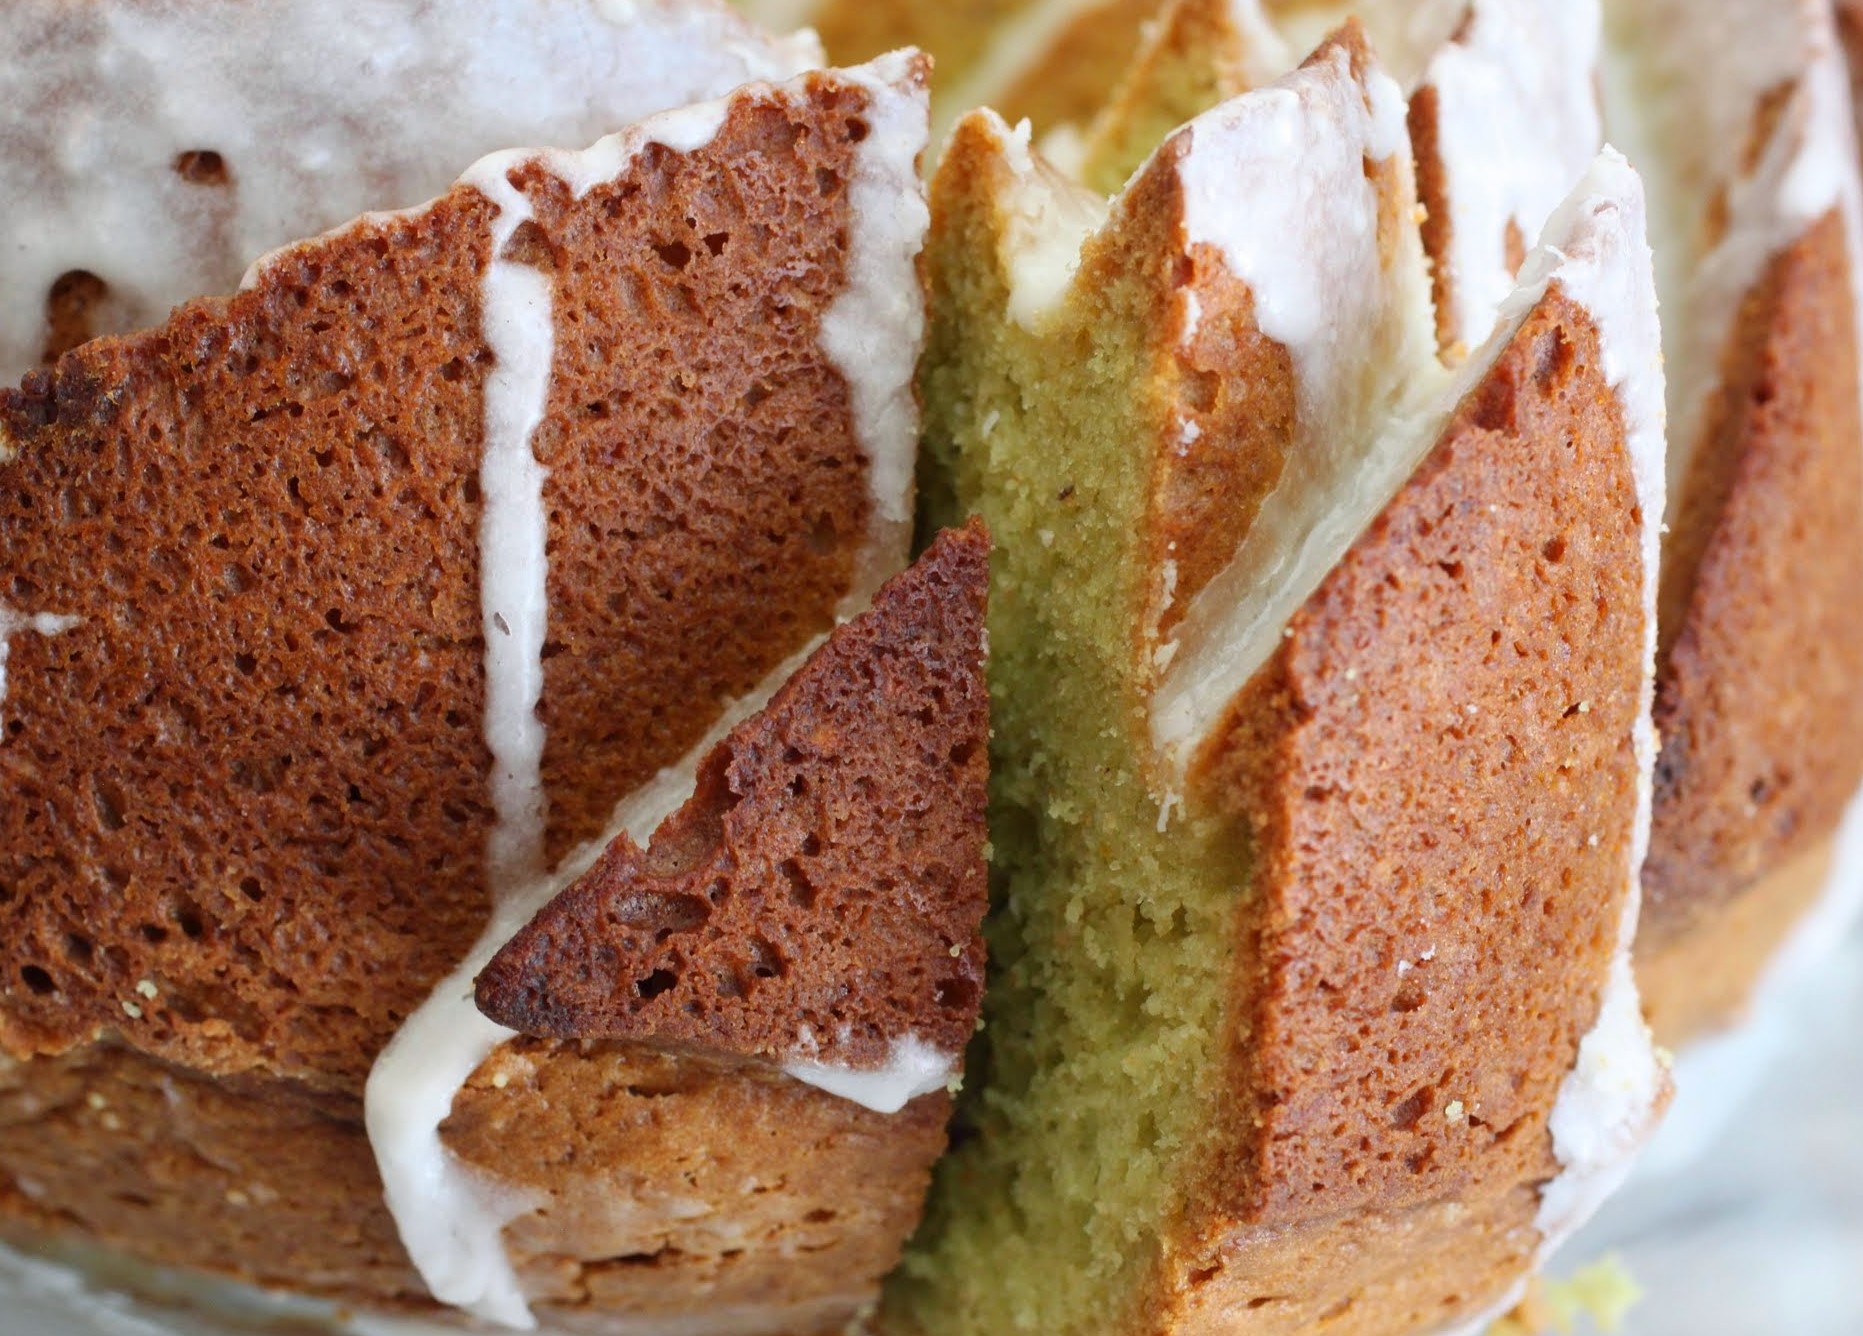
Just in time for St. Patrick’s, might I add! That’s right. I’m getting into the holiday spirit here. And the glaze pushes this cake right over the top. I put some almond extract into the glaze (which I would inhale straight if I didn’t suspect it tastes icky by itself) and that really made that pistachio flavor pop.
The thing is, we never notice some of our favorite things until they’re gone. Or people, really. I miss a lot of people. I miss places I grew up. I miss red pistachios. And while I hope never to miss pudding mix, you never know. The time is now. Cherish what you have!
Ingredients
Instructions
- Preheat the oven to 350. Coat a bundt or tube pan with cooking spray. Set aside.
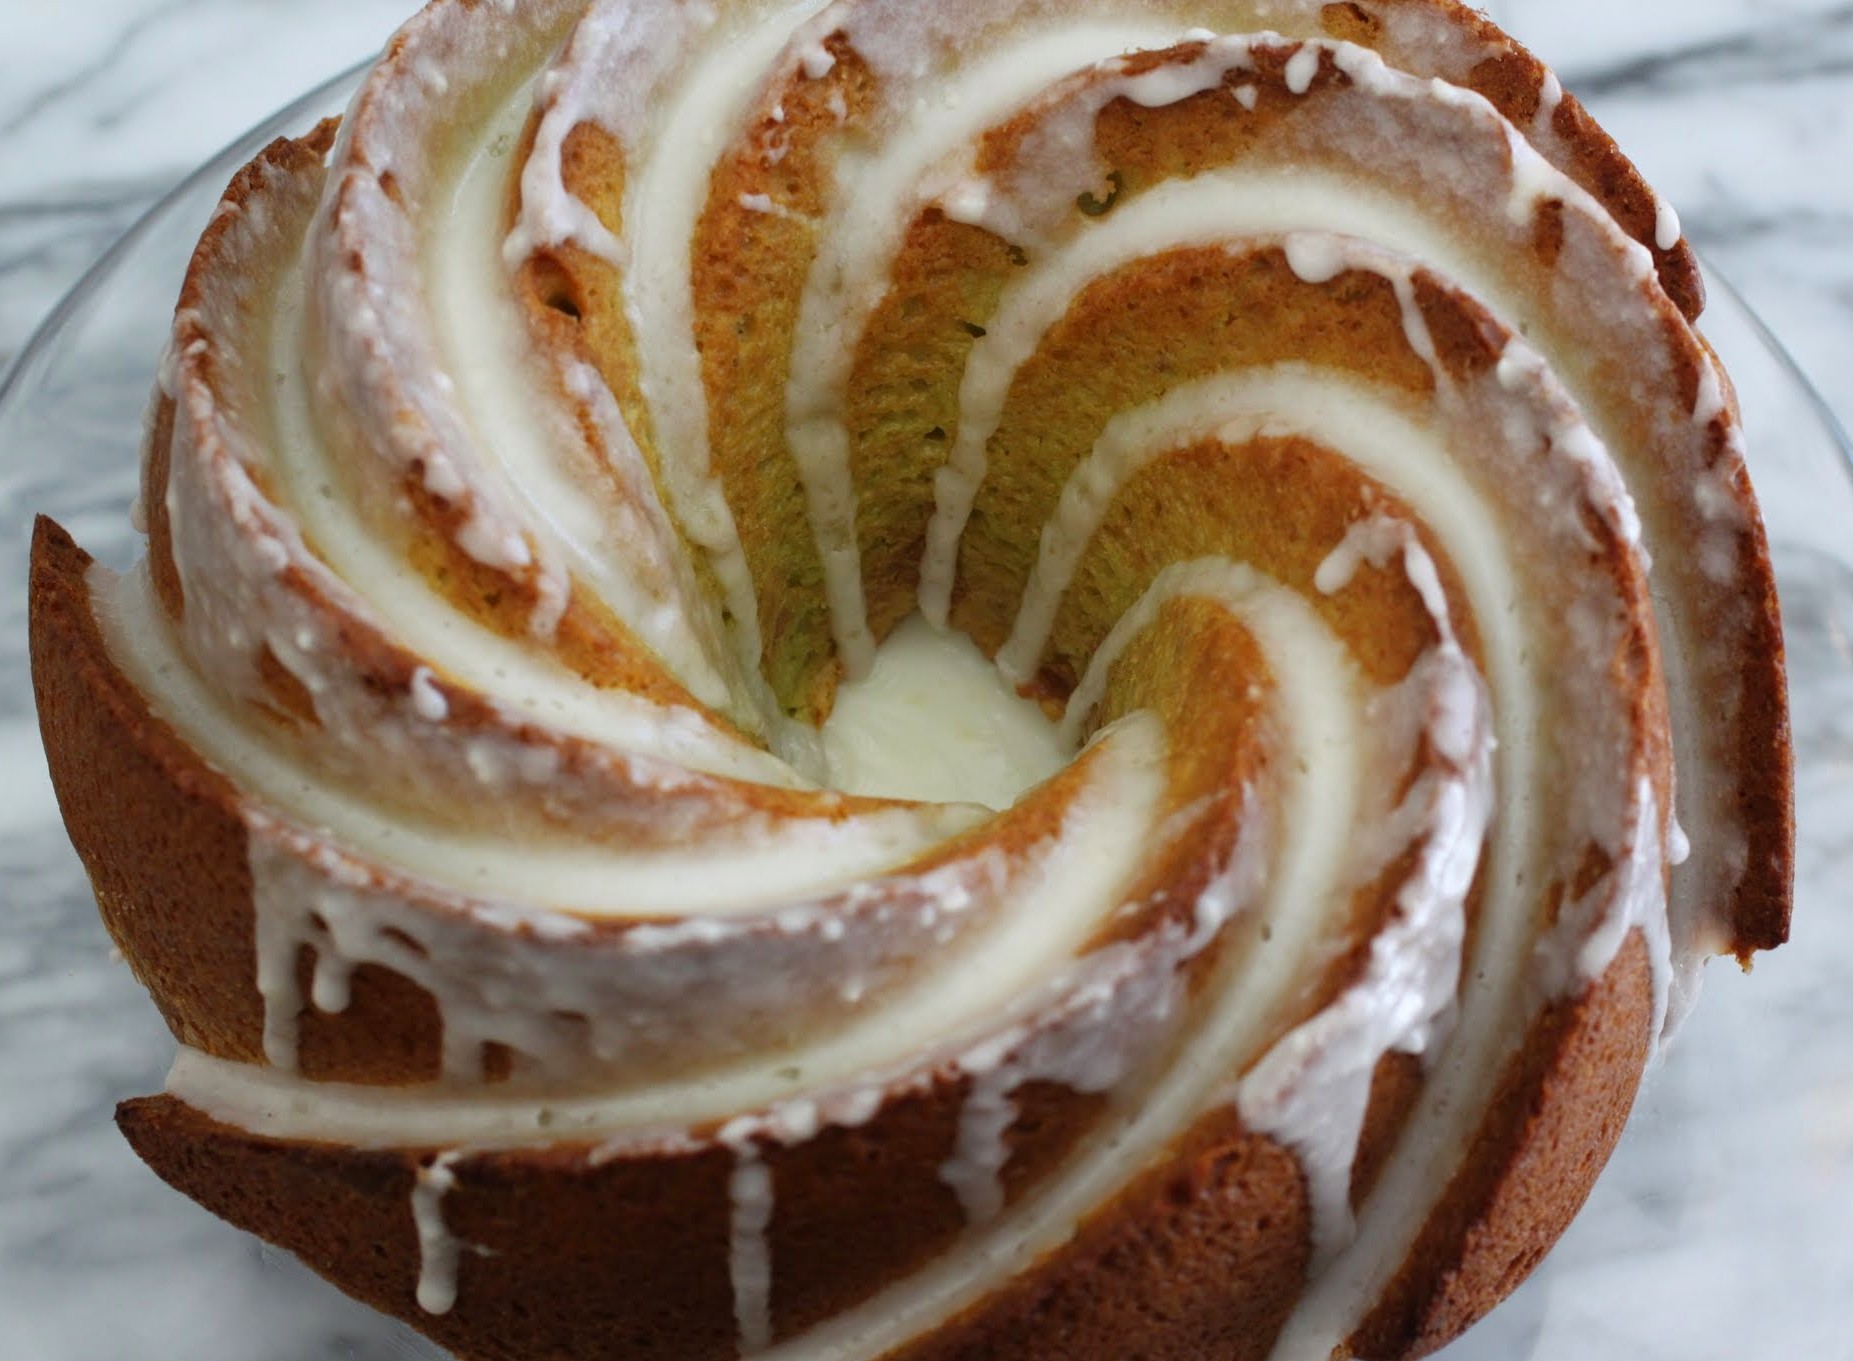
- In a bowl, mix all of the cake ingredients together until everything is smooth and incorporated. Your batter should be nice and evenly green.
- Pour the batter into the pan. Depending on the size of the pan (a smaller and/or deeper pan has more baking time), bake for anywhere from 45-60 minutes. The cake is done when a toothpick inserted into the center comes out clean.
- Cool until the cake is no longer hot. Invert the pan onto a plate and continue to cool.
- While the cake cools, make the glaze. Combine the butter, almond extract, and powdered sugar. Gradually add the milk until the desired consistency forms. You want a thick glaze, but it needs to be liquidy enough to pour.
- Carefully remove the cake from the pan. Pour the glaze on the cake and let it set.
- Cut into slices and serve.
]]>
Think about it: 40 years ago, women couldn’t do so many important jobs because we weren’t considered worthy. Gradually, thanks to women’s rights and some common sense, the general population has come to realize that we kick butt. I mean, we still make less money and people are still sexist. Nothing changes overnight. But at least we’re moving in the right direction.
But see, that element of choice that has resulted from having more rights has made life a lot harder to navigate. Do we work at home or work outside the home? Claw up the ladder or stay complacently put? Wear heels or flats?
As I get older, by the way, flats. But the bottom line is, choices are quite the double-edged sword. They’re much more fun when the decisions you have to make aren’t that vital to society, but make or break your day. Thus, the Girl Scout cookie conundrum.
Tagalongs all the way for me, baby. But I know a lot of you don’t agree. Thin Mints have a raging following, and Samoas are also pretty dang popular. And while there’s a smaller but loyal contingent who dream of Trefoils, they’re still solidly in the minority.
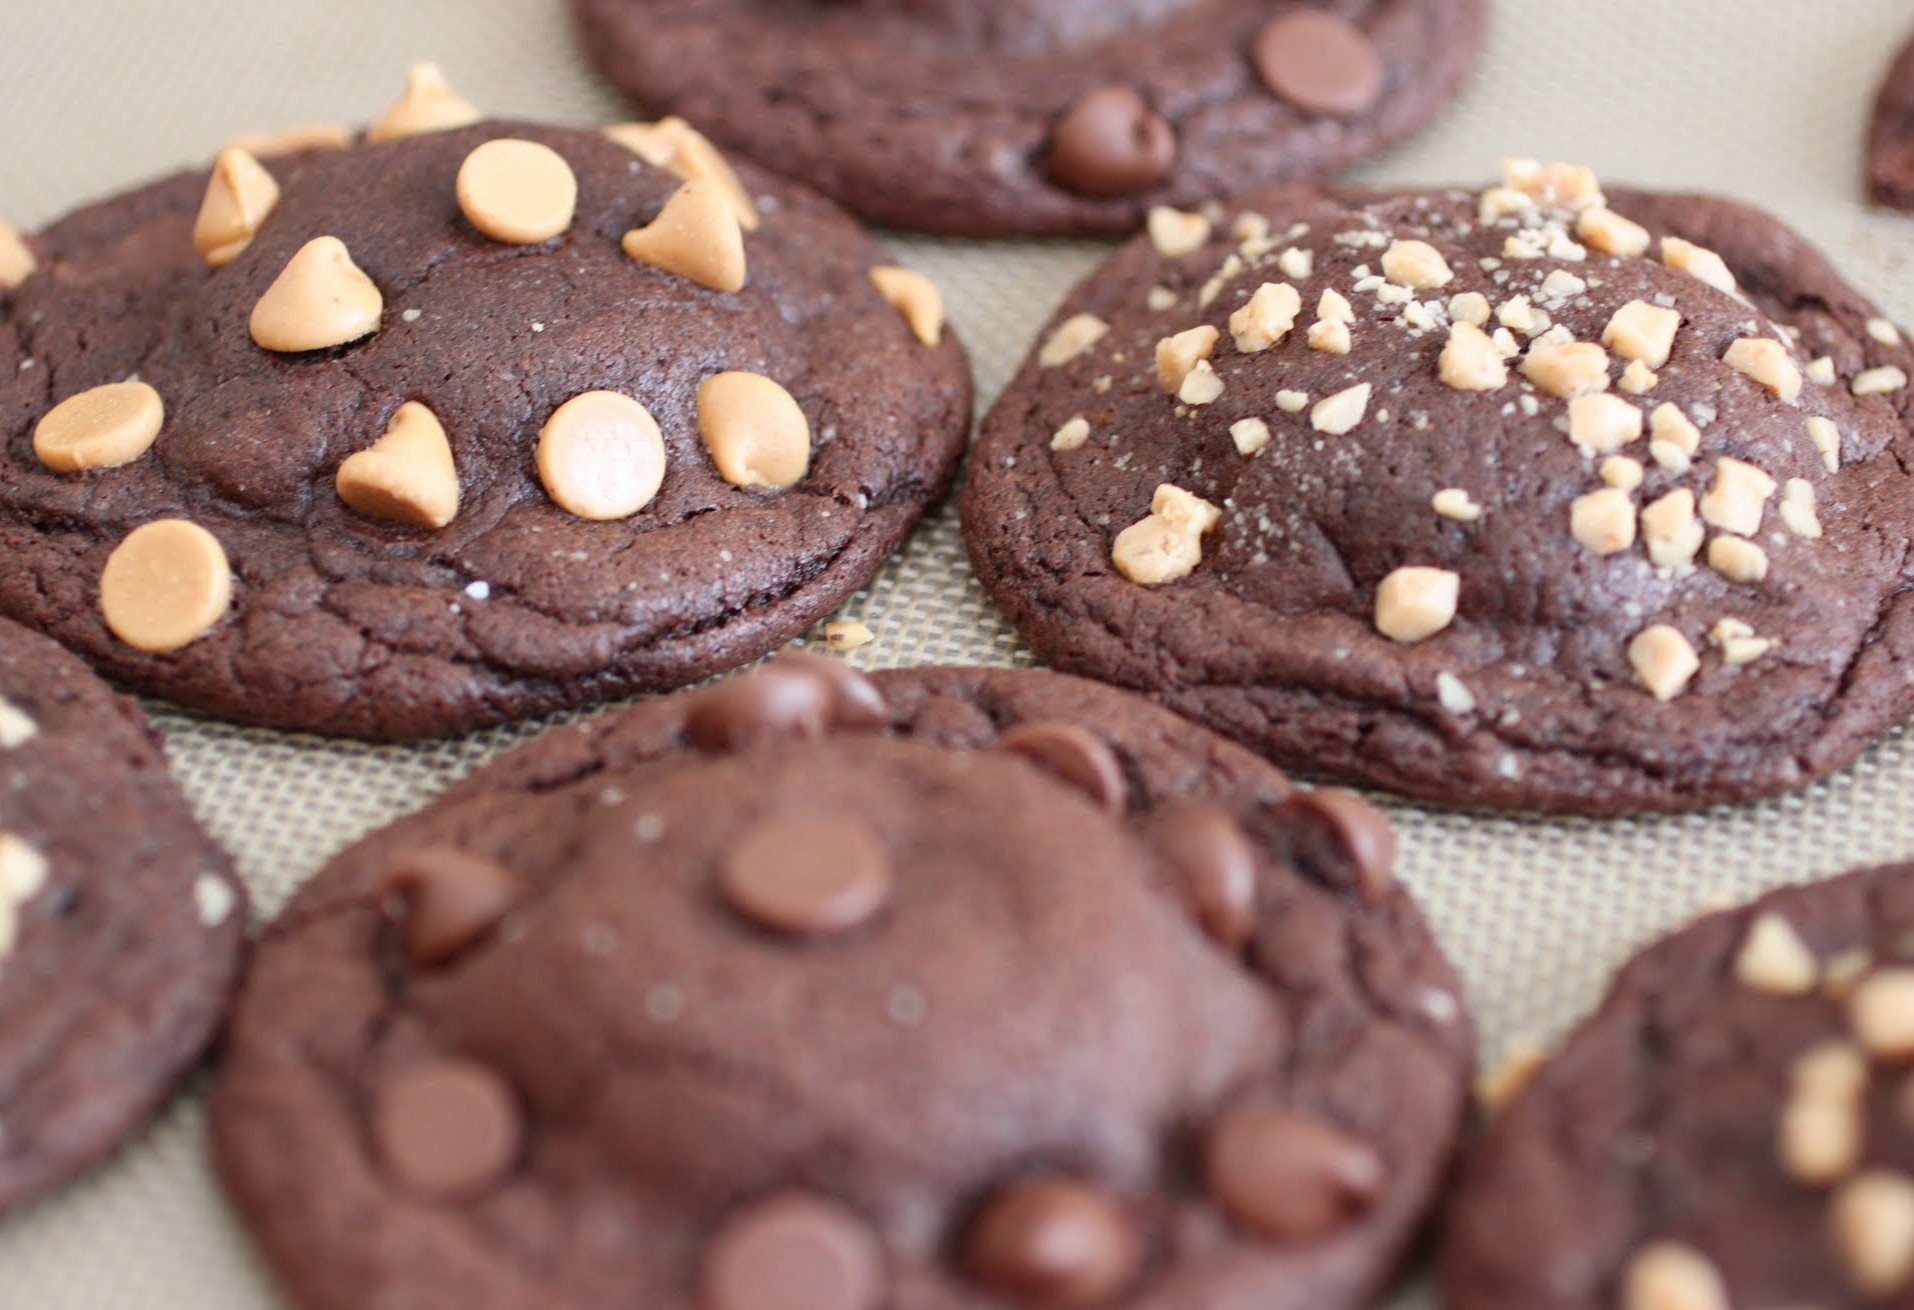
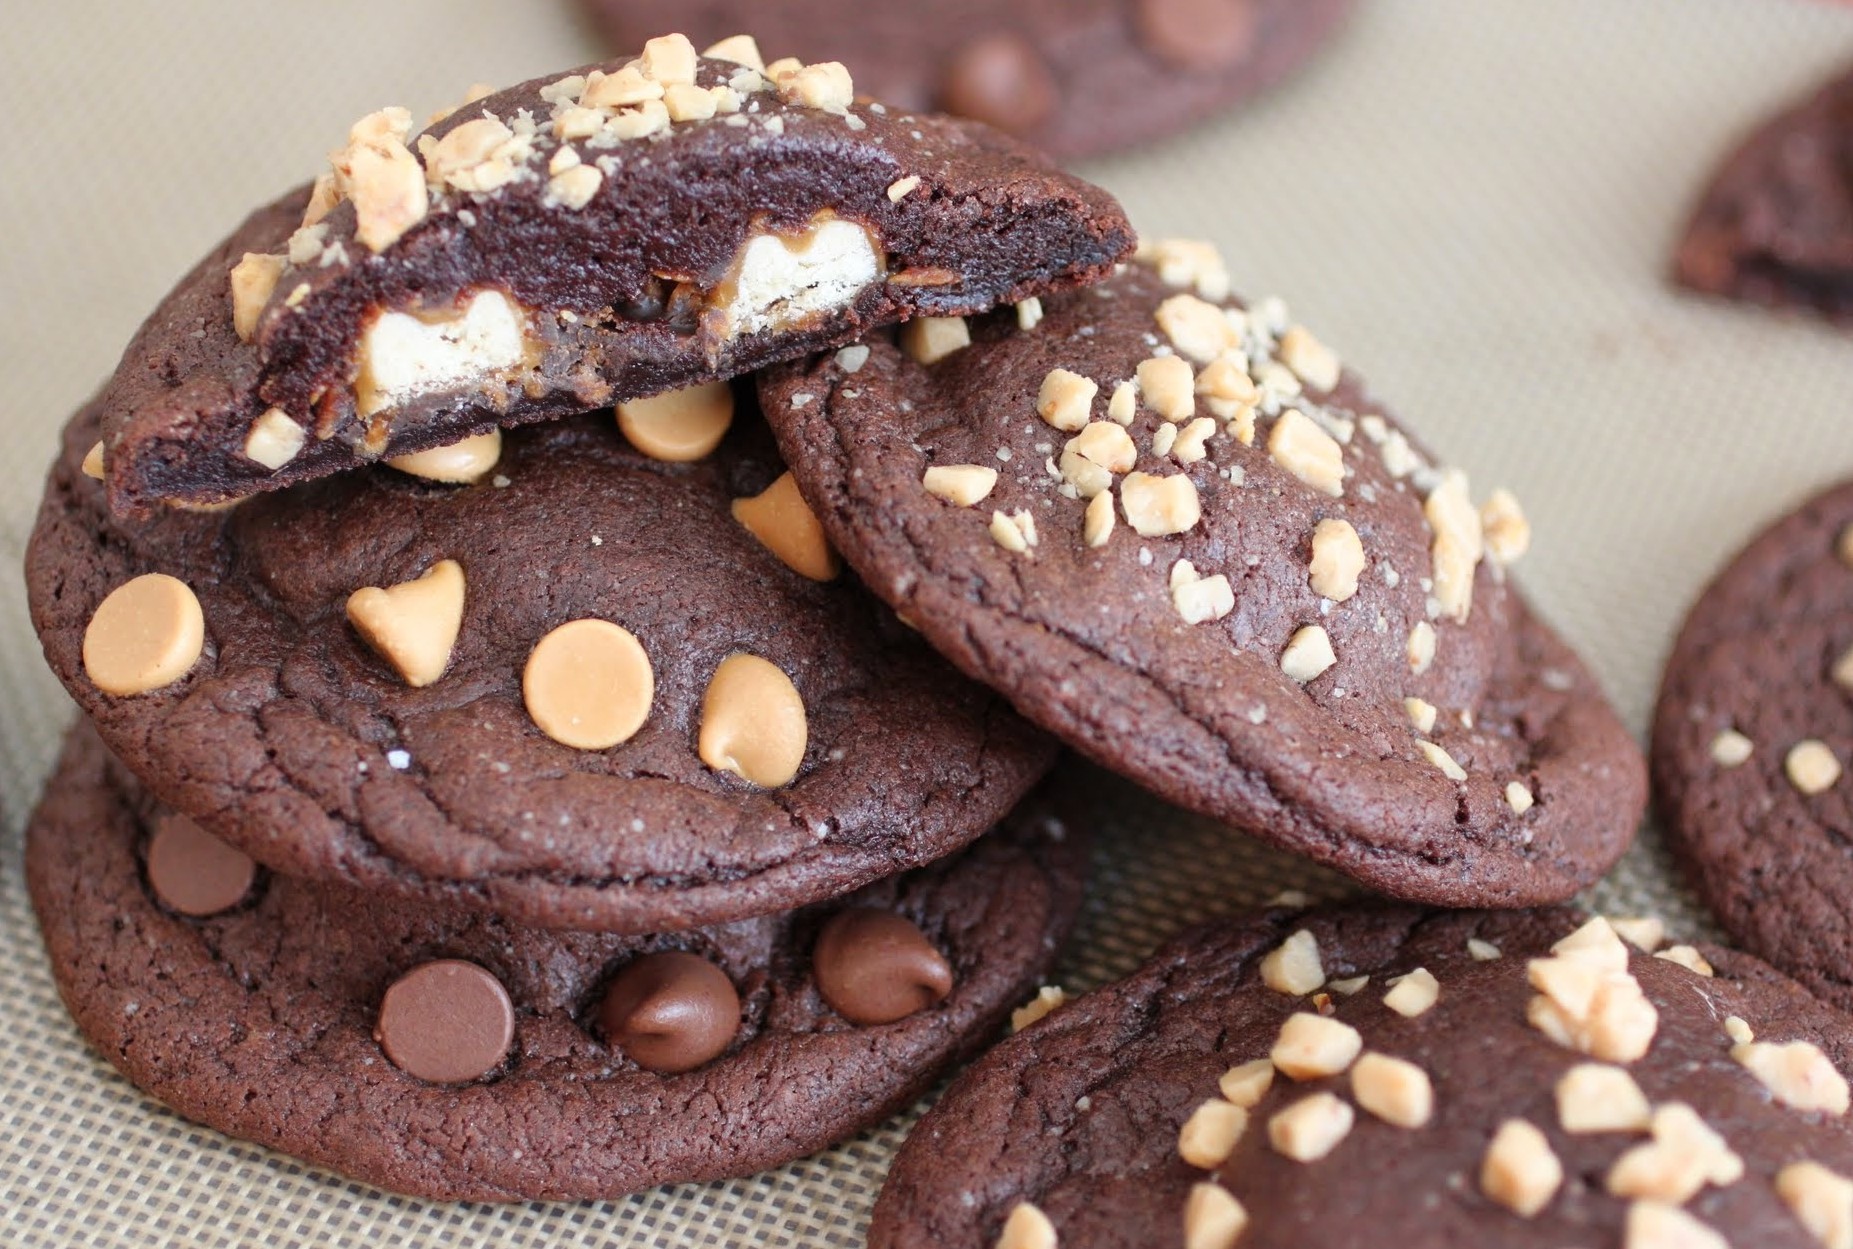
When I bake with Girl Scout cookies, it’s always with being fair in mind. I use the three top favorites somewhat evenly and then dabble a bit in desserts involving other flavors. Last year, I made these mini-cheesecakes with equity as a goal. I do have one Trefoil recipe coming up, but today is all about those three superstars: Tagalongs, Thin Mints, and Samoas.
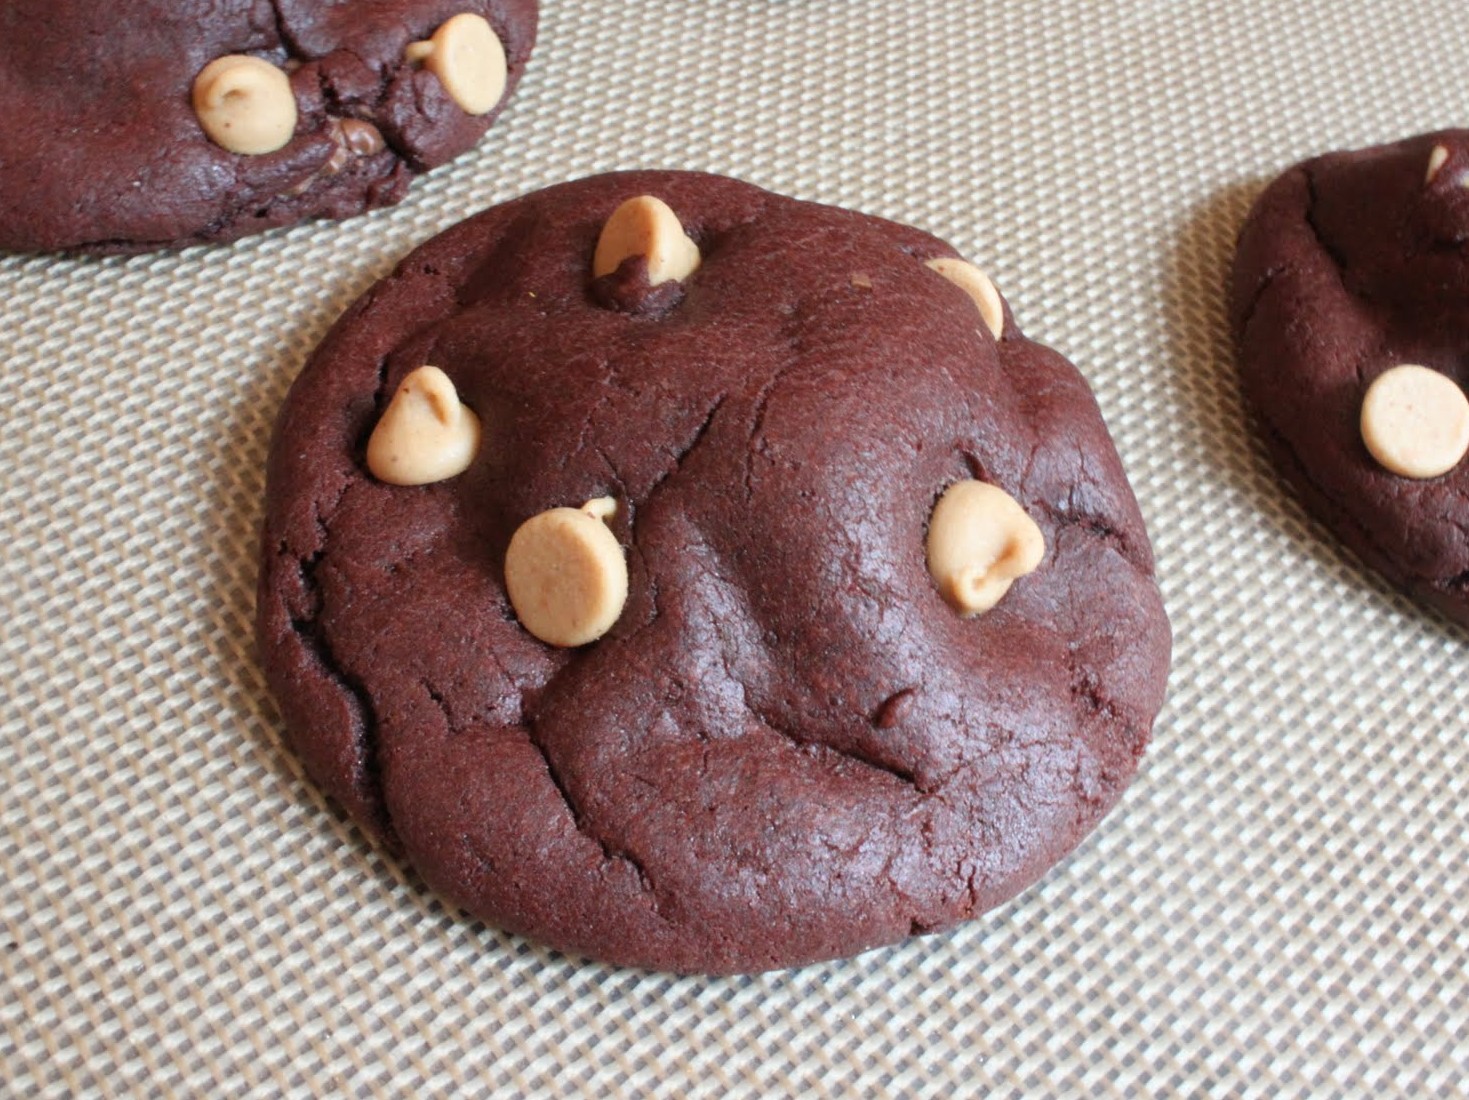
This recipe is simple, fun, and easy to do with kids if you’re into that kind of torture. The base is a cake mix chocolate cookie, which then gets wrapped around the various Girl Scout Cookie flavors. I have a code that makes it easy to remember which is which: Tagalongs get topped with peanut butter chips, Thin Mints with chocolate chips, and Samoas with Heath toffee bits.

Like all cake mix cookies, these bake up instantaneously and without additional fridge chill time. And when they’re done, they’re fudgy and an oh-so-perfect pillow for the cookie nestled inside. It really is hidden treasure. What could be more valuable than finding a Girl Scout cookie hiding inside another giant cookie?
Well, women’s rights are probably more valuable, but let’s not squabble over it. The worst thing is when women tear one another down about the choices their sister-friends have made, so let’s let that one go. Instead, go eat a cookie. Do it for yourself, for Girl Scouts, and for women in America!
Ingredients
Instructions
- Preheat the oven to 350. Line two cookie sheets with parchment paper or silicone baking mats.
- In a medium-sized bowl, combine the first 5 ingredients and mix thoroughly until a smooth cookie dough forms. Set aside.
- Take out your Girl Scout cookies and garnishes.
- For each cookie, make a flat disc of dough. Put the Girl Scout cookie in the middle and then cover with another flat disc of dough. Pinch the sides together so the entire cookie is covered in cookie dough.
- For the Tagalong-stuffed cookies, press peanut butter chips into the top. For Thin Mints, use the chocolate chips, and for Samoas, use the toffee bits.
- Place the cookies two inches apart on the baking sheets.
- Bake for 10 minutes. Cool completely. Store in an airtight container.
I may have mentioned before that my son doesn’t like chocolate. So whenever it comes time to bake for him, life gets complicated. Because you know, he’s picky. He’s not fond of caramel either, or certain textures really get to him. But candy? Candy is always okay. And candy corn is even better! And when baked into a cookie?
Yep. Happiness!
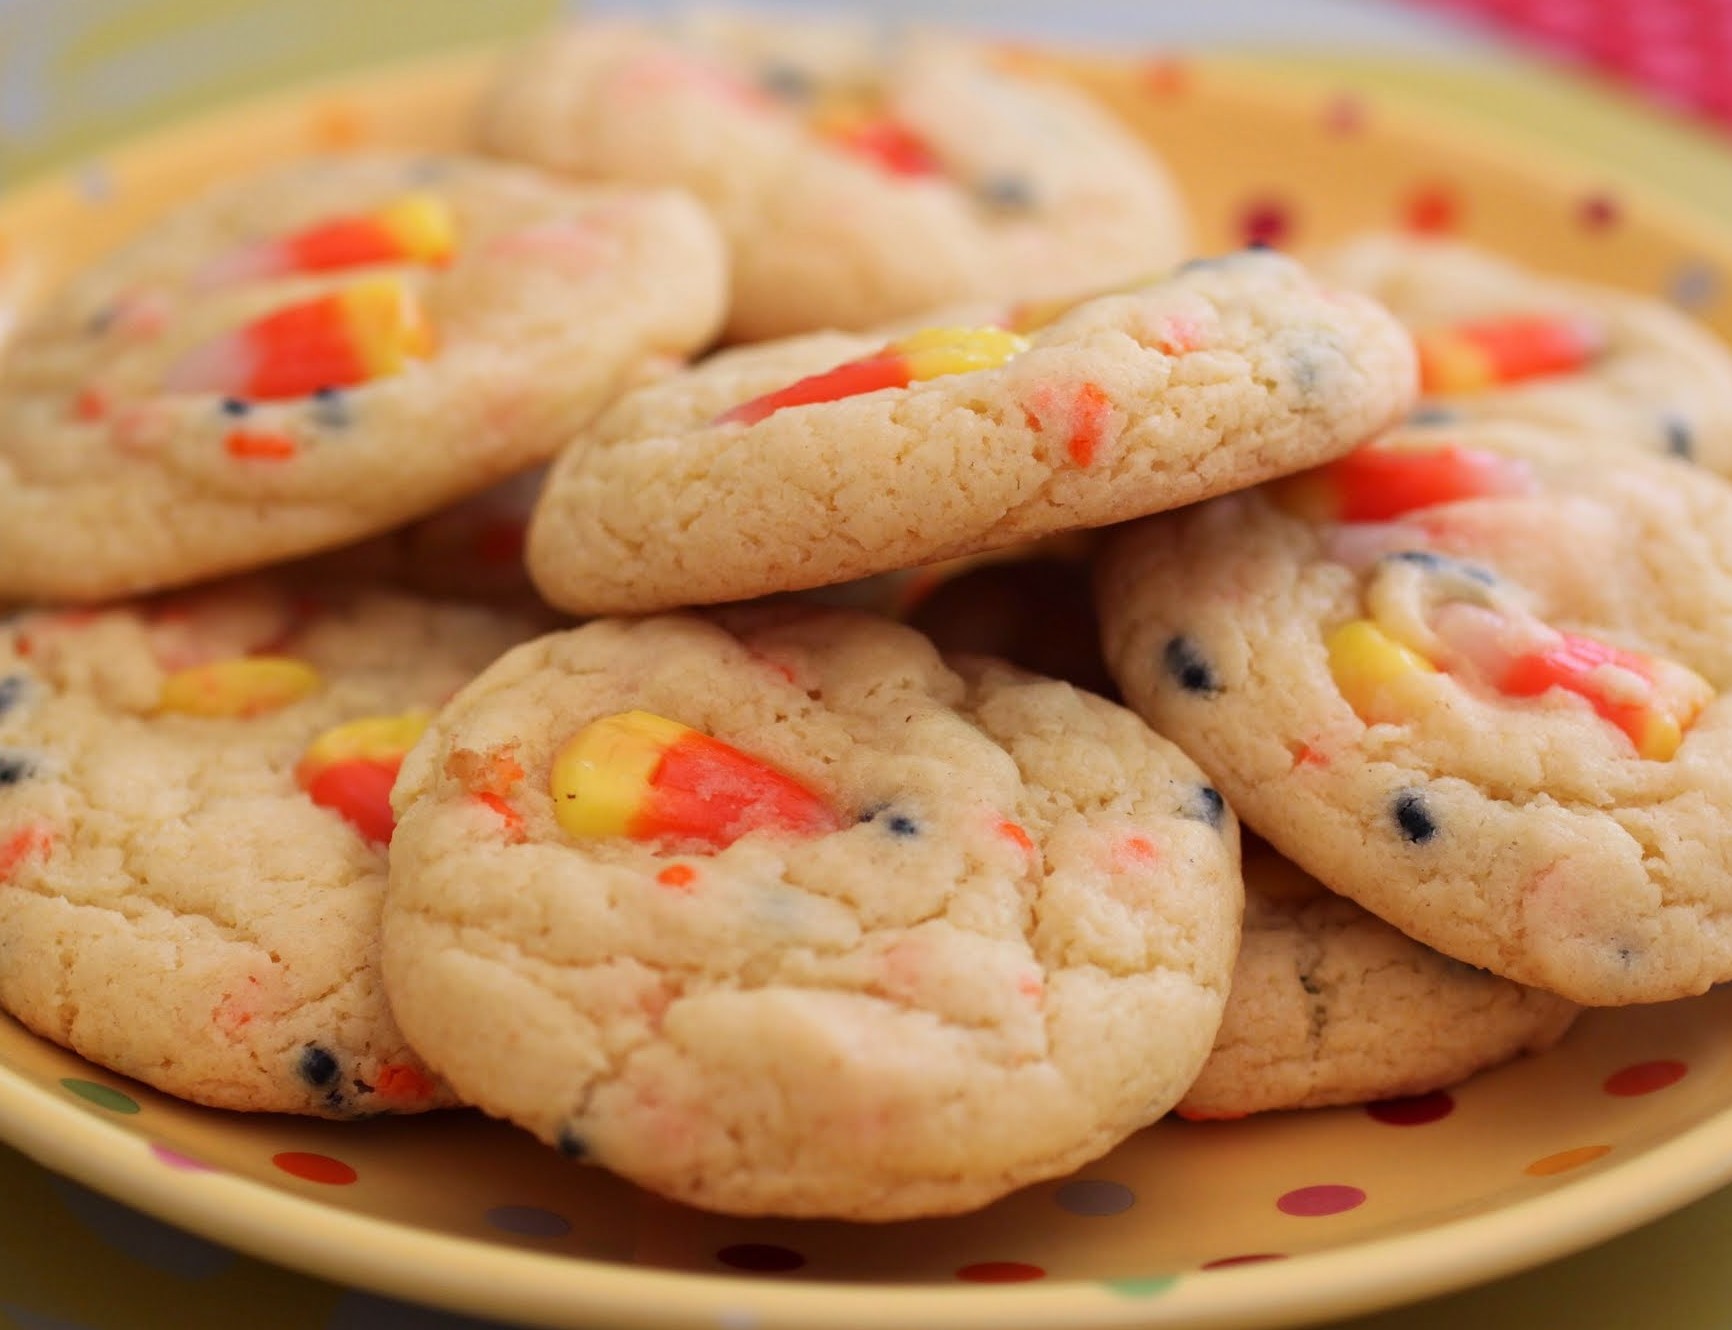
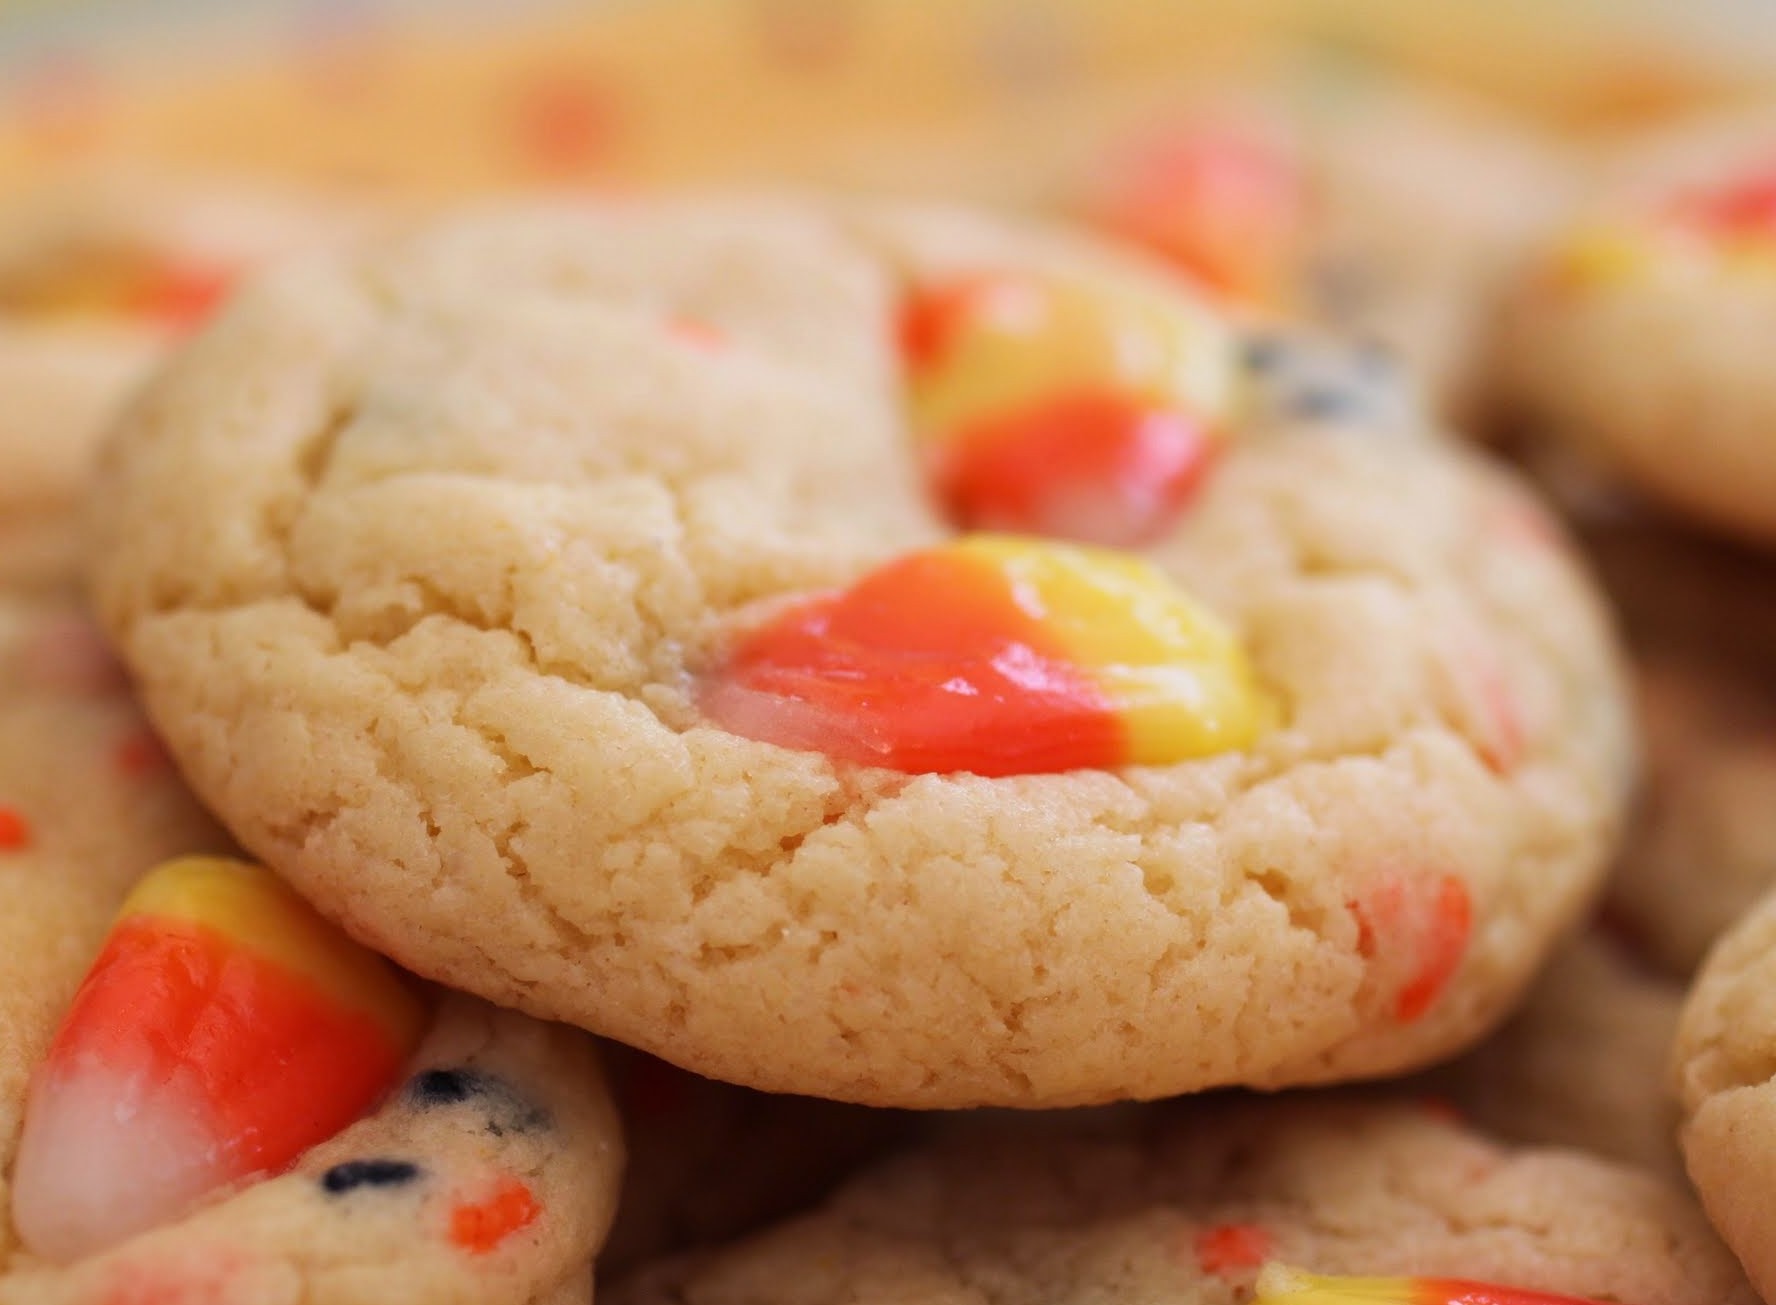
I used the Halloween Funfetti cake mix to do these. Because really, who can resist Funfetti? The sprinkles in the mix are shaped like bats and pumpkins. That’s kind of impossible to tell, they’re so small. But that’s the idea!
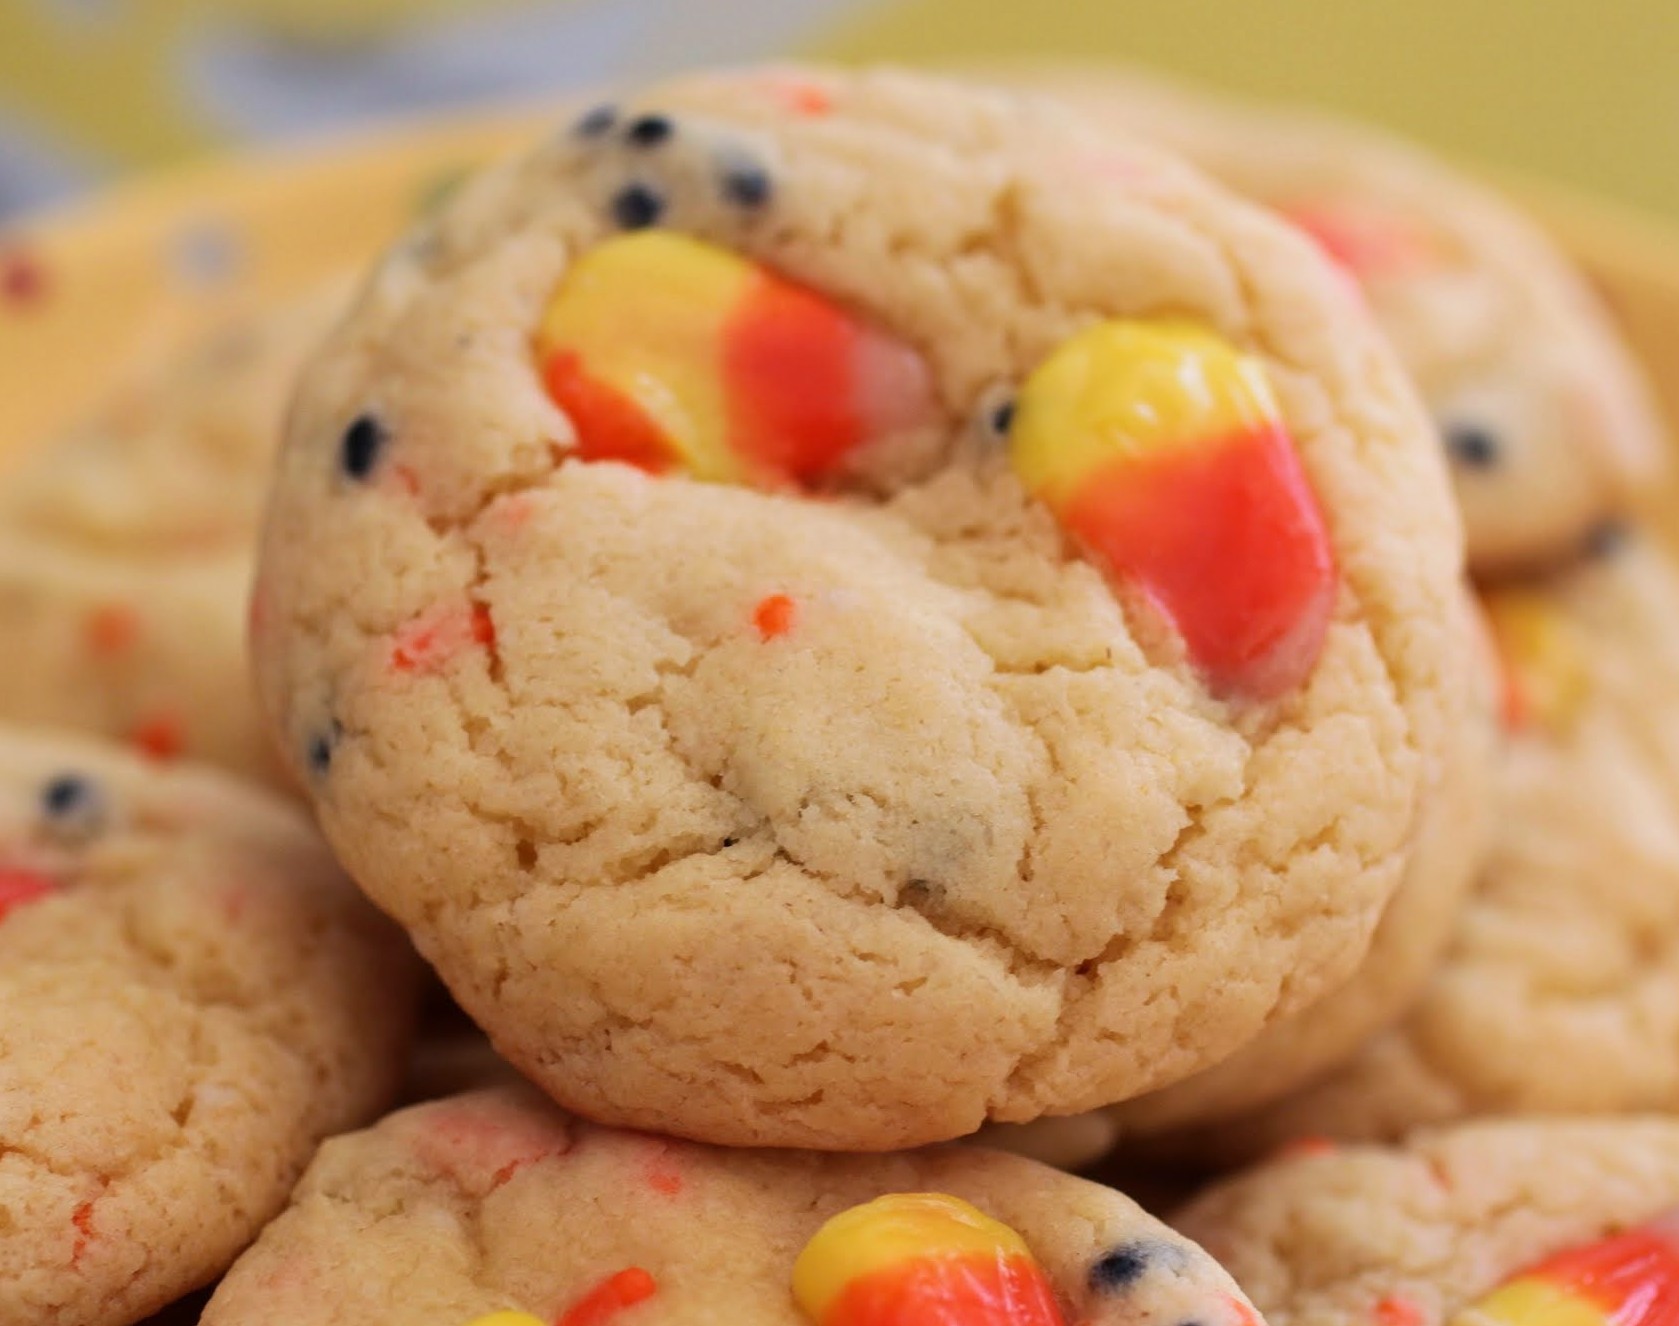
In terms of the cookie dough, I used cake mix. What would better mesh with that extreme sweetness of candy corn than a good cake batter taste? They were the perfect combination. I really couldn’t stop eating these, but more importantly, neither could my son.

It was a good half birthday! Mine’s on Valentine’s Day. Feel free to bake me some cookies then, too!
Ingredients
Instructions
- Preheat the oven to 350. Line a cookie sheet with parchment paper or a silicone baking mat.
- In a bowl, combine the first 5 ingredients and mix well. Fold in 1/2 cup of the candy corn, reserving the rest.
- Roll the dough into balls about 1 and 1/2 tablespoons in size. Be sure that the bottom and sides of the dough balls have no candy corn sticking out, because they will melt and bleed onto your baking sheet.
- Place the dough on the baking sheet and press candy corn into the top for aesthetic purposes.
- Bake 10-12 minutes until set. Cool completely and store in an airtight container.
]]>
Someday I’m going to live in a warm climate. Someday.
But for now, I just have to do things to keep myself from getting all maudlin. Enter these whoopie pies!
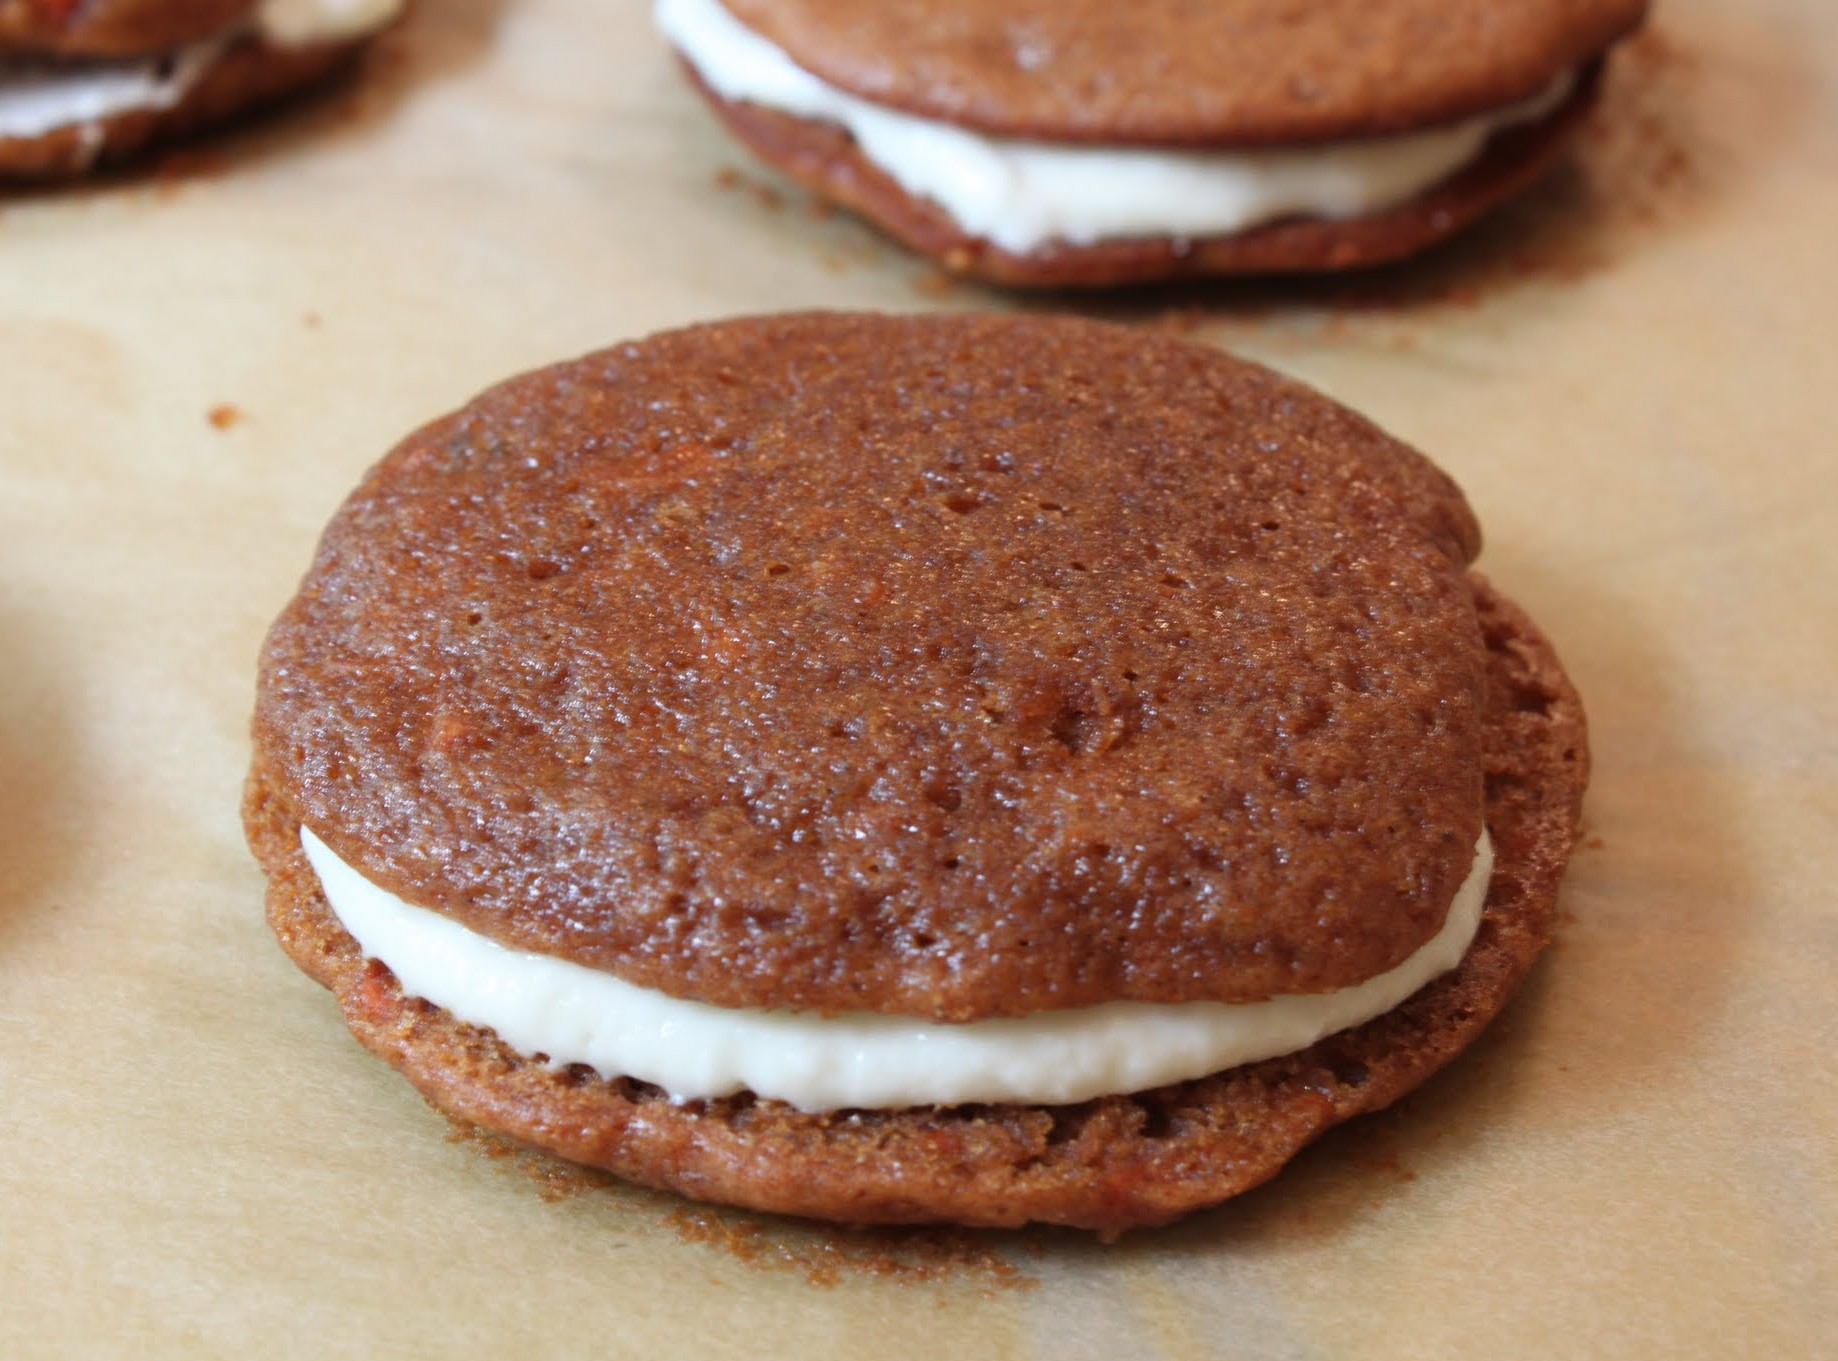
Once a year, I bake a few carrot cake recipes in honor of my sister-in-law. Her birthday is next week, and she loves carrot cake. A lot. So in the next few days I’ll grab a grater and make a homemade carrot cake. That’s how grateful I am that somebody loves my brother! I kid, I kid. He’s very lovable.

For these, I used a mix. Duncan Hines (a.k.a. “Uncle Duncan” in my family) makes a “decadent” series of cake mixes with cool stuff added in, so this is from their carrot cake mix. It has a little raisin and carrot pouch in it that goes in the cake. Cute!
So I modified the instructions on the box, added frosting, and whoopie! Pies, that is.
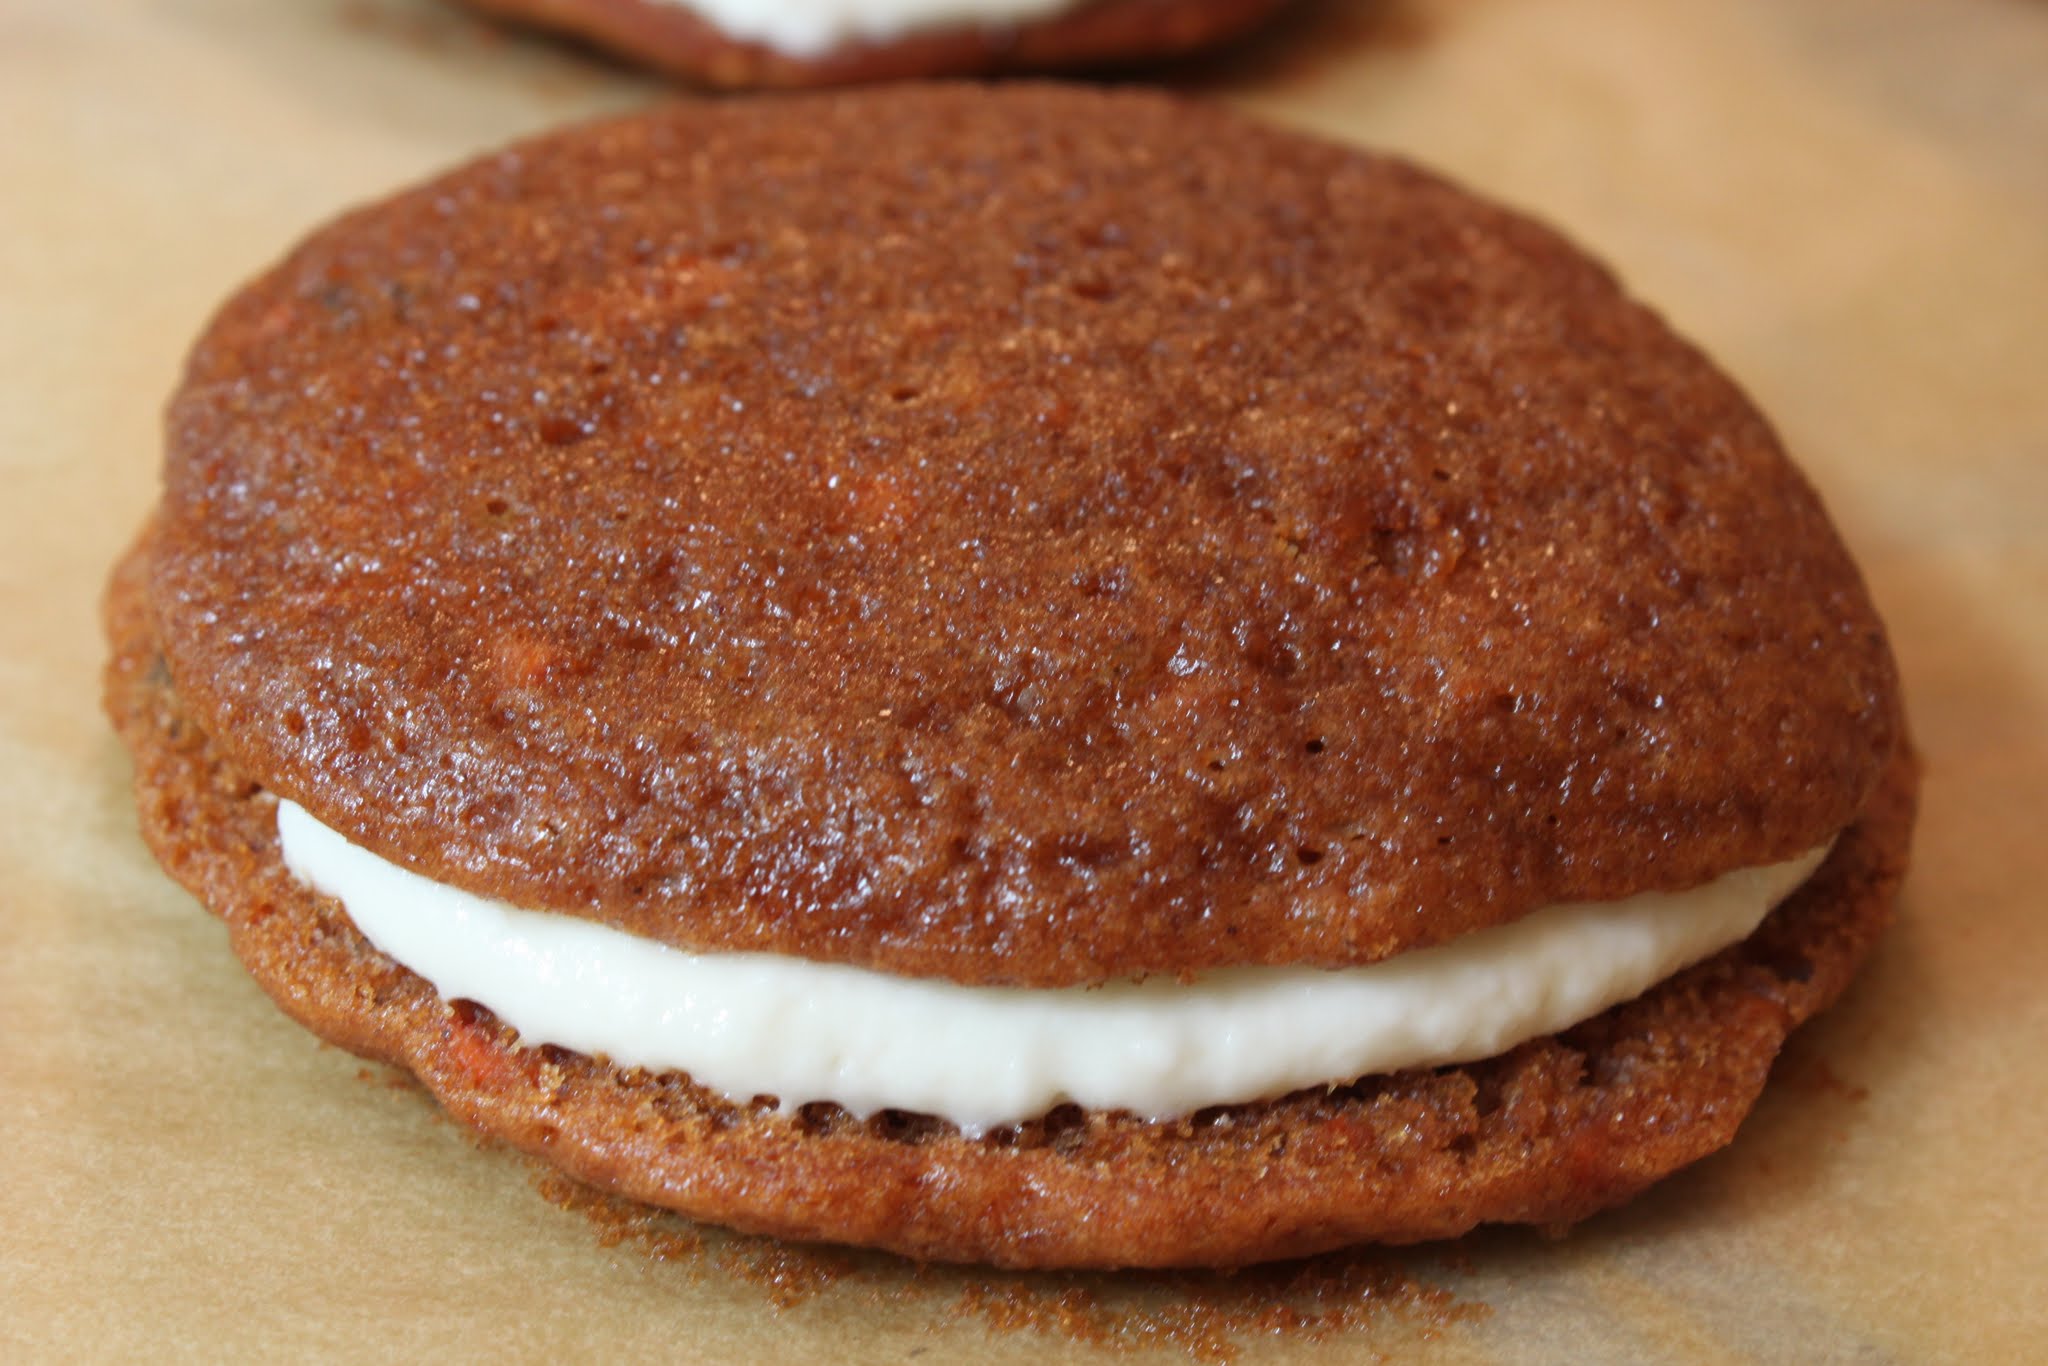
They were super soft and something to celebrate. And I didn’t even have to convince my son that they were good since there was no chocolate involved. He thought it was pumpkin, though. His palate needs just a bit of work.

So happy almost birthday week to my sister-in-law! Everyone needs a favorite cake flavor (peanut butter brownie, anyone?). Hope you get yours on your birthday!
Whoopie Pies:
- 1 box carrot cake mix
- 3 eggs
- 1/2 cup oil
- 1/2 cup water
Filling
- 1 cup unsalted butter, softened to room temperature
- 1 and 1/2 cups powdered sugar
- 1 teaspoon vanilla
- 1 heaping tablespoon cream cheese
Instructions:
Preheat the oven to 350. Line cookie sheets with parchment paper or silicone baking mats.
In a medium-sized bowl, mix all the whoopie pie ingredients until a smooth batter forms. Spoon the batter onto the prepared cookie sheets in 1 and 1/2-inch circles, spacing the circles 2 inches apart. Bake for 10 minutes.
While the whoopie pie cakes are cooling, make the frosting. Beat the butter in the bowl of a stand mixer until creamy. Slowly add the powdered sugar, beating after each addition. When the powdered sugar is fully incorporated, add the vanilla and beat again. Finally, add the cream cheese, mixing one last time.
When the cakes are completely cool, either spread the frosting generously between two cakes or pipe it on. You can cut a hole in the corner of a Ziploc bag if you don’t have a pastry bag or piping tip.
Store at room temperature in an airtight container.
]]>
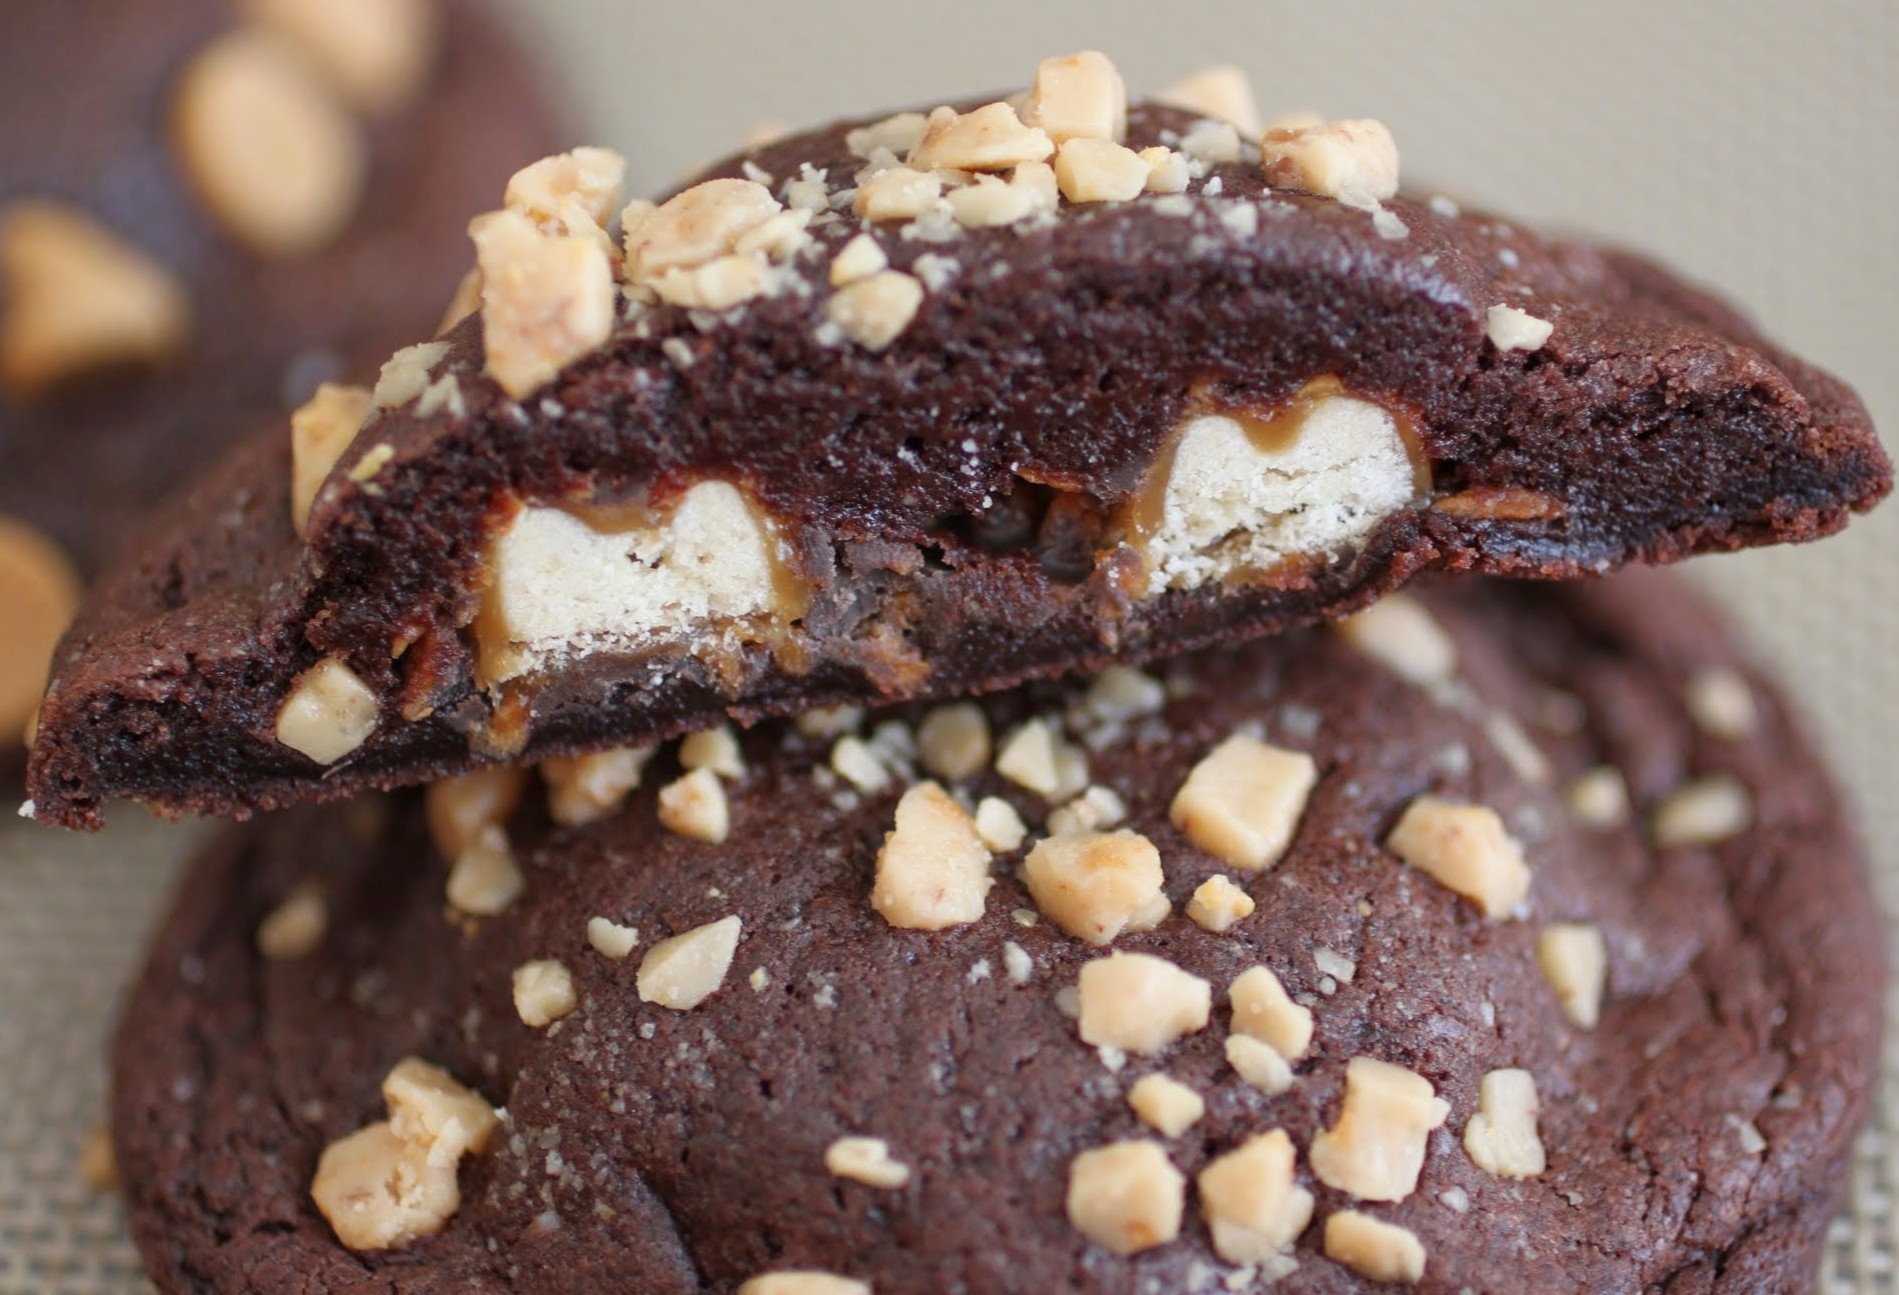
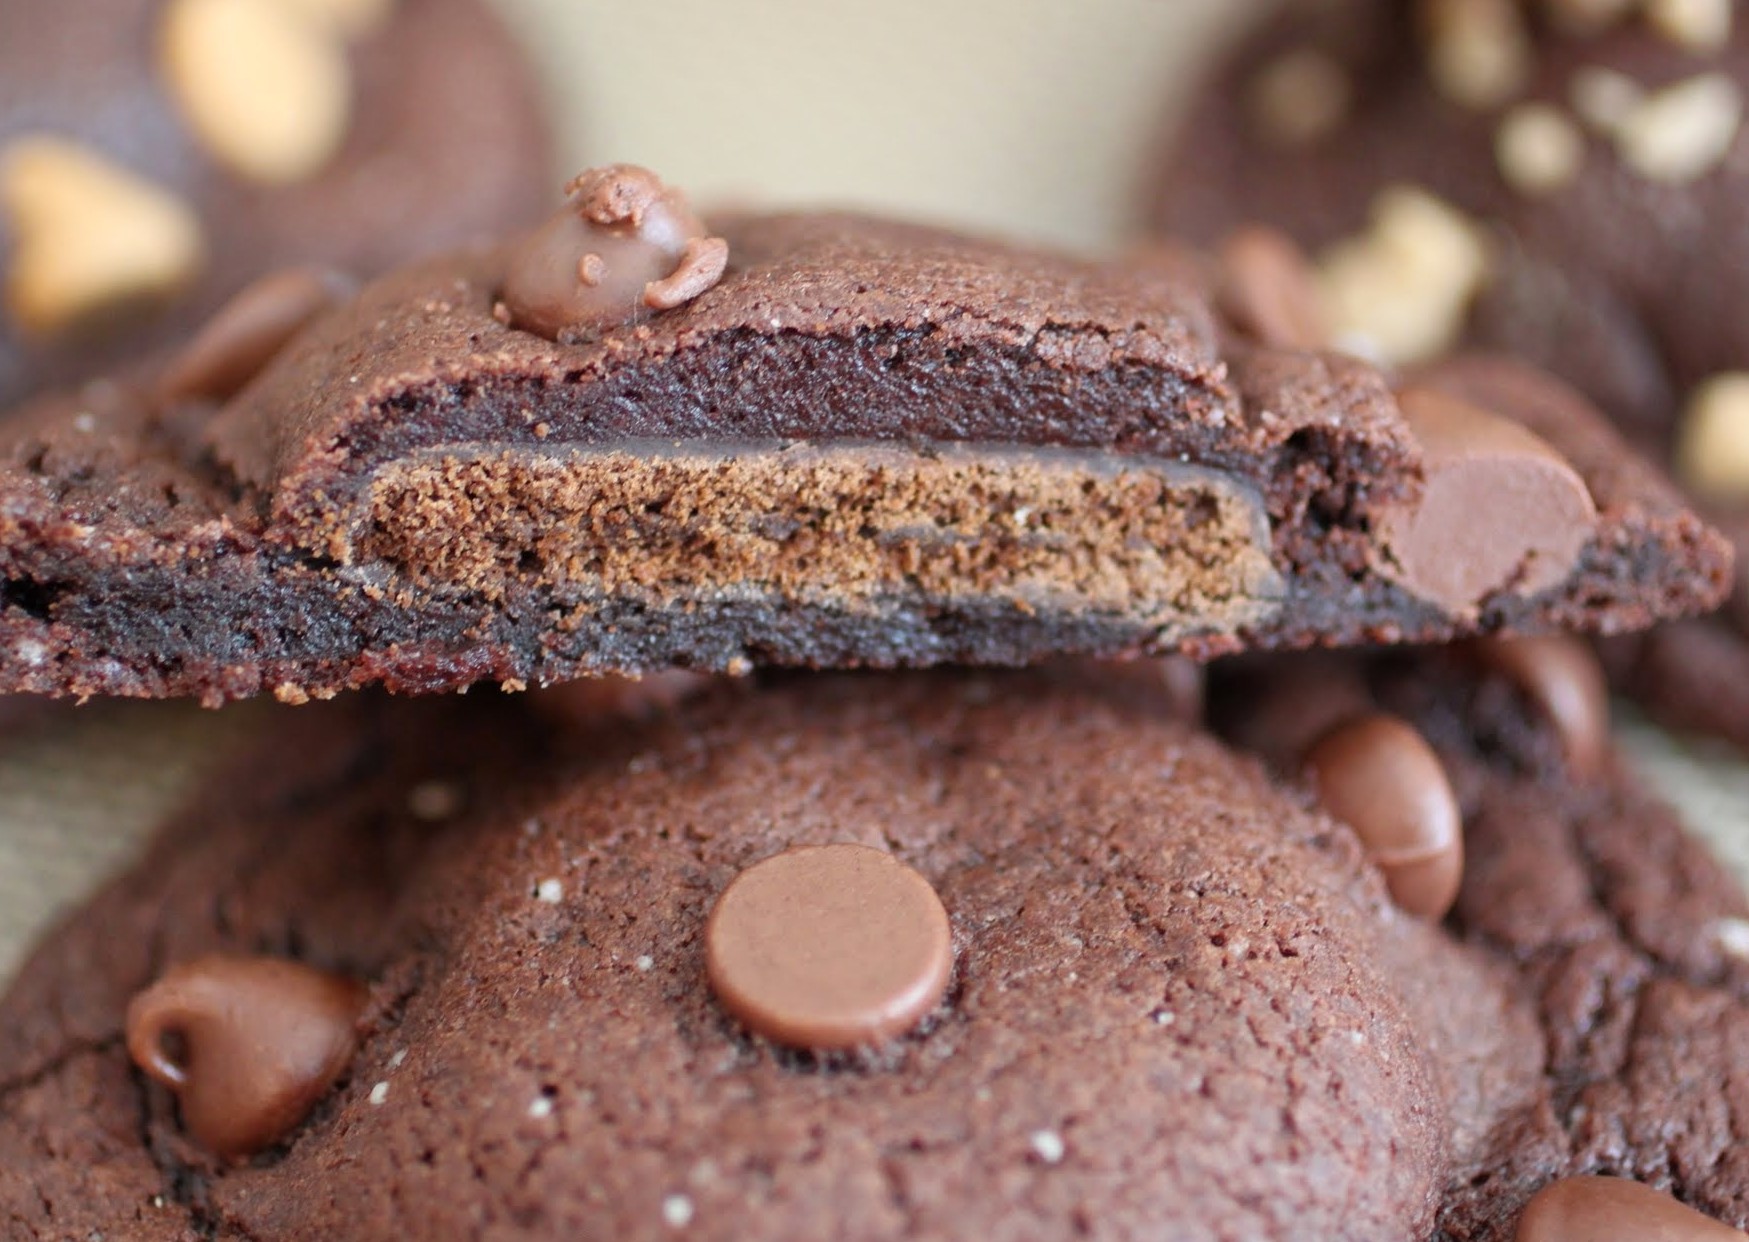
Every now and then, they’d serve the best slice and bake cookies in the universe. No, I’m not exaggerating, so leave me alone. They were really the best. And I’ve hunted them down for years without any luck. It’s so sad!

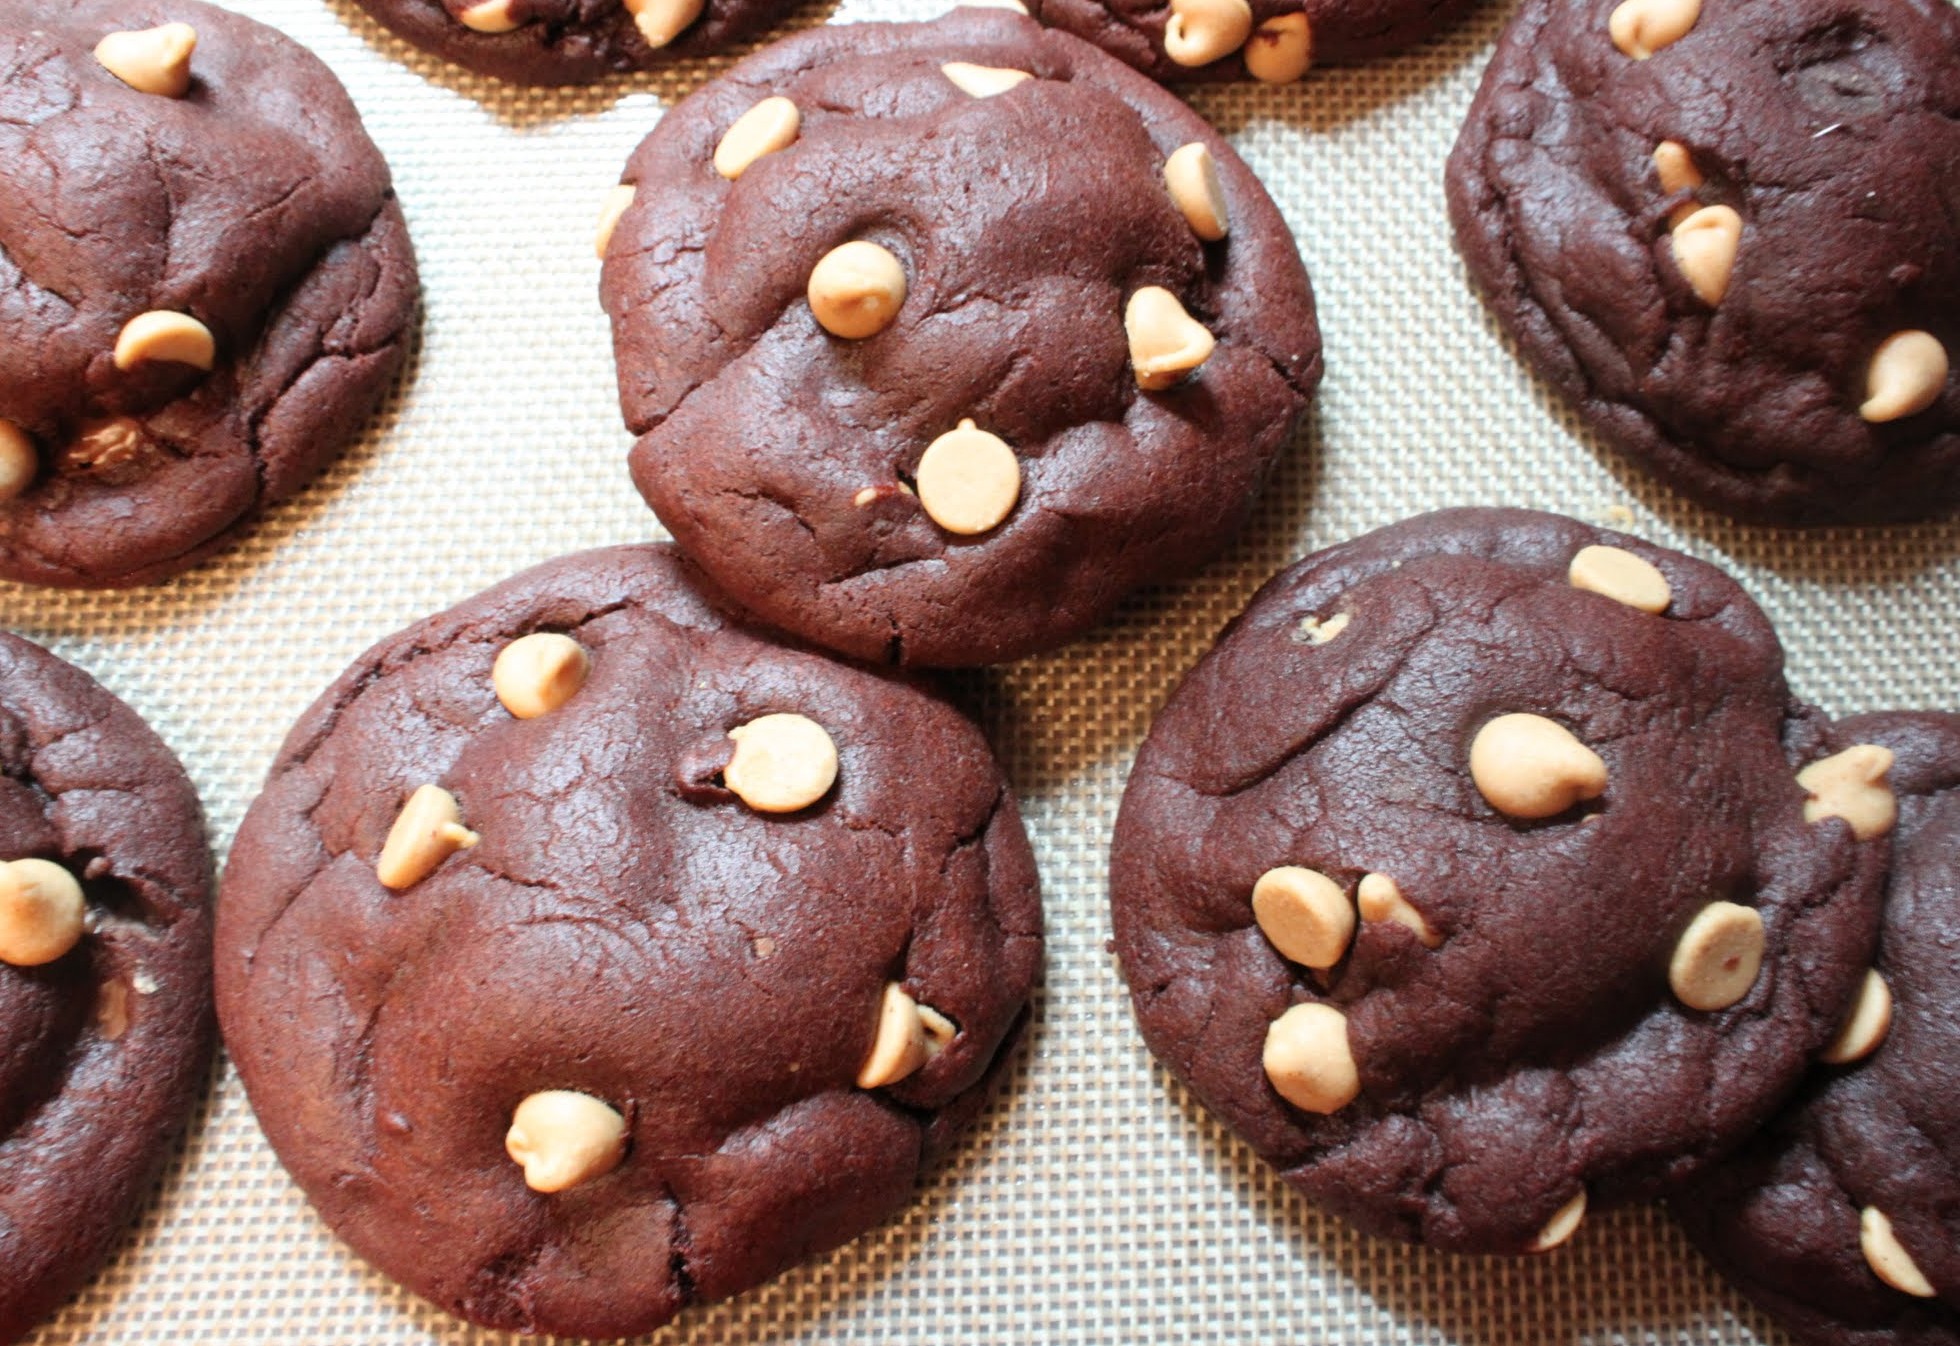
They were rich chocolate cookies, huge ones, with an amazing peanut butter center that reminded me of a Reese’s peanut butter cup. Can you wonder at all why these were my idea of perfection? Years later, I learned that this kind of cookie is called a Magic Middle. And while they are magical, they can take a while to make with both the cookie dough and the peanut butter center dough. So I made up a shortcut, a cheat, a whatever. And they taste even better than the labor-intensive ones!
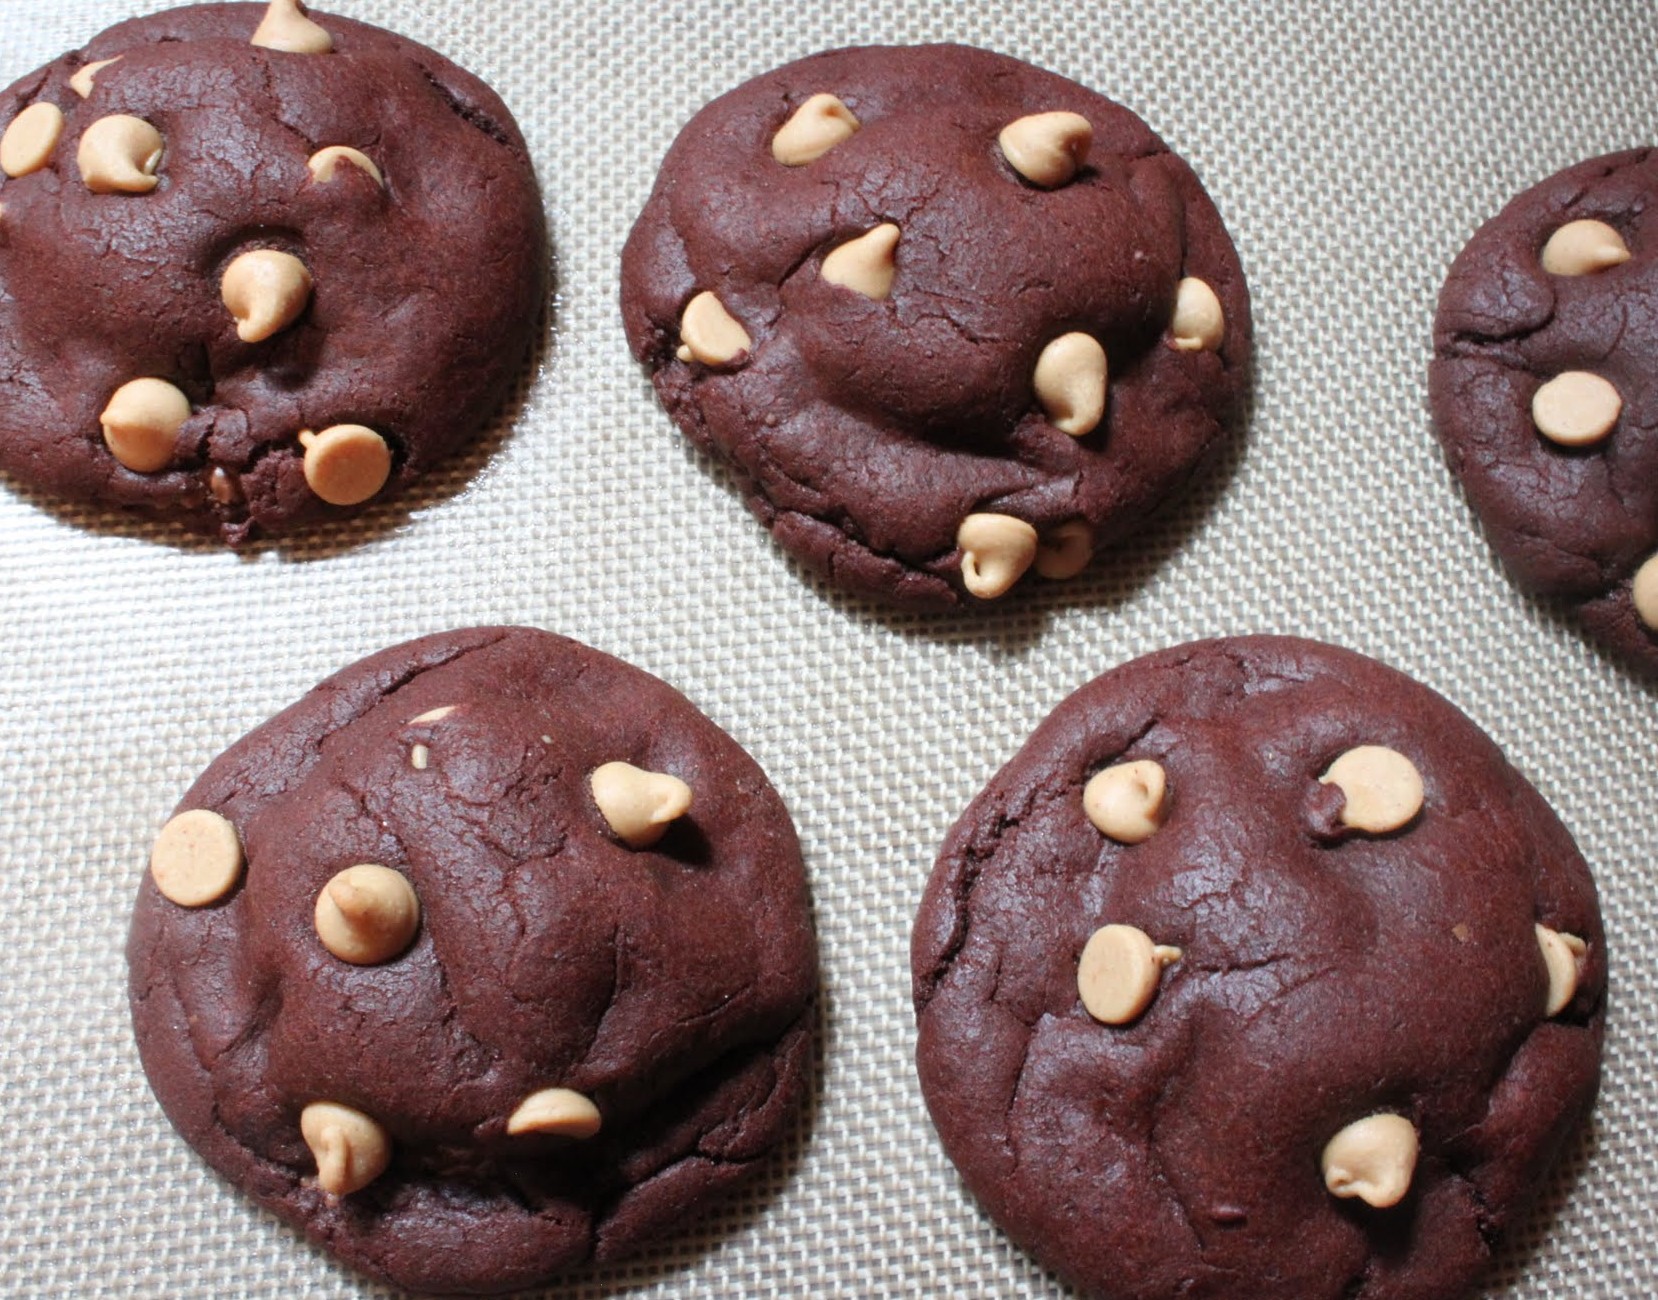
Yep, I used cake mix and actual Reese’s cups. I don’t care. I’m brilliant. It saves a ton of time, there’s no butter involved, and I get to have a giant Reese’s in the middle of my cookie. Plus, I added peanut butter chips for extra fun. I have not been able to stop eating these! They’ve been lunch for two days. Don’t even try to tell me I’m not a healthy person!
In fact, these are so good that I will probably not be able to make them again because it’s just too dangerous. I took myself on a date to the movies the other day and actually hid these in my purse for snacking. That’s so not me. But it was glorious! All I needed to complete the perfect moment was a Coke Slurpee.

I promise you that I never lie about the recipes that I’m really enthusiastic about. This is one of them! If you love peanut butter and chocolate, you must make this. You will never regret it! Just make sure you have a ton of people who want to share around you, or…yep. You’ll eat them all!
As usual, this is a super-quick recipe. I have some serious sun worshiping to do this time of year! With sunscreen, no worries. But there’s always time for cookies. Enjoy!
Ingredients:
- 1 box devil’s food cake mix
- 1 box (3.4 oz.) chocolate pudding mix
- 2 eggs
- 1/2 cup oil
- 1 teaspoon vanilla
- 1/2 cup peanut butter chips
- 12 regular-sized Reese’s peanut butter cups
Instructions:
Preheat the oven to 350. Line two cookie sheets with parchment paper or silicone baking mats.
In a medium-sized bowl, combine the first 5 ingredients and mix thoroughly until a smooth cookie dough forms. Add the peanut butter chips and mix again.
For each cookie, make a flat disc of dough. Put the unwrapped peanut butter cup in the middle and then cover with another flat disc of dough. Pinch the sides together so the entire peanut butter cup is covered in cookie dough.
Place the cookies two inches apart on the baking sheets. Press additional peanut butter chips into the tops of the cookies to make them prettier.
Bake for 10 minutes. Cool completely. Store in an airtight container.
]]>
Let me backtrack. When I became a mom, I decided I would bake for my children. They would take freshly made cookies for granted, know the exact texture and thickness of a perfect brownie, and crave my homemade creations with nostalgia when they grew up and left home.
I didn’t realize that small children don’t really like anything decadent. You have to keep it simple. Like, a plain cookie. A sugar one. With nothing else. Sigh. It doesn’t really appeal to my creativity, I’ll tell you that!
But I finally hit upon a cookie that both they and I love! Thank the powers above, because I was in the mood to be cute and girly today, not boring.
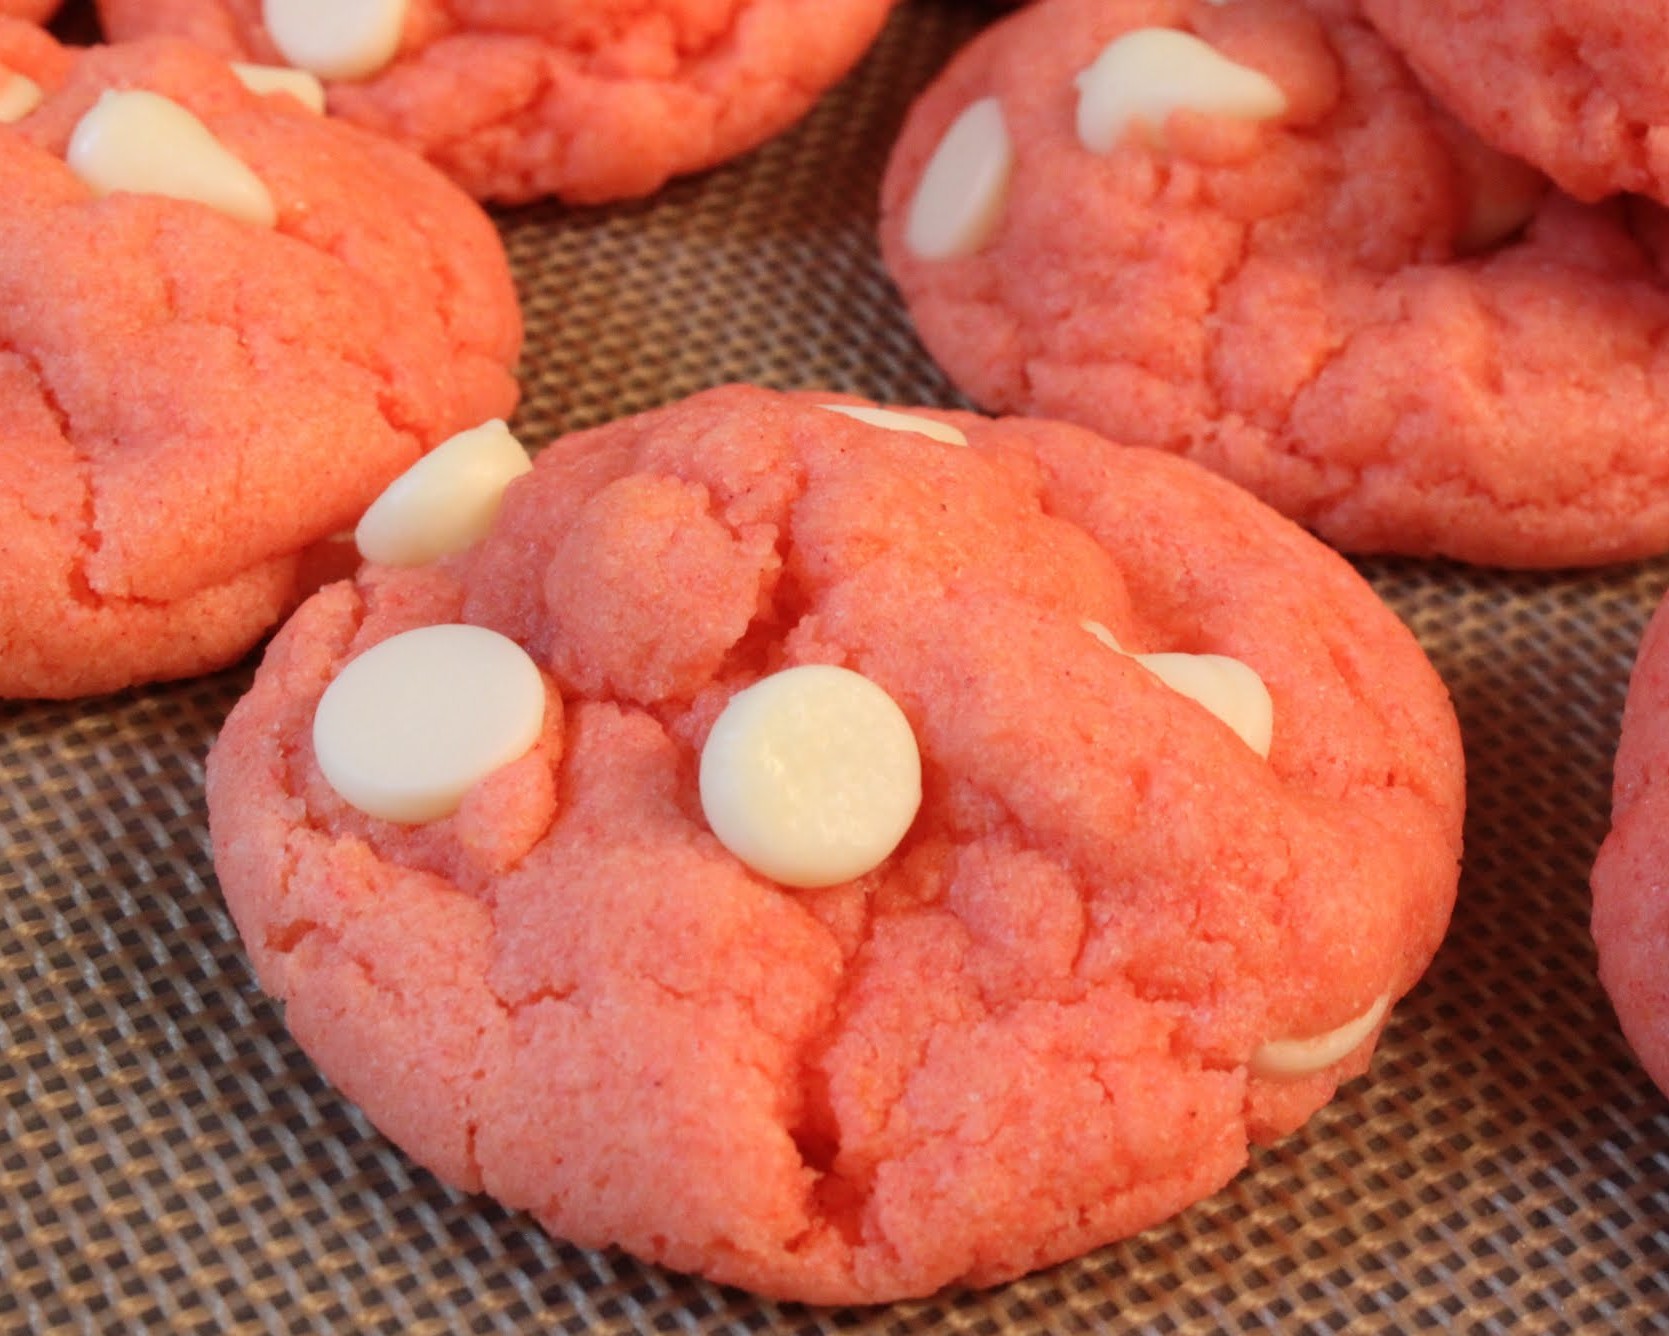
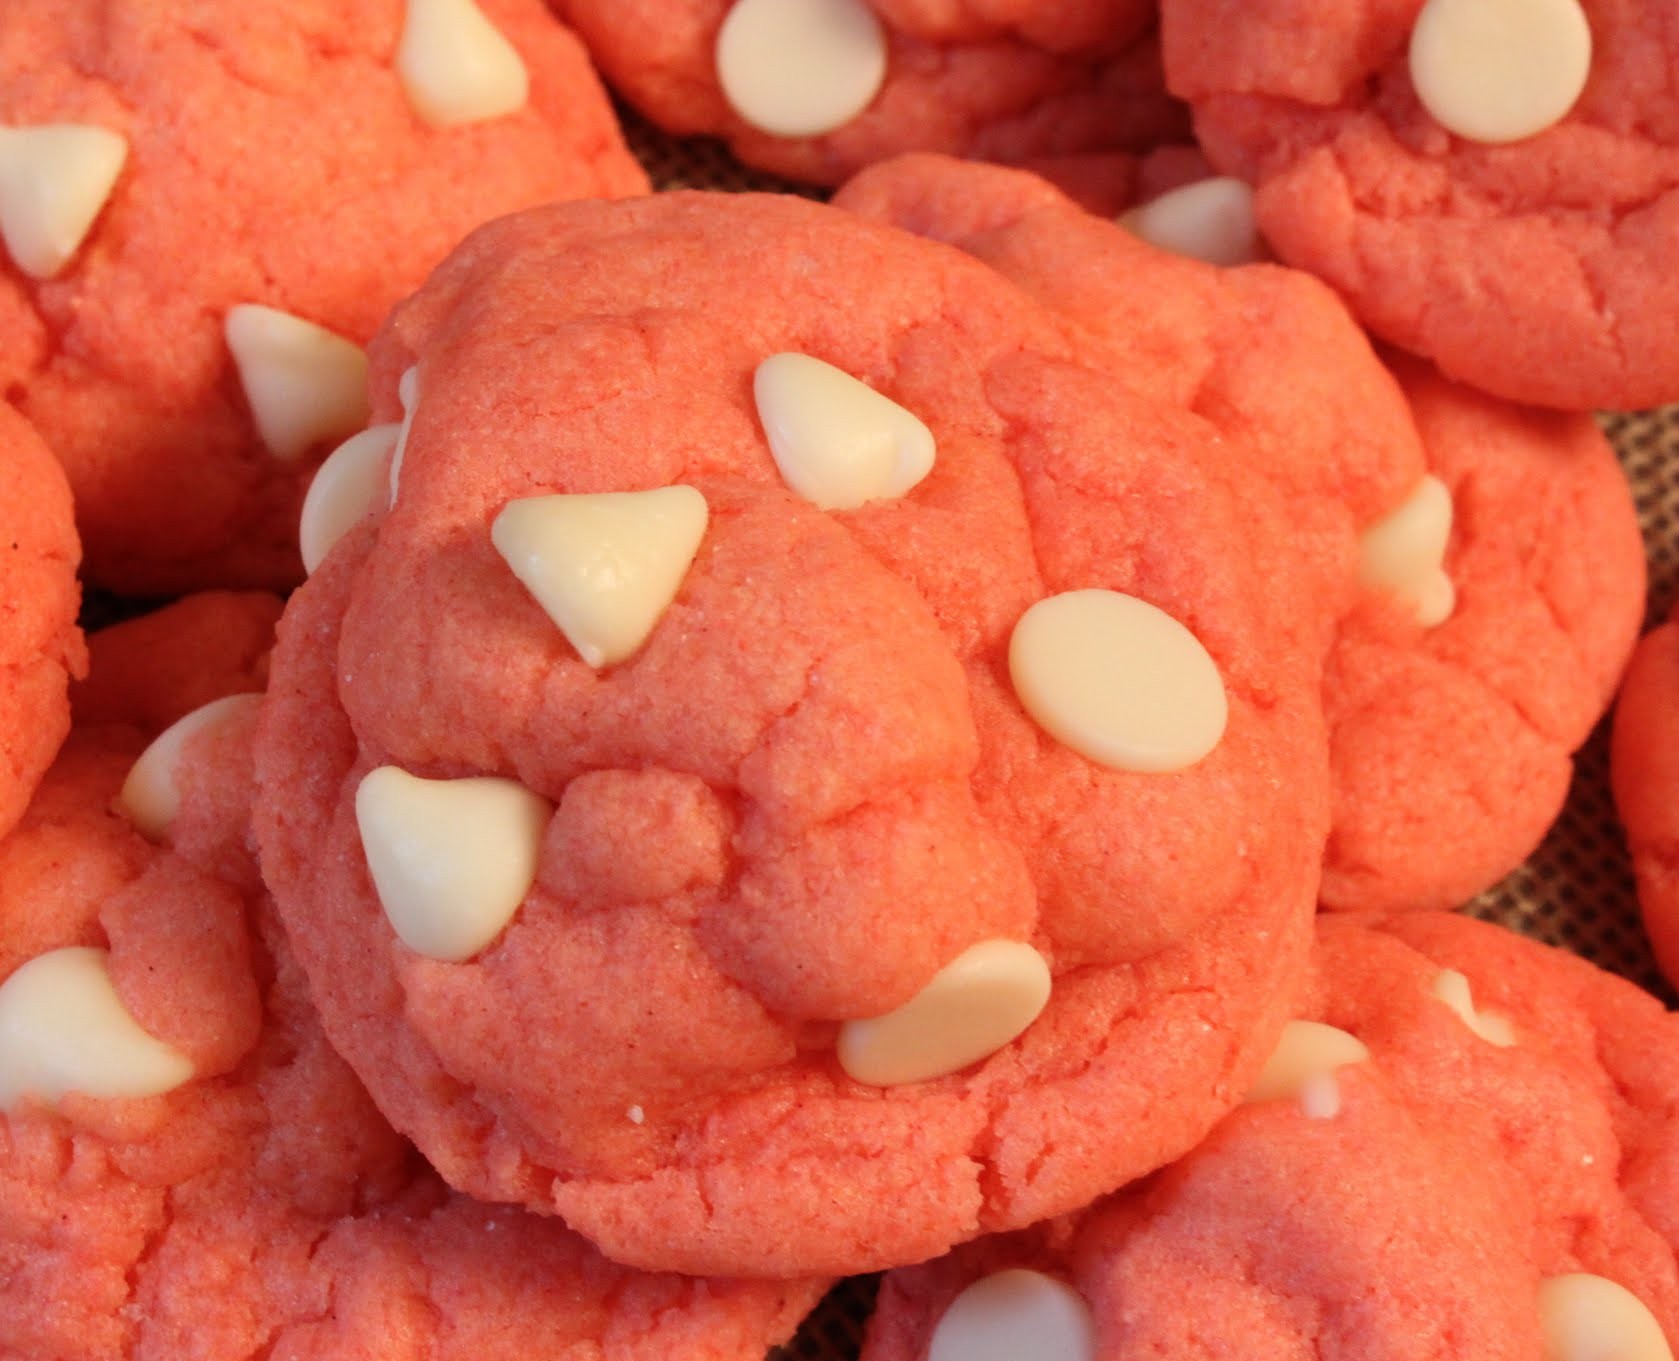
Can’t you tell? Look at these cookies. They’re precious! Pink and white and irresistible. I should know. I’ve been hiding them from my kids all day. But I can only hold out so long. I think they’re staging a rebellion. My son just walked by with a particularly dangerous look on his face. You know, a smile that you just know isn’t just a smile? And it’s scary?
So yeah, I’d better talk about these cookies quickly before they disappear before my eyes!

These are cake mix cookies, made with pink velvet cake mix and vanilla pudding. They come together super quick. And they’re so soft and thick!
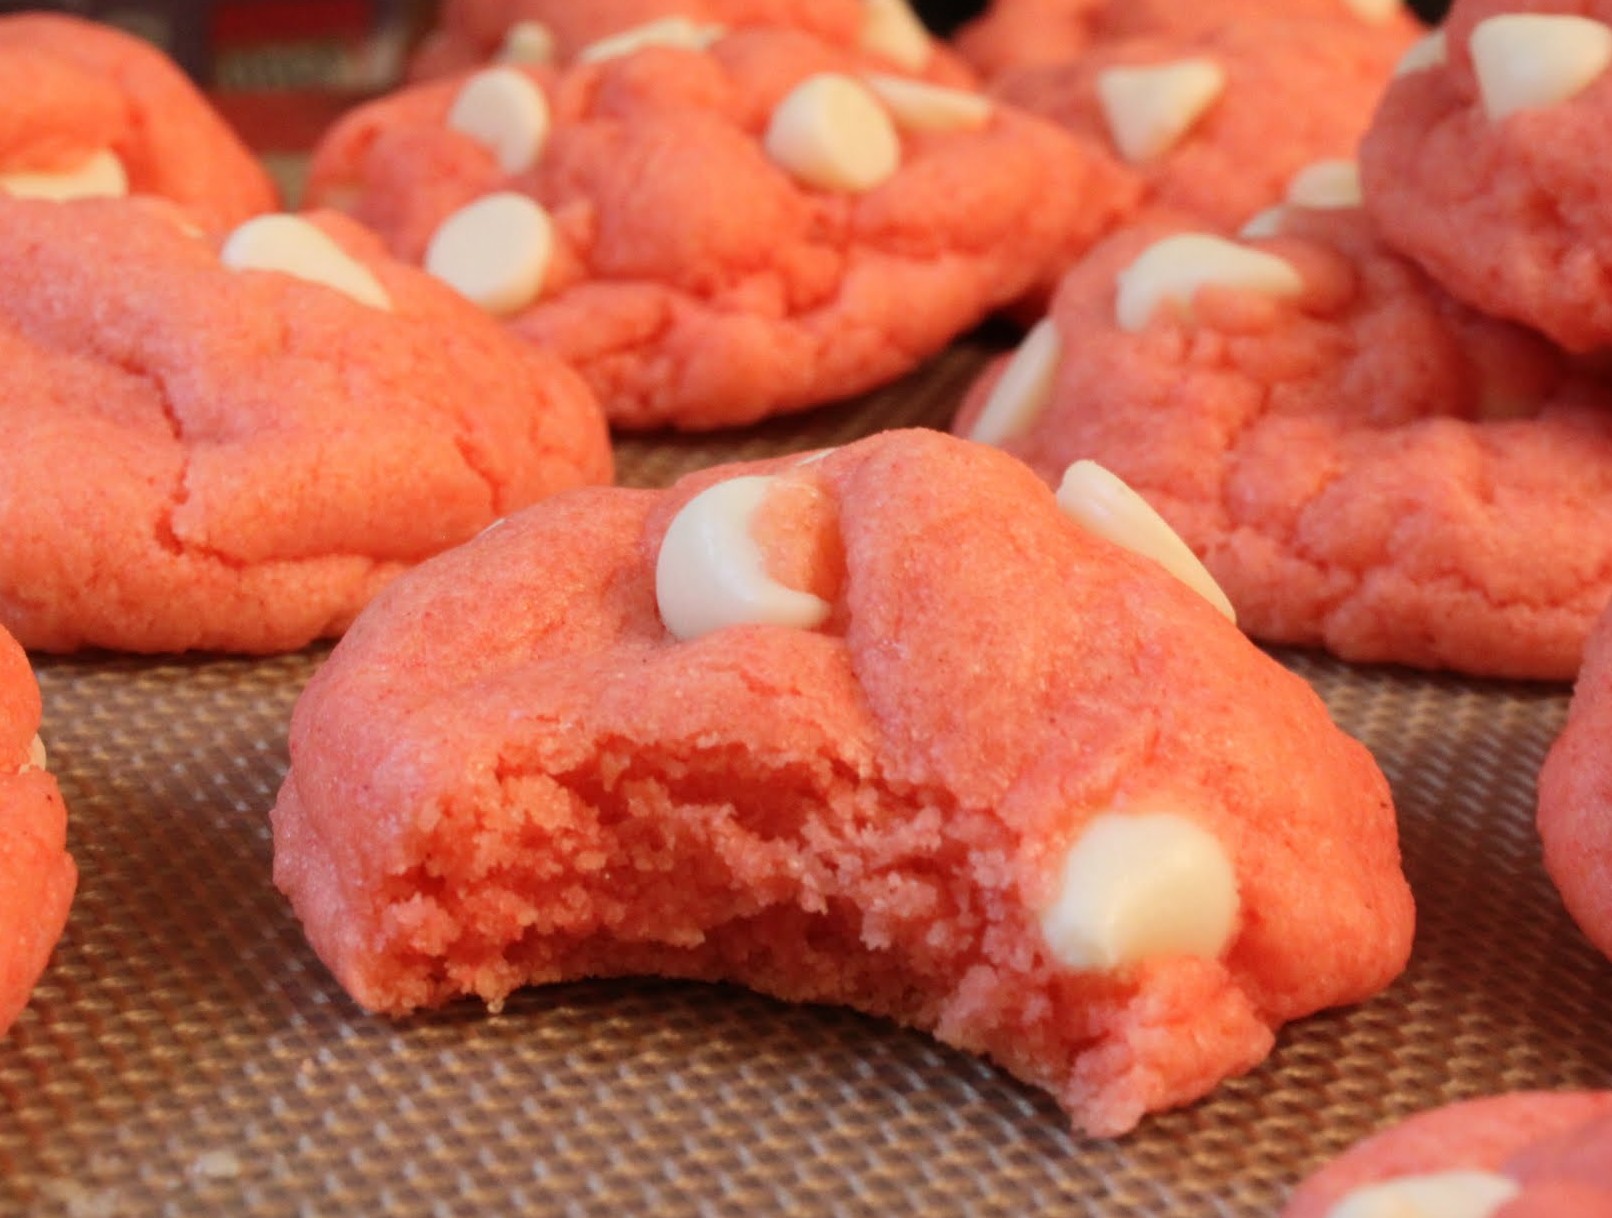
As you know by now, the best road to thick cookies is usually refrigerating the dough. That’s not as necessary here, though, because there’s no butter in this cookie dough. That’s right! It’s vegetable oil. So you don’t have to spend time waiting for the dough to chill, although it’s also not forbidden if you feel like it anyway!
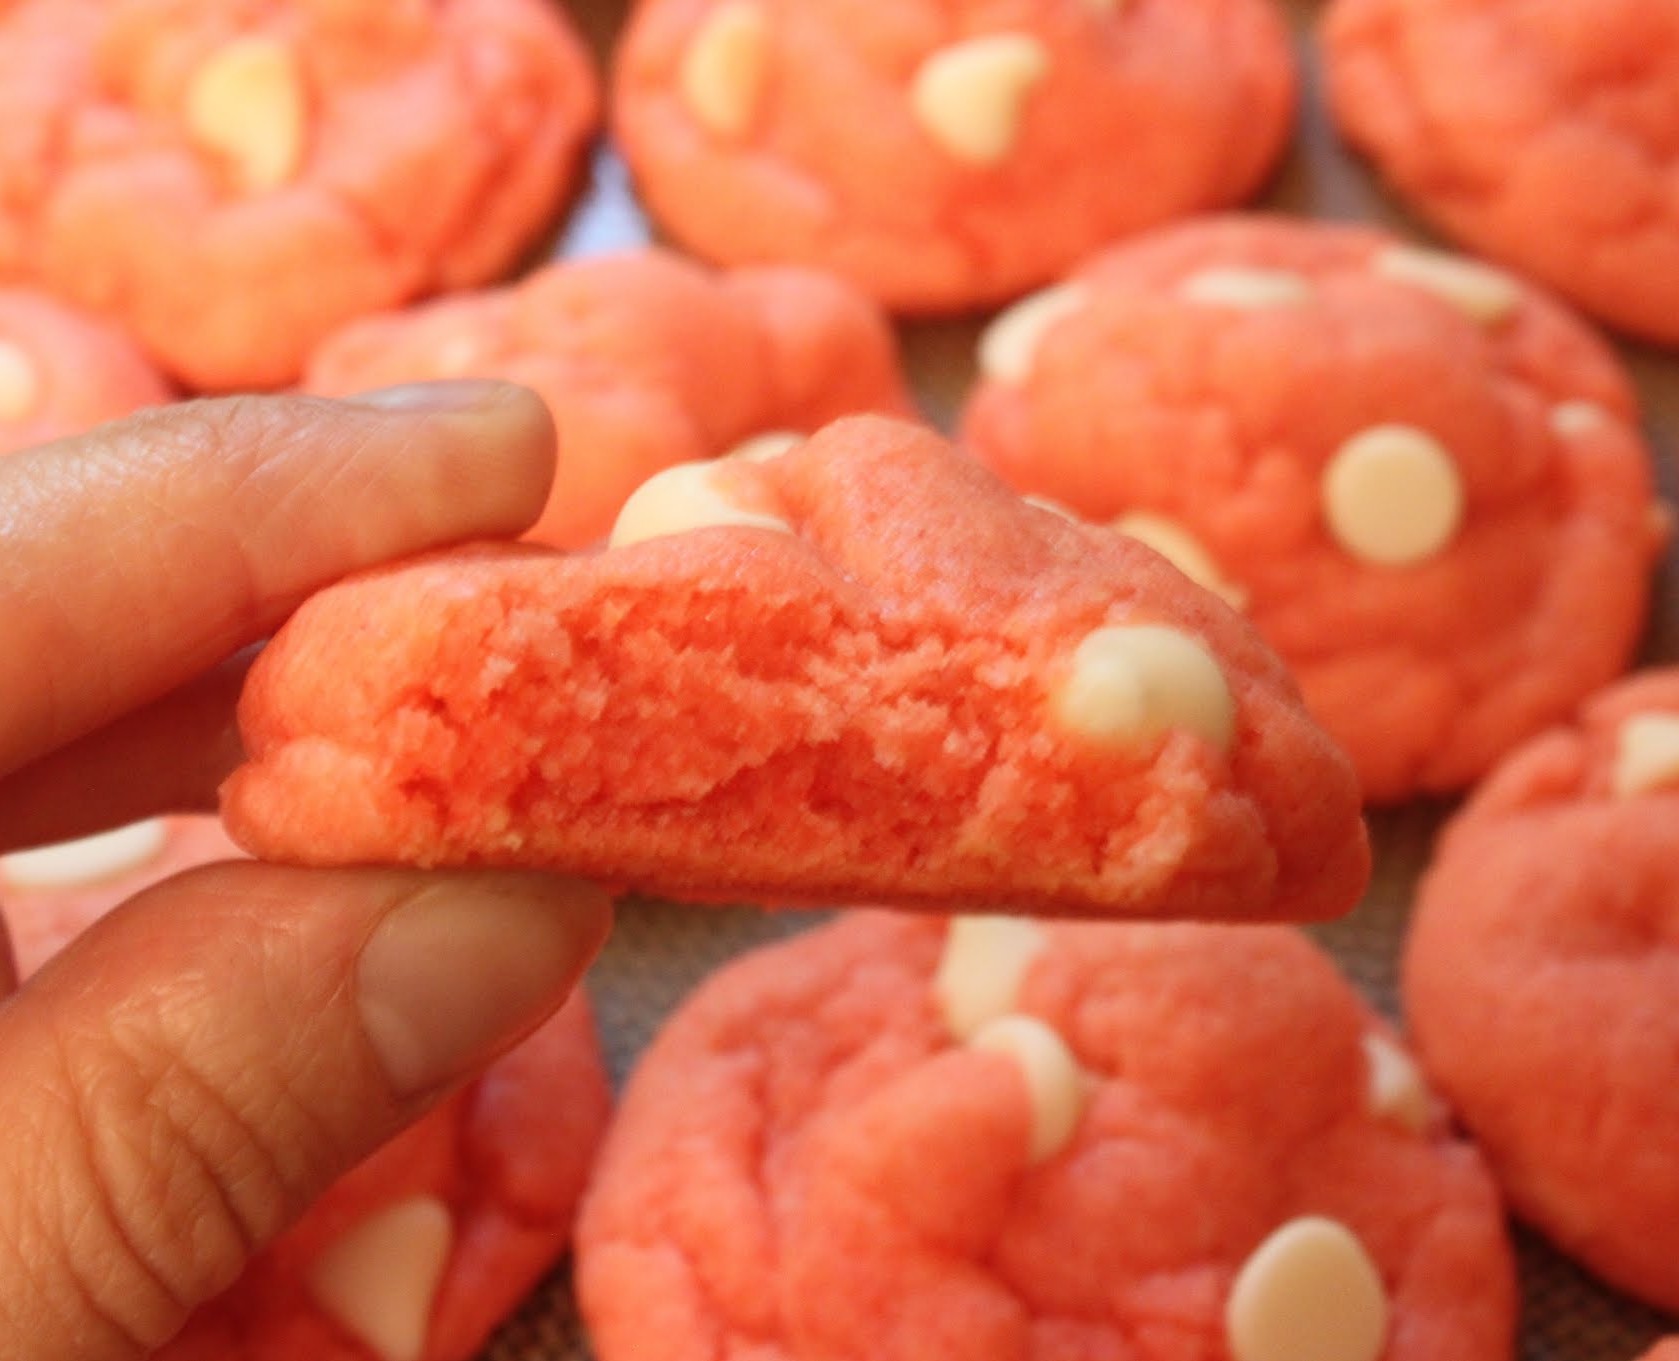
When you make the cookies, save a few white chocolate chips to dot the tops with. It makes them so pretty!
And then you have a lovely snack, appealing to adults and children alike. Someday, your kids will be away in college, just wishing they had a batch of these. Or maybe not. Either way, you’re going to love them!
Ingredients:
- pink velvet cake mix (Duncan Hines)
- 3.4 oz. box of vanilla pudding mix
- 2 eggs
- 1/2 cup vegetable oil
- 1 teaspoon vanilla
- 1/2 cup white chocolate chips
Instructions:
In a mixing bowl, combine all of the ingredients except the white chocolate chips. Mix well. Once the dough is consistently pink and smooth, add the white chocolate chips.
Refrigerate the dough for at least one hour.
When you’re ready to bake, preheat the oven to 350. Line cookie sheets with parchment paper or a silicone baking mat. Roll the cookie dough into tall mounds about 2 tablespoons in size. Place 2 inches apart on the cookie sheet.
Press any white chocolate chips that fall into the bowl onto the tops of the cookies.
Bake for 10 minutes exactly. Let the cookies cool and then remove from the cookie sheets. Store in an airtight container.
]]>